
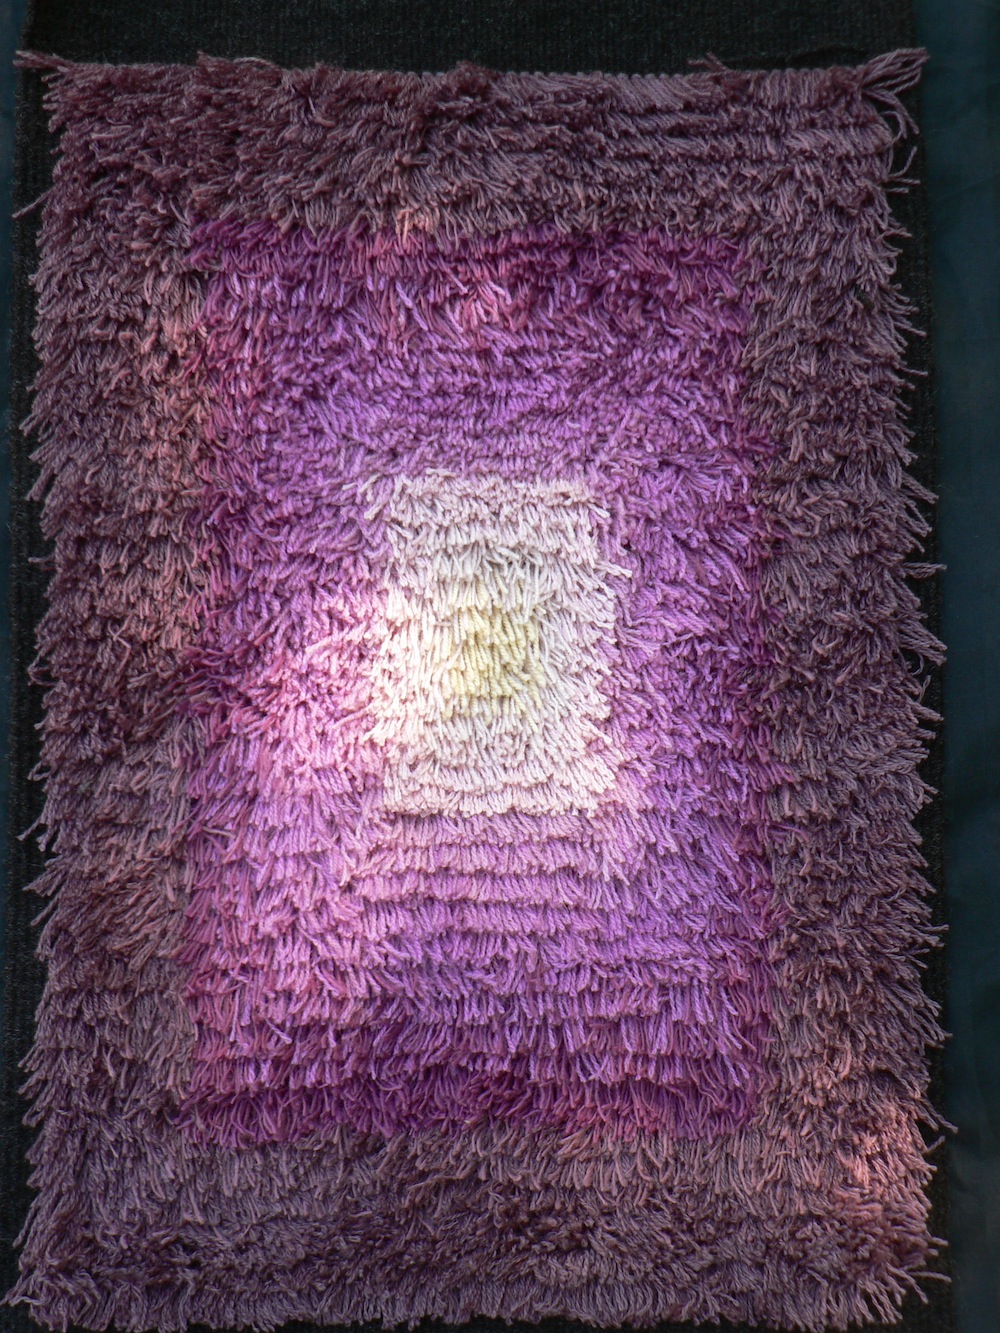
I finished a new rya. Here it is:
Back in September, I finished a custom order of 8 books, which was very satisfying. I used only naturally-dyed pattern weft, in linen, cottolin, and cotton (the warp and tabby wefts were commercial). I had a variety of weld-dyed yellow, madder-dyed pink and terra-cotta, and woad-dyed blue yarns to work with. They were all woven in an overshot pattern called Young Lovers Knot, which I have been using for my book cloth for about a year now.
You may recall my frustration earlier in the spring when I was weaving the cloth, and I was bored of weaving the same pattern over and over again. I complained about it at the time, and then got re-inspired when I bought some new tabby weft colors. I also switched from weaving the design star fashion, which creates boxes and distinct diagonal lines as you weave, to weaving rose fashion, which makes the motifs rounded and gives a sense of concentric circles rippling outward. Continue reading “Recent Books”
I recently heard a little rhyme about the growth habits of perennials that I couldn’t believe I had never heard before: Sleep, creep, leap. This year my yarrow finally got to the “leap” stage. Yarrow, of course, grows wild all over the place and there isn’t necessarily any need to cultivate it. I have only seen it as a white-blooming wildflower (Achillea millefolium, I believe) which sometimes has a purplish or pinkish tinge. It is beautifully frothy and creamy looking. But I do cultivate it because it comes in such beautiful colors, and I have tried several varieties in the garden over the years. For some reason, the red, yellow, and orange ones have not survived, but this year my pink-flowering ones were lush and tall and bloomed in abundance.
Here is a young little yarrow plant early in the spring. It is feathery and burly at the same time. It looks a little bit like Queen Anne’s Lace when it’s young, and they often grow in similar places. But yarrow is fuzzier, almost furry, and more dense.

Here are some buds. At this stage it can look velvety and fuzzy and silvery grey.


This is what my pink-flowering type looks like in full bloom. It’s cheery, and I find it kind of humorous. The shade of pink is so bright that it entirely over-rides the feathery, lacy quality of the foliage. Continue reading “Yarrow (Achillea)”
Since Queen Anne’s Lace has been so abundant this year, I wanted to experiment with using the entire plant, roots and all, for dyeing. Quite a lot of plants needed to be weeded out of our garden plot, so on August 2nd I decided to try it. I was pretty certain it would make yellow, which is the most common color from wildflowers, but you never know until you try.
When I am dyeing, I often think of Jill Goodwin’s summary of her dyeing philosophy in her introduction to A Dyer’s Manual (12/24/2023 Edited to add that this link no longer works so I deleted it). I find two of her points especially comforting and motivational:
So, I do try to prove everything with my own efforts. And I try to persevere with each problem. Hopefully over the years I solve some of them.

I pulled up many plants and chopped them up with pruning shears. I got 4 lbs. 8 oz. of plant material. I liked the cauldron-esque look of the dye pots with stems, leaves, flowers, and especially the roots. Whereas the flowers alone smell lemony and sweet while they are simmering, the whole plant smells a bit more like carrots, as you might imagine. Lemony carrots. Continue reading “More Queen Anne’s Lace”
Supposedly this blog is about dyeing. Even though I don’t seem to write about it very often, I do sometimes actually dye things. This week I had great success with woolen yarns using Queen Anne’s Lace flowers. Plus I managed a successful woad vat, aerated and everything. Here are the lovely yellows, greens, and blues hanging on the line to dry in the back yard (each skein is about 4 ounces).
My woad beds are looking fantastic! I am very pleased about this. For the past couple summers, the woad plants at Amethyst Brook have been small and feeble compared to the woad I grew up at the dye- and fiber-plant garden at Bramble Hill Farm. This year the garden at Bramble Hill has been sadly neglected (well, I’ve been distracted by multiple flax plots), so the community garden is my sole source of woad. Consequently, I made an extra effort to add plenty of composted manure before planting this year. And ta-da, success. Here is one bed before I weeded it the other day:
On Thursday, May 17th, our flax and linen study group met at the lab of one of our members to look at flax fibers under a microscope (and cotton and wool, for comparison). It was so incredibly fun!
Here are the tools and equipment we used to make slides.
")
We used tweezers to position our samples and to pull them apart a little to separate the fibers so the light could pass through. We put our samples on a slide (in the square boxes on the right), and added a drop of the mounting adhesive on top (from the little bottle in the blue box). Then we dropped on a small glass cover and used tweezers to press out the air bubbles and get the adhesive to spread evenly between the slide and the cover (small glass covers are in the orange box). Sharpies are for labeling slides. The pink yarn in back is madder-dyed 40/2 linen. Scissors and razor blades are for cutting. Because the samples were dry, we could make permanent mounts.
Folks brought in a range of flax in various stages of processing: dried but un-retted, retted but unbroken, and retted and broken but not scutched or hetcheled, and fully processed strick, both old and recent. We looked at flax in several different stages including some of my naturally dyed yarn.
Here is the microscope.

Here’s the big monitor, which was awesome because we could all see the slides without having to take turns looking through the microscope.

The program let us do things like adjust the color and take photographs.
We took a lot of very beautiful photos. Here are a few highlights. This image shows the tips of two flax cells overlapping. You can see it in the upper-most edge of the large central bundle, just to the right of the less-in-focus strand that’s crossing diagonally in the left hand corner. Those two greyish-colored pointy tips are the ends of two fiber cells.

The granular purplish area just to the right of the overlapping cell ends shows that part of the structure of the fiber there is hollow. The black circles are air bubbles. Beautiful but irrelevant.
This image shows cotton fibers for comparison. Cotton fibers are flat and ribbon-like in structure, and they twist, whereas flax fibers are rounded or tubular.

There is some twist in the structure of flax fibers, also. The image below shows this twisting (in a greenish color in the thin strand in the center). One important thing I learned on Thursday is that the flax fibers we use for spinning and weaving are not the fibers from the circulatory system of the plant (xylem and phloem), which I had previously believed. In fact, they are the structures that give the plant strength and rigidity. They are associated with the vascular cells but are different.

The two images below show strick fibers (fully processed and ready to spin) from the Zinzendorf brothers in Pennsylvania. The flax was grown and processed on their farm. In the top photo, the center-most green, translucent strand shows the horizontal bars that are typical of flax fibers. In the upper left hand corner you can also see some brown decayed plant matter that is still sticking to the fibers. Click on the images to see a larger view.


On the slide below we used a stain that shows lignin (the woody material that makes the fibers strong and rigid) in blue and pectin (the starchy glue that holds cells together) in pink. This is a piece of water-retted flax fiber. In the process of water retting, bacteria consume the pectins and allow the fibers inside the plant stalk to separate from the woody core and the outside “skin” of the stalk. If you let the retting continue until all the pectins are eaten, then the individual cells separate also, and you don’t get long fibers to spin. You just get a hairy mess. So, since these fibers are still holding together, there is still pectin present. We think the blue made the pink hard to see. You can see the tubular structure of the flax fibers and the horizontal bars very clearly.

The photos below show pale pink madder-dyed 40/2 linen. I used alum acetate for the mordant. I was amazed at how the color sticks to the fibers in clumps. I wonder if yarns with a darker color would show the color adhering more evenly.

This photo shows some strands of undyed fiber next to the dyed fibers. I wonder if these were on the inside of the yarn and came free when I teased apart the snippet of yarn to put on the slide.

Who knows what is going on here, but whatever it is, it doesn’t look good. That little nugget of color is about to get away.

Hopefully we will have a chance in future to look at cross sections of the plant stalks at different points in their growth, to see how the fiber bundles develop. Science is fun!
After three extractions and a lot of soaking in between, my madder and lichen baths are ready to go. I’m sticking with Flavoparmelia caperata for the ID on the bark-growing foliose lichen, though I’m sure I could be wrong.
For each dyebath, I combined all three extractions. Next for some tinkering.
Here are the color and pH of the madder bath before I did anything to it. Brown.


I would call that pH6 which is acidic, not where I want it to be to develop good reds. So, first I added more calcium carbonate (there was already one teaspoon in the roots as I extracted them). This did not produce much of a pH shift (see below). I’d still call that 6, though I don’t know what’s up with that bottom square. It’s not supposed to be so orange. Happily, the color darkened and shifted a little from brown to red.

 I wanted to get the pH up a little, so I added 1/2 teaspoon dissolved soda ash at first, which got it up to pH 8 (photo on the left below). The dyepot contains about 2 gallons of liquid. I did not weigh my modifiers or figure out the percent on the weight of the dyestuff this time around (I extracted 8 ounces of roots). After another half teaspoon of dissolved soda ash, the pH was 9, which I was happy with (photo on right).


Since I’m dyeing linen, I’m not worried about making it too alkaline. I introduced a 2 ounce skein of 20/2 linen half bleach, which I had mordanted with alum acetate back in December, and re-mordanted yesterday for good measure. After 30 minutes heating, the color was promising:
 Here is what it looked like once I got up to my target, and maximum, temperature of 160 degrees (over 160 you’ll get brown rather than red tones):
 I am very satisfied with this so far. My quest to create rich color on linen yarns seems to be advancing, though I shouldn’t speak too soon. The color is always lighter once it is dried and rinsed. I held the temp between 150 and 160 for an hour (and actually had to shut off the heat for a while to keep it from getting too hot). Next, the skein will sit and soak all day and overnight in the dyebath, and then it’ll drip dry before I rinse it. I find that delaying the rinse helps with fastness. So, that’s the status of the madder bath. As the week progresses, I expect to re-use the bath repeatedly and get a lot of pink, salmon, apricot, and so on until it’s exhausted.
The Flavoparmelia experiment is less exciting, but at least now I know not to bother with it again, so that’s useful information anyway. Here’s the initial color of the dyebath with all three extractions combined (I started with 5.4 ounces of lichens including a lot of bark).
 The pH was a bit weird. I didn’t take a photo (by now you’re probably tired of photos of pH strips). It looked like 6 at first, but as the liquid wicked up it shifted to 5. The initial color of the skein was light and not promising.
 Just for the heck of it I decided to see if the color was pH sensitive (since I already had the soda ash out anyway…). I put some of the hot dyebath liquid in a jar and added 1/4 teaspoon of soda ash. It darkened, so I decided to add this solution to the dyebath (I took out the skein first). Since this dyebath contains less liquid than the madder pot, about one gallon rather than two, even such a little soda ash had a noticeable effect on the pH, which went up to 8.


OK, I guess there isn’t a big difference between these two photos. On the left is the yarn halfway through heating it, and on the right is how it looks after sitting and soaking for eight hours. I do not plan to exhaust this bath.
The Leap Day of the Leap Year
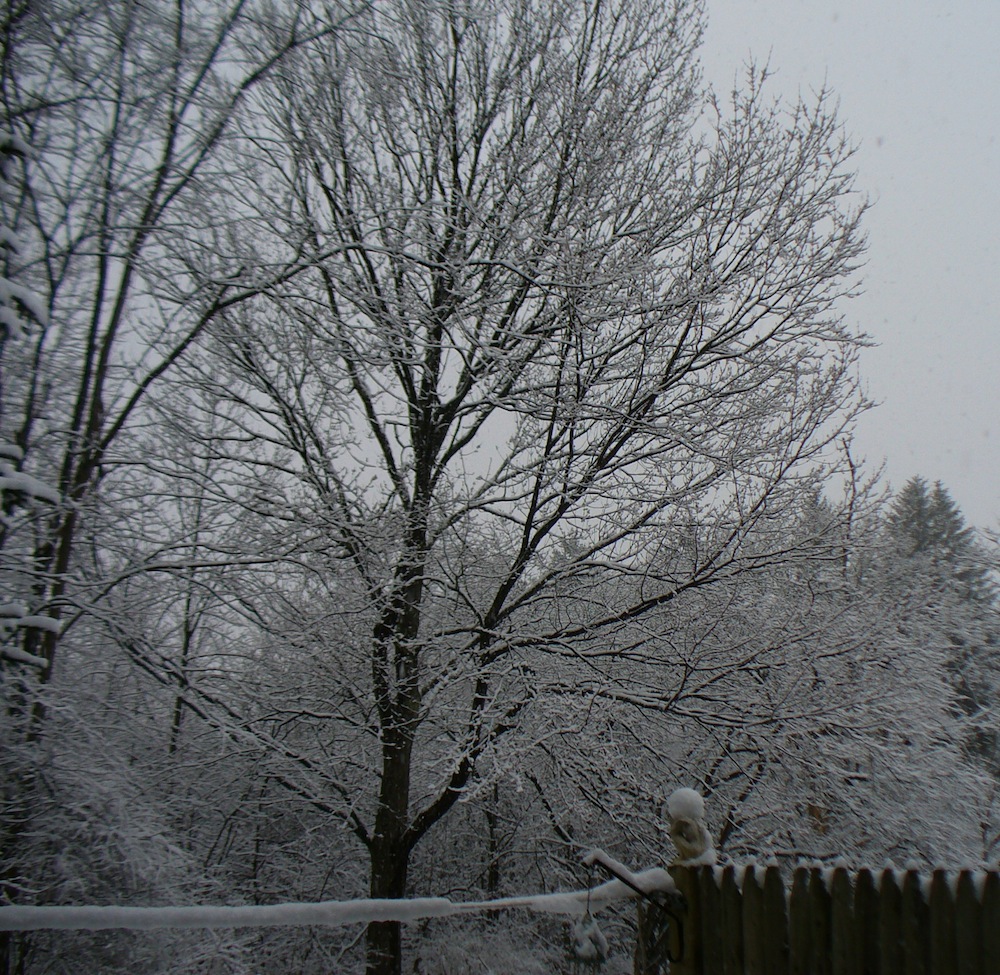
Today it is snowing. A much more typical wintry day than February 1st. Here’s what I have been doing so far today, fiber-wise:
I wove a section on my new warp, threaded once again with Young Lovers Knot, for a new batch of journals. Today I wove the section in the photo below. The blue is 22/2 cottolin dyed with woad and weld, and the tabby weft is teal 20/2 cotton, commercially dyed. When I first dyed the cottolin I was disappointed not to get a better green, but with the brighter colored tabby background it looks very nice anyway.

I changed the treadling for the sections where I’m using 20/2 linen or 22/2 cottolin because no matter what I do, I can’t beat it square with these yarns. With 10/2 cotton or 10/2 tencel it’s not a problem. Linen is just less inclined to submit to compression. It’s one of the things I love about linen, it has a mind of its own. And really, it’s not meant for overshot pattern weft, so who can blame it? To accommodate the linen, I shortened the square (or table) by two picks.
I wet-spun spun some bleached flax top (from Louet, not my own). It’s tow (short fibers). I did about half this bobbin today. My legs got wet, but it went with the snowy theme outdoors, so I didn’t really mind.

I was originally planning to spin a second bobbin and ply them, but I think I will leave it as singles and take out some of the extra twist when I wind it onto bobbins for weaving. My new plan is to spin the other half dry and then weave samples with them (using them for weft) to see if there is a noticeable difference between wet and dry spun tow.
I did the second extraction on two new dyebaths that I started over the weekend. One is madder (8 oz. roots bought from Aurora Silk a few years ago). The other is the Flavoparmelia lichens I collected this winter, plus the bark they were growing on. Since it is snowing, I heated these indoors today. Fortunately, they both smell amazing. Too bad you can’t smell them. The lichen smells like hot piney woods in the summer or a toasty fire in a cabin in the woods. The madder smells fruity, like red wine or blackberries getting boiled for jelly.

 I plan to extract each one more time, then combine the extractions for stronger color. With the combined extractions, I am hoping to get a respectably rich color from the first madder bath, at least. The Flavoparmelia is an experiment, but I figure I’ll give it every opportunity to yield a strong color, if it can.
I am sticking with cellulose yarns for the time being, which are proving to be tricky. The colors are coming out lighter than I expect each time, with the exception of the CRAZY bright weld earlier in the fall/winter. Here’s how it’s looking woven up. These two photos show 20/2 linen half-bleach pattern weft with black 20/2 cotton tabby (on the black warp).

 These two show the same weld-dyed yarn with a light blue 20/2 cotton tabby weft. It’s a very woady blue, but it’s commercial. (In these sections I had not yet shortened the square, hence it is rectangular.)


Last but not least, I have stirred up my new umbilicate lichen vats to incorporate oxygen. I will post about that separately.
It’s been great to have an extra day to work on all these projects. We should have a leap day every year.
What do weavers and dyers do when they are not weaving and dyeing? For one thing, textile-related puzzles! Matthew and I just finished this incredible puzzle.

Sorry, the overview of the whole puzzle is a bit blurry, but here are some details.


The puzzle is published by Pomegranate,1000 pieces, and very complicated. It took us quite a long time, but it was fun and it’s beautiful.
According to the description on the box, the image shows a portion of an offering cloth from the late 1700s found on the Island of the Sun in Lake Titicaca, Bolivia, made from handspun wool. The description specifically says that it probably was not a woman’s manta (shawl), because of its size. It is in the collection of the National Museum of the American Indian in Washington, D.C.
On the website of the National Museum of the American Indian, this same cloth is catalogued as a woman’s manta, 120x120x110 cm, made of cotton and camelid fiber yarns (meaning alpaca or llama). The site where it was found is described as the Temple of the Sun or Temple of the Virgins of the Sun on La Isla de la Luna, or Island of the Moon. I’m not sure which source is more accurate (I assume the museum catalogue). By the way, check out the “materials” list in the “object specifics” part of the collection search function. A list after my own heart.
The cloth features horizontal rows of abstract patterns (reminiscent of flags and bunting) alternating with fields of representational images including amazing animals like deer (or maybe alpaca or llamas), ducks, eagles, parrots and other birds, monkeys, people, and mer-creatures (one looks like it’s playing a guitar and is half-seal or perhaps half-manatee). There are lots of things which look like stacked up bowls, which we came to refer to as “ice cream sundaes,” and reminded us of those beautifully presented piles of fruit and other offerings at Buddhist temples. The overall feeling is a celebratory sense of teeming life and energy and abundance.
As a dyer, I was very interested in the colors. Shades of red and maroon dominate, with gold, yellow, white, purplish brown, and several shades of blue, of course all dyed with natural dyes. It was hard to tell how many colors had been used in the original cloth. The same shade of maroon looked different depending on whether it was surrounded by bright red or gold… or were they really two different shades of maroon? Tricky.
This is a color theory phenomenon called simultaneous contrast. The hue (color), chroma (intensity), and value (degree of light/white or dark/black) of a color look different depending on one color’s relationship to another. If you search for this on line you can find some great examples. I liked the examples on David Brigg’s website (though to view the videos you need Flash and some other plug-ins).

