
Harvesting and Dyeing with Woad (Isatis tinctoria or Isatis indigotica)
I use the chemical vat method using fresh leaves as outlined by Rita Buchanan in A Weaver’s Garden and A Dyer’s Garden.
Jill Goodwin, who pioneered this method for modern dyers, gives excellent directions for this type of vat in A Dyer’s Manual. Her description of “The Great Woad Hunt” is entertaining, informative and inspiring.
There are many other types of woad vats, but this is the one I have had consistent success with. For other types of vats such as urine, lime-zinc, fructose, madder/bran fermentation vats, etc., please see the resources below. Many of the woad vat recipes on other websites use powdered woad extract. I grow my own plants and use the leaves when they’re fresh.
You will need:
- Prepared fibers (fibers must be well-scoured; mordanting is optional but see below)
- A sturdy, heat-resistant bucket with a tight fitting lid and a handle
- A sink or water source for filling pots of water
- Pots for boiling water
- Stove or other heat source to boil water
- Additional buckets to use while you aerate the vat, so you can pour the liquid back and forth between several buckets
- Outdoor or splash-and-stain-resistant space
- pH test papers
- ammonia, wood ash liquor, soda ash, or other alkaline substance
- thiourea dioxide or RIT Color Remover (contains sodium hydrosulfite, active ingredient is sodium dithionite)
- A set-up for hanging or laying out fibers to drip and dry
- Heat resistant rubber gloves
- A spoon or stick for lifting fibers out of the vat
Preparing Fiber for Dyeing
It is important to have your fibers scoured and “wetted out” ahead of time, so plan ahead. Scoured means clean. Wetting out means that the fiber has been soaking for at least an hour before you add it to the dyebath. This helps the color absorb more evenly and prevents additional air from being added to the vat.
When dyeing with woad, mordanting your fiber is optional. If I have already mordanted my fibers and am just over-dyeing with woad, I do not bother to re-mordant. For example, if I mordanted wool with alum sulfate and dyed it yellow with goldenrod, I would not re-mordant before I over-dyed with woad to make green. Re-mordanting is recommended for over-dyeing with other dye plants. Woad will dye any natural fiber. Protein fibers (i.e., fibers from animals including wool, alpaca, mohair, and silk) take the dye much more readily than cellulose fibers (i.e., fibers from plants including cotton and linen). That is, the same amount of woad will dye protein fibers to a much darker, richer shade, and cellulose fibers to a lighter shade. Woad works on bamboo and tencel, too, which are also cellulose fibers.
Harvesting Woad
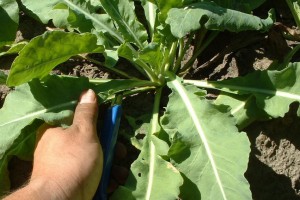
Woad bed ready to harvest:
 If you plant your woad seeds in April, you should be able to do your first harvest in July. I wait until the leaves are about 6 inches long. Harvest and use the leaves as soon as they’re big enough. If you wait too much longer, the older leaves will just die and you won’t be able to use them. You can use a blade to cut the stems close to the base, or just snap them off by hand. It’s faster to do it by hand, though it might stain your hands. New growth comes from the center of the rosette, so harvest the mature leaves from the outside. You can harvest about half the leaves from a plant at once. The plant will generate new leaves after you harvest, so you can harvest several times throughout the summer and fall.
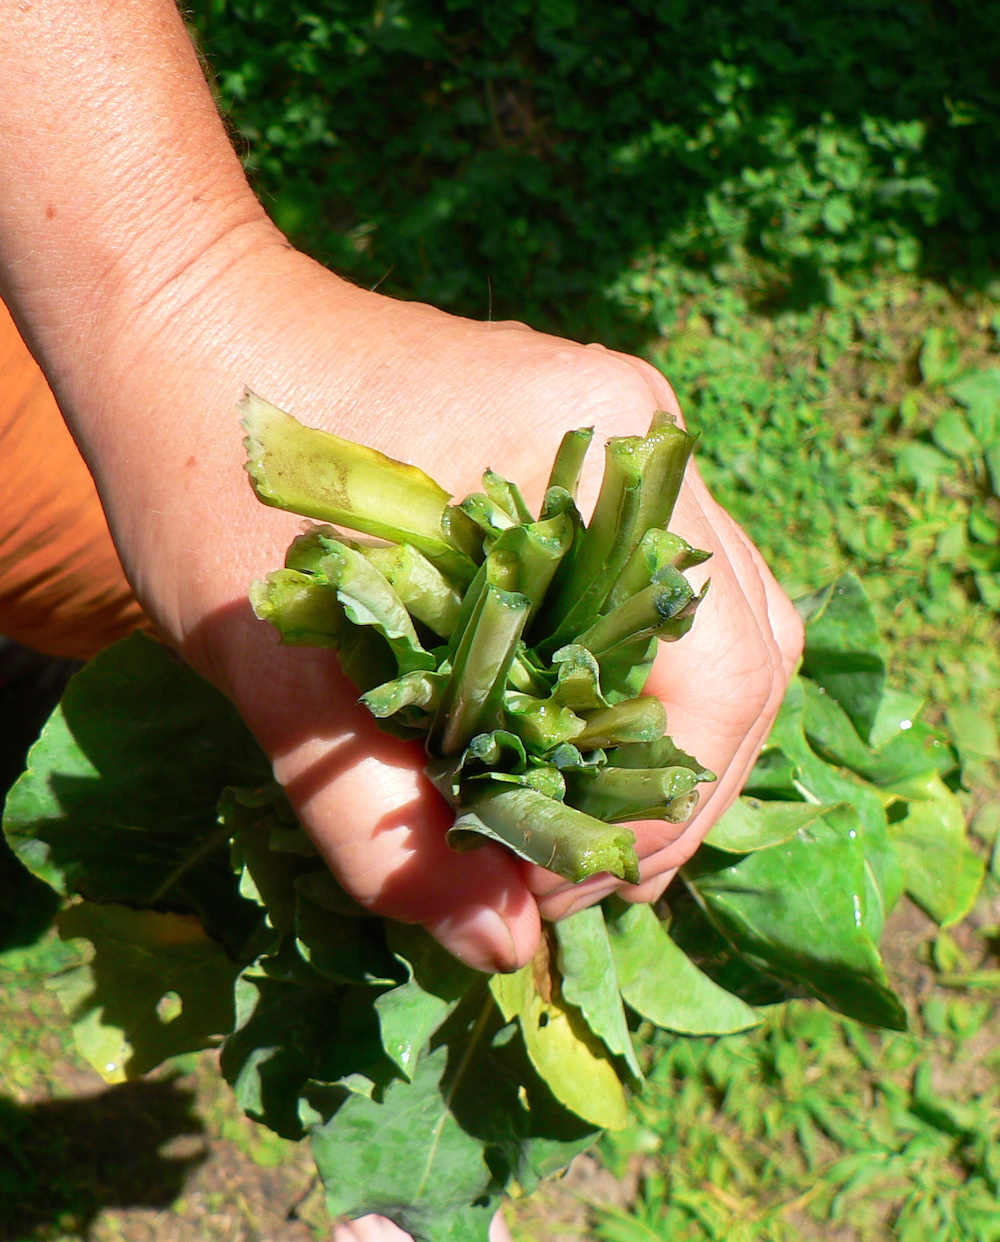
Cut or snap as close to the center of the plant as you can:
Sometimes you can see the broken stalks turning blue when the juice is exposed to the air:
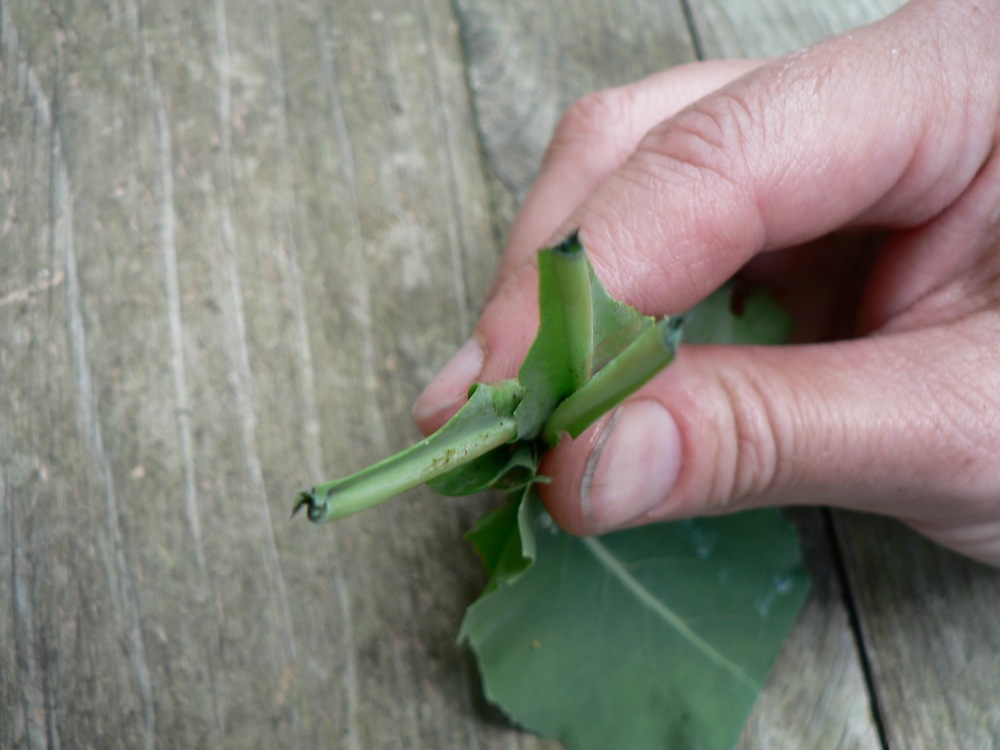
This “breaking blue” doesn’t always happen, but it’s exciting to see.
Running a vat takes the better part of a day, whether it’s a small one or a large one. Since it is an all-day commitment, it makes sense to me to prepare a lot of fiber and harvest a substantial quantity. I tend to harvest a lot of leaves at one time, between 3 and 8 pounds.
However, if I only have a small quantity of fiber ready to dye, I’ll pick less and use a smaller bucket for the vat. If I have a lot of fiber ready, I’ll pick more and use a 5 gallon bucket.
To transport them back home from the garden I just cram the whole leaves into plastic shopping bags, or paper bags if the leaves are dry.
I always weigh the leaves for my records:

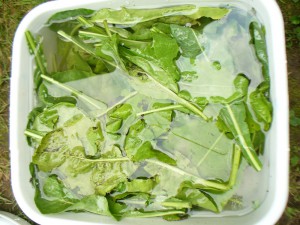
Depending how gritty they are, I rinse them.
Washing woad leaves:
Then I coarsely shred them with my hands into about 4 pieces.

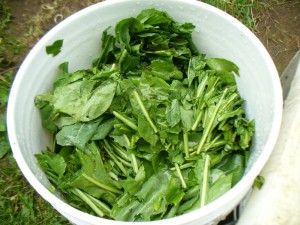
Then I put them into my bucket. Bucket full of woad leaves:
Bring enough water to a boil to fill your bucket to the brim. I pour the water over the leaves immediately once the water has boiled. When you pour in the water, watch out! There will be a lot of chortling and burbling and hot water spurts. Fill the bucket until the leaves are covered and the water is right at the rim.
At this point in the process, I have found that I get more color if I exclude as much air as possible. Press on a tight-fitting lid, using a pot-holder or towel to protect your hands, and make sure that some water squirts out. This way you can be sure that there isn’t any air at the top of the bucket. Let the leaves steep for about 45 minutes.
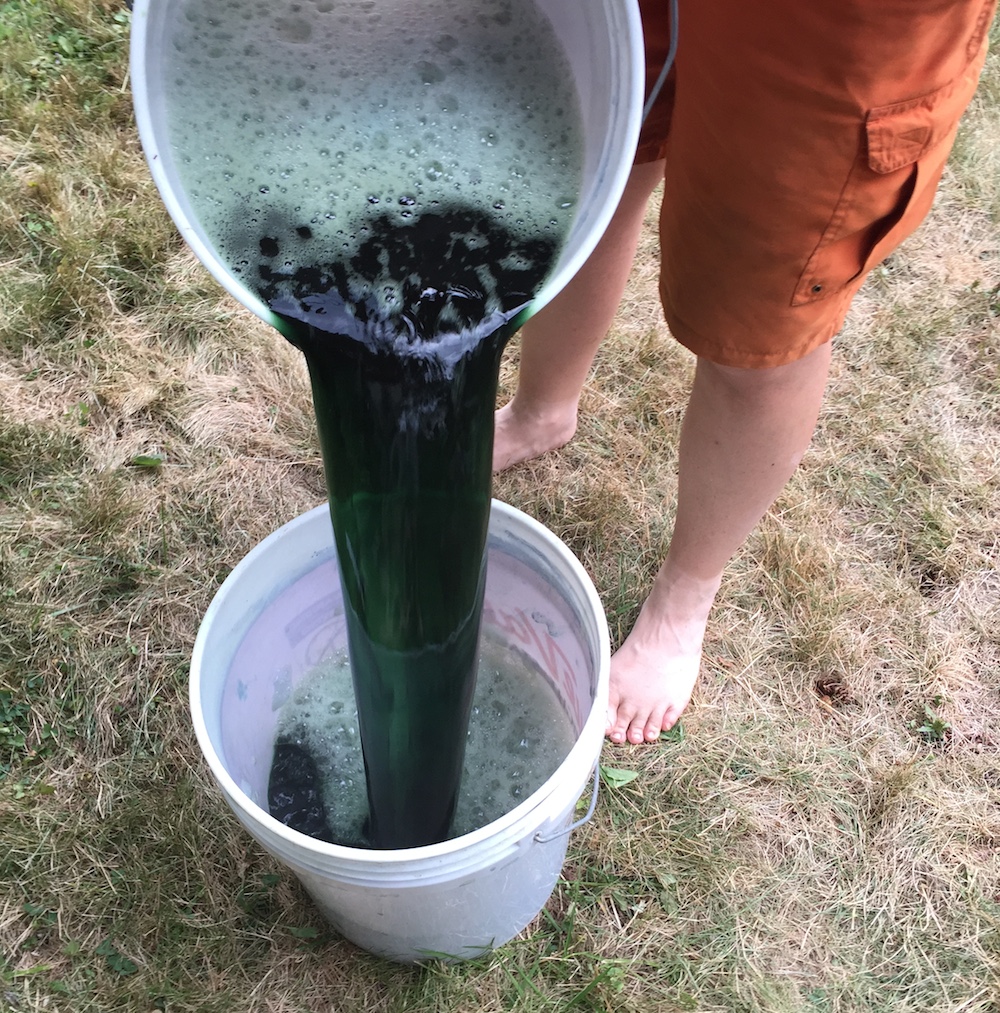
Then, take off the lid and separate the extracted leaves from the liquid. I usually scoop out some of the leaves into a colander, using heat-resistant gloves, then pour the liquid through the colander once the bucket is lighter.
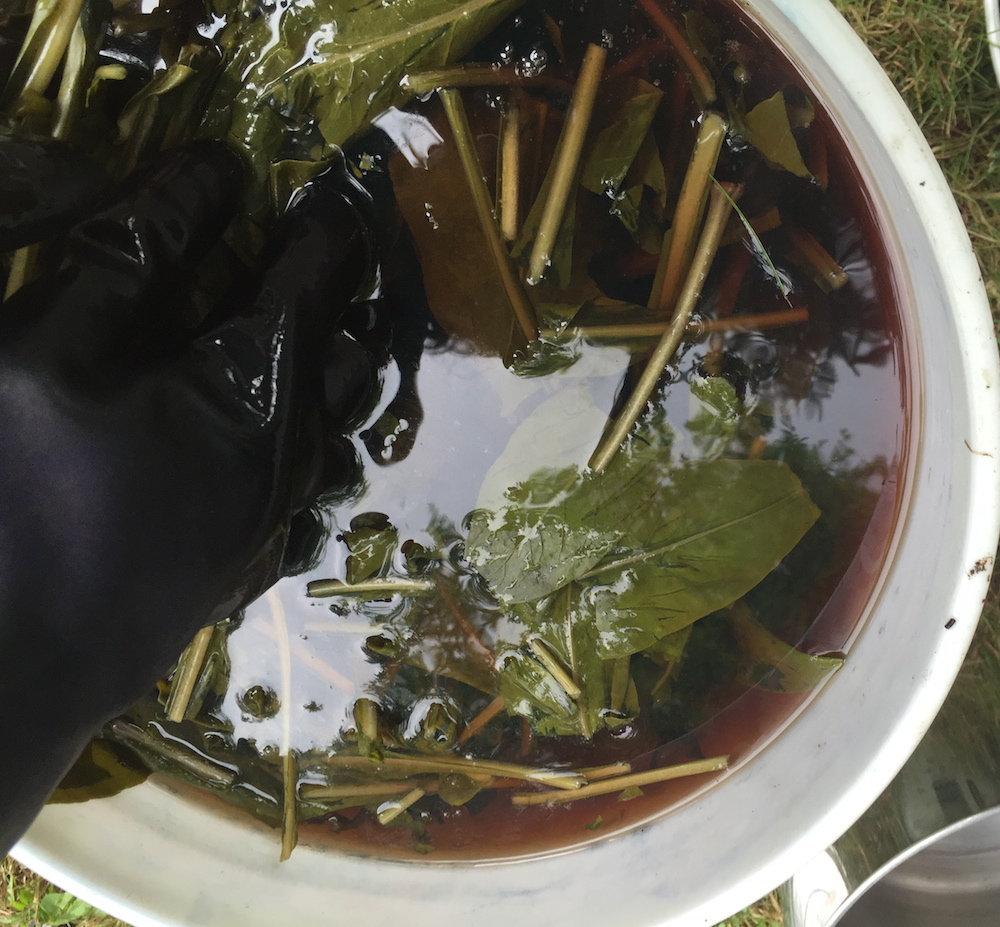
Extracted, strained liquid:
The liquid will be reddish-brown, bright cherry, or burgundy color. Squeeze out the leaves as well as you can. You can save the wilted leaves to make a pale pink using the boiling water method and alum mordant on protein fibers, but to my eye it is not a very exciting color.
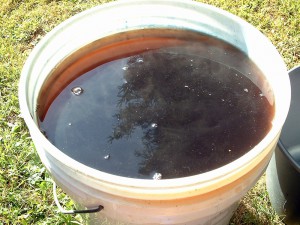
Next, add ammonia or other alkali (wood ash liquor or dissolved soda ash) to the liquid in the bucket until the pH is 9. You can go to a higher pH for cellulose fibers. The liquid will change color dramatically from reddish to a dark, murky green.
Alkaline woad vat:
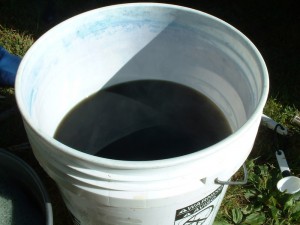
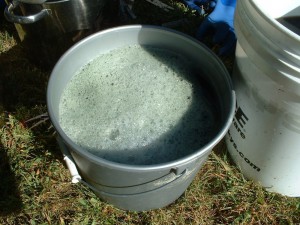
At this point, you need to aerate the liquid. I pour the contents of the bucket back and forth between two or three buckets, and continue doing this for at least 5 minutes, ideally 10 minutes. Do not skimp on this step; take breaks when you feel tired.
Aerating woad vat in a small bucket:
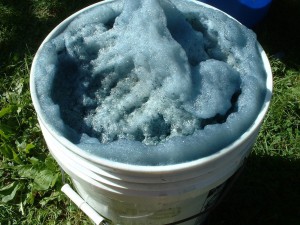
 Aerated vat in large bucket. It’s the ammonia that makes it so frothy. Other alkaline additives wouldn’t do the same thing:
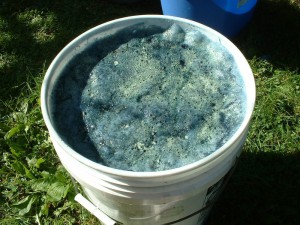
Next, add your reducing agent. For a long time I used RIT Color Remover and was pleased with the results. It contains sodium hydrosulfite. However, the perfume odor can be bothersome, so sometimes I use thiourea dioxide instead. Thiox has a chemical smell but it doesn’t smell like perfume. The amount of reducing agent that you need to use depends on how much liquid is in your bucket.
In her article “Grow Your Own Indigo” (in Dyes From Nature published by the Brooklyn Botanic Garden) Rita Buchanan says to use 1 tablespoon of Spectralite (a brand-name thiox product) per gallon of liquid, or 2 tablespoons of RIT Color Remover. I have found that 1½ packages of Color Remover (about 5 tablespoons) is enough to reduce a 5 gallon bucket (which is usually about 4 gallons of liquid once the leaves are removed). Both of these chemicals lose their potency over time (as does ammonia, for that matter) so sometimes you have to tweak the quantities. With RIT Color Remover, I just sprinkle the powder over the foamy surface of the bucket. With the thiox I dissolve it first then pour it in. Then, put the lid back on and let the vat reduce for 45 minutes.
Vat with reducing agent sprinkled on top:
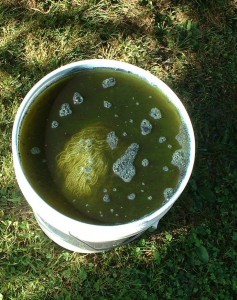
When the vat is reduced, the color will change from murky dark green to translucent yellow-green. There will be a dark filmy layer on top of the vat with a rainbowy, iridescent sheen. Note the clear, bright yellow-olive-green color of the liquid against the edge of the bucket. That’s what you are going for. If it is bright yellow, it might be over-reduced, in which case you can add oxygen by stirring it. If it is still dark olive-green, it might need more time to reduce. However, I have found that sometimes with a very strong vat, it’s ready to go even when the liquid looks a little murky : 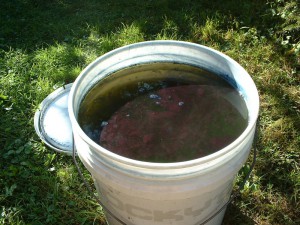
Now your vat is ready to use. Gently lower your clean, wet fibers into the vat. Try not to agitate the liquid, as this will add oxygen back into the vat.
The chemistry of a woad vat is a complicated business. Please refer to the resources below if you want to read about it in more detail. Here’s the gist: The indigo molecule that produces the blue color on fiber is only water-soluble in an alkaline solution, and only in its “indigo white” form, which requires oxygen-reduced conditions. Once exposed to the air, the molecule converts to “indigo blue” and attaches to the fiber, and is no longer water soluble. So, try to keep oxygen out of the vat.
For evenness of color, it helps to move the fibers around gently under the surface of the liquid. This is much more of an issue if you’re dyeing cloth or garments. If you’re dyeing skeins or fleece and you’re not too concerned with evenness, you can set a timer, walk away, and go do something else while your fiber is in the vat. When the time’s up, pull it out gently, give it just a quick squeeze, and hang or lay it out to oxidize. Spread out the strands of the skein and turn it as it oxidizes so that air can penetrate.
Wool skein in woad vat:
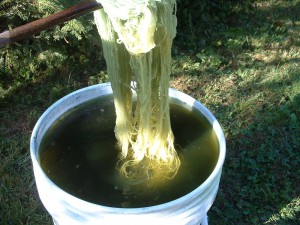
When you first pull out the skein, or other fiber, it will be a yellowish color.
“Indigo white” on woolen skein:
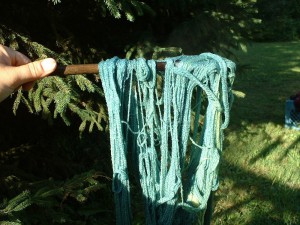
It will quickly become green, then blue.
Wool skein oxidizing:
With woad, as with indigo, you can build up darker colors by repeatedly dipping your fiber in the vat. Most people recommend that you “air” the fiber for as long as you submerged it. Others recommend at least twenty-four hours between dips.
Here is what works for me, in my experience: A 5-gallon woad vat such as the one I describe here works while it’s warm (an afternoon and an evening, say). I can sometimes eke out more color the next day, once it cools down and sits overnight, or leave fiber in overnight. My attempts to “revive” this kind of woad vat, in the way that people describe reviving an indigo vat or a natural fermentation vat, haven’t been successful. So, I recommend preparing enough fiber to use up all the color on the same day.
I dip each skein only once per vat. If I want it darker, I wait for the next vat to re-dip it. In my experience, re-dipping into the same vat doesn’t build up significantly darker color. One reason is that the reducing agent in the vat will strip existing color off of the fibers when you re-submerge them. If you do dip a second or third time, keep the subsequent dips very short. Another reason is that I believe it really does take a long time for all the indigo to oxide and bond with the fiber. There’s no point in rushing it.
As you dip successive skeins (or fleece, whatever your fiber is), there will be less and less color available in the vat. I recommend putting in the skeins that you want a deep blue first. As the vat exhausts, the color will be a little less even as well as lighter.
You can overdye yellow to make green, especially with wool. Depending on how saturated/strong the yellow is and how much blue you want, you’ll want to think about whether you dip those skeins early or later in the sequence. The color-stripping action of the reducing agent will remove some of the yellow color, so keep the dips fairly short. The alkalinity of the vat can damage the mordant, resulting in weaker color. This is more of a problem with cellulose fibers than with protein fibers. Catharine Ellis has a very informative blog post about this. You’re probably better off dyeing your fiber blue first, then mordanting and overdyeing with yellow to make green.
If you are dyeing cellulose fibers, dip them into the vat first. They will never get as dark as wool, so give them every opportunity to grab all the blue they can. The length of time that you submerge cellulose fibers is up to you, as the alkalinity won’t harm the cellulose. Wool and other protein fibers are damaged by a highly alkaline environment. For protein fibers people usually recommend keeping your dips to 15 minutes or less, but I’ve left protein fibers in for longer with no harm done.
I always let the fibers “air” or oxidize overnight before rinsing them. I usually let them dry all the way before rinsing. I find that much less color washes off if I use a delayed rinse. With wool and other protein fibers, most people recommend rinsing in a vinegar solution, after a few initial rinses with water, to neutralize any remaining alkalinity in the fiber. Jill Goodwin recommends soaking in a salt-water solution before proceeding with rinsing. Some dyers, such as Catharine Ellis and Joan Morris, recommend neutralizing cellulose fibers in a tannic acid bath when working with indigo, and I presume this would be true for woad, too.
Below are some images of the colors I have obtained with woad.
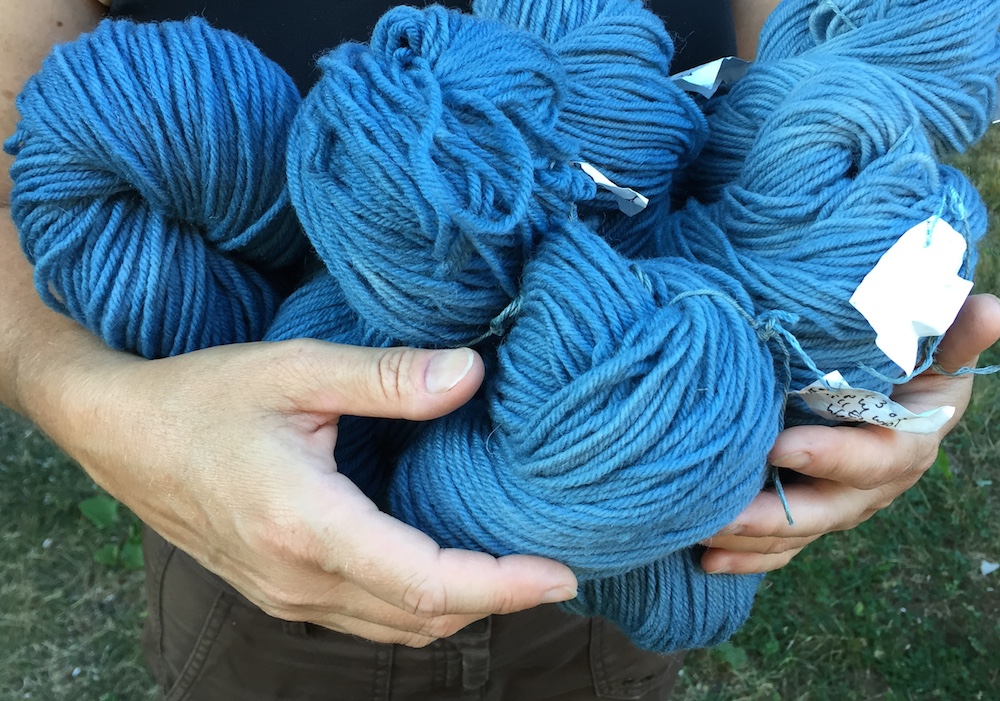
Woad on wool skeins:
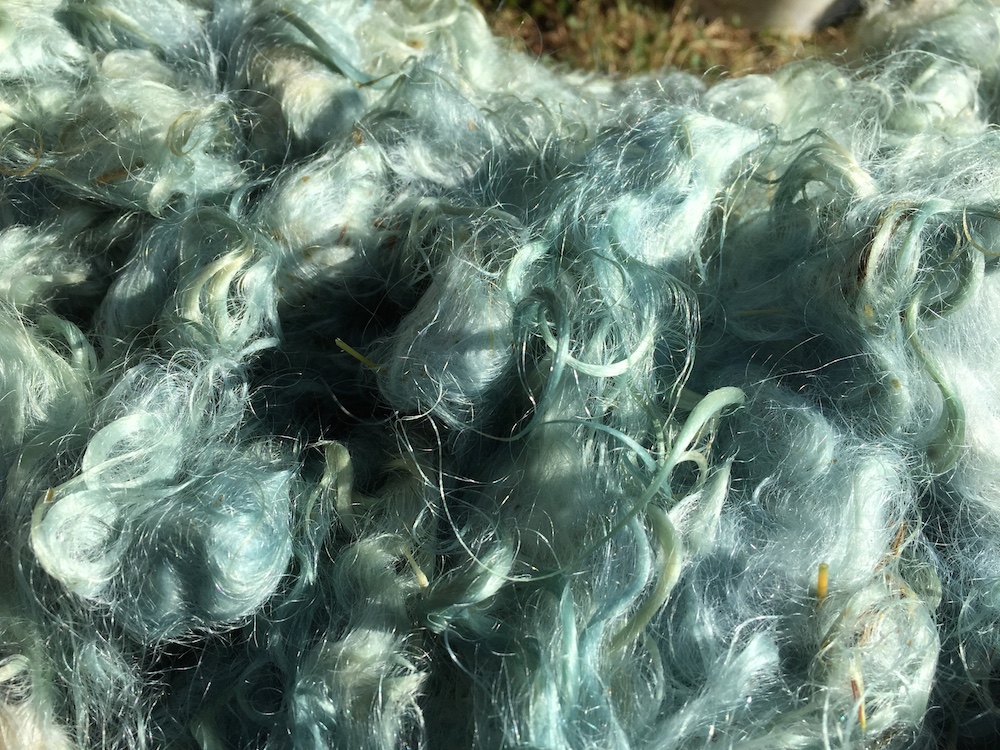
Woad on mohair locks:
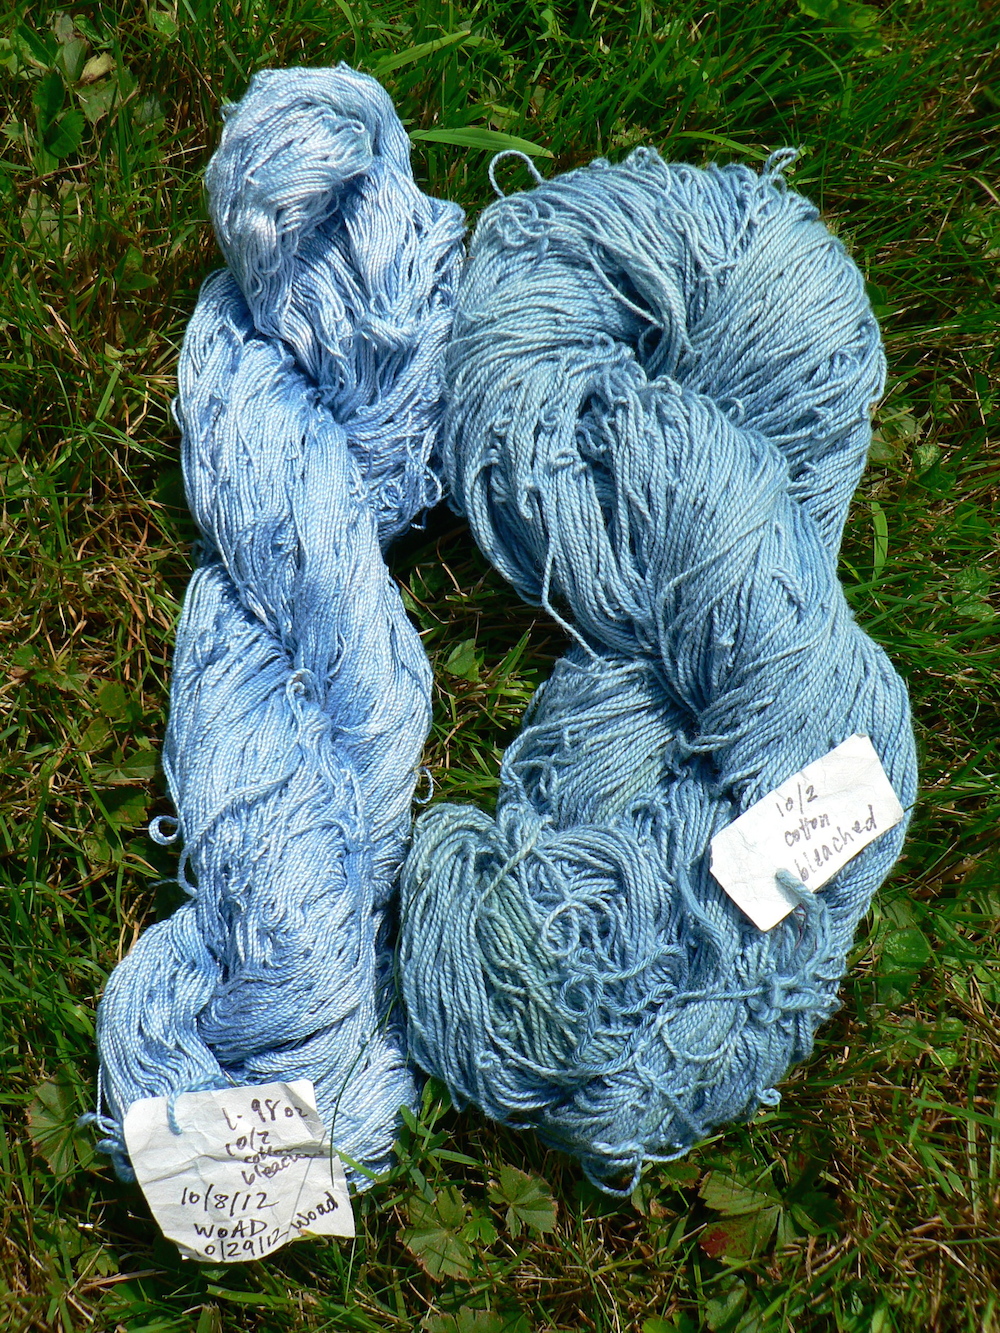
Woad on cotton skeins:
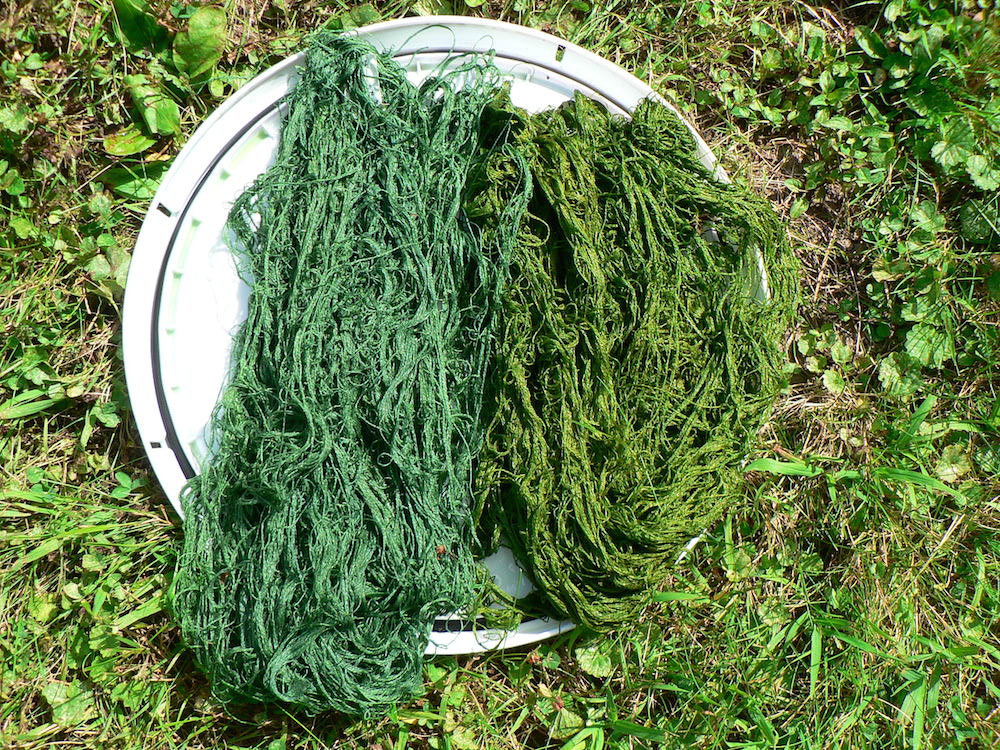
Woad over weld on linen skeins:
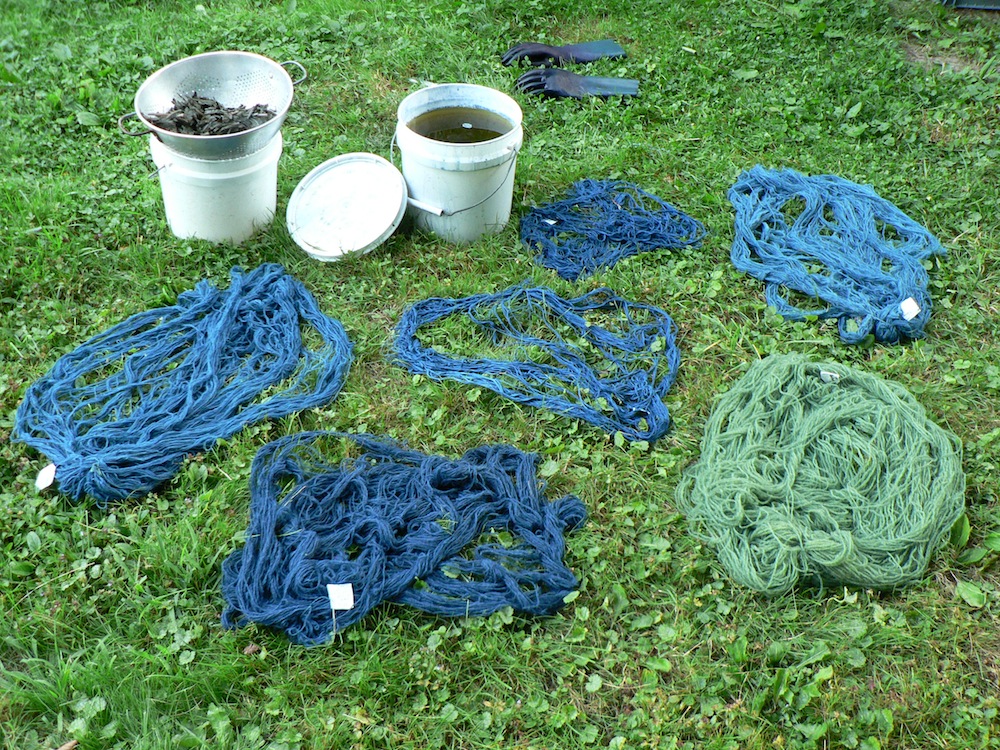
Woad vat in process:
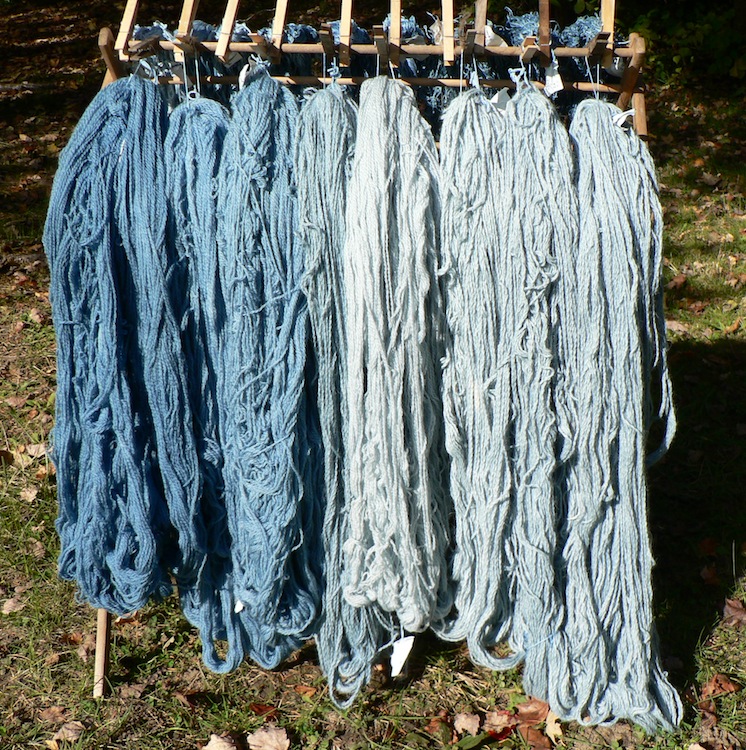
Woad-dyed wools oxidized and rinsed, hanging up to dry:
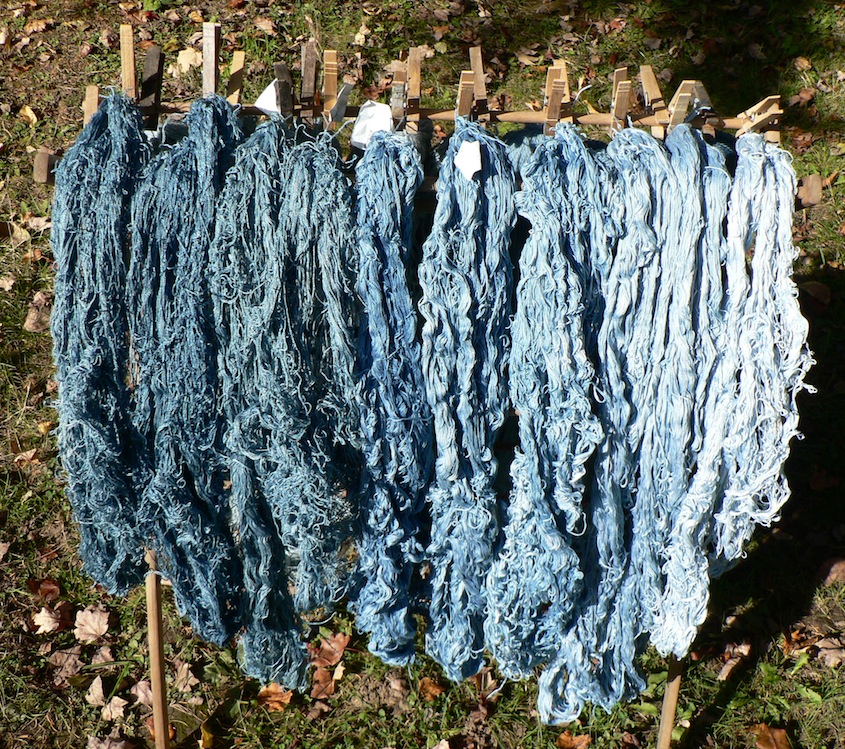
Woad-dyed cellulose yarns:
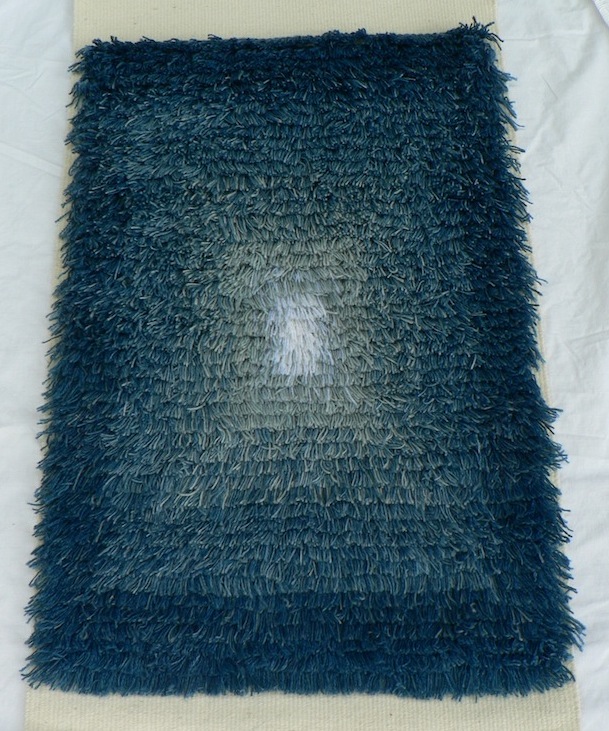
Rya wall-hanging with woad-dyed wools:
Resources and References:
- http://www.woad.org.uk/index.html
- http://www.thewoadcentre.co.uk/
- http://www.woad-inc.co.uk/dyeing_with_woad.html
- The blog Carpe Diem has many informative posts about different types of woad and indigo vats https://wroot.blog/2015/05/26/how-the-magic-works-the-chemistry-of-blue/
- The Lectoure Blue http://www.bleu-de-lectoure.com/en/
- Paivi Suomi’s website https://www.allfiberarts.com/2017/woad-vat.htm
- Harald Bohmer. Koekboya. Ganderkesee, Germany: REMHOB-Verlag, 2002, p. 224-225.
- Rita Buchanan. A Dyer’s Garden. Loveland, CO: Interweave Press, 1995, p. 42-44 and 108-109.
- _______. “Grow Your Own Indigo” in Dyes From Nature, guest editor Rita Buchanan. Brooklyn Botanic Garden Record Vol. 46, No. 2, Summer 1990, p. 82-85.
- __________. A Weaver’s Garden. Loveland, CO: Interweave Press, 1987, p. 109-113.
- Jenny Dean. Wild Color–Revised and Updated EditionNew York: Watson-Guptil Publications, 2010, p.56-57 and 100-101.
- Jill Goodwin. A Dyer’s Manual. London: Pelham Books, 1982.
- Anna Hartl, et al. Searching for blue: experiments with woad fermentation vats and an explanation of the colors through dye analysis. Journal of Archaeological Science Reports, vol. 2 June 2015, p. 9-39.