Making Brown with Black Walnuts Part Two

To re-cap, I had managed to transform linen yarns, grown and hand spun at Aker Fiber Farm in New Hampshire, from lovely shades of silvery- and golden-tan into more drab versions of same colors. This was deeply dissatisfying. But, if at first you don’t succeed… try, try again.

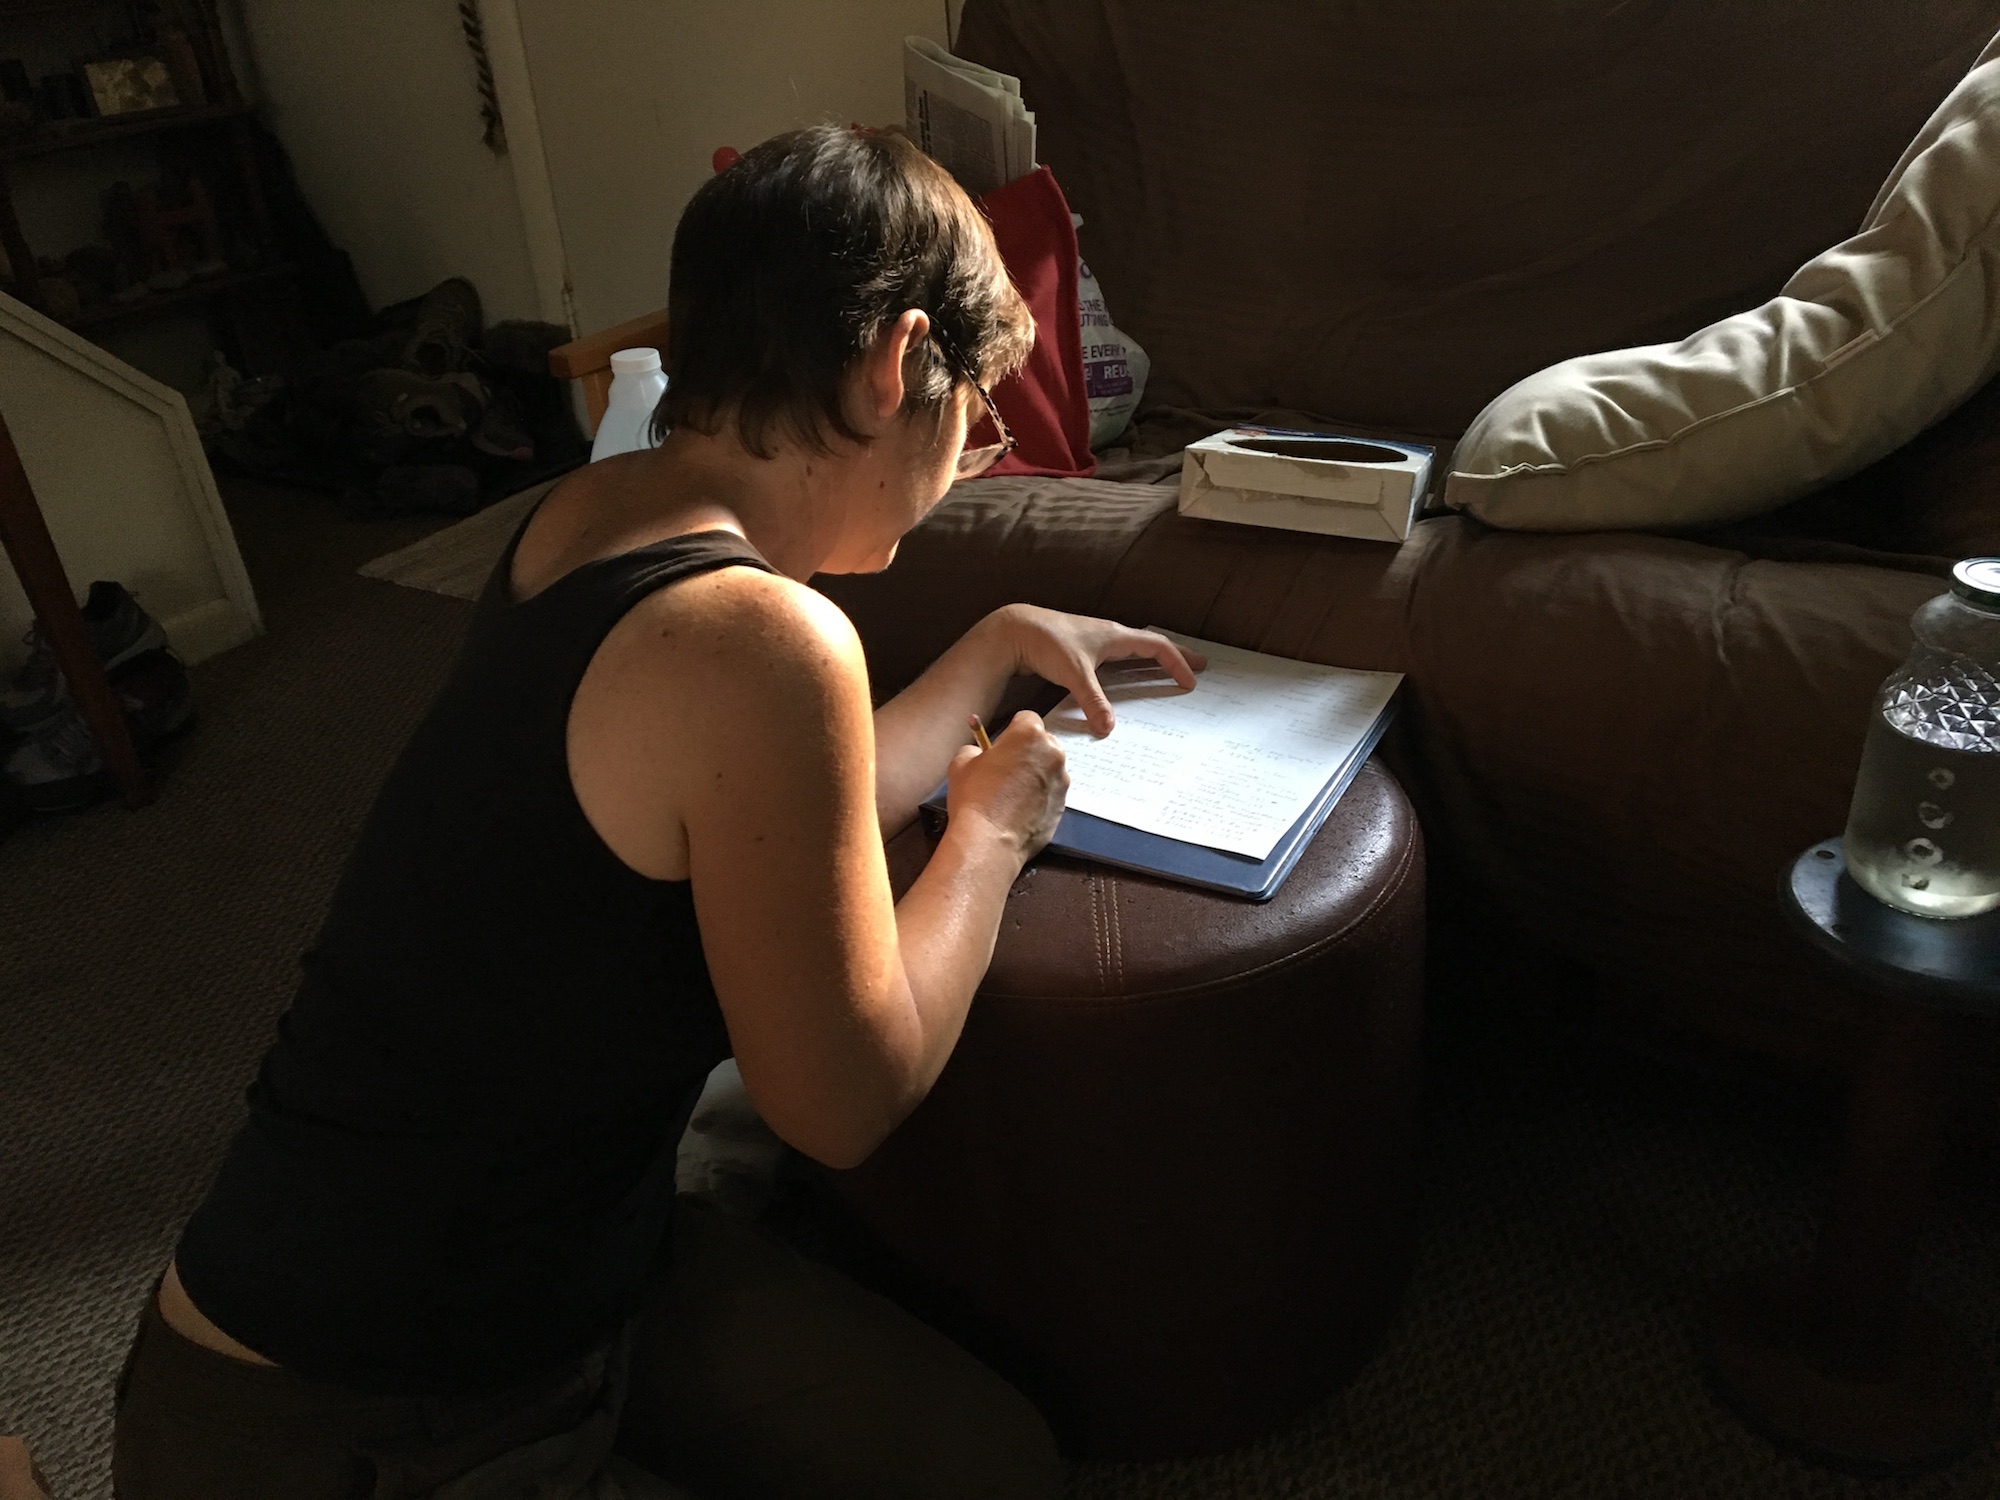
I thought about the factors that might have led to such disappointing color, and decided to change a few things the second time around. I was in a hurry at this point, because I was planning to deliver the yarns in just a couple days. So, I moved through some steps quicker than I normally do.

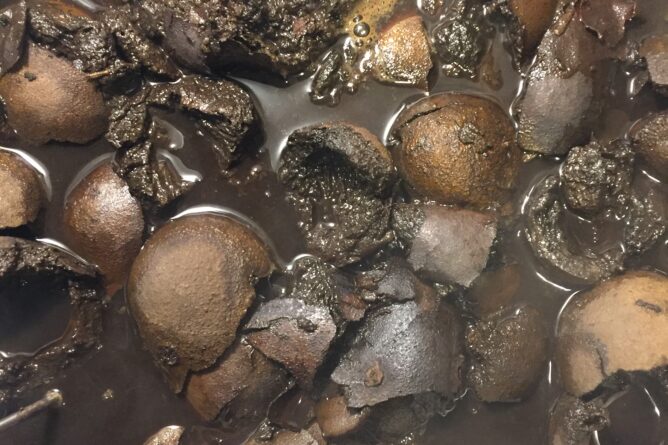
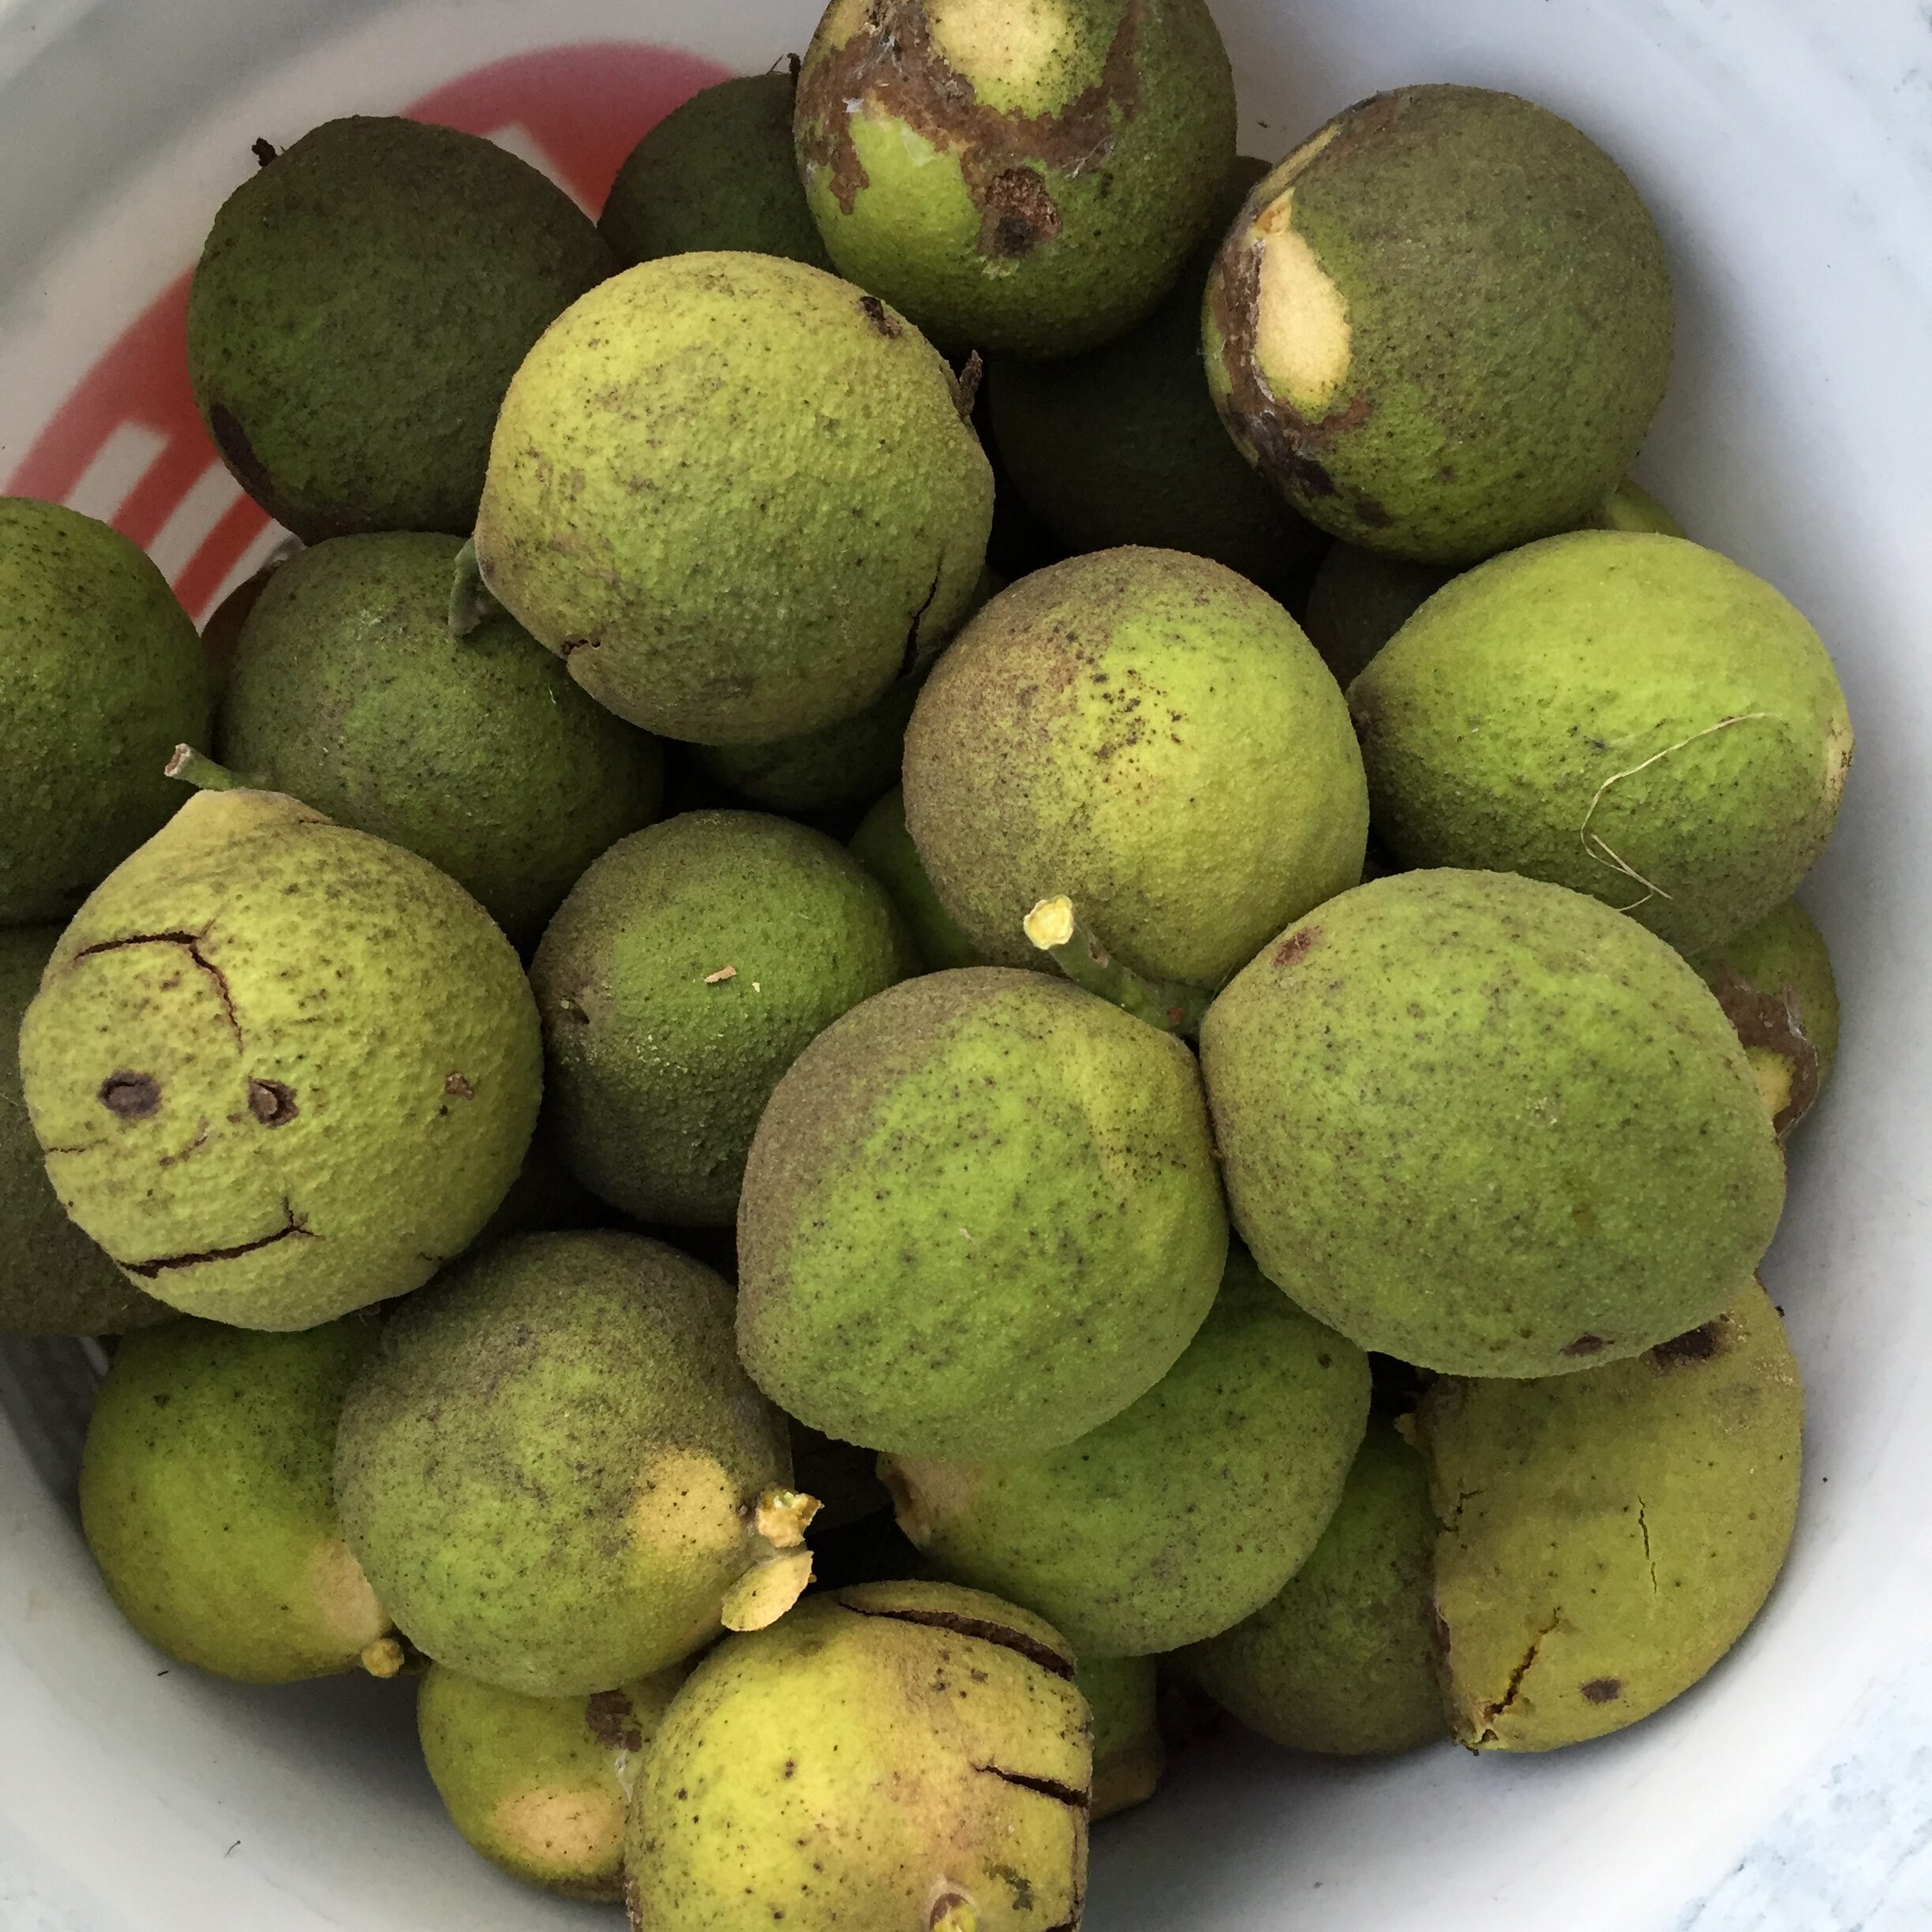
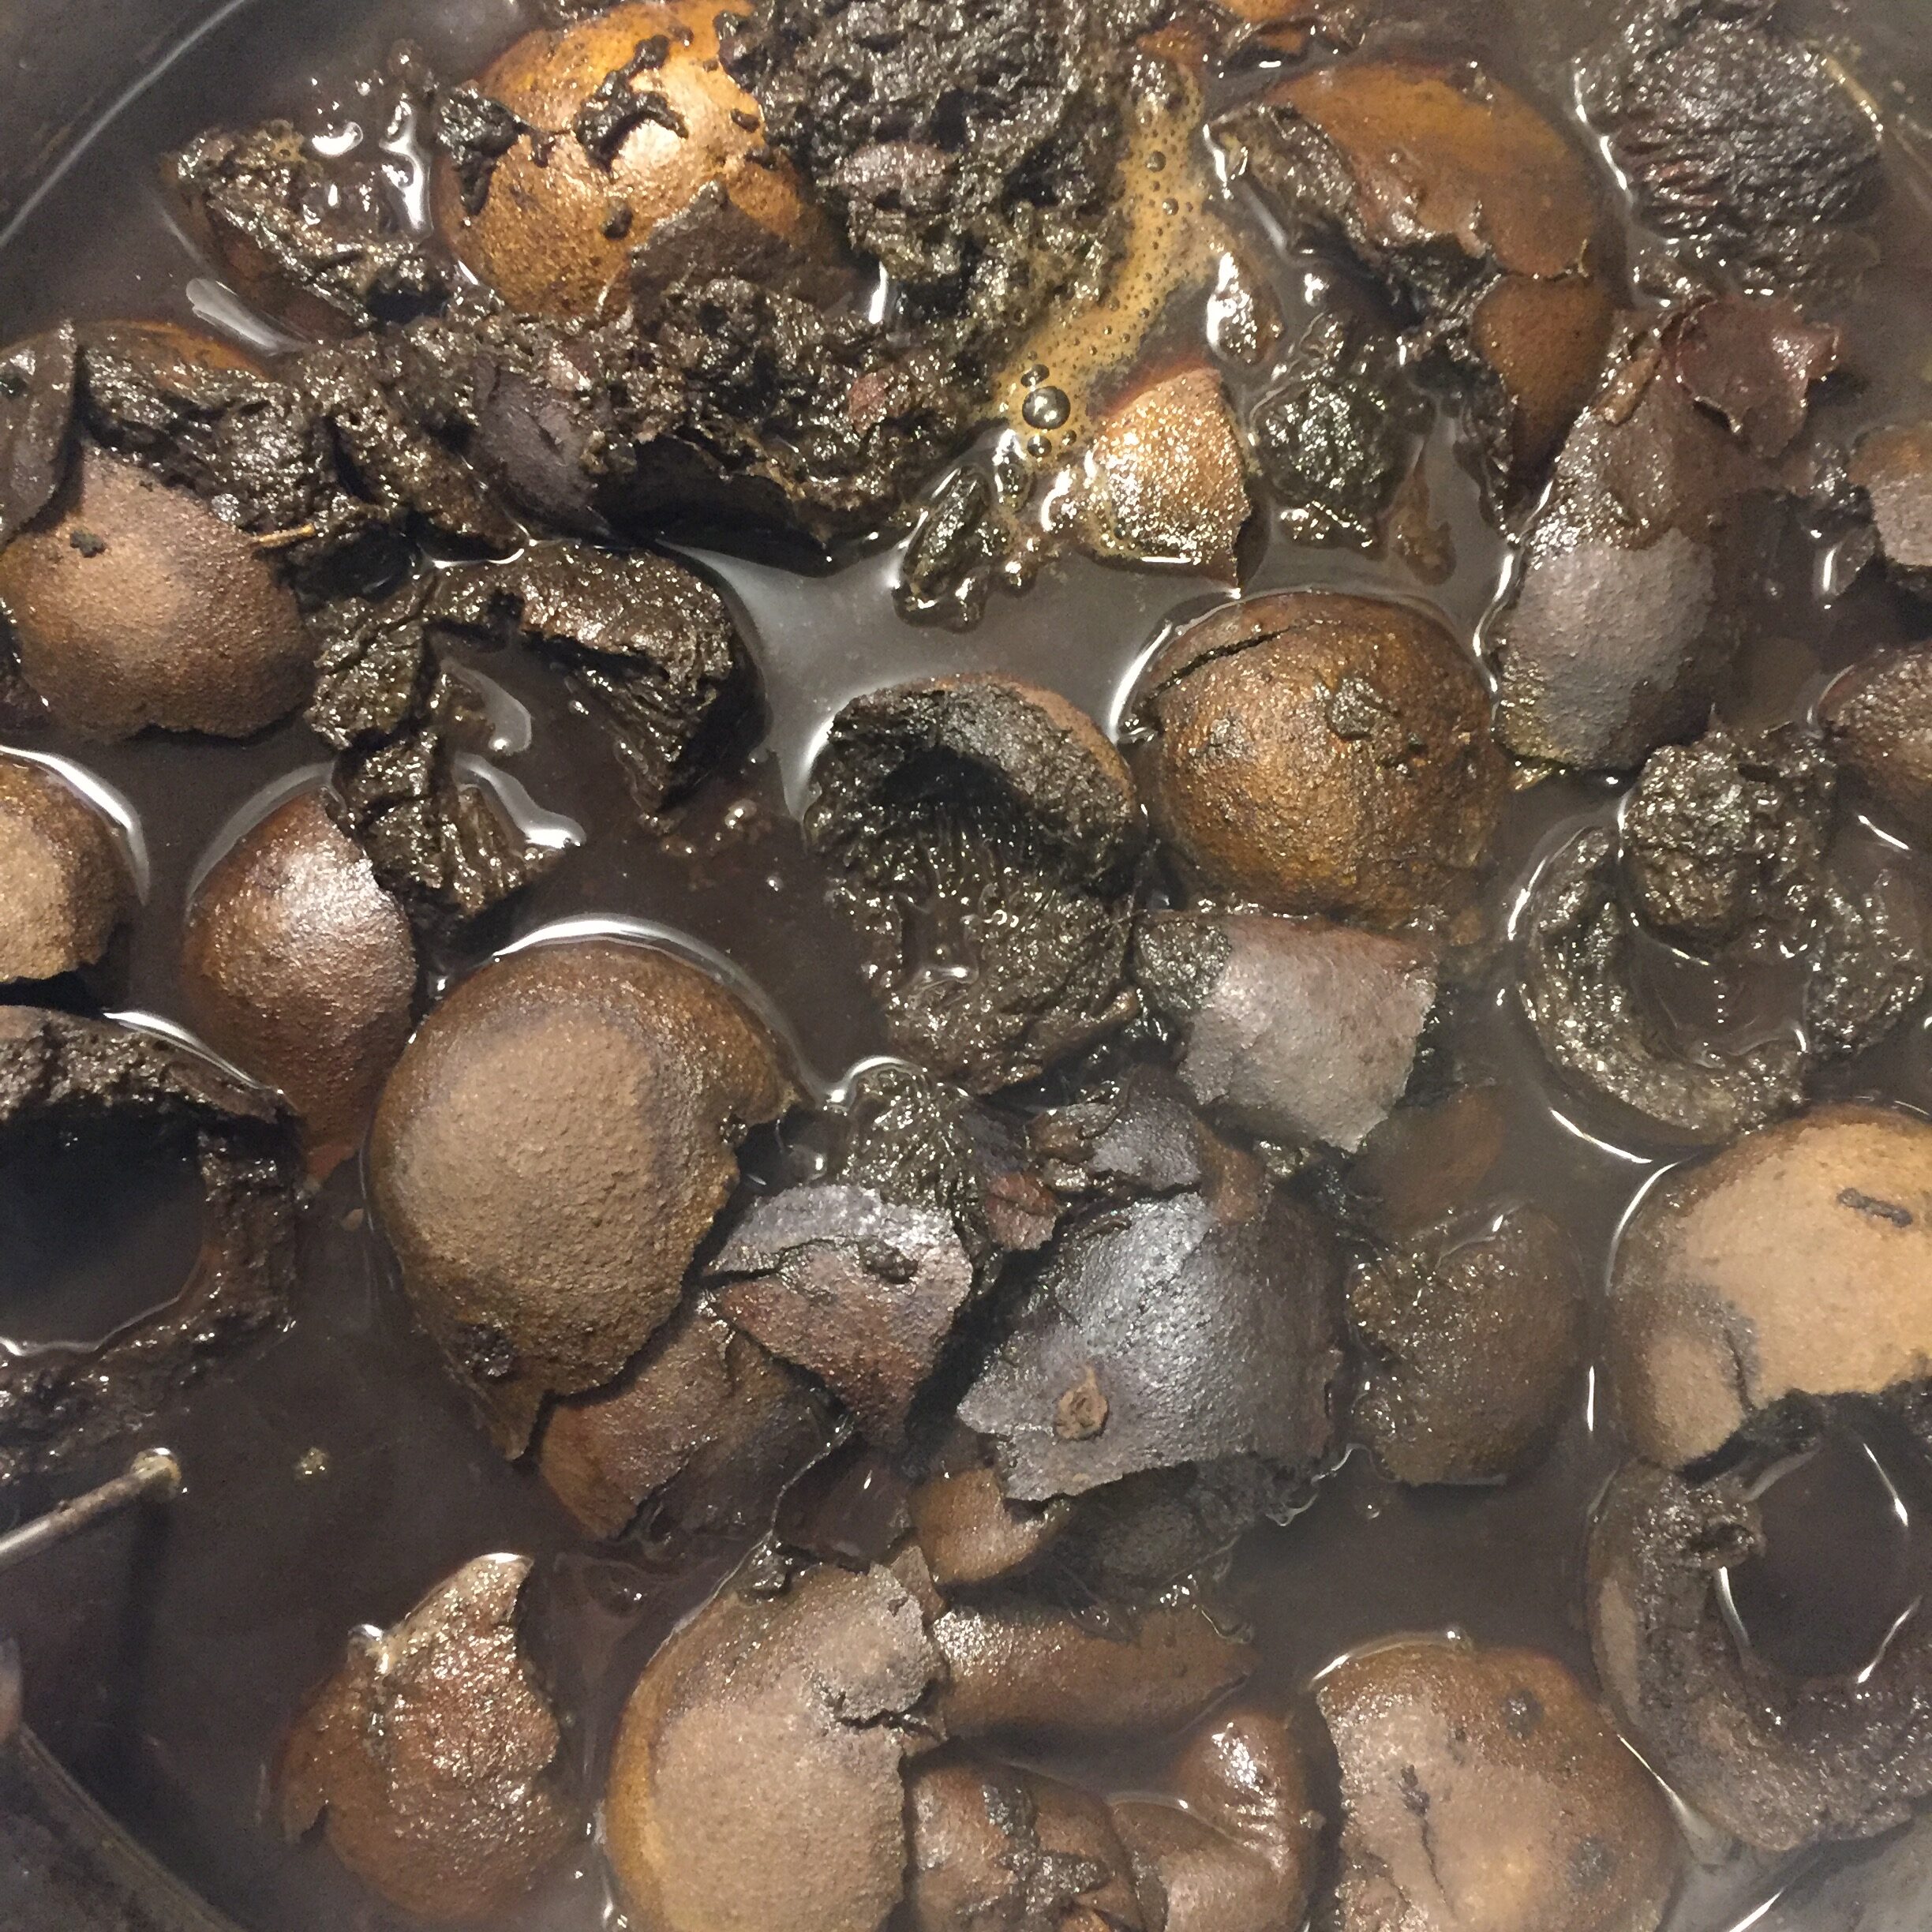
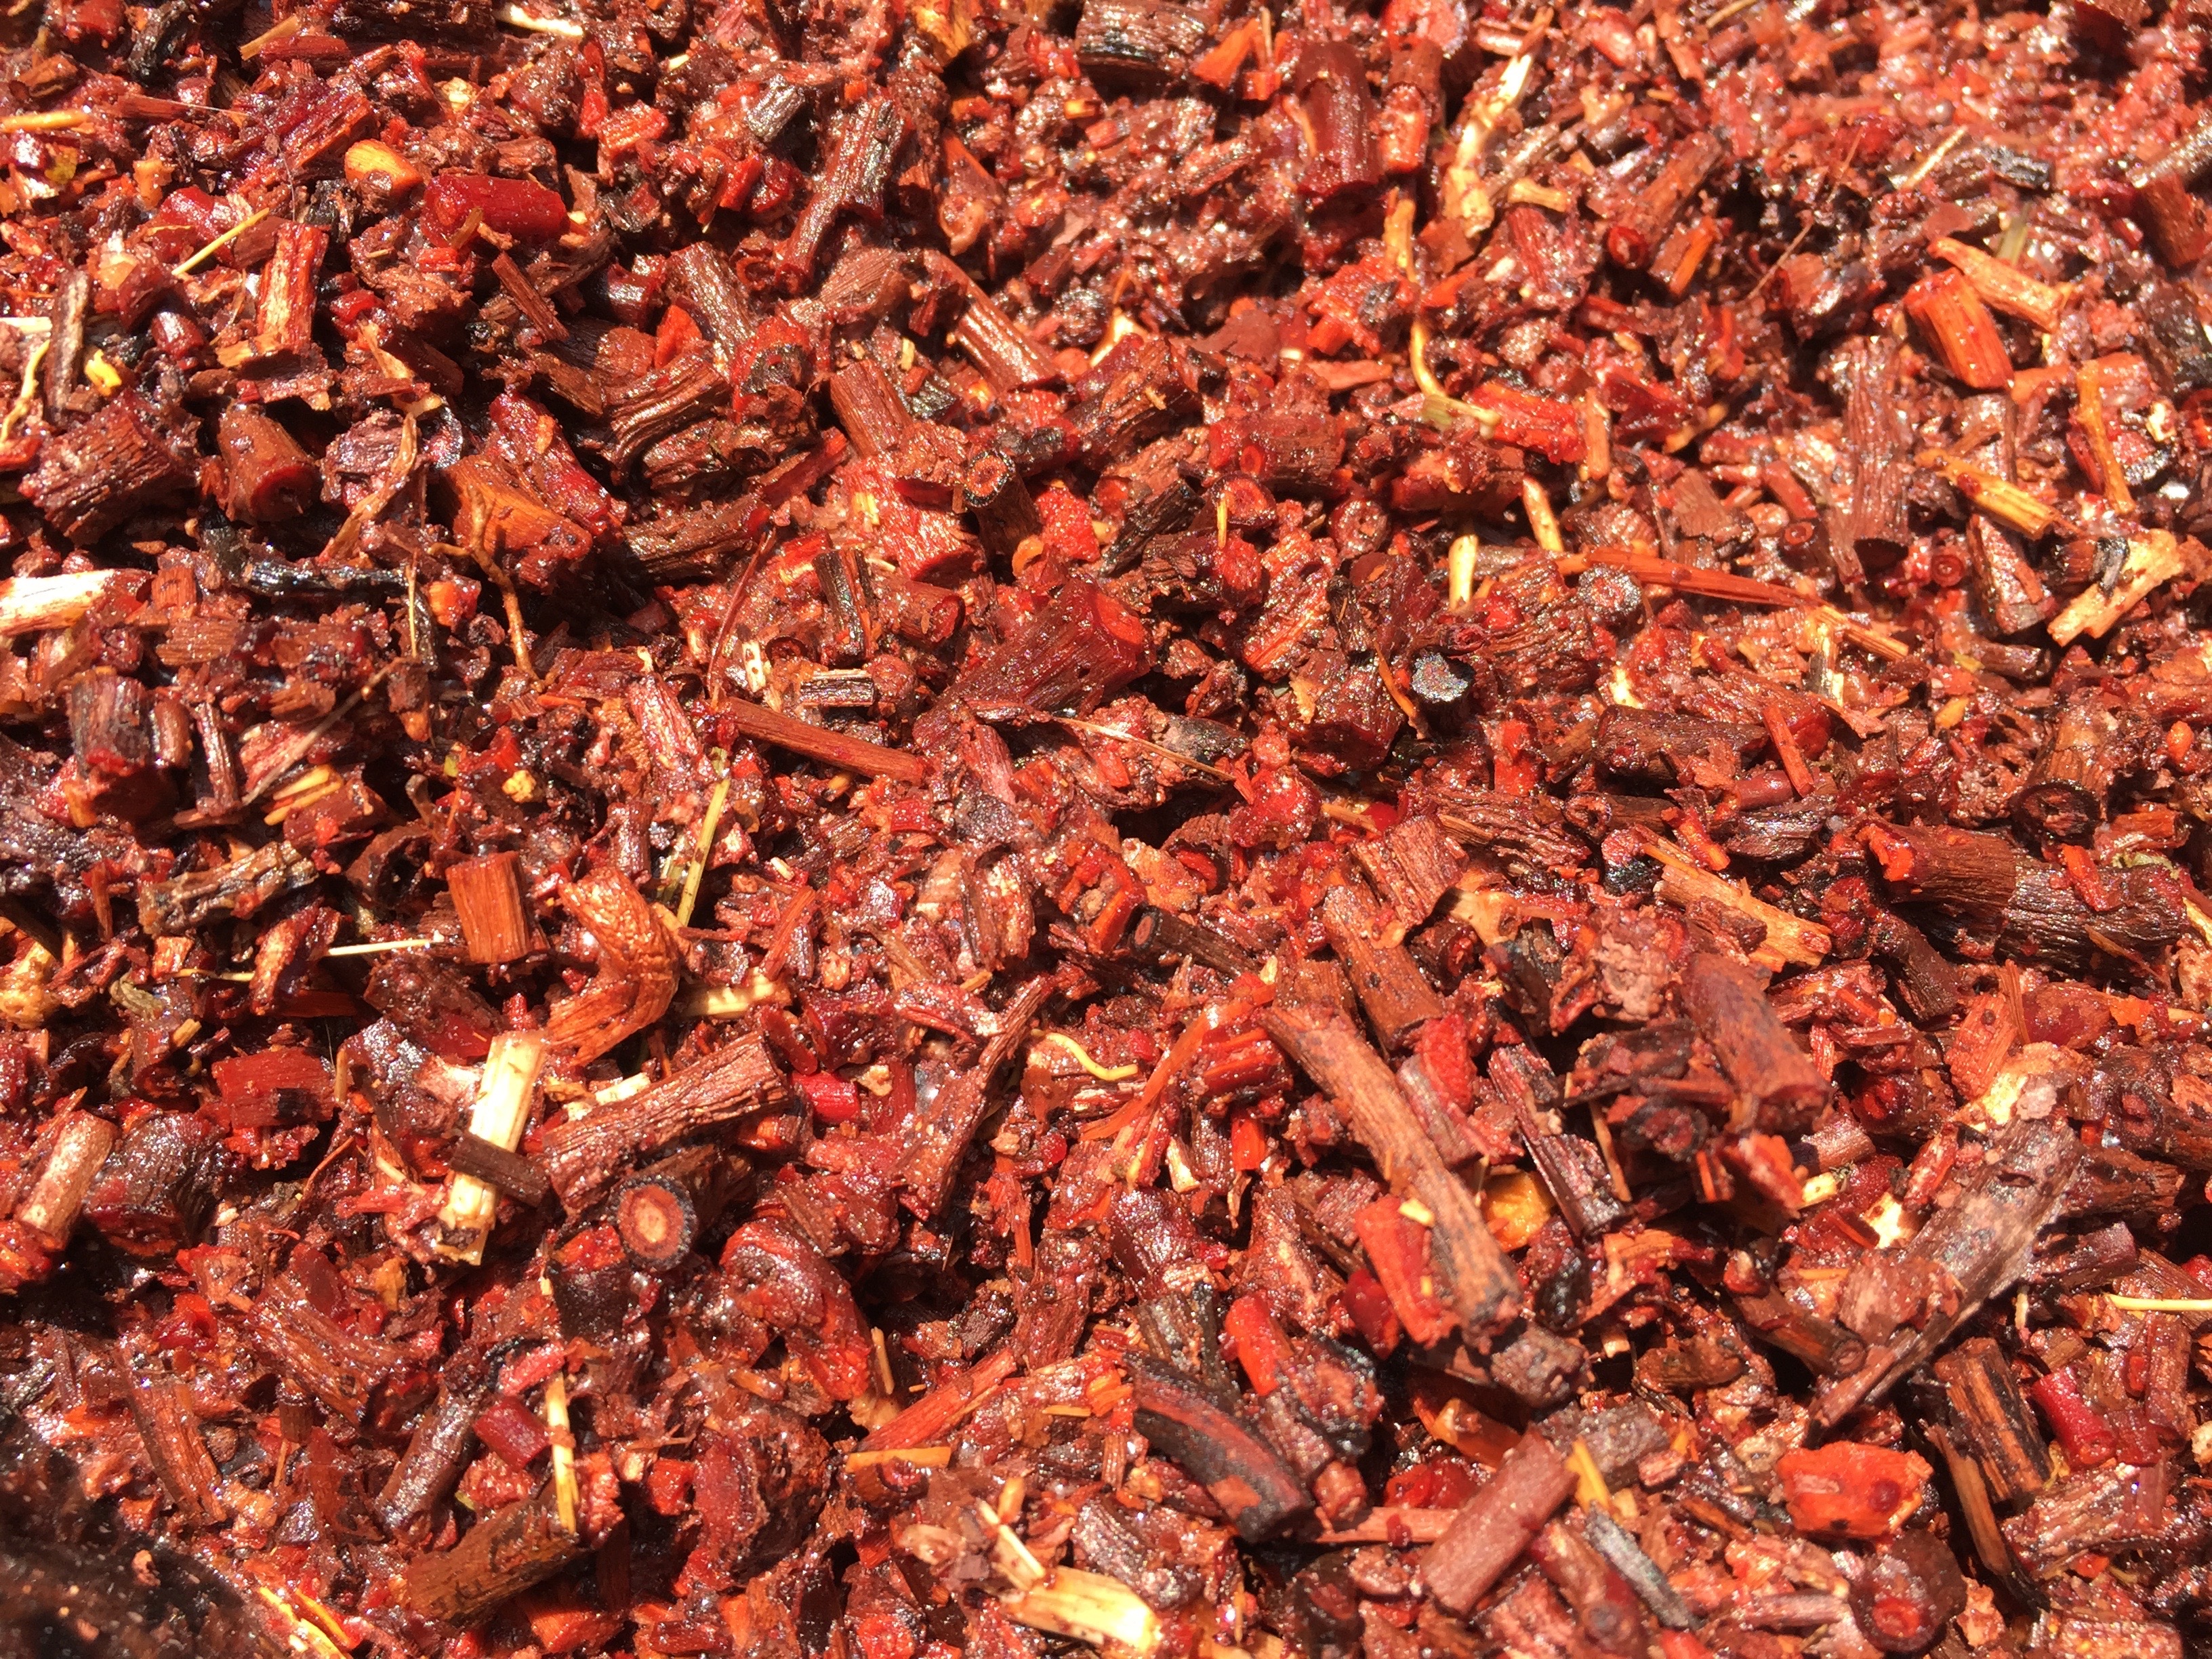
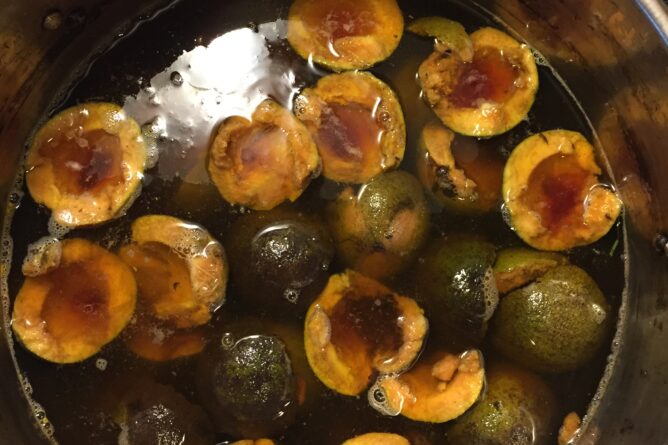
First, I made a fresh dyebath using only the very greenest of the walnut hulls that had been soaking outside. This involved finding the bucket that contained the hulls I had collected earliest in the fall, which was tucked under a table and very well protected from squirrels. It was a little bit of an excavation project. Again, I used 3 gallons of hulls to make the dyebath, but I only used the brightest green ones:

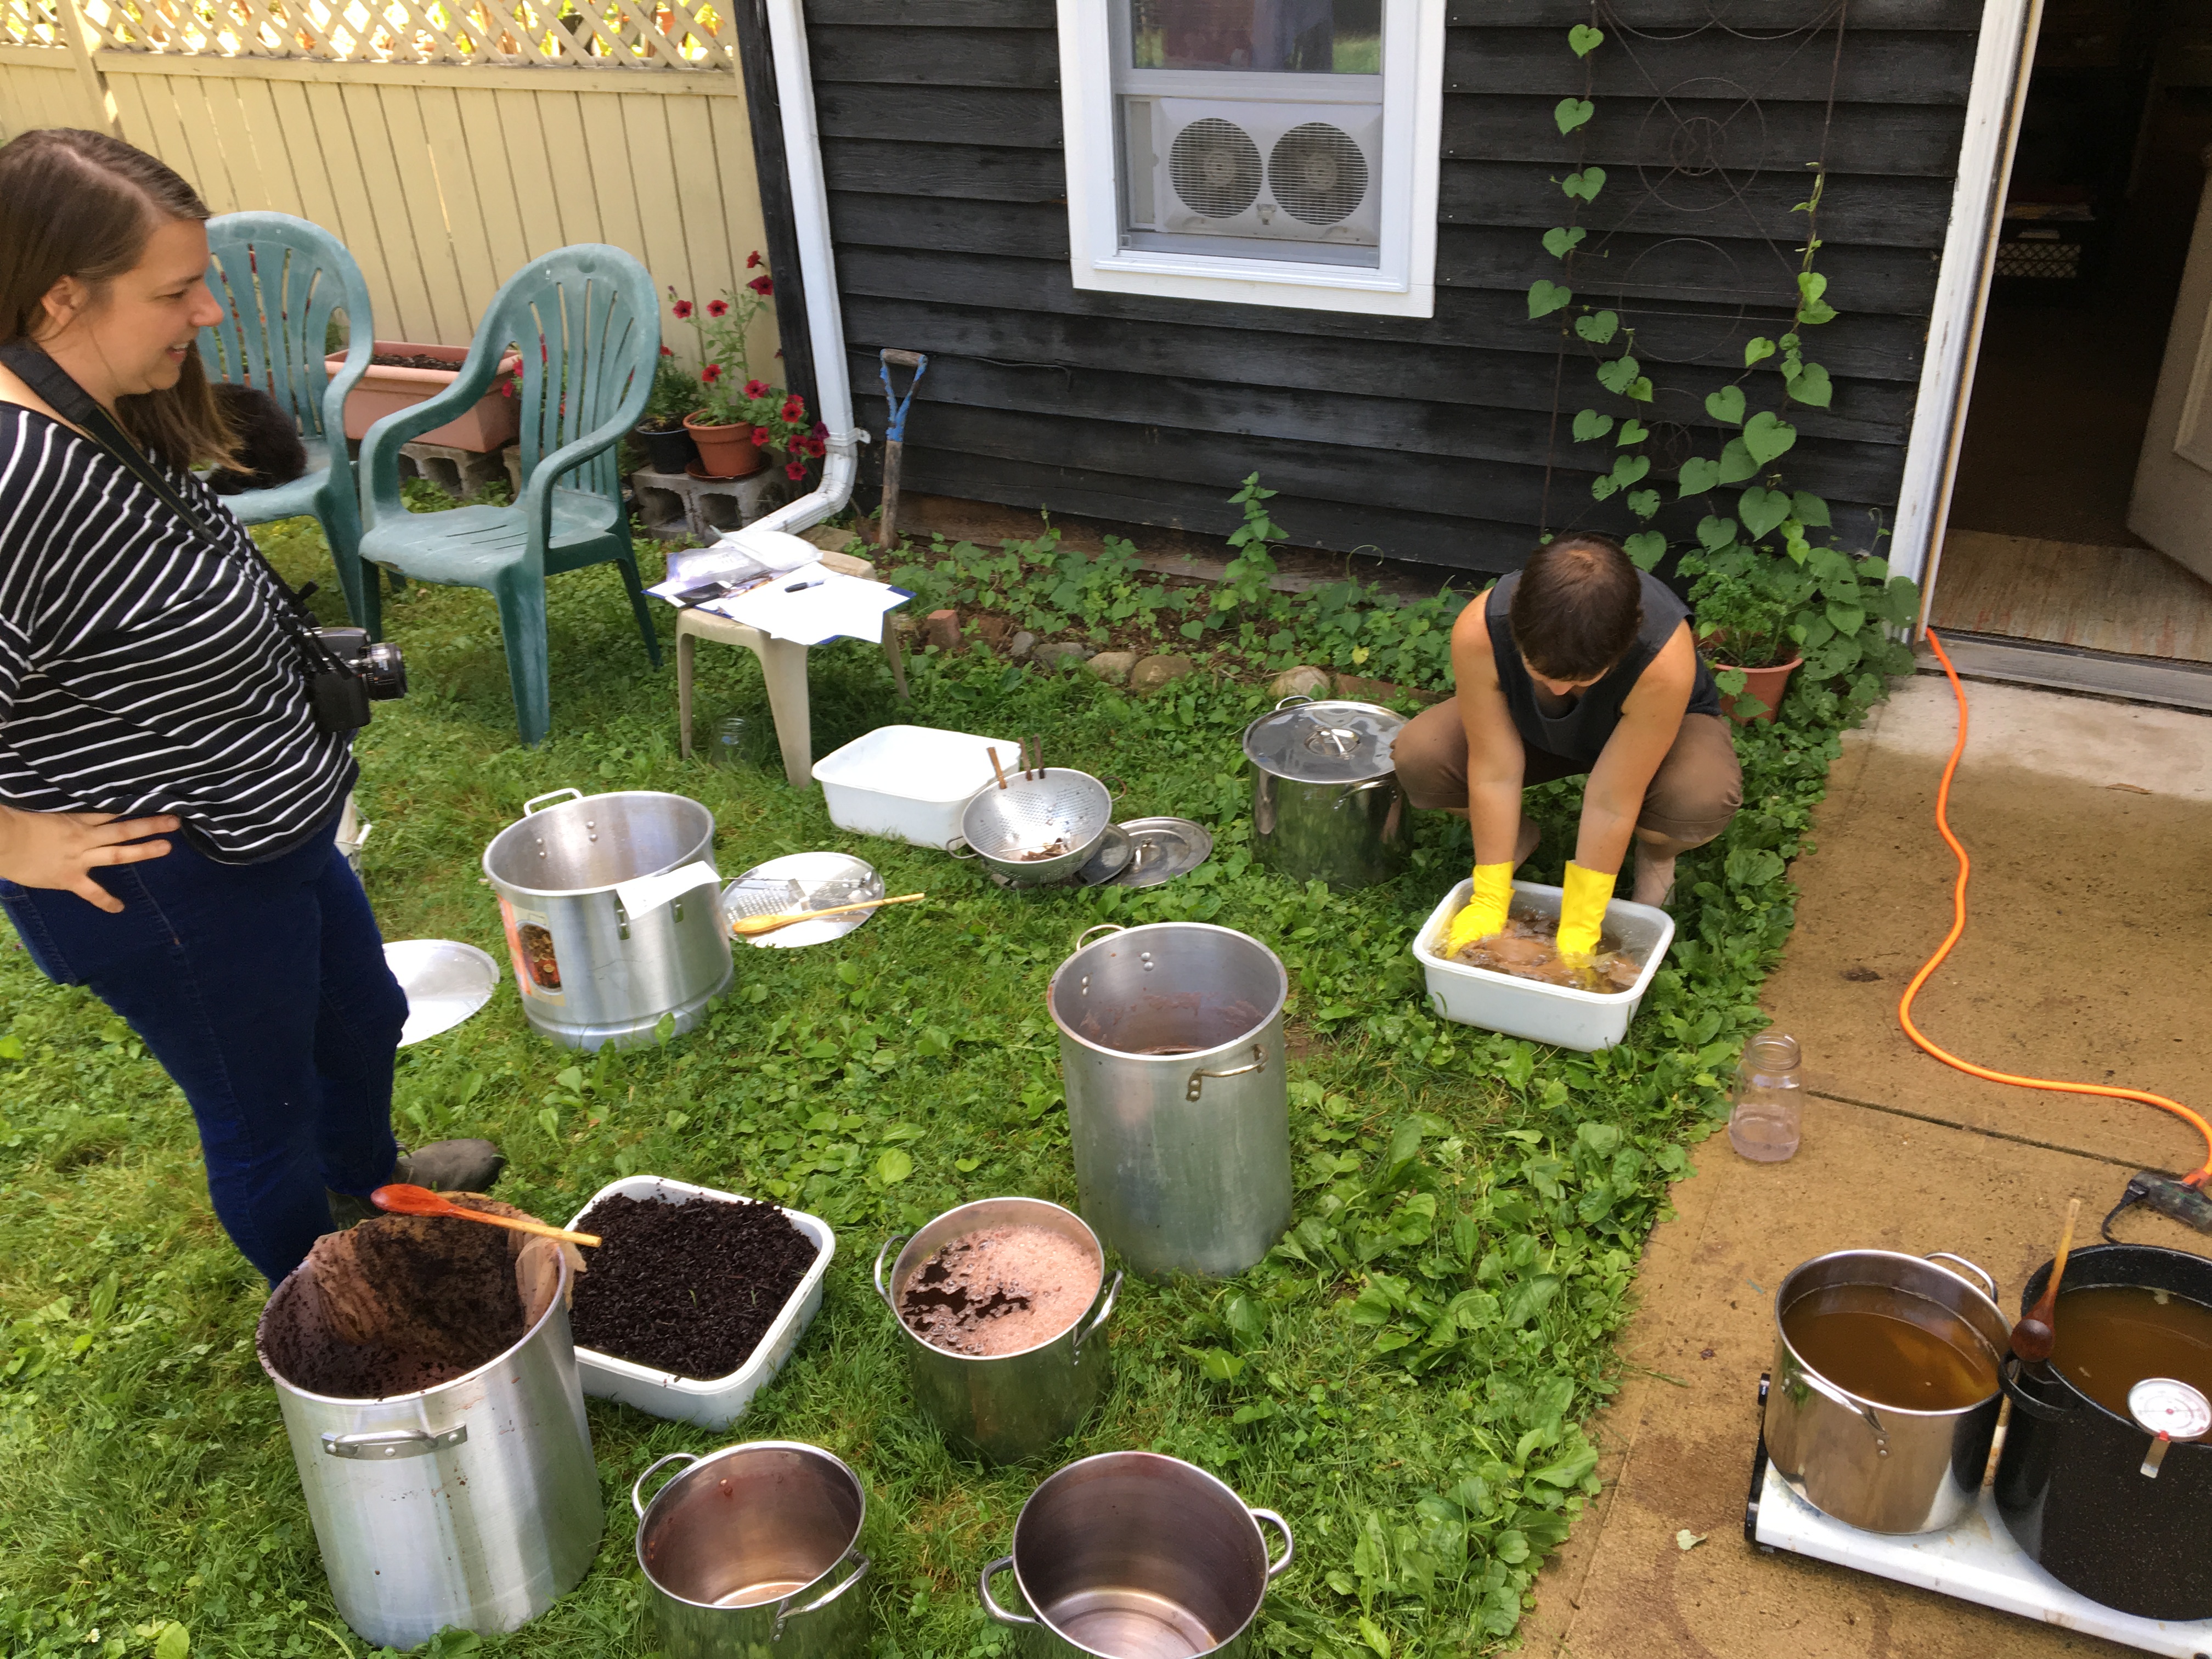
Second, I used fresh tap water to make the dyebath, not the liquid that the hulls had been soaking in. I heated the bath to about 180°F, maintained that temperature for two hours, then allowed it to cool and steep for a couple hours. I strained out the hulls while the liquid was still very warm, instead of giving it time to cool completely. I did not add any vinegar this time. The pH was 6.

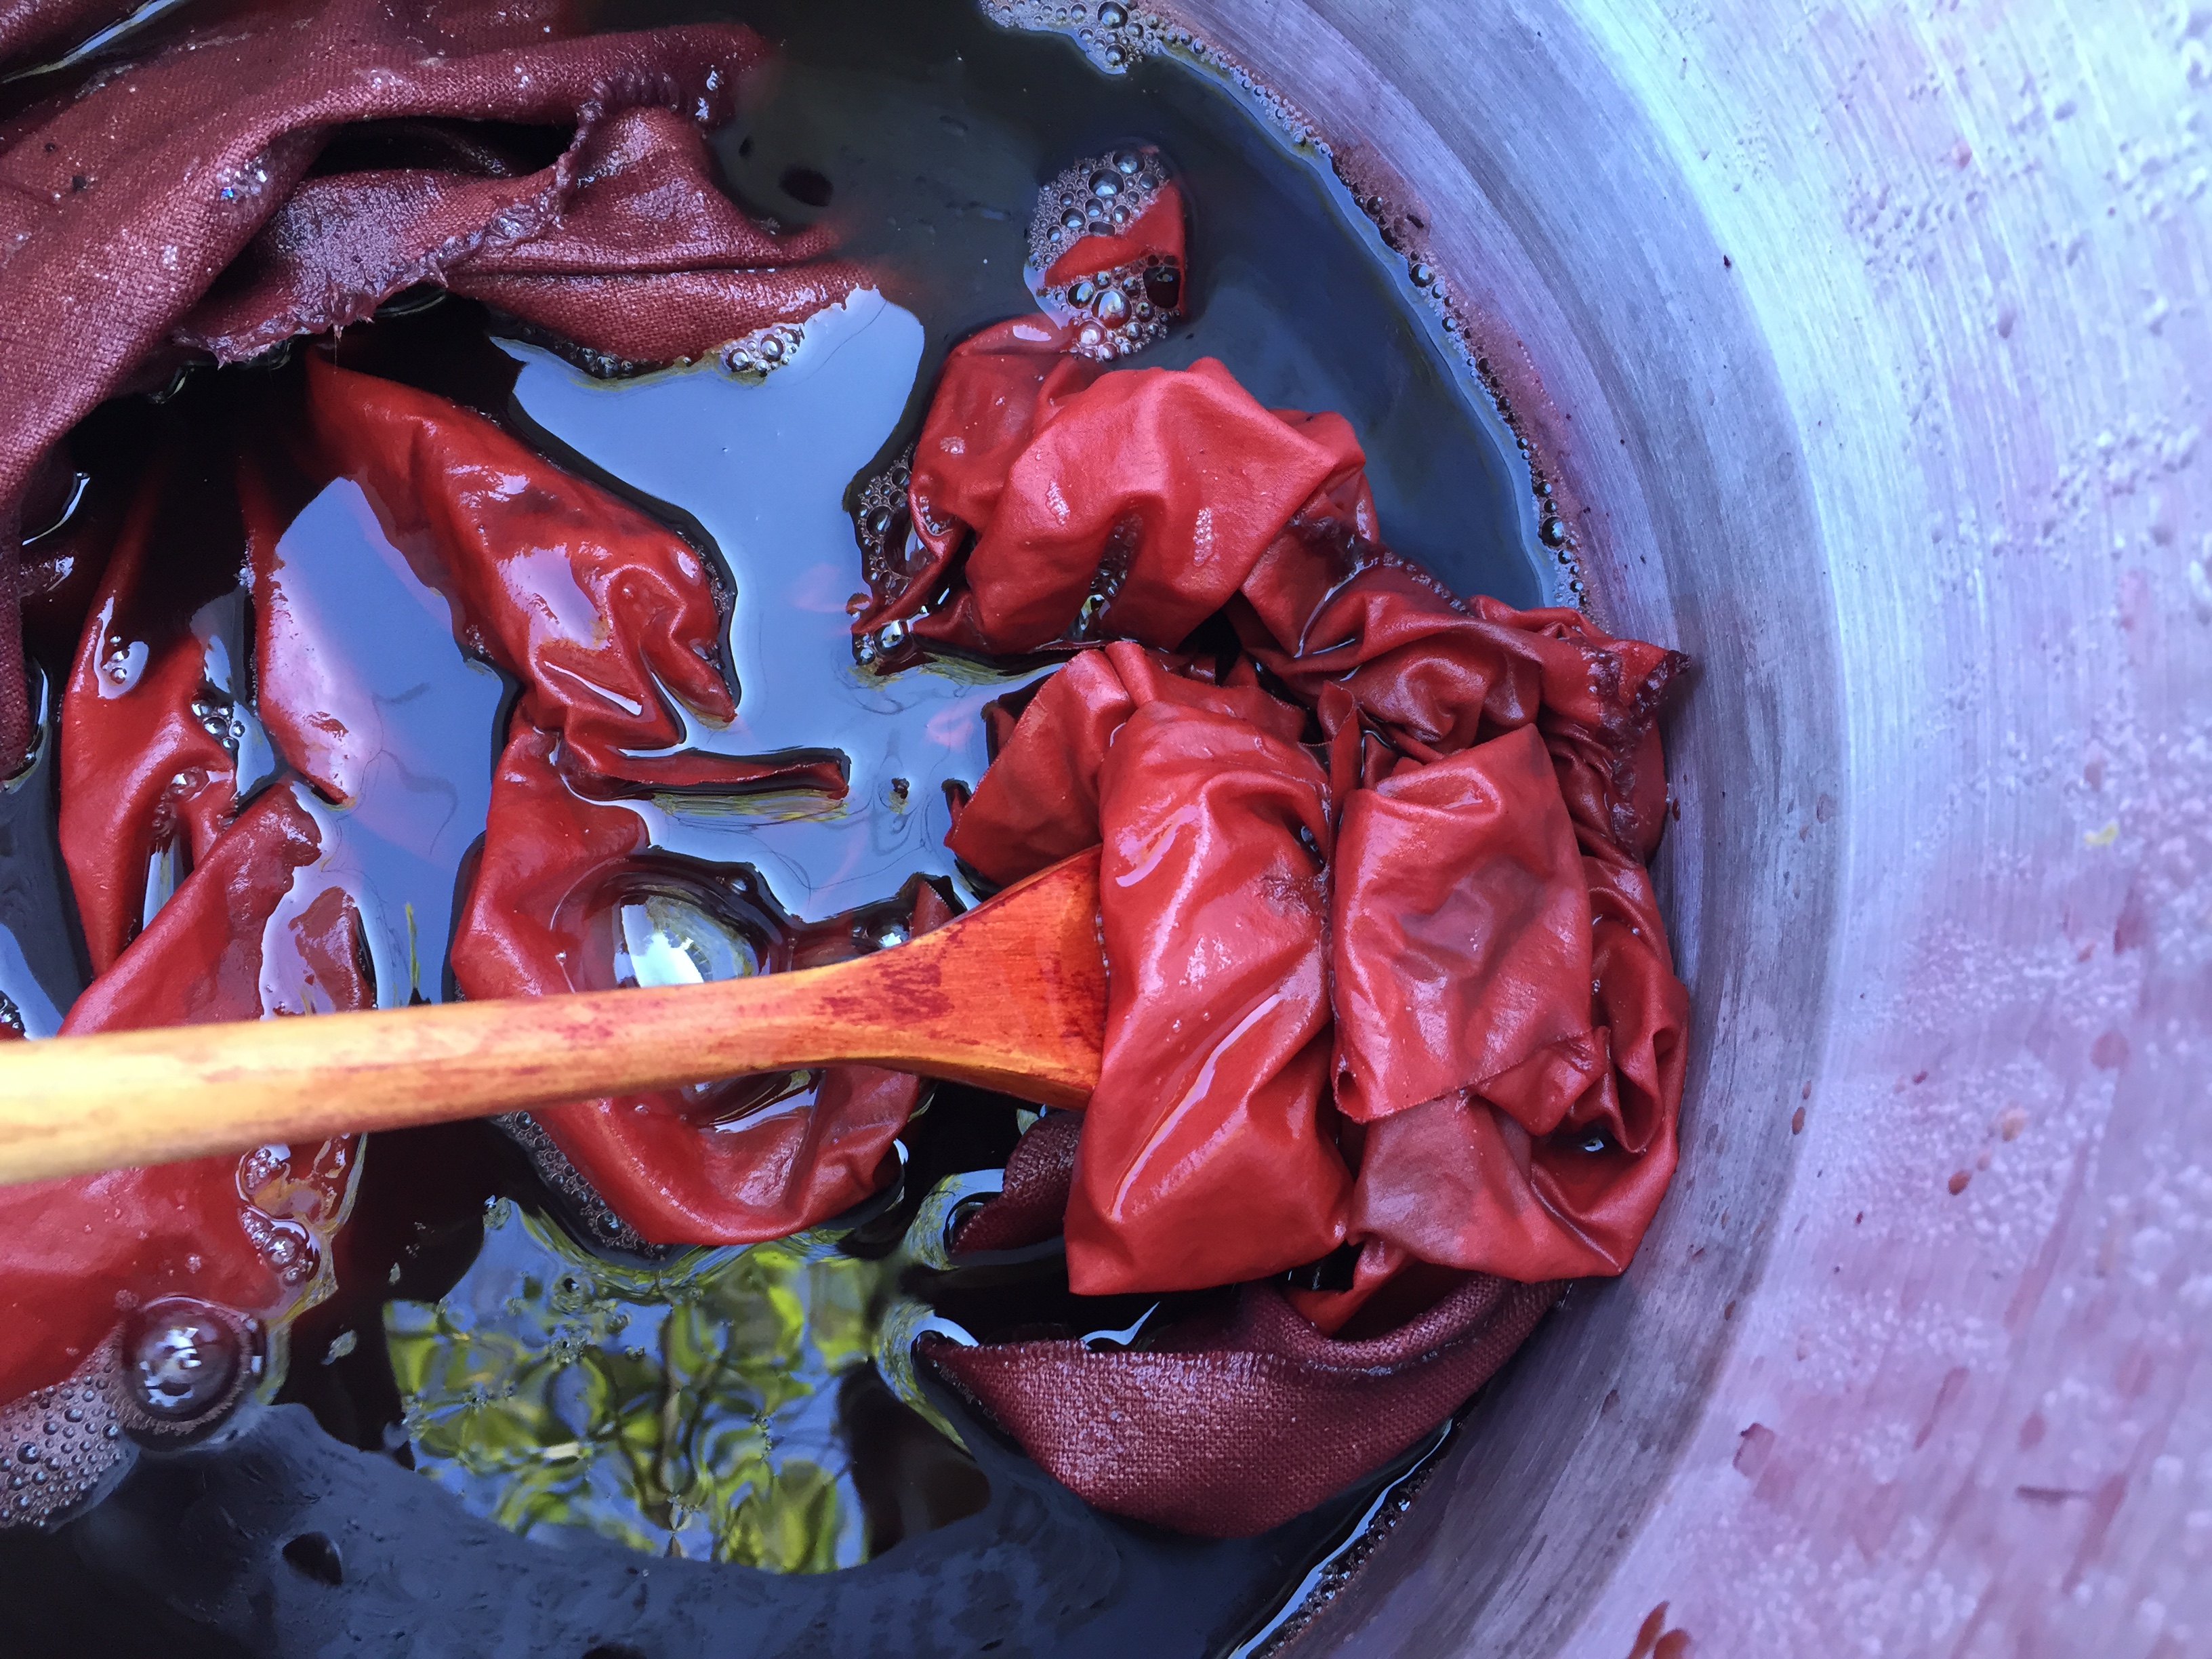
Third, I re-mordanted the fibers with aluminum acetate at 5% WOG at 100° and let the yarns soak in the mordant solution for two hours. I rinsed the yarns before putting them into the dyebath. After about ten minutes in the dyebath, I decided that this situation really called for iron sulfate.

I’ve used tannin with iron on cellulose before. I have even written some blog posts about it. So I knew it would darken the color significantly. I had been hoping that with black walnut I could get a dark color without iron. But at this point in my story it was Thursday and I was planning to deliver the yarns on Saturday, so I figured I’d better go with something that I was certain would do the trick.

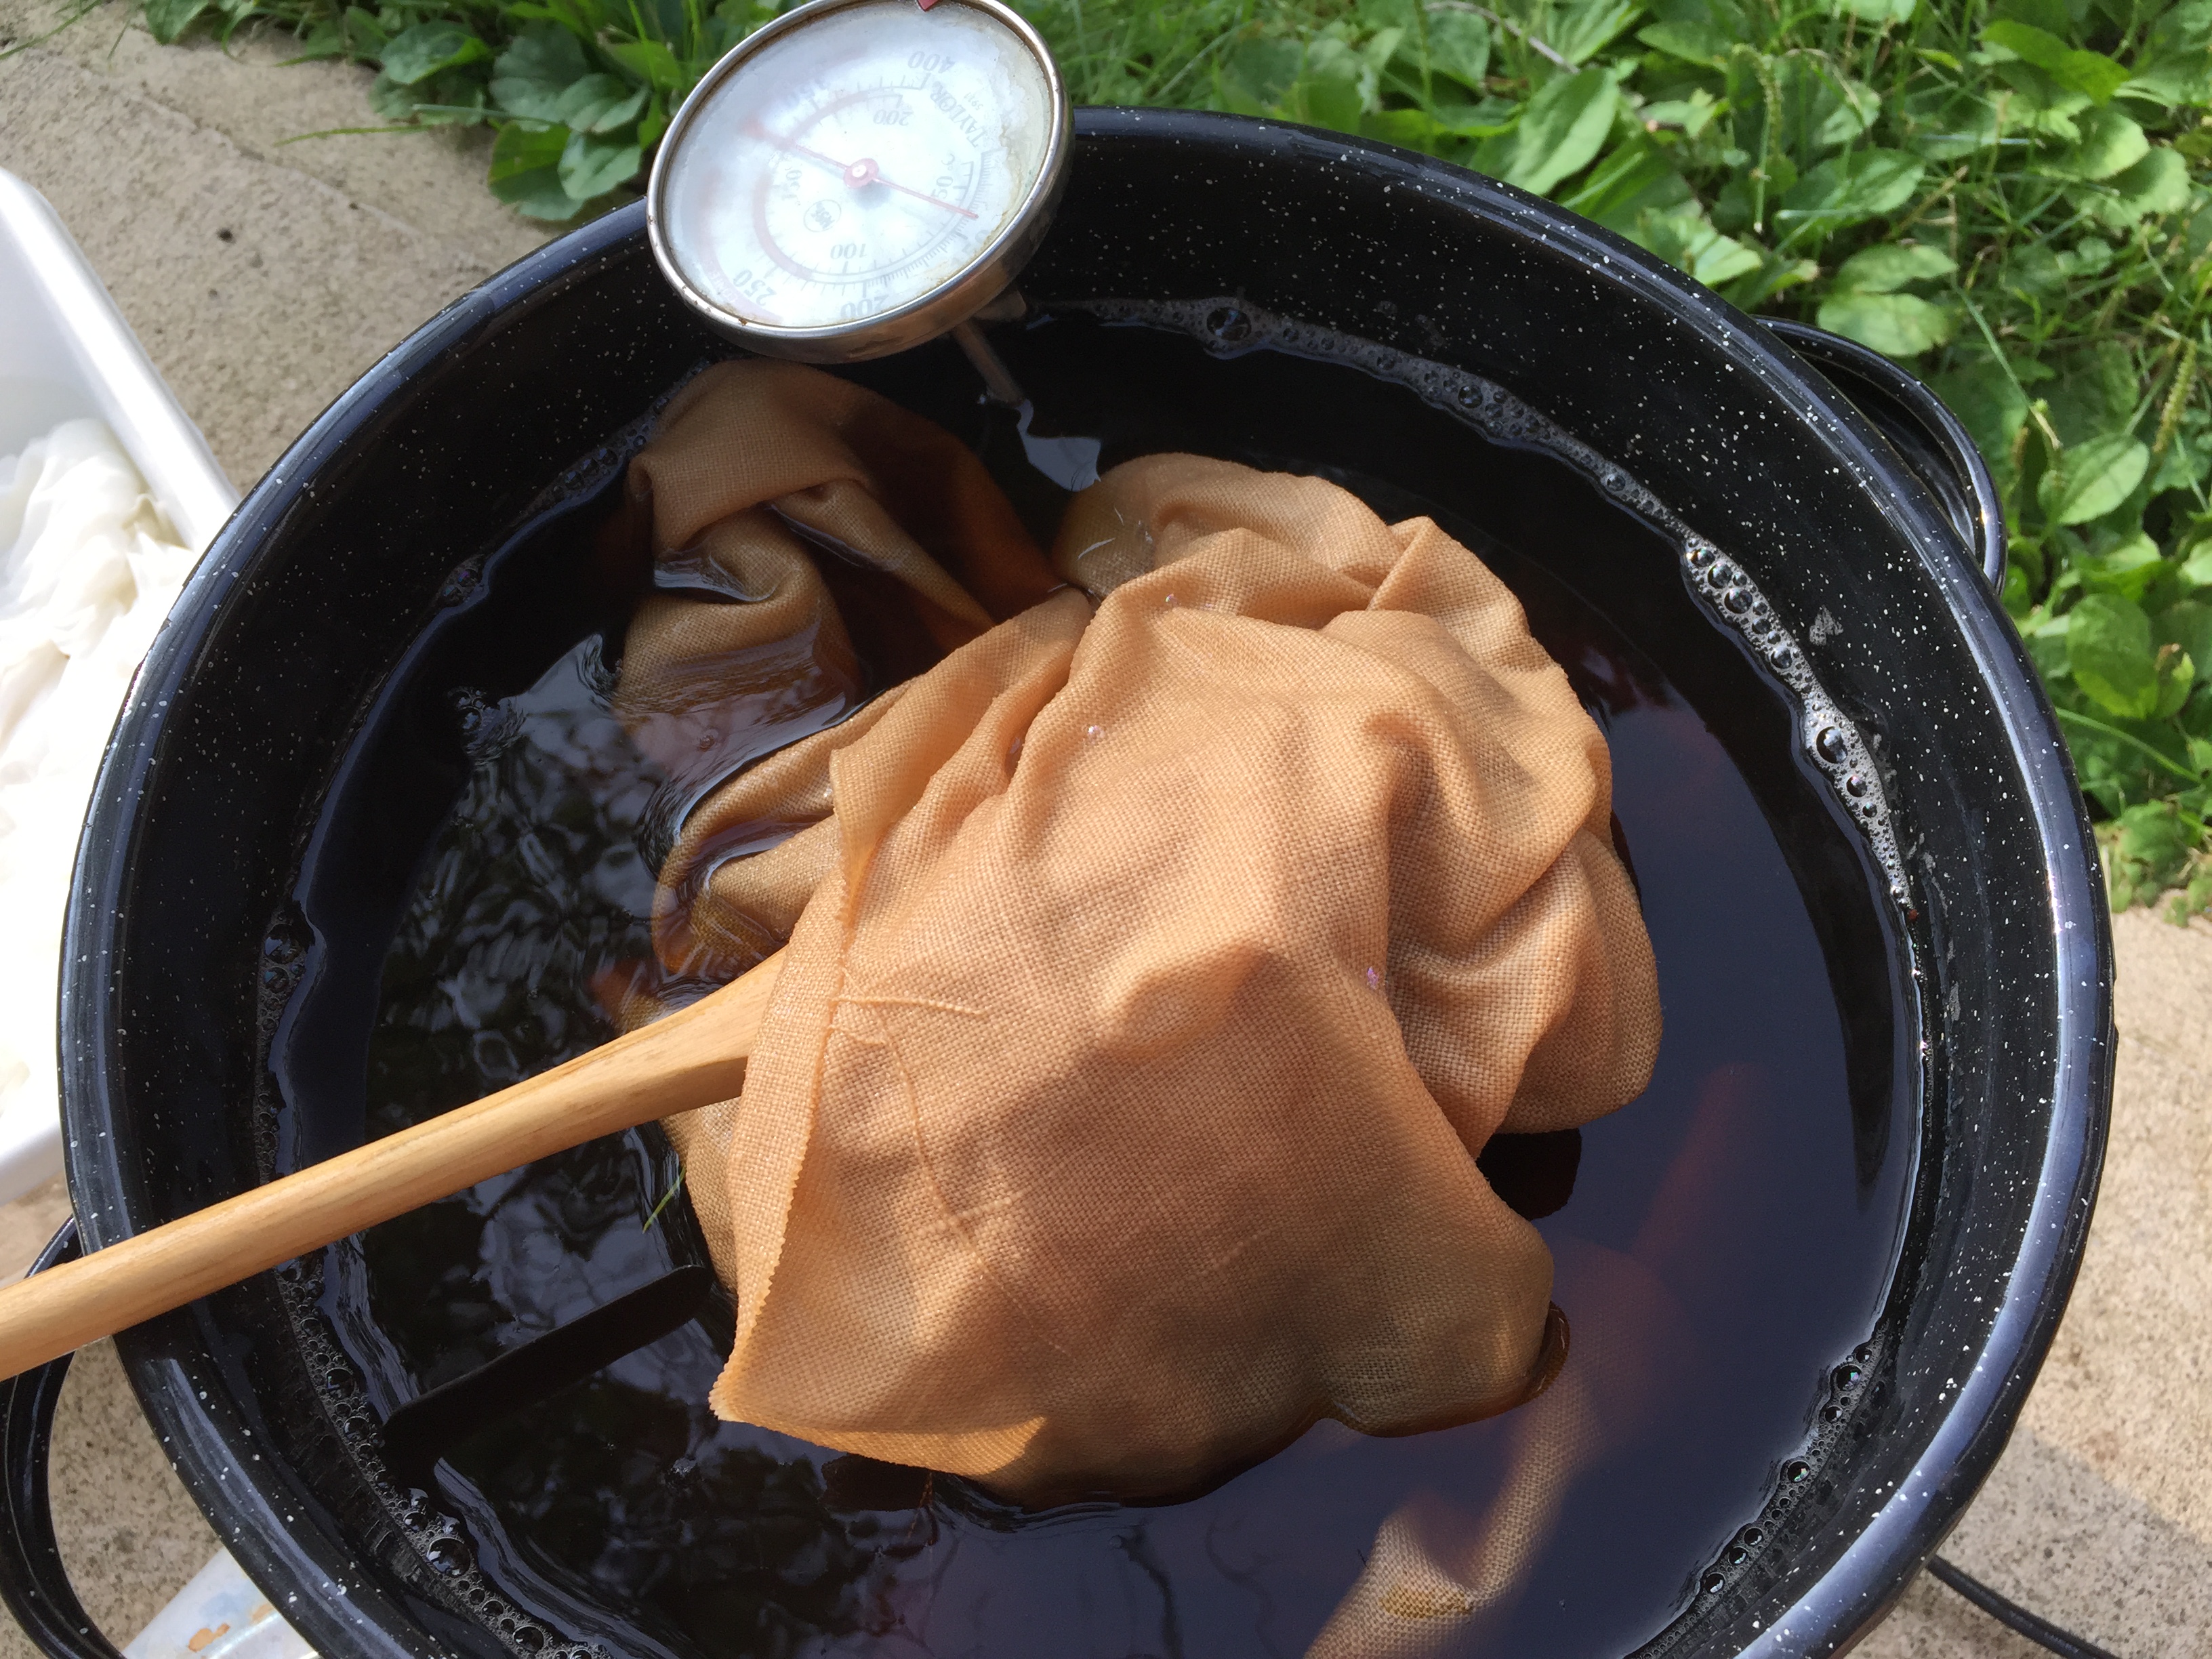
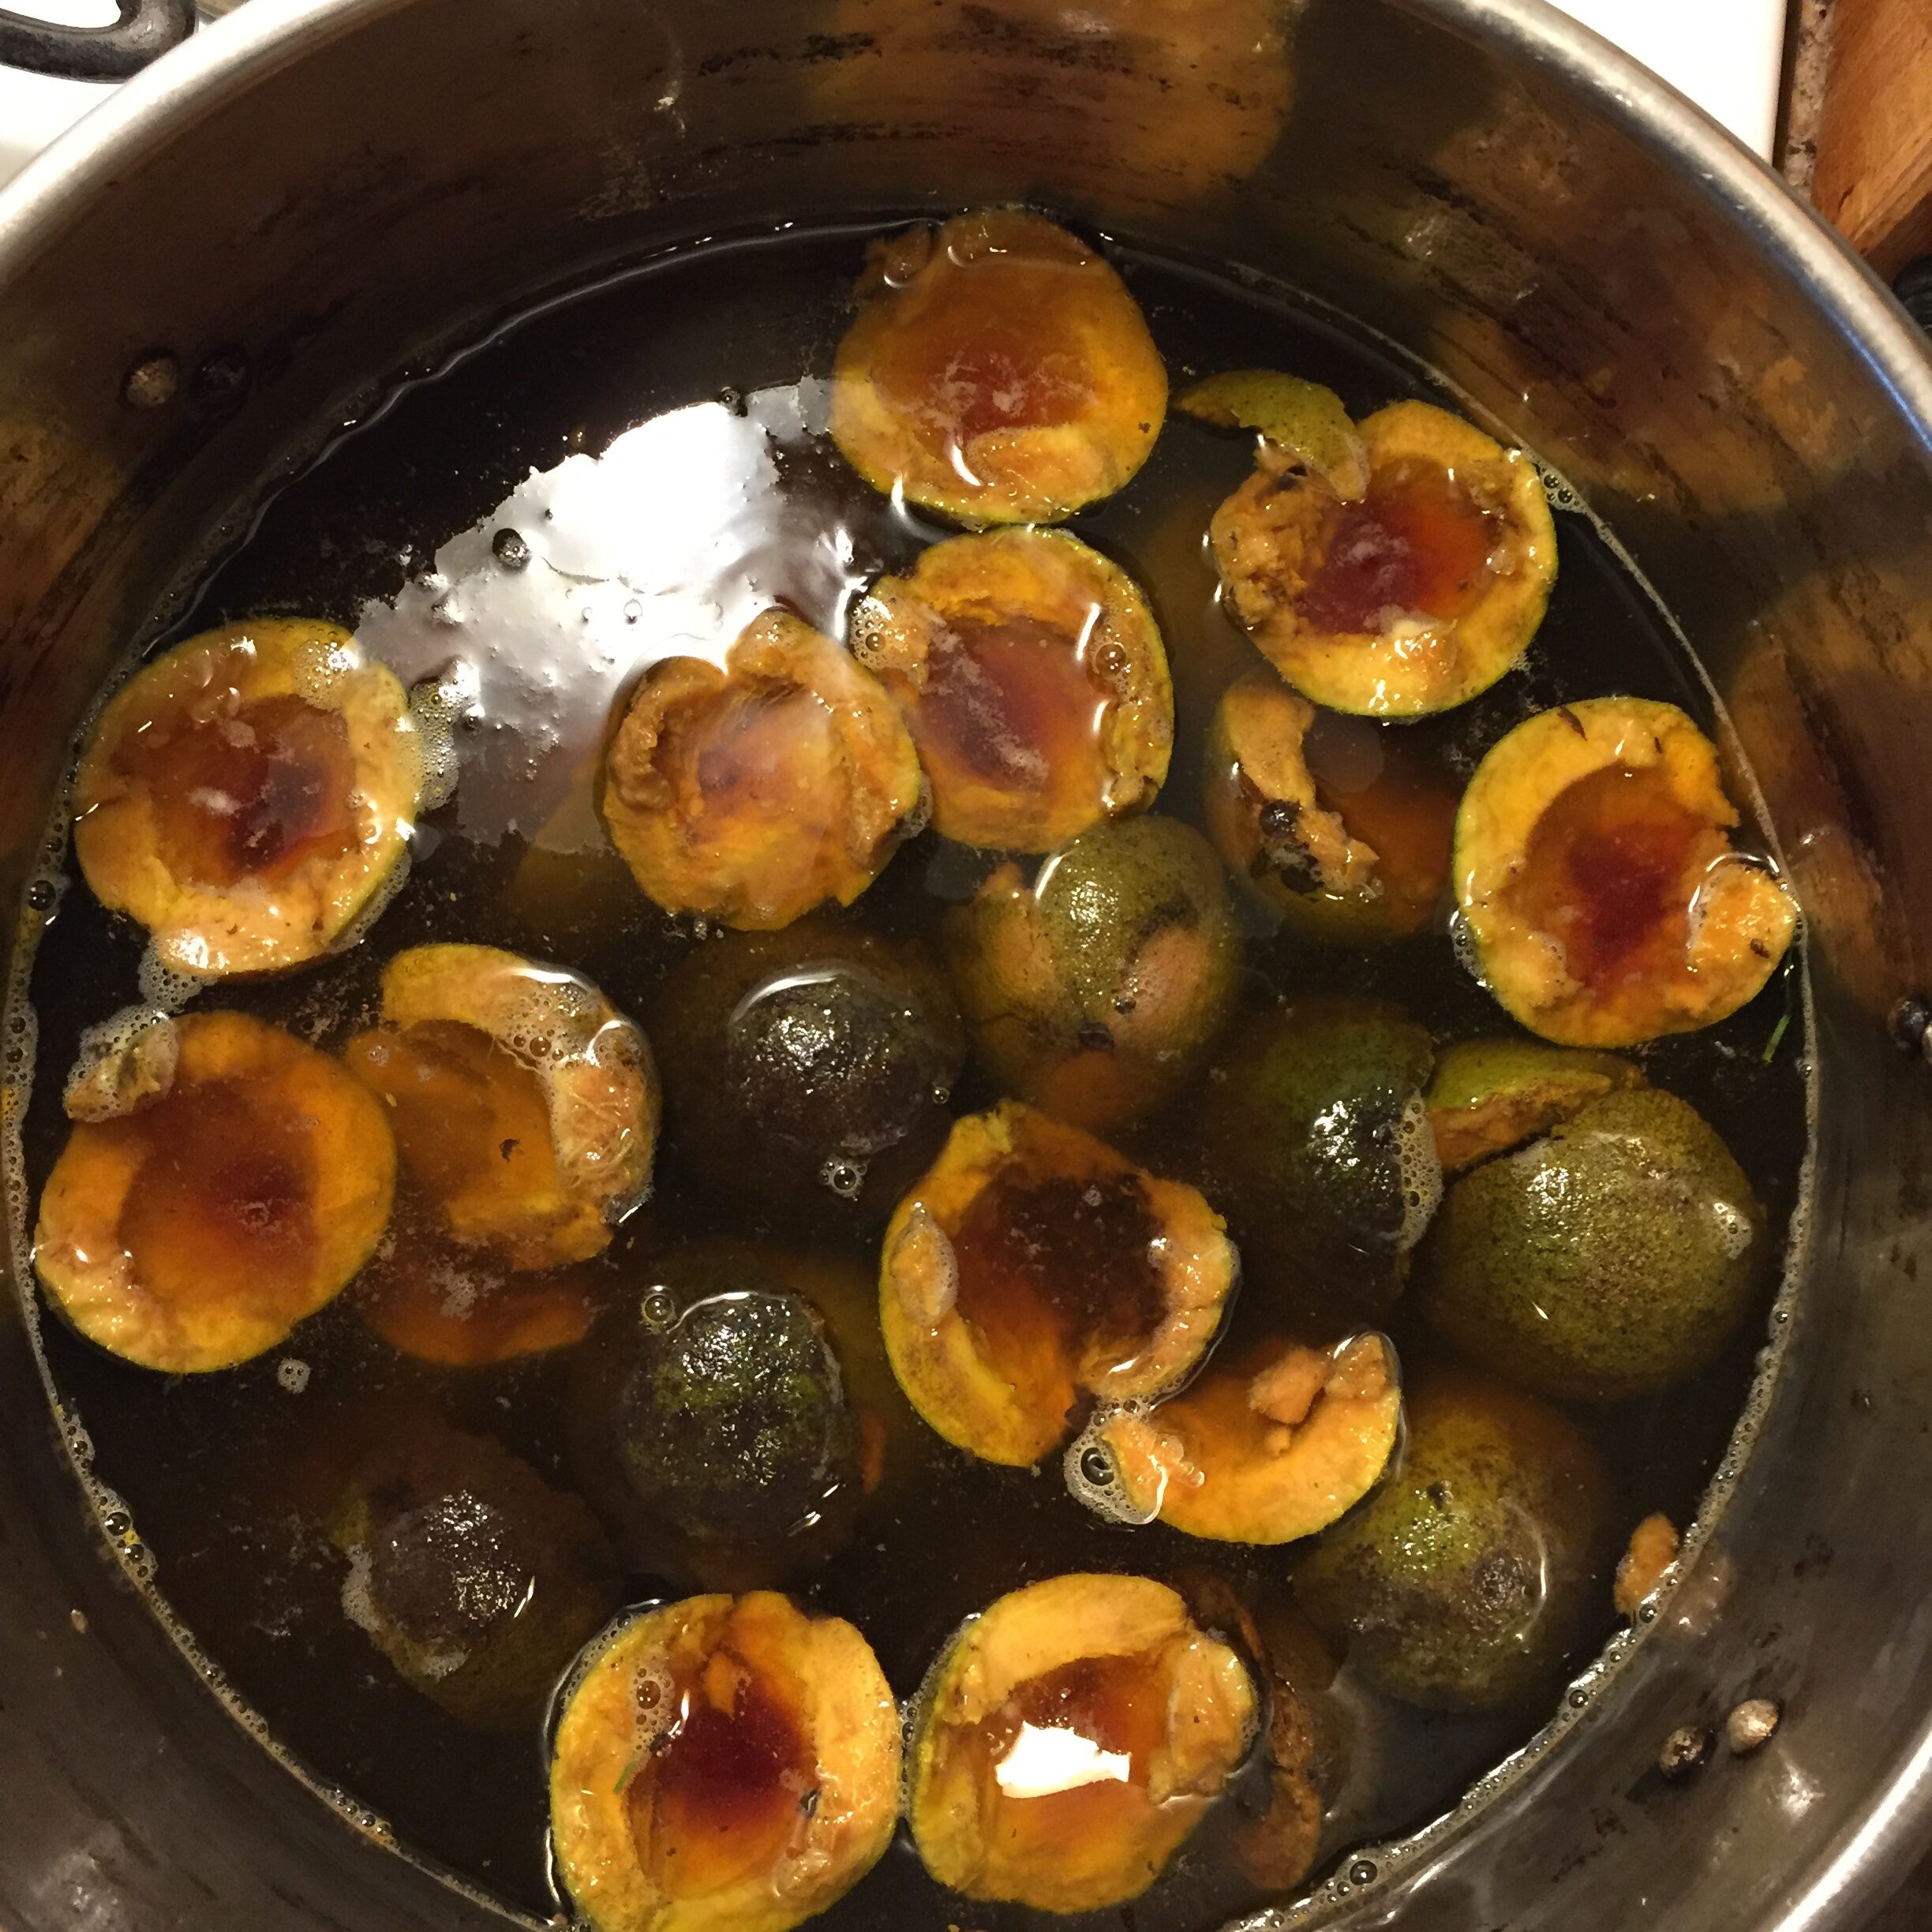
I dissolved 1 Tbsp. of iron sulfate in a tub containing 2 gallons of hot water. I pulled the skeins out of the dyebath and “worked” them briefly (meaning swishing them around in the solution to try to prevent blotches), wearing gloves all the while. The color shift to a dark brown was basically instantaneous. I returned the skeins to the dyebath without rinsing.

Then I continued to heat the skeins for an hour, and they cooled overnight in the dyebath.

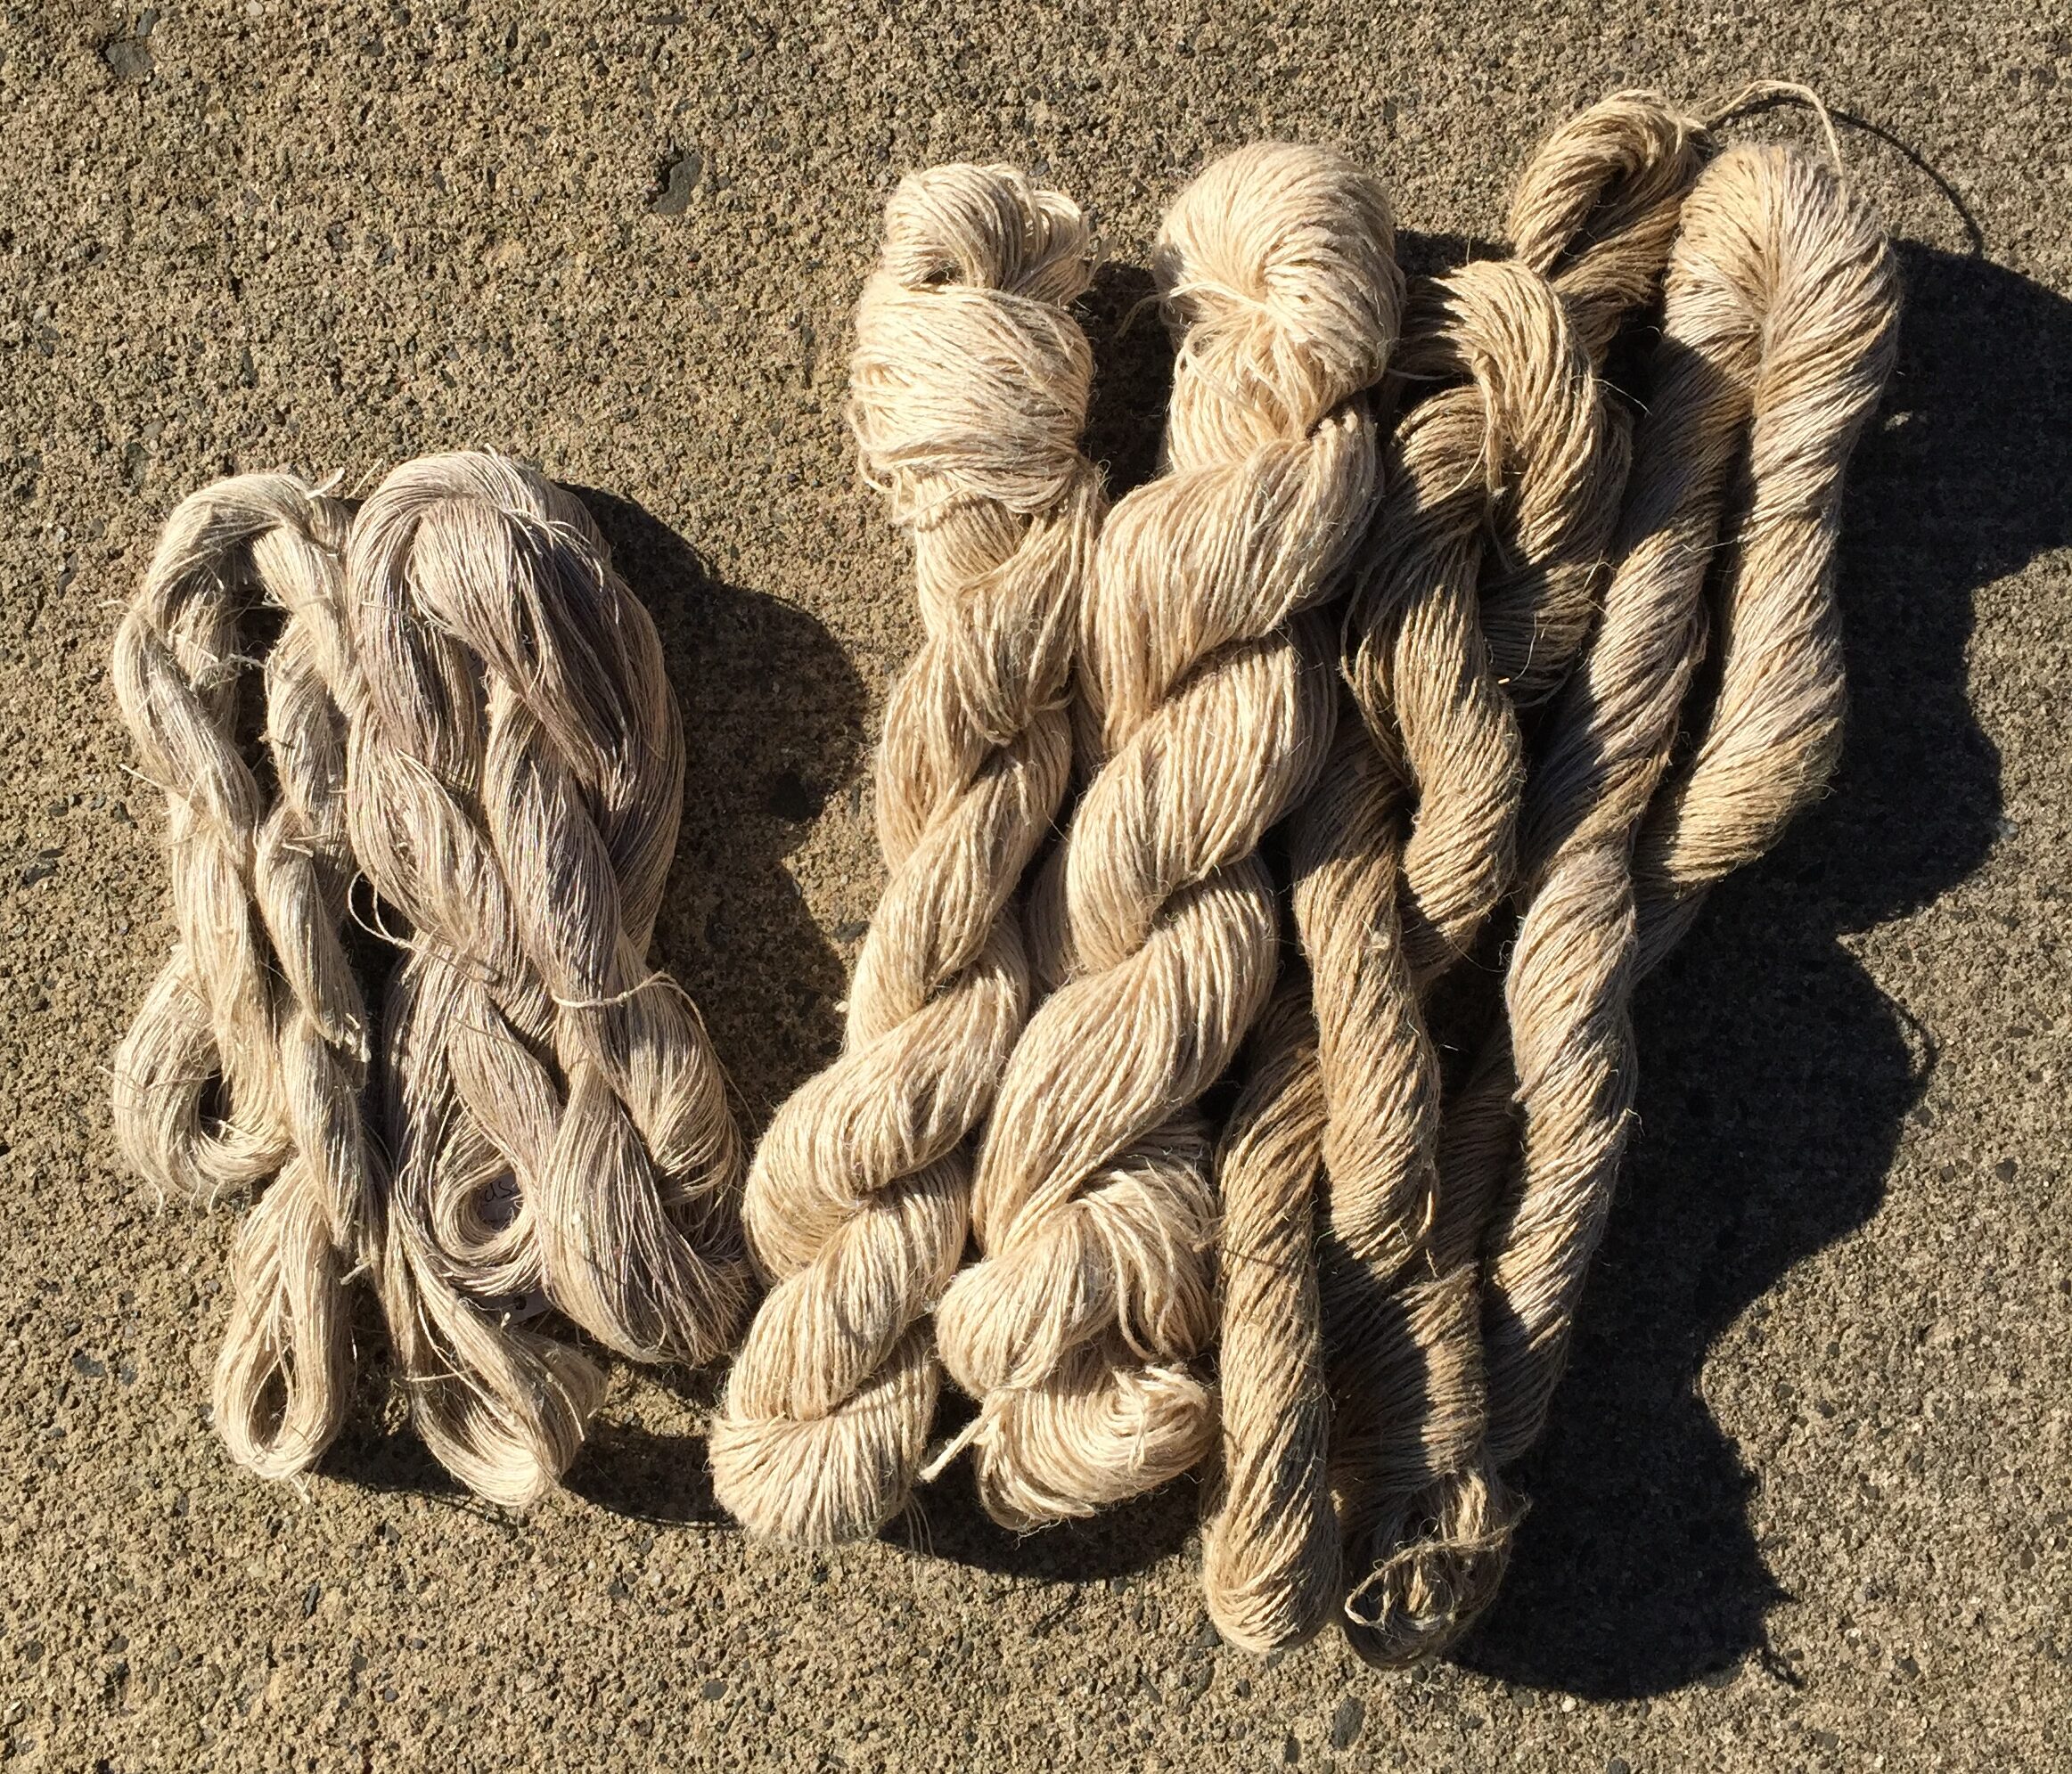
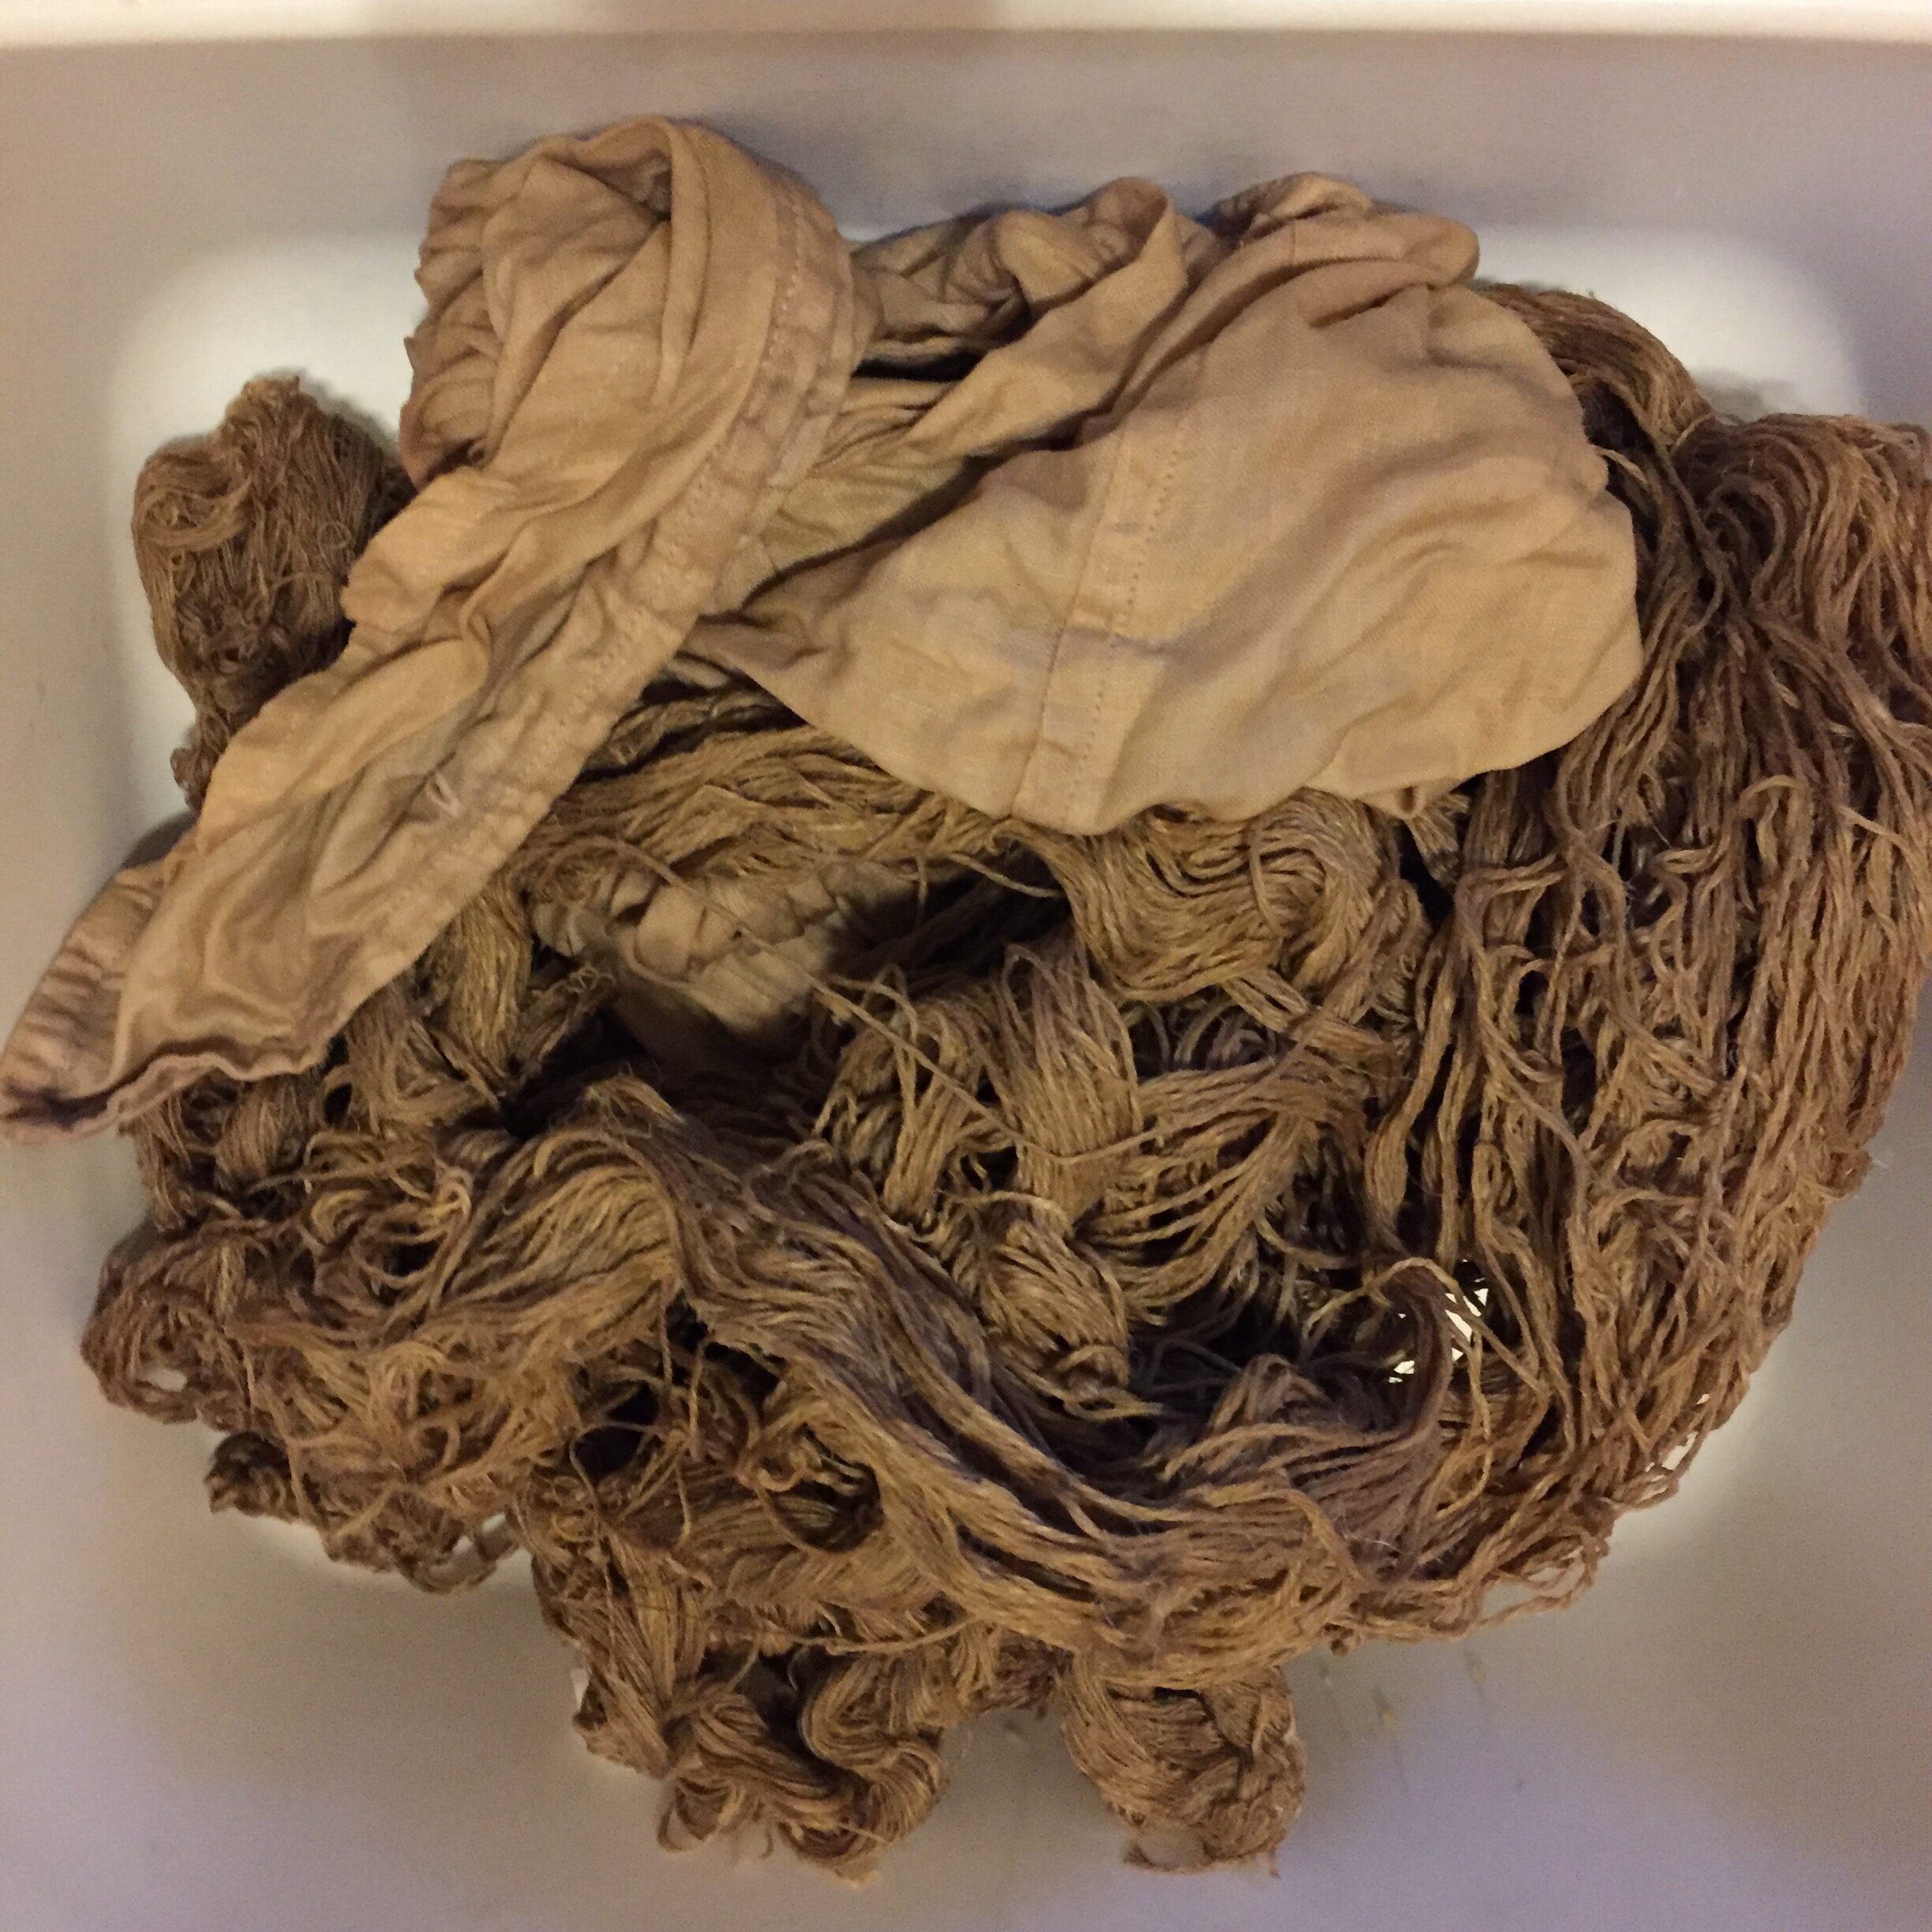
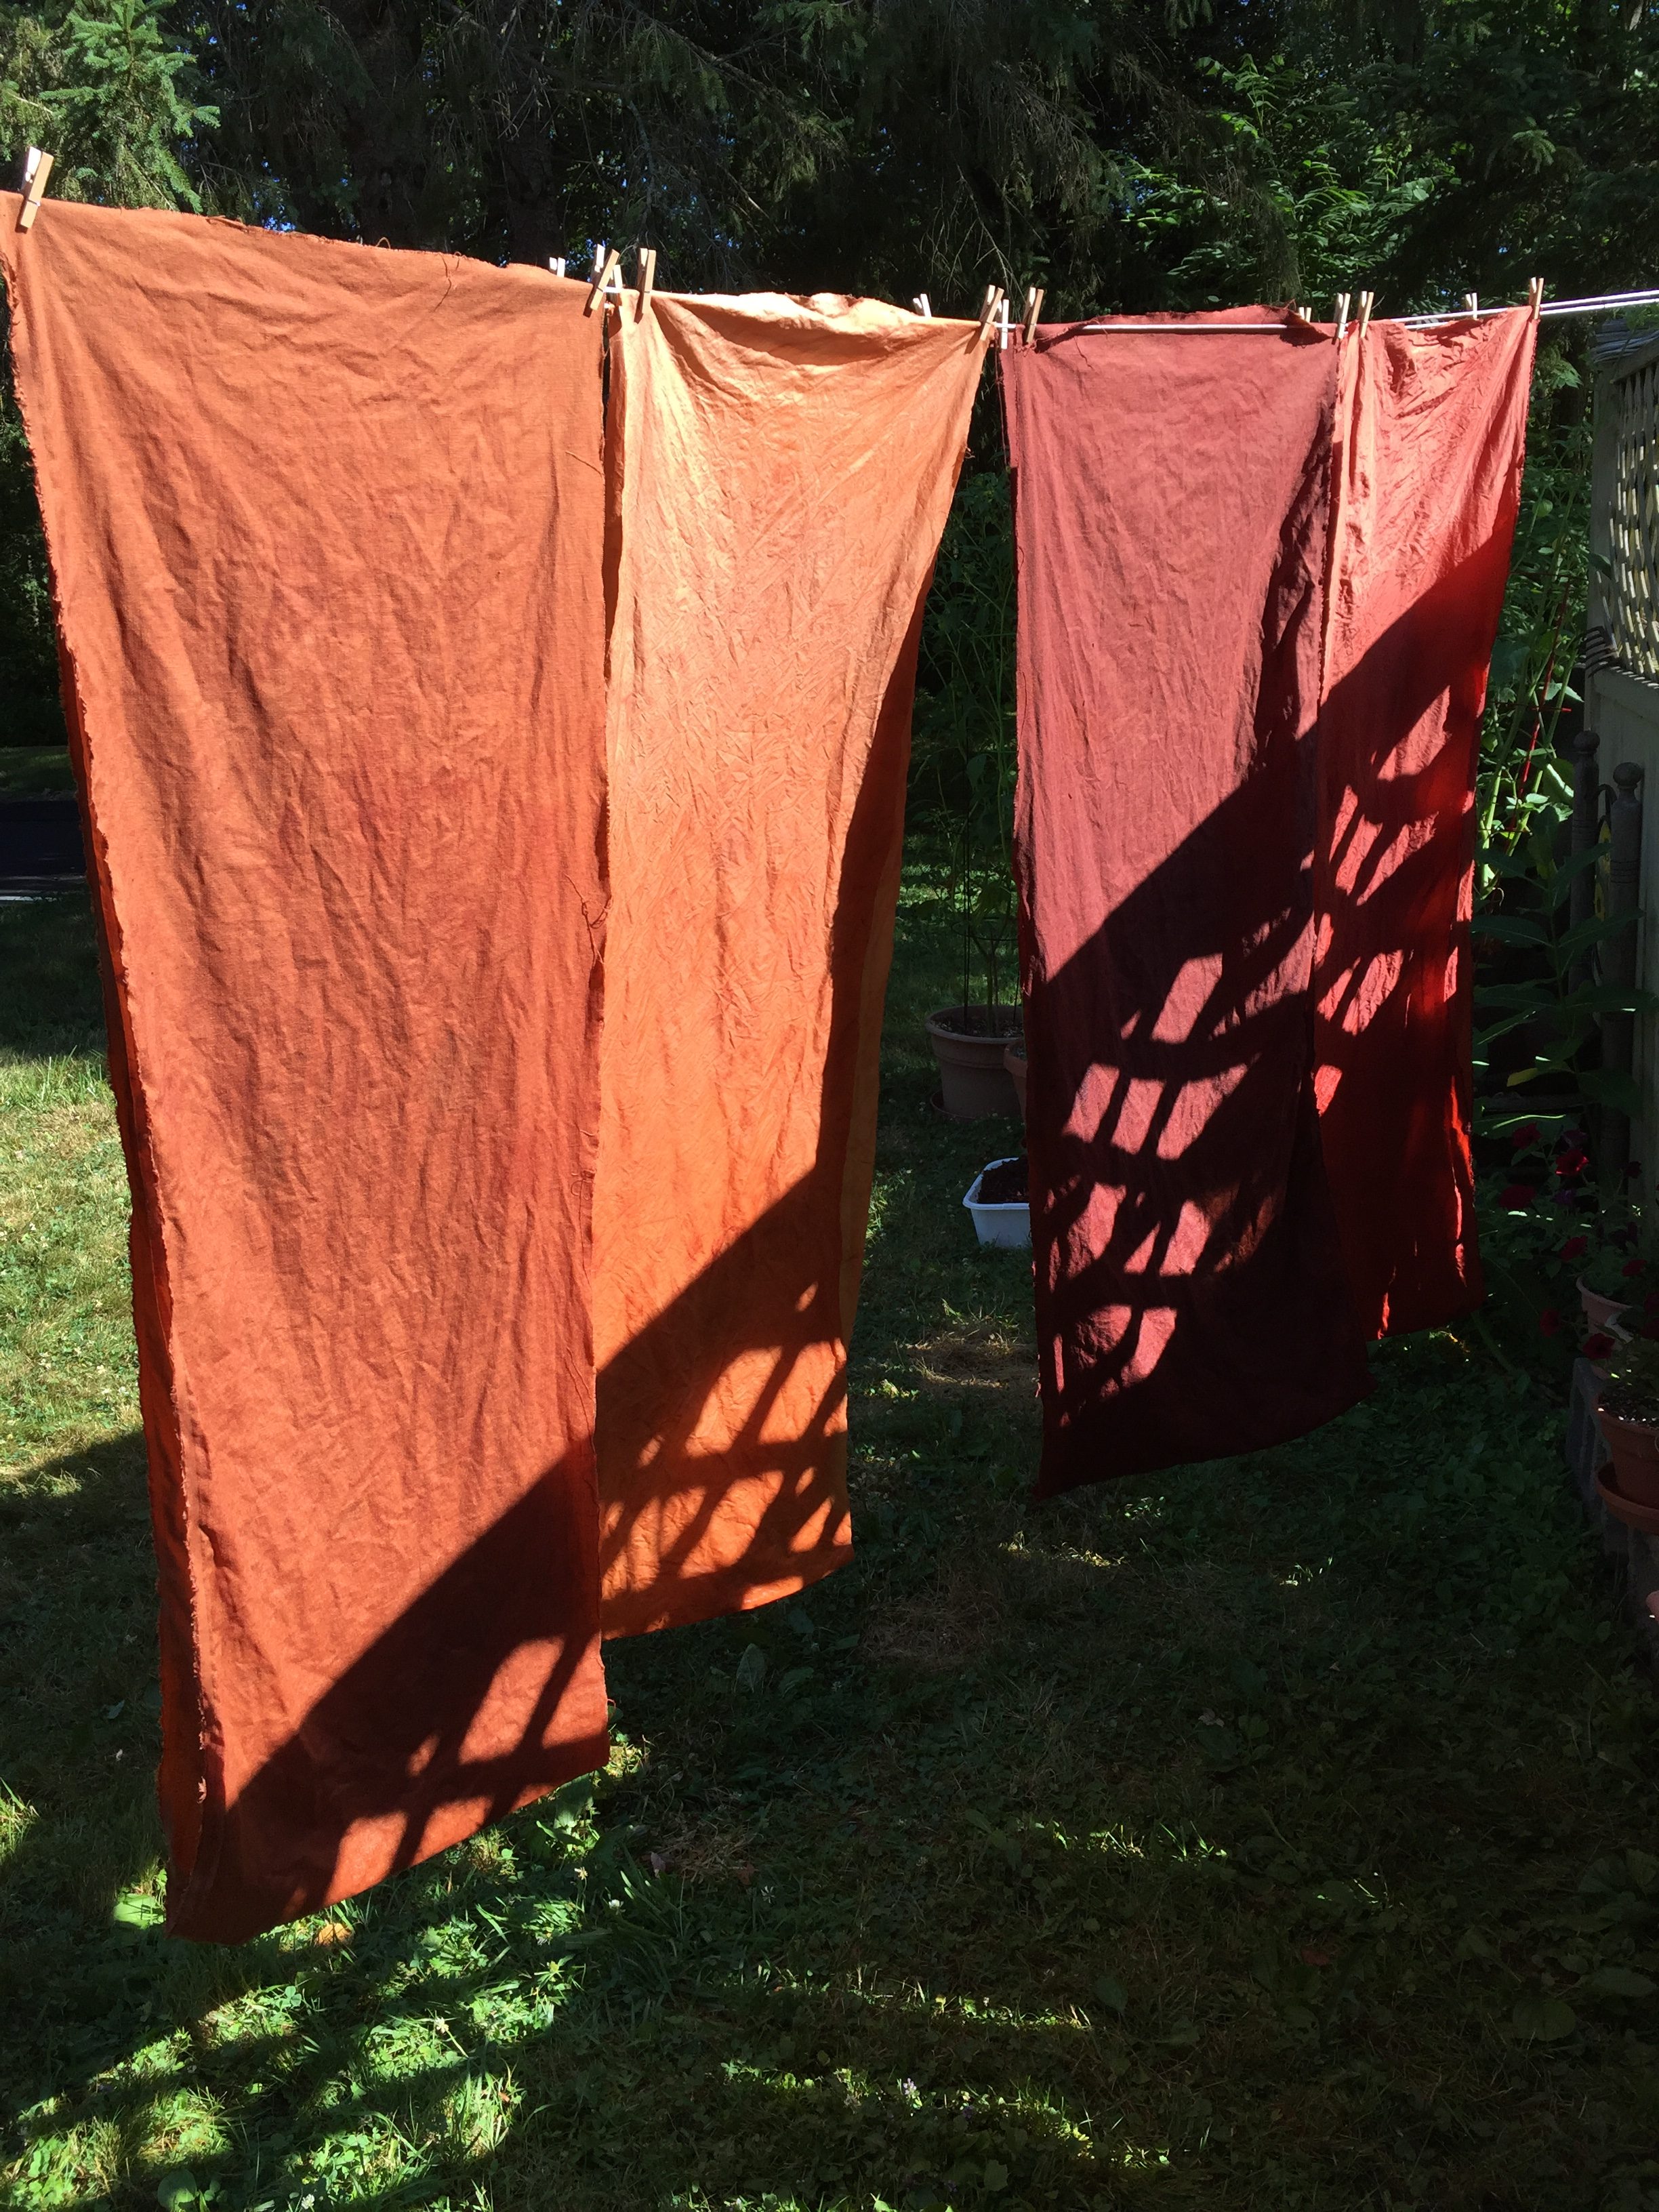
Once again, I let the the skeins drip and dry a little before rinsing. And, here they are all washed and dried:

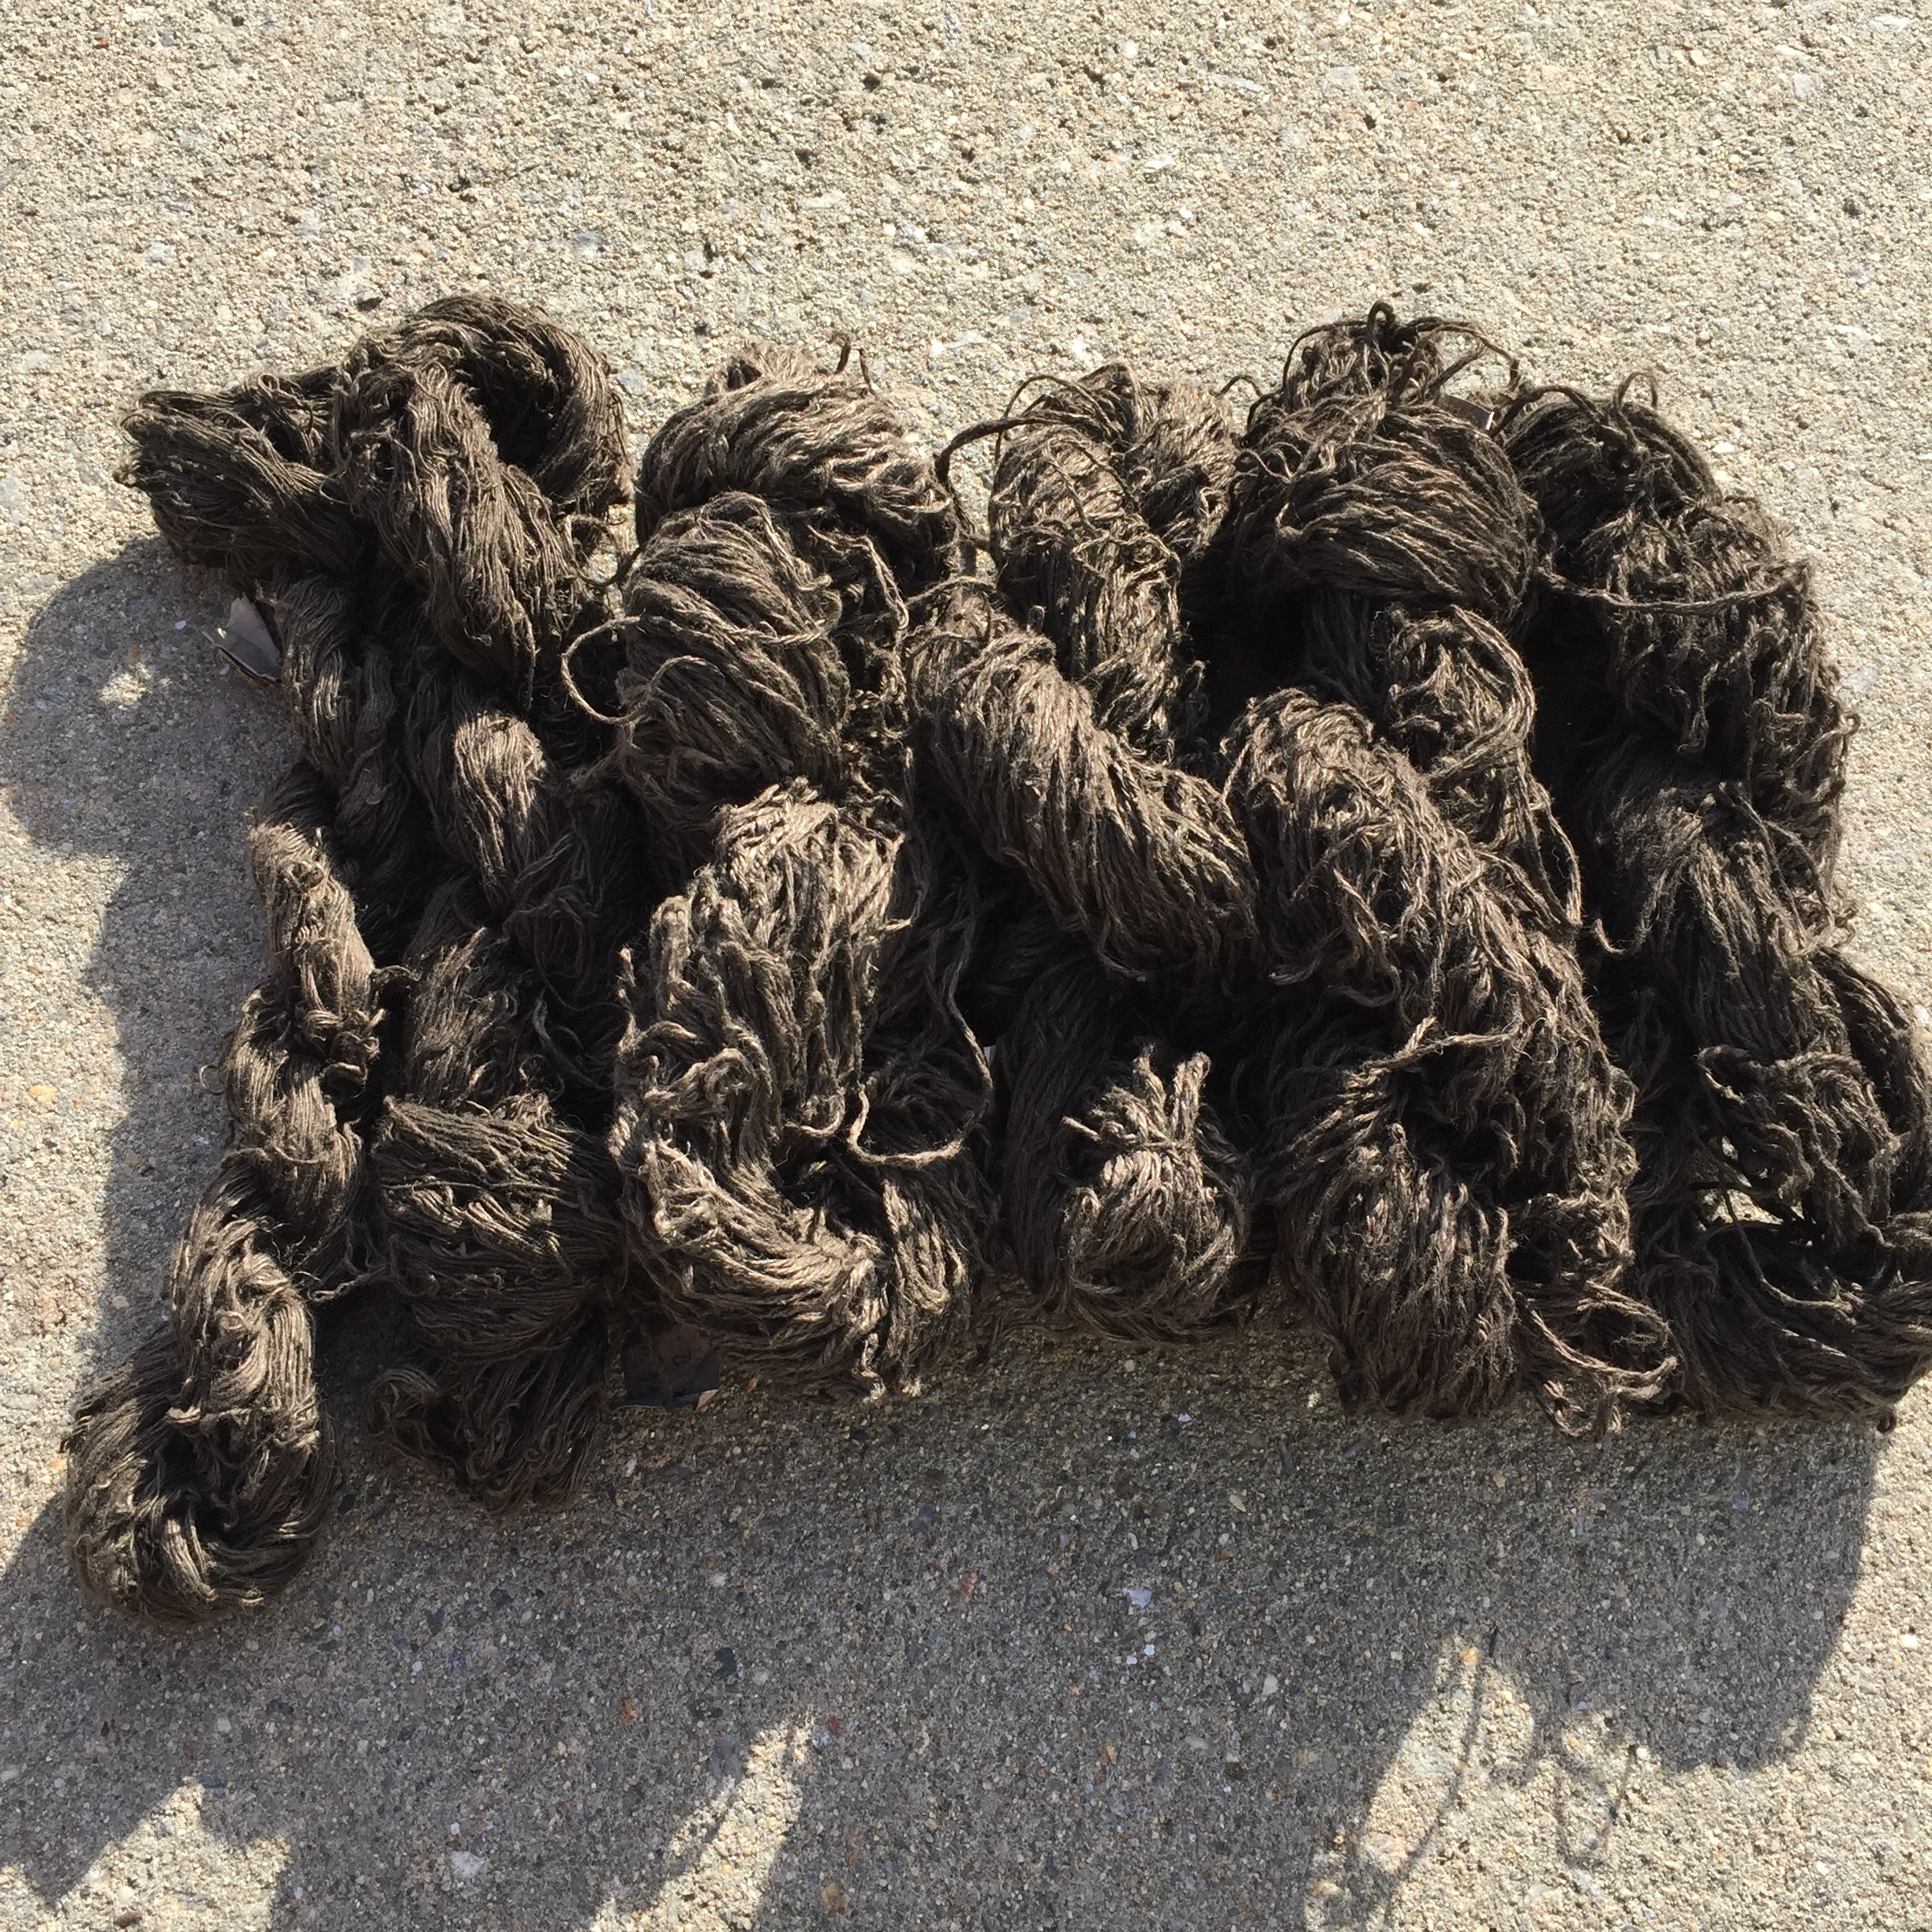
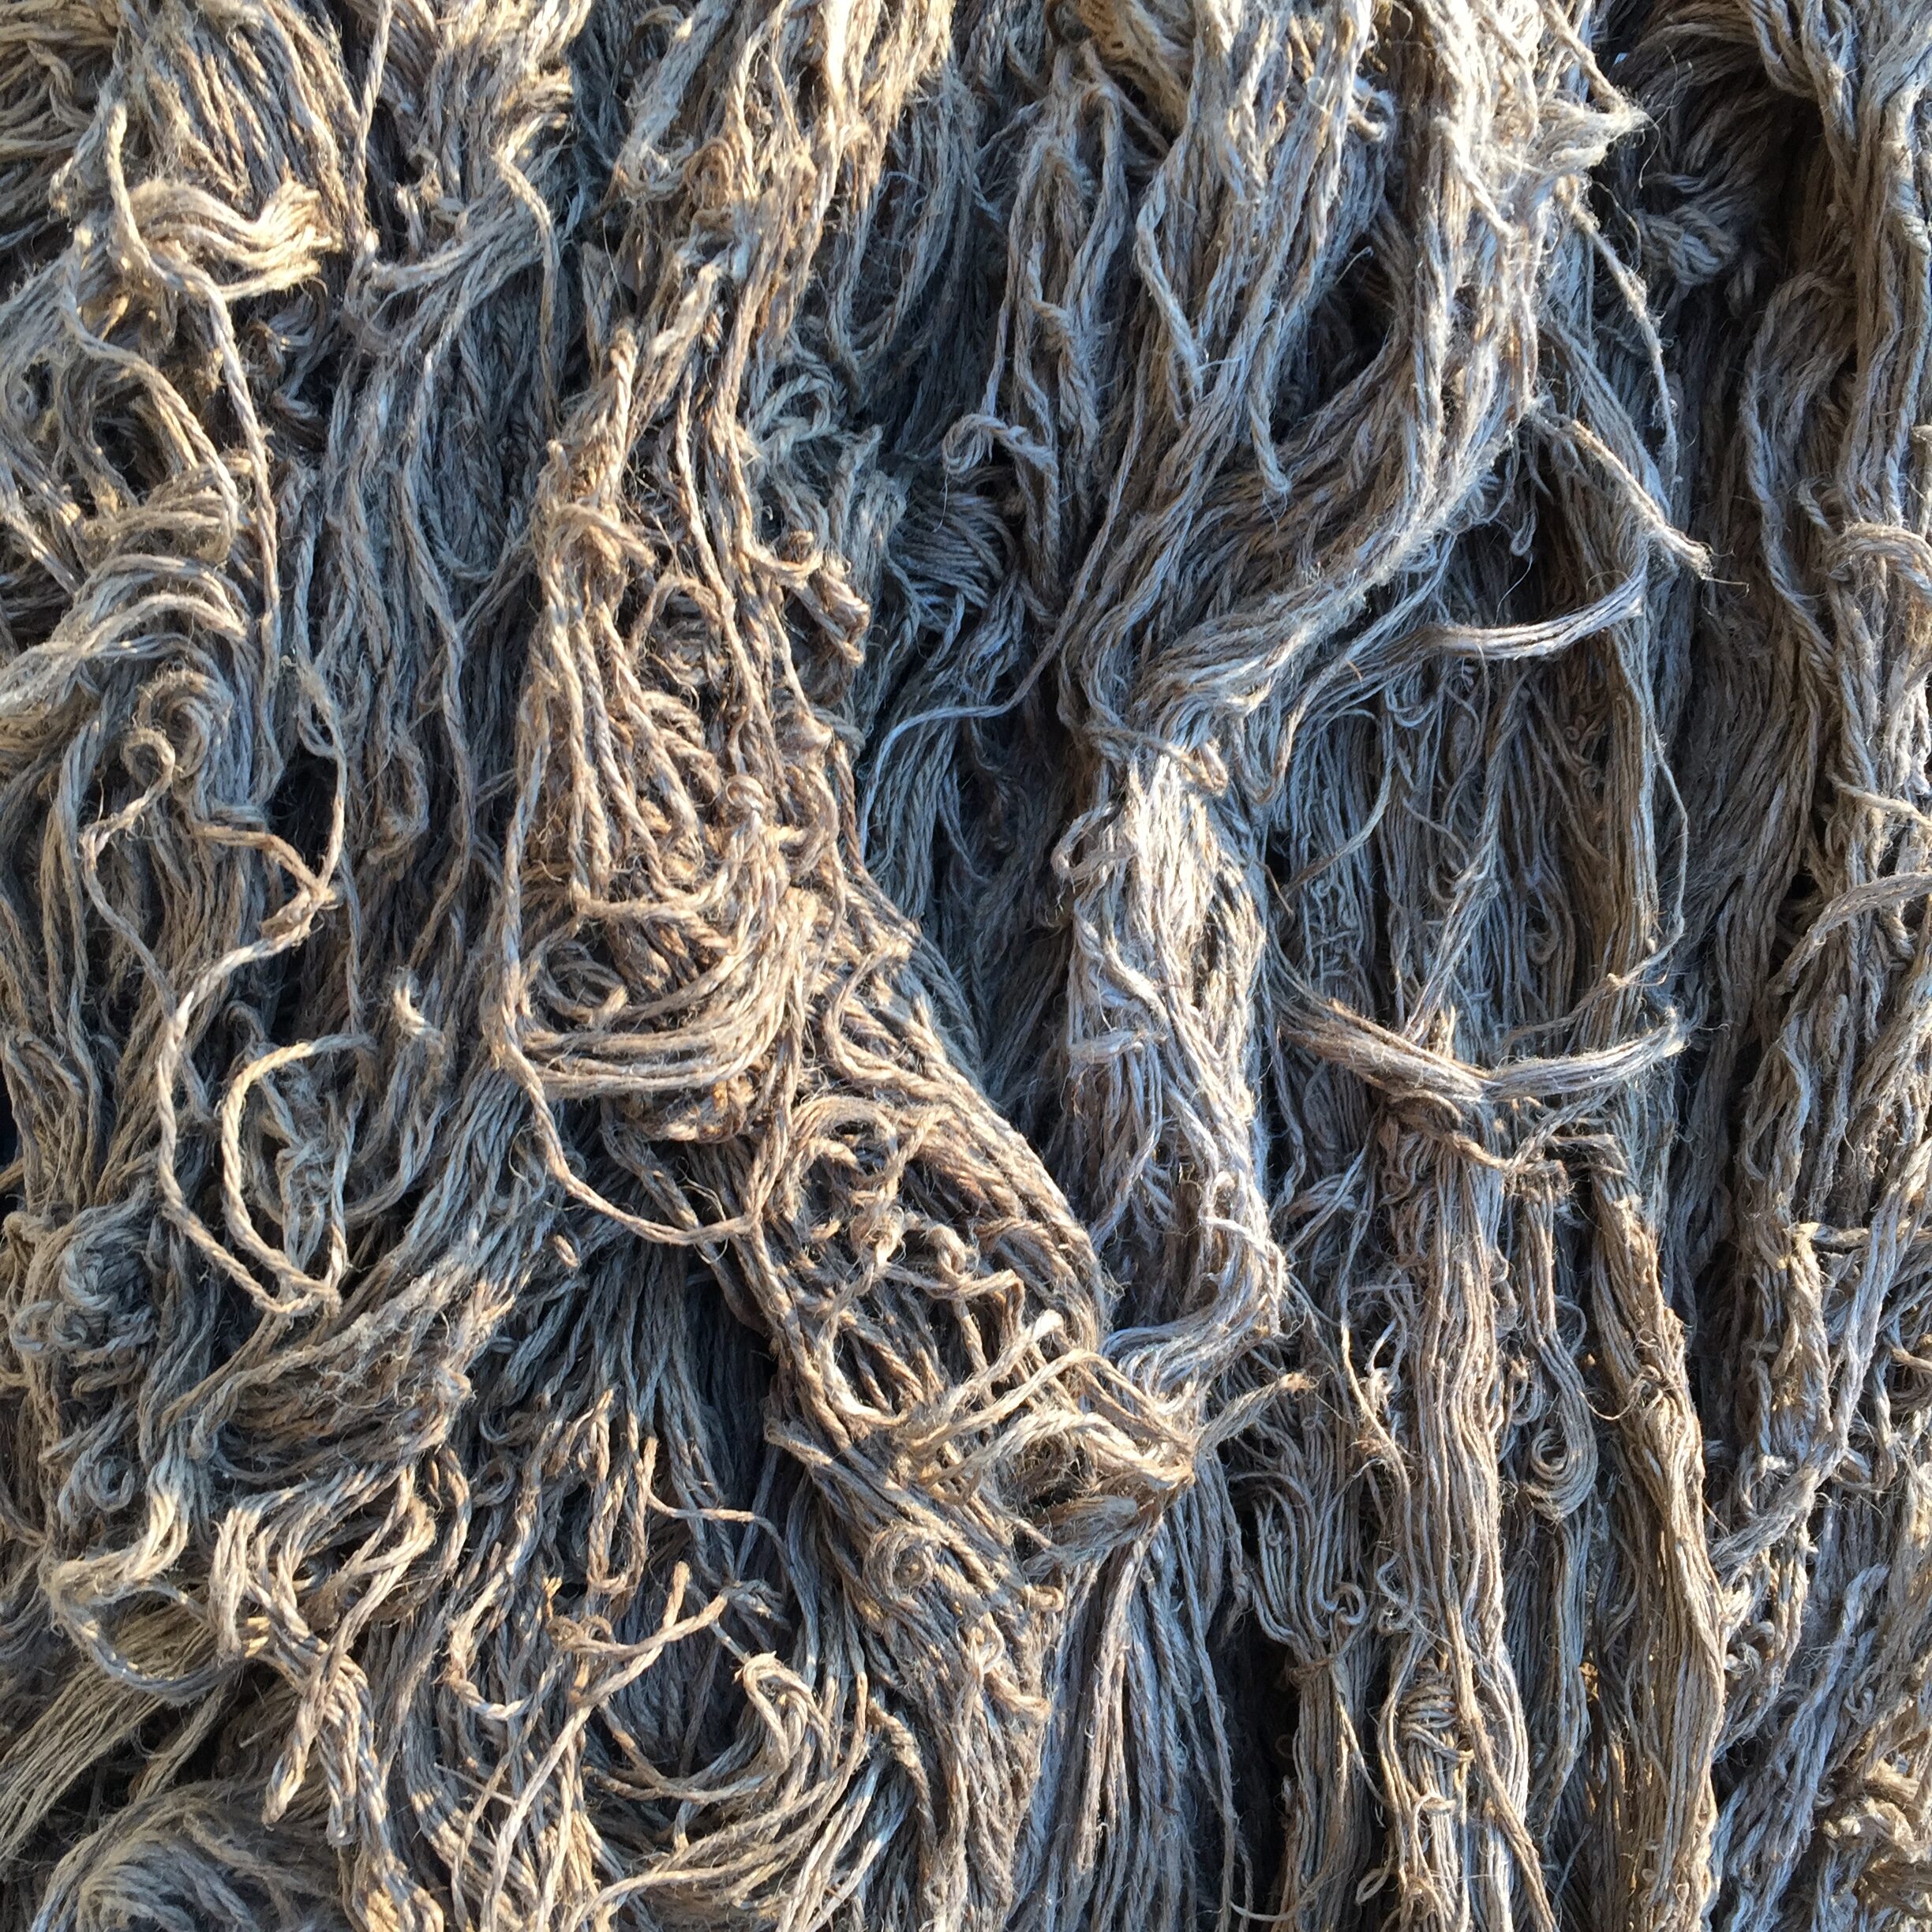
You can see the yarns wound into balls by Locally Dressed here.

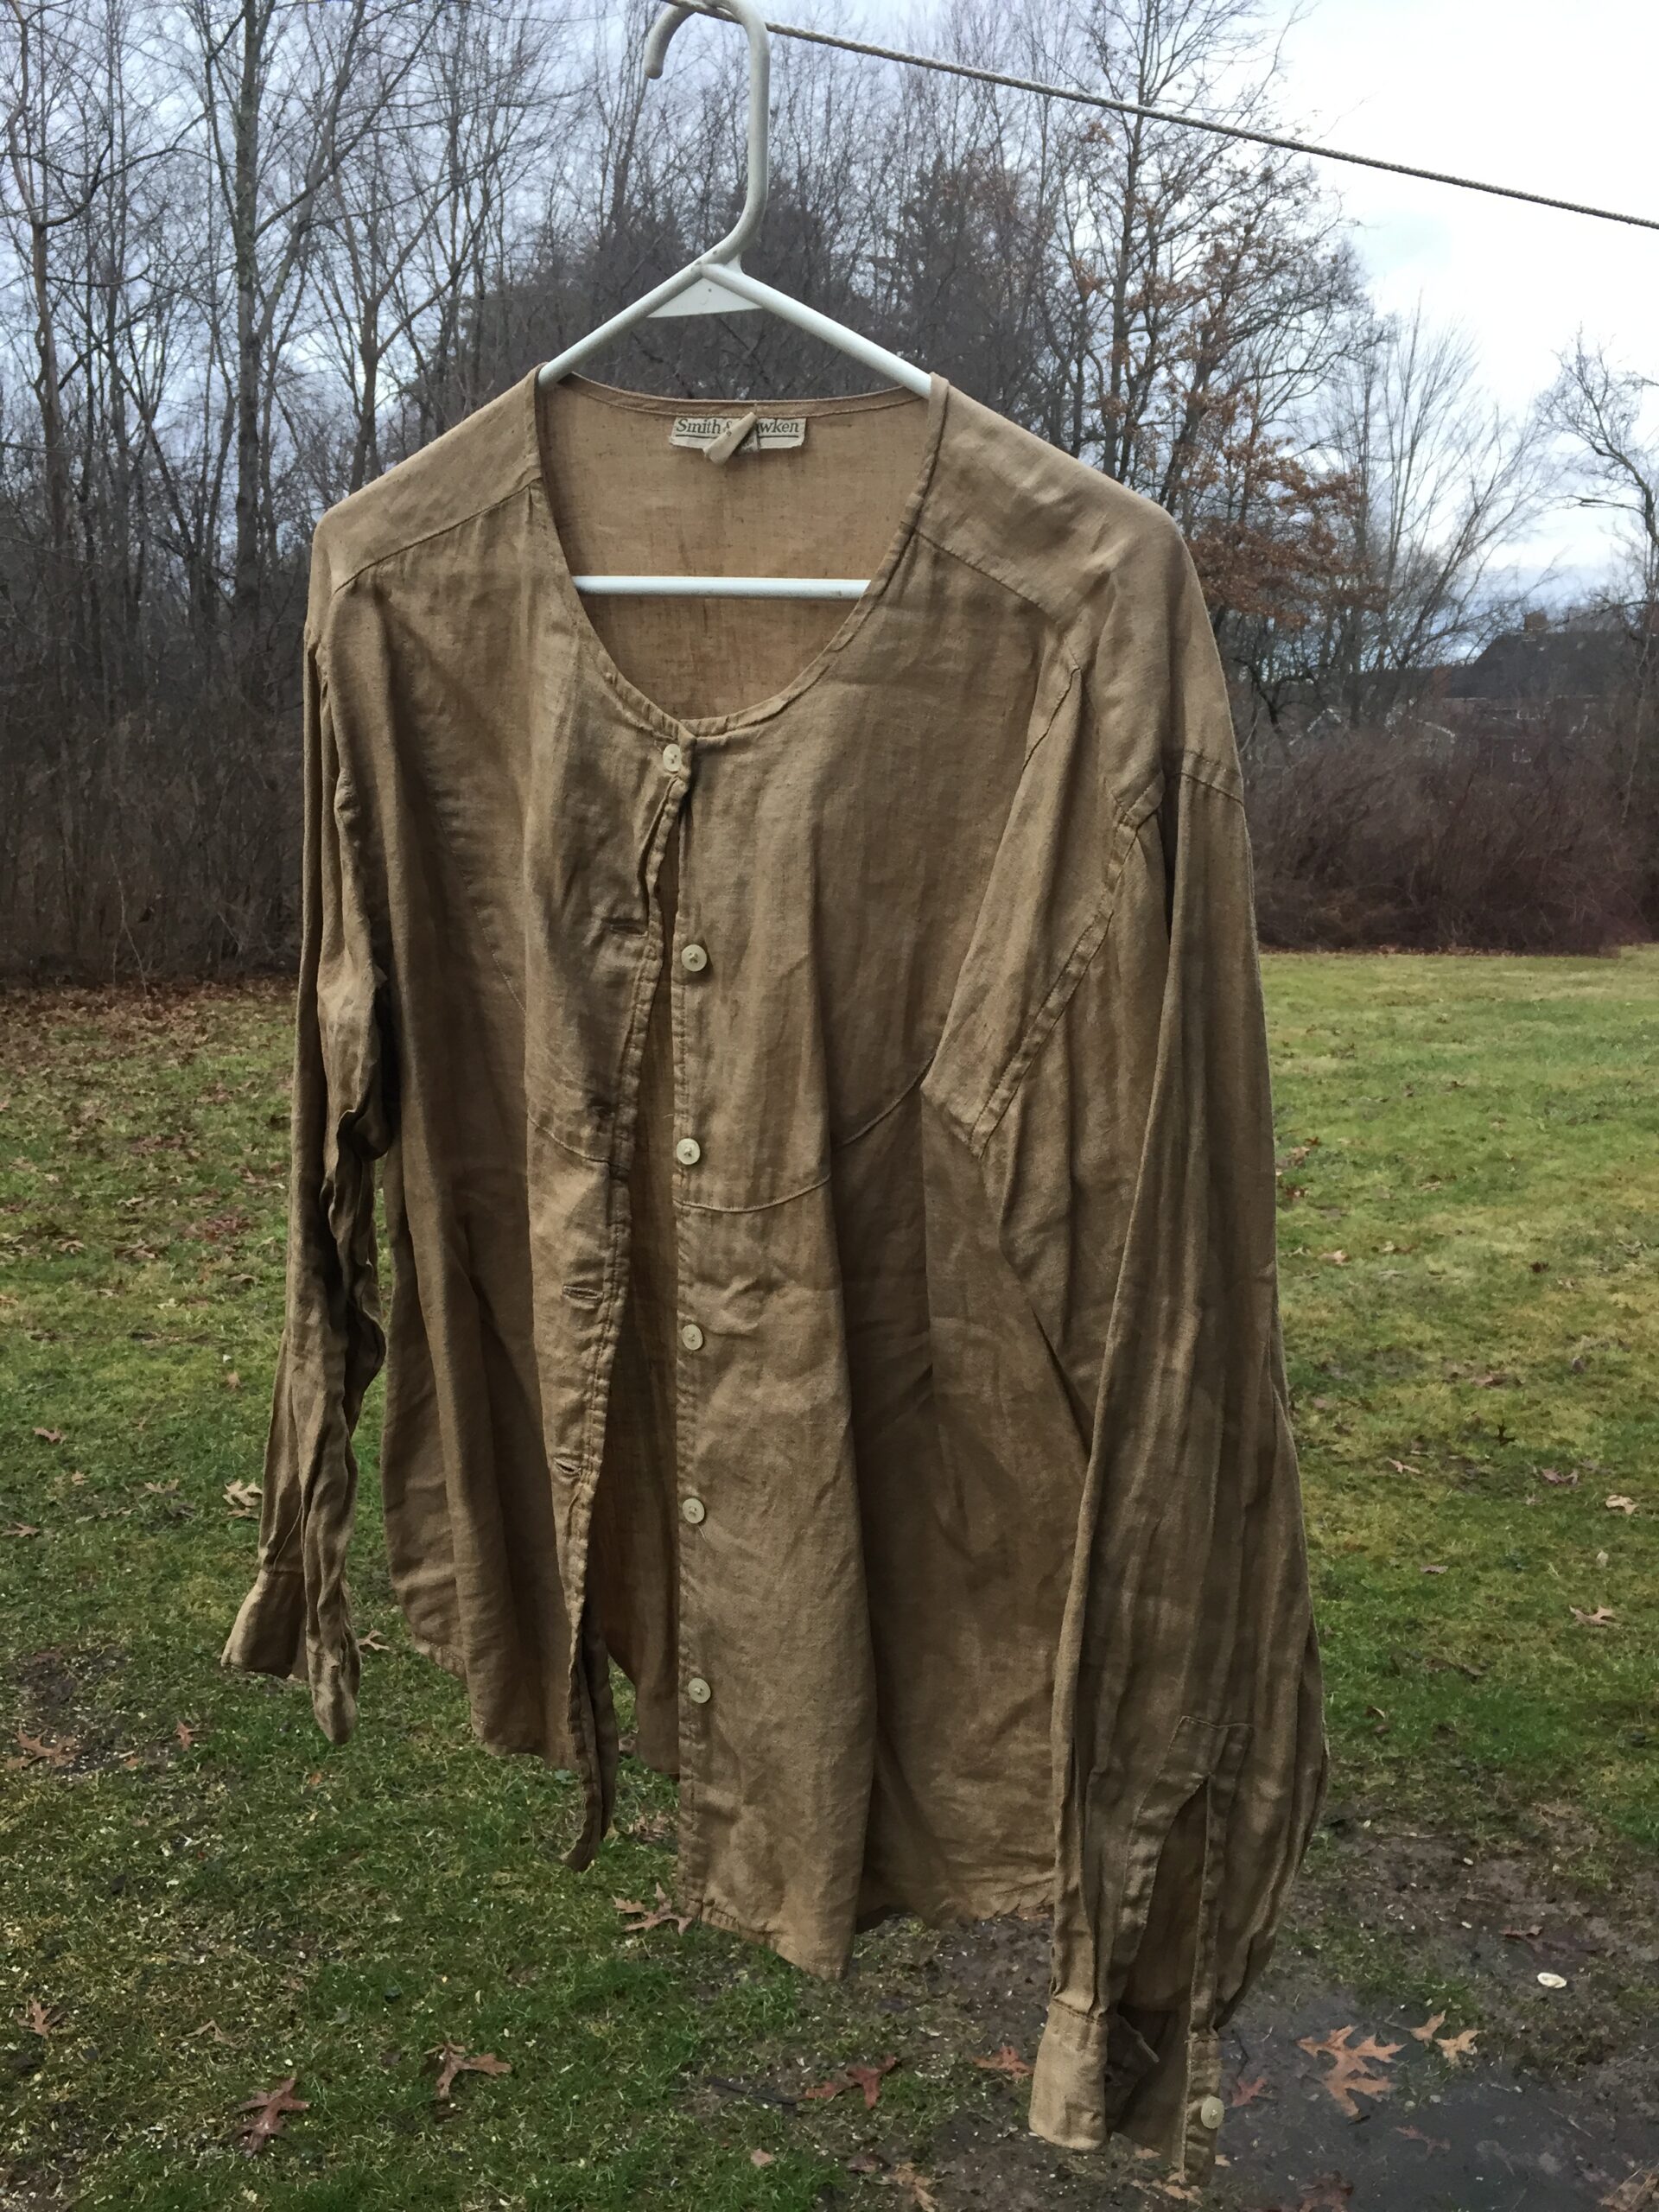
The color of the linen shirt actually grew on me as it dried, so I left it alone. Obtaining an unbleached-linen look on linen is a lot more satisfying when that wasn’t the original color!

I do believe that the greener and more resinous the hulls are, the richer the color you will get. However, I’m positive that it was the iron sulfate that ultimately created the dark color I was able to achieve on the linen yarns. I am currently taking the Maiwa class Natural Dyes: Alchemy Chemistry Craft, so in a few weeks I will be much better informed about the chemistry of the tannin-iron reaction!

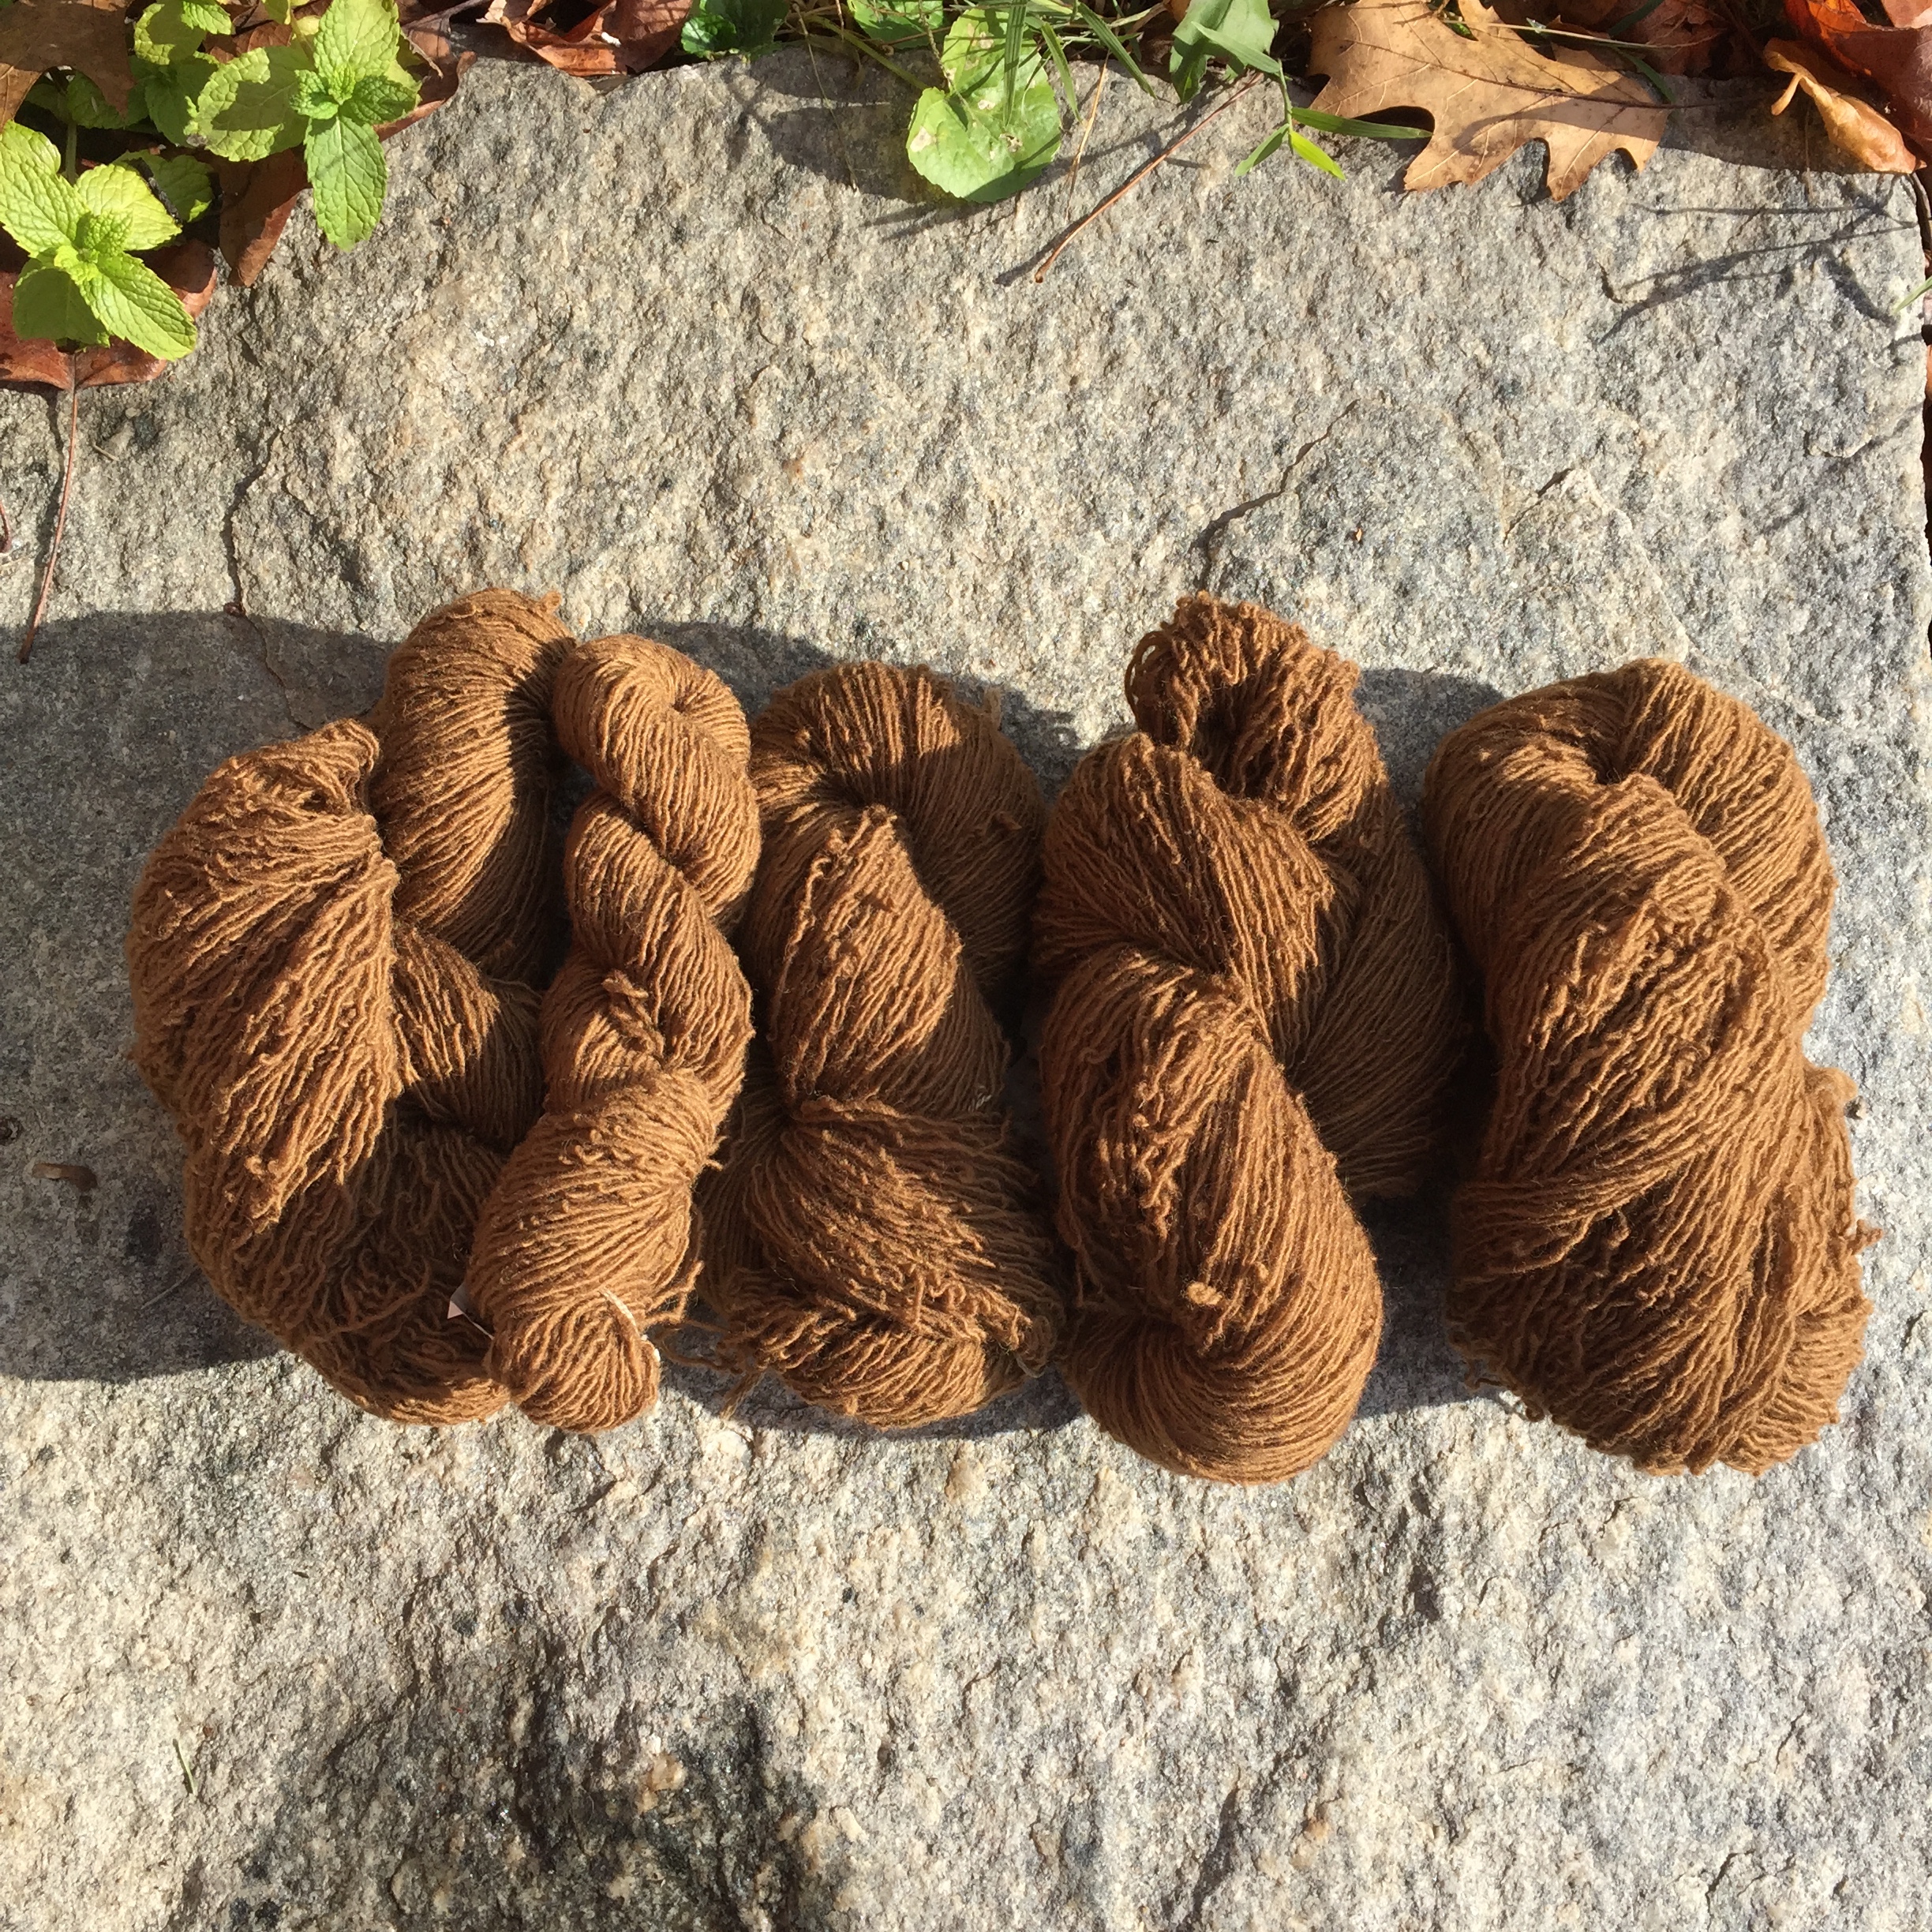
I am a lot more cautious about using iron on wool. A fresh dyebath, with no tannin or mordant at all, yielded this medium brown on Western Massachusetts Fibershed white wool singles spun at Green Mountain Spinnery:

Making Brown with Black Walnuts Part One

Fall 2023 was a bumper year for black walnuts around here. I started collecting them in October, and with very little effort filled up three 5-gallon buckets.

To prevent them from getting black and oozy, I filled the buckets with water. Being submerged under water kept them pretty fresh. I covered the buckets and stacked weights on top to discourage squirrels until I could remove the nuts from the hulls.

As noted in my last blog post, there’s always more to learn about everything in life, black walnuts included. This fall I was struck by the variation in size, shape, density of hull, color of hull, and fragrance from one tree to the next. I don’t think the differences had to do with altitude (down in the valleys versus up in the hilltowns) because sometimes two trees right across the street from each other were carrying fruits with noticeably different hulls. I don’t have any photos of those observations, but documenting these variations would be an interesting project for another year. I did not separate them by “type” or keep track of which hulls went into which dyepots.

My first dyeing effort with this fall’s abundance was a collaboration with Locally Dressed, who is participating in the Northern New England Fibershed design challenge. You can find out more about what Locally Dressed is all about on her social media and her blog and website.

Without giving too much away, I will just share that I dyed handspun linen yarns from Aker Fiber Farm. The yarns are destined to part of a garment and/or accessory woven by @marionceres. The finished pieces will be showcased on August 17th, 2024 at Sanborn Mills Farm in Loudon, New Hampshire.

Here are the yarns. Lovely, right? Why mess with perfection? Rest assured, I understand that most of the fabric lets the natural colors of this linen speak for themselves. But sometimes you want a little bit of contrast. Hence my mission to make brown.

I was consulting two different sources in this process, Jim Liles’ book The Art and Craft of Natural Dyeing and the how-to pages on Botanical Colors’ website. Their directions differ somewhat, plus daily life imposes its own limits. What I describe here is what I ended up doing, but I’m not saying it’s the best way to go about things!

To start with, I scoured the skeins. Well, actually, first I weighed them and recorded the weights on waterproof labels. For scouring cellulose fibers I often use a liquid scour, but I didn’t have any on hand. So, first I just hand washed them with my regular laundry detergent, then simmered them with soda ash at 2% weight of goods (WOG in dyer’s shorthand). I heated the skeins in the soda ash solution until it reached 180°F, then held at that temperature for 30 minutes, then removed promptly and rinsed.

The next step was a tannin treatment. I had a few options for tannin, and decided to use chestnut tannin at 10% WOG. I dissolved the tannin (which comes as a powder) and soaked the fiber overnight at room temperature in the tannin solution.

Next up, mordanting. Even though I did have aluminum acetate on hand, I decided to go with the aluminum sulfate/soda ash combo described on the Botanical Color website here. Yes, the mixture does “bubble vigorously,” just as they describe! The fibers soaked in this mordanting solution overnight, with no heat applied.

Then, back into the tannin solution for another night. Then, because of pot re-arranging, they went back in the mordant bath. This was just a storage issue for the various liquids in their various stages, not a purposeful decision.

As I mentioned, the black walnuts had been soaking submerged in buckets of water since October, and this linen-dyeing project got underway on November 16th. I didn’t mention that I was also dyeing a linen shirt in this process (the one with the weird pink-stained arms, if you saw that post on Instagram back in August 2022). The total weight of the fibers was a little over 15 ounces, basically 1lb.

For my first try, I used about 3 gallons of hulls (removed from the nuts, which I just tossed out for the squirrels), and filled up the dyepot with the water they’d been soaking in. I heated the hulls until they reached about 180°F and maintained that for 2 hours. Jim Liles says to add vinegar or other acid, which I did, but he doesn’t specify a pH. My pH was 5. The hulls steeped about 24 hours, then I strained out the hulls and topped up the liquid in the dyepot. I think it’s cool how you can see the texture of the walnut shells inside the hulls:

I rinsed the fiber after the tannin-mordant-tannin process, which perhaps I should not have done. Ah, well. Here are the prepared fibers before dyeing:

Then I added the damp fibers to the dyebath. As before, I heated the pot up to about 180°F then maintained that for one hour. Then I let it steep overnight. I like to do a delayed rinse, so I let the fibers drip-dry for a day or so before rinsing.

Then I rinsed them. And…. Come on, now. Would you call this brown? I would not. I would not say that it’s any darker than the original color.

The date by which I had agreed to deliver the yarn was drawing closer. Not much time left to try again, but try I did!


Madder on Silk and Linen

During the week that I ran the bolted woad vat in July, I also ran weld and madder baths. This post is about the madder baths. All of the dyeing I did that week was for the Art and Science of Dyeing at the Botanic Garden of Smith College. (12/31/2023 Thanks to the Wayback Machine for the link to the old Botanic Garden site!)

I was planning several consecutive days of dyeing, so there was a lot to keep track of.  Here I was on Tuesday night making a game plan for what had to happen when, and doing a lot of math regarding measurements and quantities:

Part of what was tricky was that I was dyeing two different fibers, silk and linen, which need different preparations. I was also running that woad vat, and the weld baths. We were aiming to dye lengths of cloth in shades of blue, red, orange, and green that week. The quantities were large, at least compared to my usual projects, and we were trying to photo-document everything and coordinate our schedules. Many logistics.

We measured out the madder and weld on the same day that we ran the woad vat, Wednesday July 10th. I wanted rich colors, so we measured the dyestuff based on 100% of the weight of the goods. The cloth that we were planning to dye weighed 51 ounces. We used the same quantity of plant material so we had a 1-1 ratio of plant material to fiber. Each piece of cloth was 16 inches wide and 9 feet long, so it was pretty heavy (the linen in particular).

We weighed out 51 ounces each of dried, chopped madder roots and dried, chopped weld. We set them to soak in buckets of water at 10 am.

Even when the plant material was dry, the volume was significant. Once the dried plant material started to absorb water, I knew it would swell like crazy. So, we soaked it in 5 gallon buckets. Here’s a close up of the madder bucket:

The bucket sat all day and overnight. When working with madder, I like to extract the roots twice or even three times, and let the roots sit overnight each time. Then, I combine the extractions. In this case, I had time constraints, so I only extracted them twice.

After soaking the roots overnight, I extracted them once on Thursday morning. I had to split them between three pots. Due to being distracted, I let them overheat. There was not as much liquid in each pot as I might typically have, since the roots took up a lot of room. So, they heated faster than I anticipated and I just wasn’t watching closely enough. Other pots were also heating up in other locations in and around the apartment. Multi-tasking isn’t always a good idea.

Normally I am very careful not to let madder get hotter than 150 or 160 degrees F., and sometimes I keep it lower. Typically, I get the roots up to temperature, then maintain that temperature for an hour. I also add soda ash to get the pH up to 9 or so, and add some calcium carbonate (between a half teaspoon and a teaspoon per pot, depending on the size of the pot).

In this case all the pots got up to a boil. Frothy, red dye liquid and madder root particles got all over the stove. Yikes. So, I had to stop and clean that up.

Then the roots sat and cooled off for several hours. That evening, I strained out the roots and re-heated them. This time I watched the temperature carefully, and kept it around 150. The roots soaked in the second extraction overnight, and we used them for dyeing on Friday.

To prepare the linen, I had first washed all the cloth in a washing machine, and dried it in a dryer so it would be shrunk before we cut it. After the pieces were cut, I scoured them again with cationic scour from Earthues (which you can order from Long Ridge Farm in Westmoreland, NH) and soda ash. I follow Earthues’ recommendations of 5.5% WOG scour and 2% soda ash. I bring the bath up to 180 degrees F. hold for 30 minutes, remove the fiber promptly, and rinse.

Then, I treated the linen pieces with a tannin solution. For the madder, I used a chestnut tannin at 5% WOG, heated to 180 degrees for an hour, and cooled overnight. Then I rinsed the cloth well. I hadn’t used this chestnut tannin before, and was kind of surprised at how foamy and soapy-looking it was.

It left the linen a pleasing shade of warm orange-tan.

Then I mordanted with aluminum acetate at 5% WOG, brought up to 180 degree, held for an hour, and cooled overnight. It’s a lot of steps just to get the cloth ready for dyeing.

The process for mordanting the silk was a little simpler. After washing the full length of cloth in the washing machine, I washed each piece again with the same laundry detergent, and rinsed well. The silk was mordanted with aluminum sulfate at 20% WOG. I was following Earthues’ mordanting rate, but I skipped the cream of tartar. Don’t ask me why. For mordanting, I brought the bath up to 180 degrees, held for an hour, and cooled overnight.

On Friday morning, Sarah Loomis from Smith came over around 8:30 and we got rolling with the dyepots. It had rained overnight and was raining first thing in the morning, but fortunately the rain stopped around 8. Here was the set-up. There was a lot going on:

I combined both of the madder extractions, then divided the bath in half. We were using one half to make cloth for the “red” part of the show, and the other half was going to be used to make “orange” in combination with weld.

I added more dissolved soda ash to get the pH back up to 9, and put the linen and silk pieces into the same dyepot:

I heated the bath up to 140 degrees, held it for an hour, and let the cloth steep and cool for the rest of the day and overnight. Here it was in the morning on Saturday the 13th:

I always do a delayed rinse, if I have time. I hung the cloth on the line to dry before washing it. In this photo, the madder “red” pieces are on the right:

Next up, the weld baths.

Bookmark Success!

After I wove off that pink warp, dyed with madder, I finally put a new warp on the loom. It’s a blue warp, dyed with woad, for more “Jack Frost” pattern bookmarks. Amazingly enough, the first three came out exactly the same length! This is a feat of consistency of which I am rarely capable, so I was pretty happy. Here they are:

consistent weaving

What I have been aiming for in my bookmarks is a woven length of 10 inches, with 1 inch of fringe on each end. This allows them to fit exactly into the stylish wrappers Matthew designed, which are 12 inches long. Continue reading “Bookmark Success!”

Bookmark Failures (Successes Coming Soon)

This post is the latest installment in a longer saga about weaving bookmarks with naturally dyed 40/2 linen. The saga spans many months, if not years. I have posted about these bookmarks in the past. You can read my most recent post about it here.

Or you can just catch up on the back story in this post!

My linen bookmarks are woven with 40/2 linen. They are not too time-consuming to produce, though the pricing still works out to a meager hourly rate when I take into account all the steps involved in the dyeing plus the weaving. Continue reading “Bookmark Failures (Successes Coming Soon)”

Fun at the Faire

Last weekend I went to the Colonial Faire & Muster of Fyfe and Drums in Sudbury at the Wayside Tavern. Alas, the event is no longer posted on their website but I gather it is an annual event hosted by these folks. I’m not a guns-n-war sort of person, no matter what era, but I went because some friends of mine were demonstrating the flax to cloth process in their period costumes with their antique tools. Continue reading “Fun at the Faire”

I Am Pleased With My Linen Yarns

This is just a short post to say that I’m pleased with my stash of linen yarns. Here they are:

linen yarns

The pink colors at the top come from madder roots, and also the little orange skein on the left. The browns are from black walnut. The light orange in the center is from orange cosmos. The blues are from woad. The greens are from weld with woad on top. The yellows are from weld. This modest-sized basket represents a ton of work, and I am very satisfied!

Continue reading “I Am Pleased With My Linen Yarns”

Exhausting the Weld Bath–Part One

After my dyeing workshop at Massachusetts Agriculture in the Classroom I had two strong dyebaths left over. One was weld and the other orange cosmos.

The original weld bath was made with 6oz. dried plant material from second year plants in bloom. I had originally divided the bath in half because I wanted to add calcium carbonate to the bath in which I dyed the cellulose cloth swatches, but not to the bath in which I dyed the protein swatch books. I’m not sure that the calcium carbonate would do anything bad to the wool or silk, but I consulted my notes from a workshop with Joan Morris and according to my notes we hadn’t added it to the protein dyebath. I decided not to experiment this time around. Continue reading “Exhausting the Weld Bath–Part One”

Newfangled Magnification Technology

Back in December I began working on a new batch of Huck lace heart bookmarks in 40/2 linen, dyed with madder. People buy these at all times of year, but my current motivation is to have them available before Valentine’s Day.

I have a wide range of pink shades to chose from at the moment, so I plan to make a lot and have a good stash of inventory for several months. Last weekend I finished ten in a very pale pink, and this weekend I worked on ten more in a slightly darker, more blue shade of pink. Next weekend I hope to make some rich terra-cotta colored ones.

In the past, the most tedious part of the process of weaving these bookmarks has been the hemstitching. Each bookmark took just over an hour to weave (not including dyeing the yarn and dressing the loom), at least 20 minutes of which was the hemstitching. Until recently, I employed a magnifying glass to assist me with this job, since 40/2 linen is a fairly fine yarn and I will be 45 on my next birthday. Hence, my eyes need some help. Actually, I wrote about using a magnifying glass in an earlier post a couple years ago. Apparently I felt way more philosophical and content about it back then. Continue reading “Newfangled Magnification Technology”

Madder the Inexhaustible Root–Part One: Orange

Earlier in November, another teacher at school wanted to dye some cloth to create kid-sized monarch butterfly wings as part of her classroom study of butterflies. Her initial dyebaths, composed largely of marigolds combined with some orange cosmos and wild bedstraw roots, had not yielded the color she wanted. I suggested over-dyeing the cloth with madder roots, even though they weren’t from our garden at school. She decided to use some chopped roots that I had bought from Aurora Silk a few years ago, and was pleased with her results.

I asked her to save me the exhausted dyebath and the roots, which she very kindly did. I spent every spare moment of the next two weeks happily creating various shades of pink and orange on linen and cotton-linen blend yarns. I was well-satisfied with my efforts! Here they are:

drying rack madder yarns Continue reading “Madder the Inexhaustible Root–Part One: Orange”