Close up of a swamp milkweed seed pod with a few seeds still inside.

Goings On in the Winter Garden

New year, new attempt to revive my beloved but neglected blog with a post about my garden in winter. These photos are from midday Saturday January 3rd, 2026.

Here are two slightly different perspectives. One view says, “Sticks are here, amidst other sticks.” Big sticks and little sticks, above and below, in many shades of copper and silver, laying this way and that.

Dormant plants in the dyeplant garden with snow on the ground.

The other view says, “Hill! Sky! Look to the distance!” There’s a broader, hilltop perspective. Both true and both lovely. I think this second view shows more of the tracks in the snow reflecting all the activity that’s going on, even in the dormancy of winter.

View of the snowy hill top garden with distant hills in the east.

As I approached the far side of the garden, an oval-shaped dark gray furry creature toodled away quickly from the garden towards the woods. I am pretty sure it was a vole judging from the velvety dark gray color, the trundling gait, and the other vole tunnel and channel tracks around the garden. I think this line of tracks was made by that hasty vole. I don’t have a before and after photo to confirm, but it’s in the very same spot. For more about identifying meadow vole tracks, see the lovely descriptions and images in this post by Mary Holland.

Small tracks in the snow left by a vole.

Quite a lot of teensy prints were clustered in the black-eyed Susan bed:

Lots of tiny prints in the snow with small black seeds from black eyed Susan scattered about.

It makes me wonder whether the seeds are a good source of food. I suspect so, though maybe there’s something else about this bed that makes it appealing. It’s on the southeast corner of the plot. Here are a couple images of dense, intensely dark black-eyed Susan seed heads:

Spherical intensely brown seed head of black eyed Susan against a white snowy background.

A singular spiky and spherical black eyed Susan seed head against a snowy white ground.

Despite my worry in the “Whodunit” post that the black-eyed Susans weren’t coming back and that possibly the bronze fennel was to blame, they have spread and thrived and have been happy as can be.

Next up, going around to the south-facing bed, are the marigolds. It was a bumper year for marigolds. In the background behind this dried flower head there are some tracks in the snow, but I didn’t look closely enough to figure out who made them:

Faint tracks in the snow behind a dried marigold seed head.

It’s interesting how the colors fade differently on different flower heads, and the different stages of growth they were in when they froze/dried out. The in-focus one in the photo below is bleached out, glossy, and luminous while the out-of-focus ones are a dull mildewy gray. And the dried head behind them still has petals clinging to it.

One very pale bleached out marigold seed head amidst other darker ones.

Then there are the star-like orange cosmos seed heads, one of my favorites, a little further toward the west on the south-facing bed:

Single orange cosmos seed head.

Next to the cosmos, in the southwest corner of the plot, are the dyers coreopsis. I grew them from seed last year, in various colors and sizes, with seeds I’d saved from a previous year, originally from Grand Prismatic Seed. I saved seed again for this summer, and there are still tons of seed heads left, as you can see:

Flopped over stalks of dyers coreopsis.

Single dyers coreopsis seed head against a snowy background.

Behind the dyers coreopsis towards the north side is the Japanese indigo bed (also grown from seed, also originally from Grand Prismatic). There’s a lot going on here, with blue-green dried leaves, red-brown stems, and some pinkish-tan dried flower clusters. So beautiful! I know that mice like Japanese indigo seeds (ask me how I know), but in this case they don’t seem to be seeking them out.

Tangle of pink and tan colored dried Japanese indigo stalks and some dried seed clusters.

In the center of the garden is the madder bed. It was a very productive year for madder seeds, both this this garden at Bramble Hill and in the second-year raised bed at Historic Deerfield. Hopefully that will be the subject of a future post.

I had a hard time convincing my phone that those hard, round, black blobs were truly the things I wanted to focus on, so the madder seeds aren’t quite as clear as I’d like. But here, hopefully, you can see the abundance, even after I collected a lot in the fall:

A mound of pale colored dried madder tops with dark-colored seeds scattered throughout.

A small cluster of three madder seeds with snow behind.

One sole intensely black madder seed that's not quite in focus.

On the the northeast corner of the garden is the perennial bronze fennel. No wonder it self-seeds everywhere!

Umbel-shaped bronze fennel seed head drooping over.

This next photo is the curled-up leaves of a woad plant. It’s like it got too hot and threw off the covers in the middle of the night! I’ve never read that woad plants generate heat, so something else is probably going on here.

Green, curled up leaves of a woad plant surrounded by white snow.

And last but not least, back on the east side of the garden, the swamp milkweed made a come-back over the past couple years. It has established itself in a couple new spots (another future blog post, hopefully).

Close up of a swamp milkweed seed pod with a few seeds still inside.


Smith College Botanic Garden Show!

The show is up at Smith and it is gorgeous! Actually, the show opened way back in September. It will be up until May, so you still have time to go see it. Here’s the sign that greets you as you walk in. It makes me feel famous!

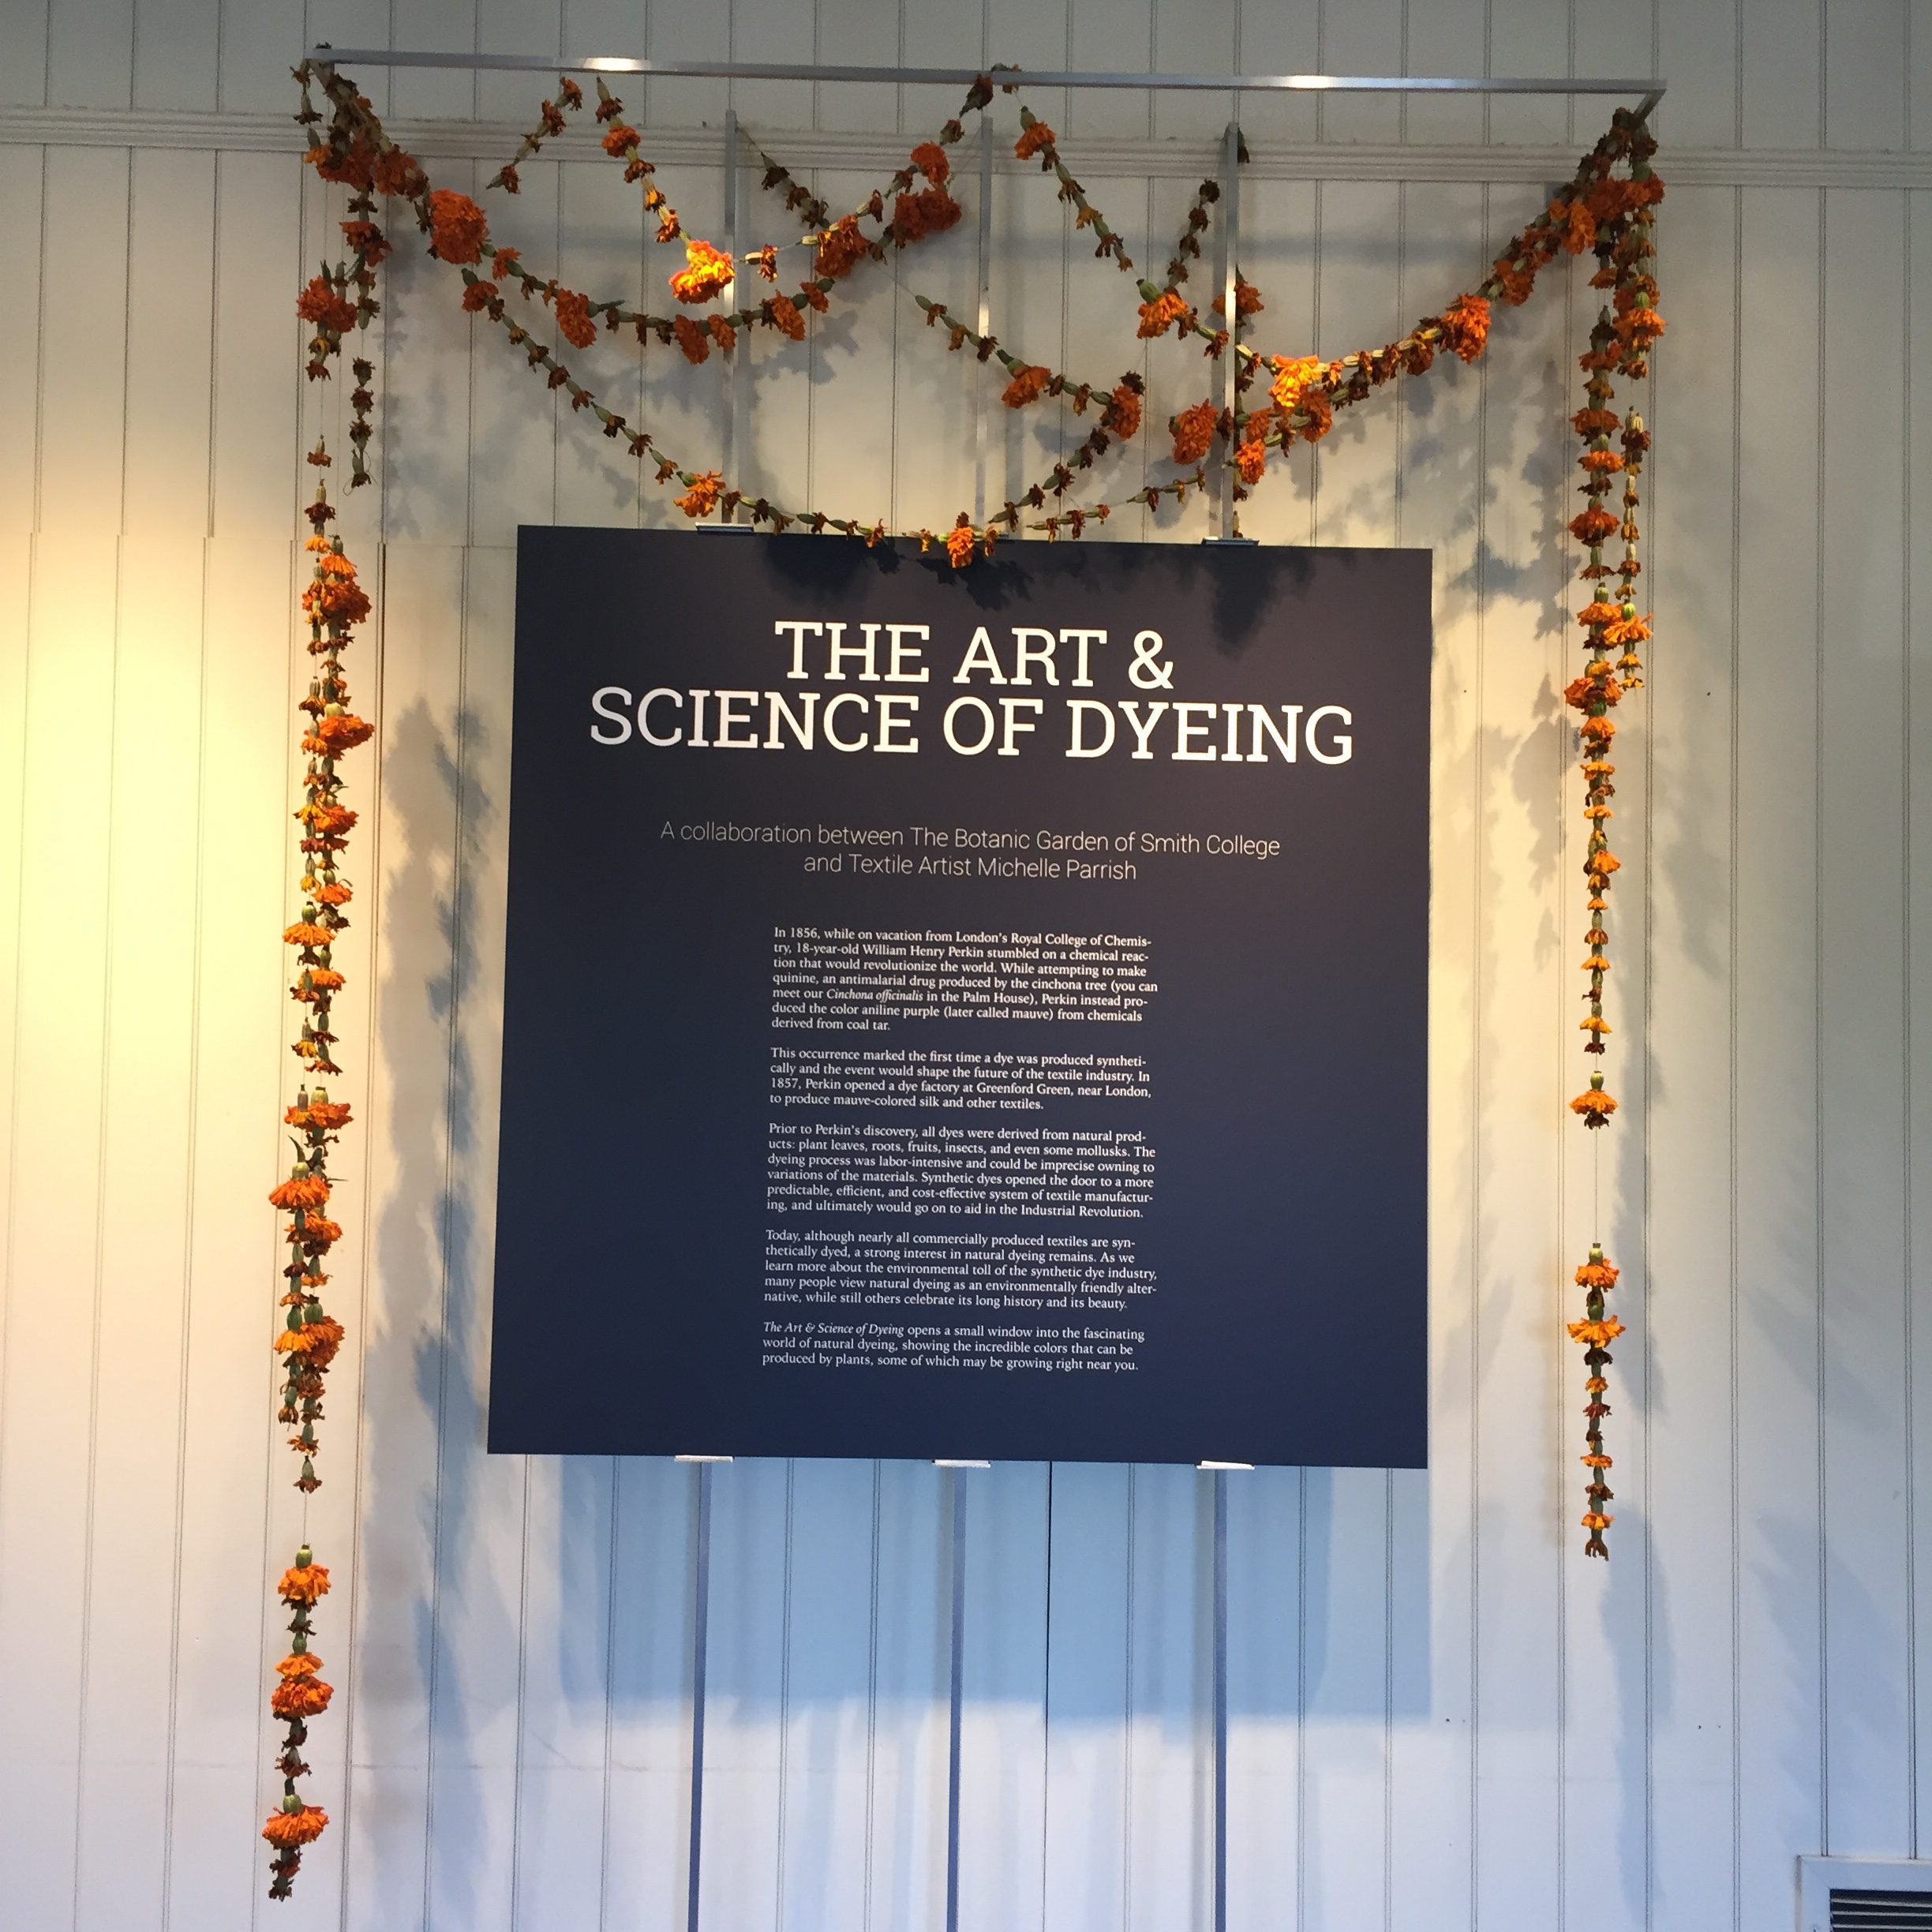
The whole concept of the exhibit was the vision of Sarah Loomis, Manager of Education at the Botanic Garden. I am so grateful to have been a part of creating it. It’s incredibly satisfying to stand in the gallery and see how it all came together.

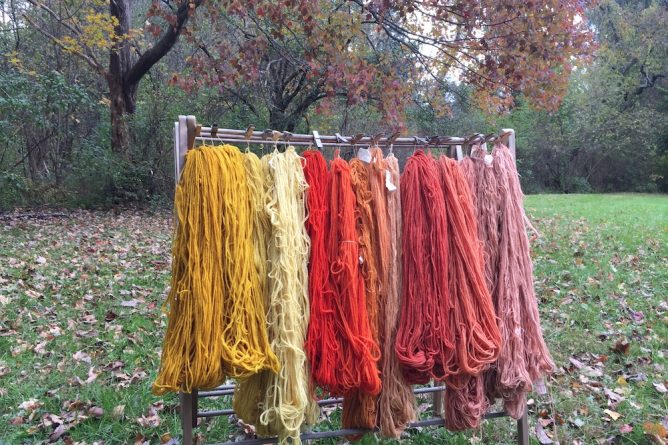
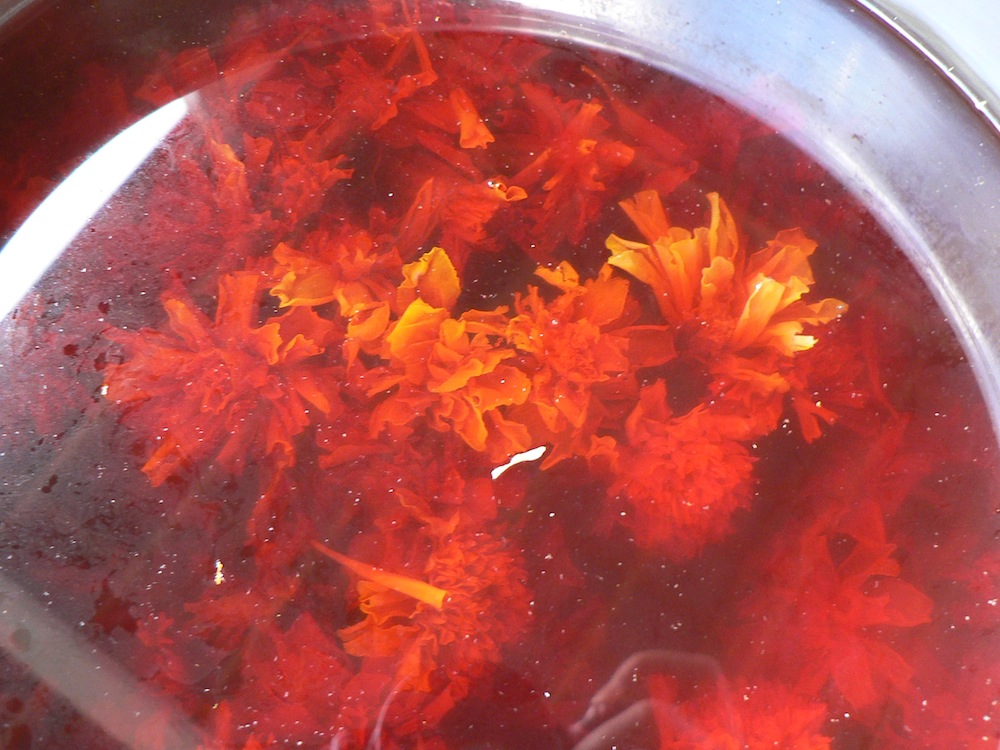
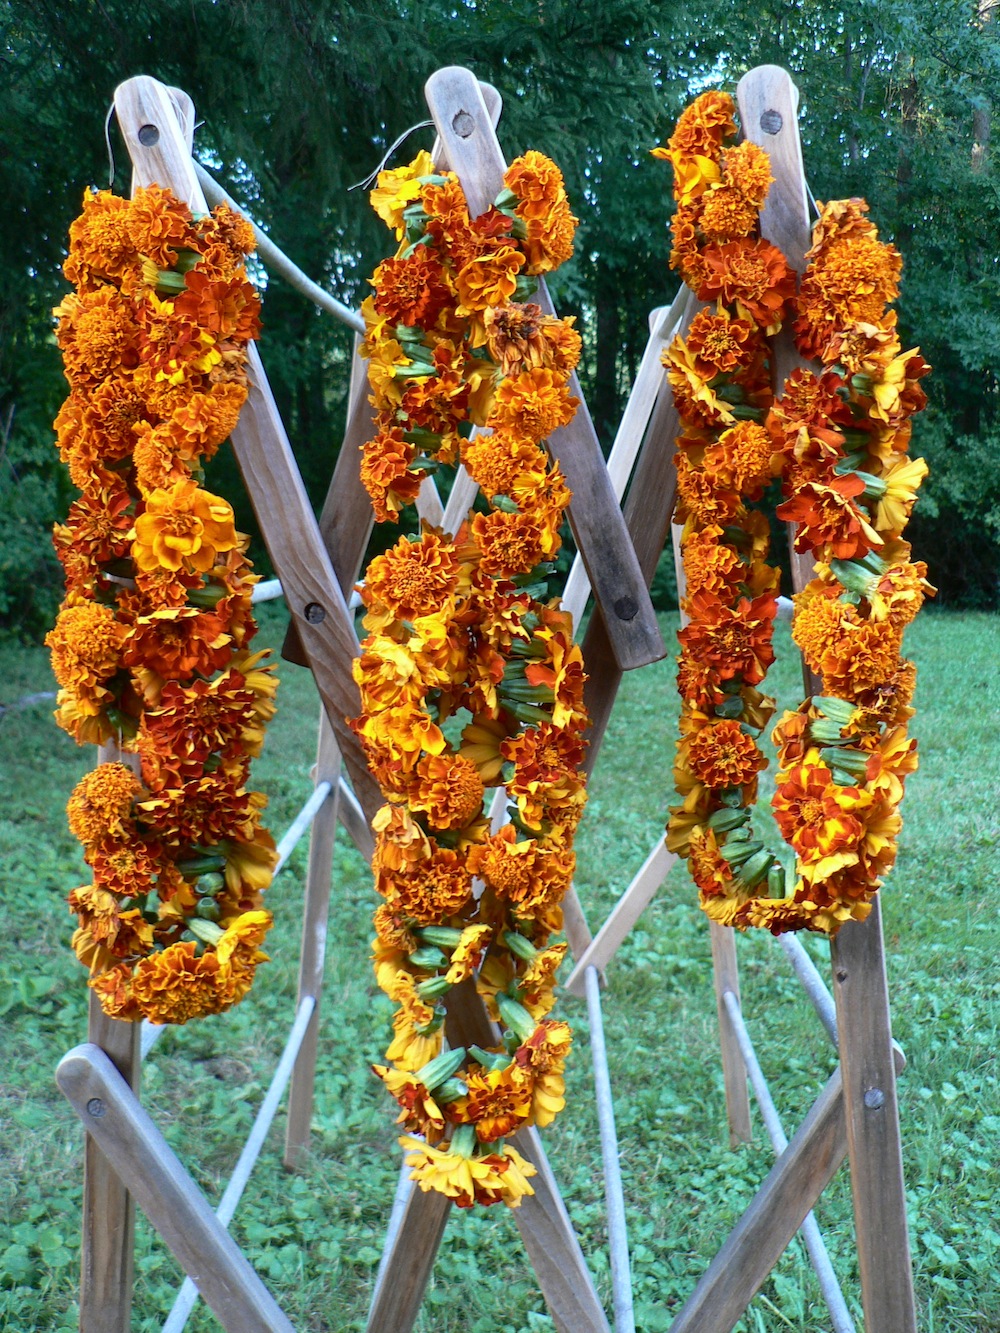
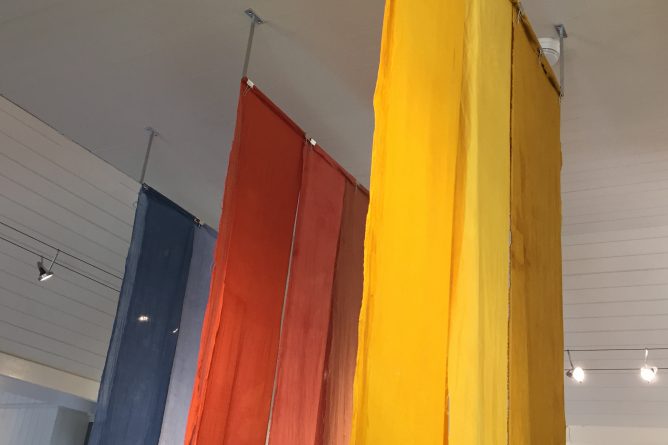
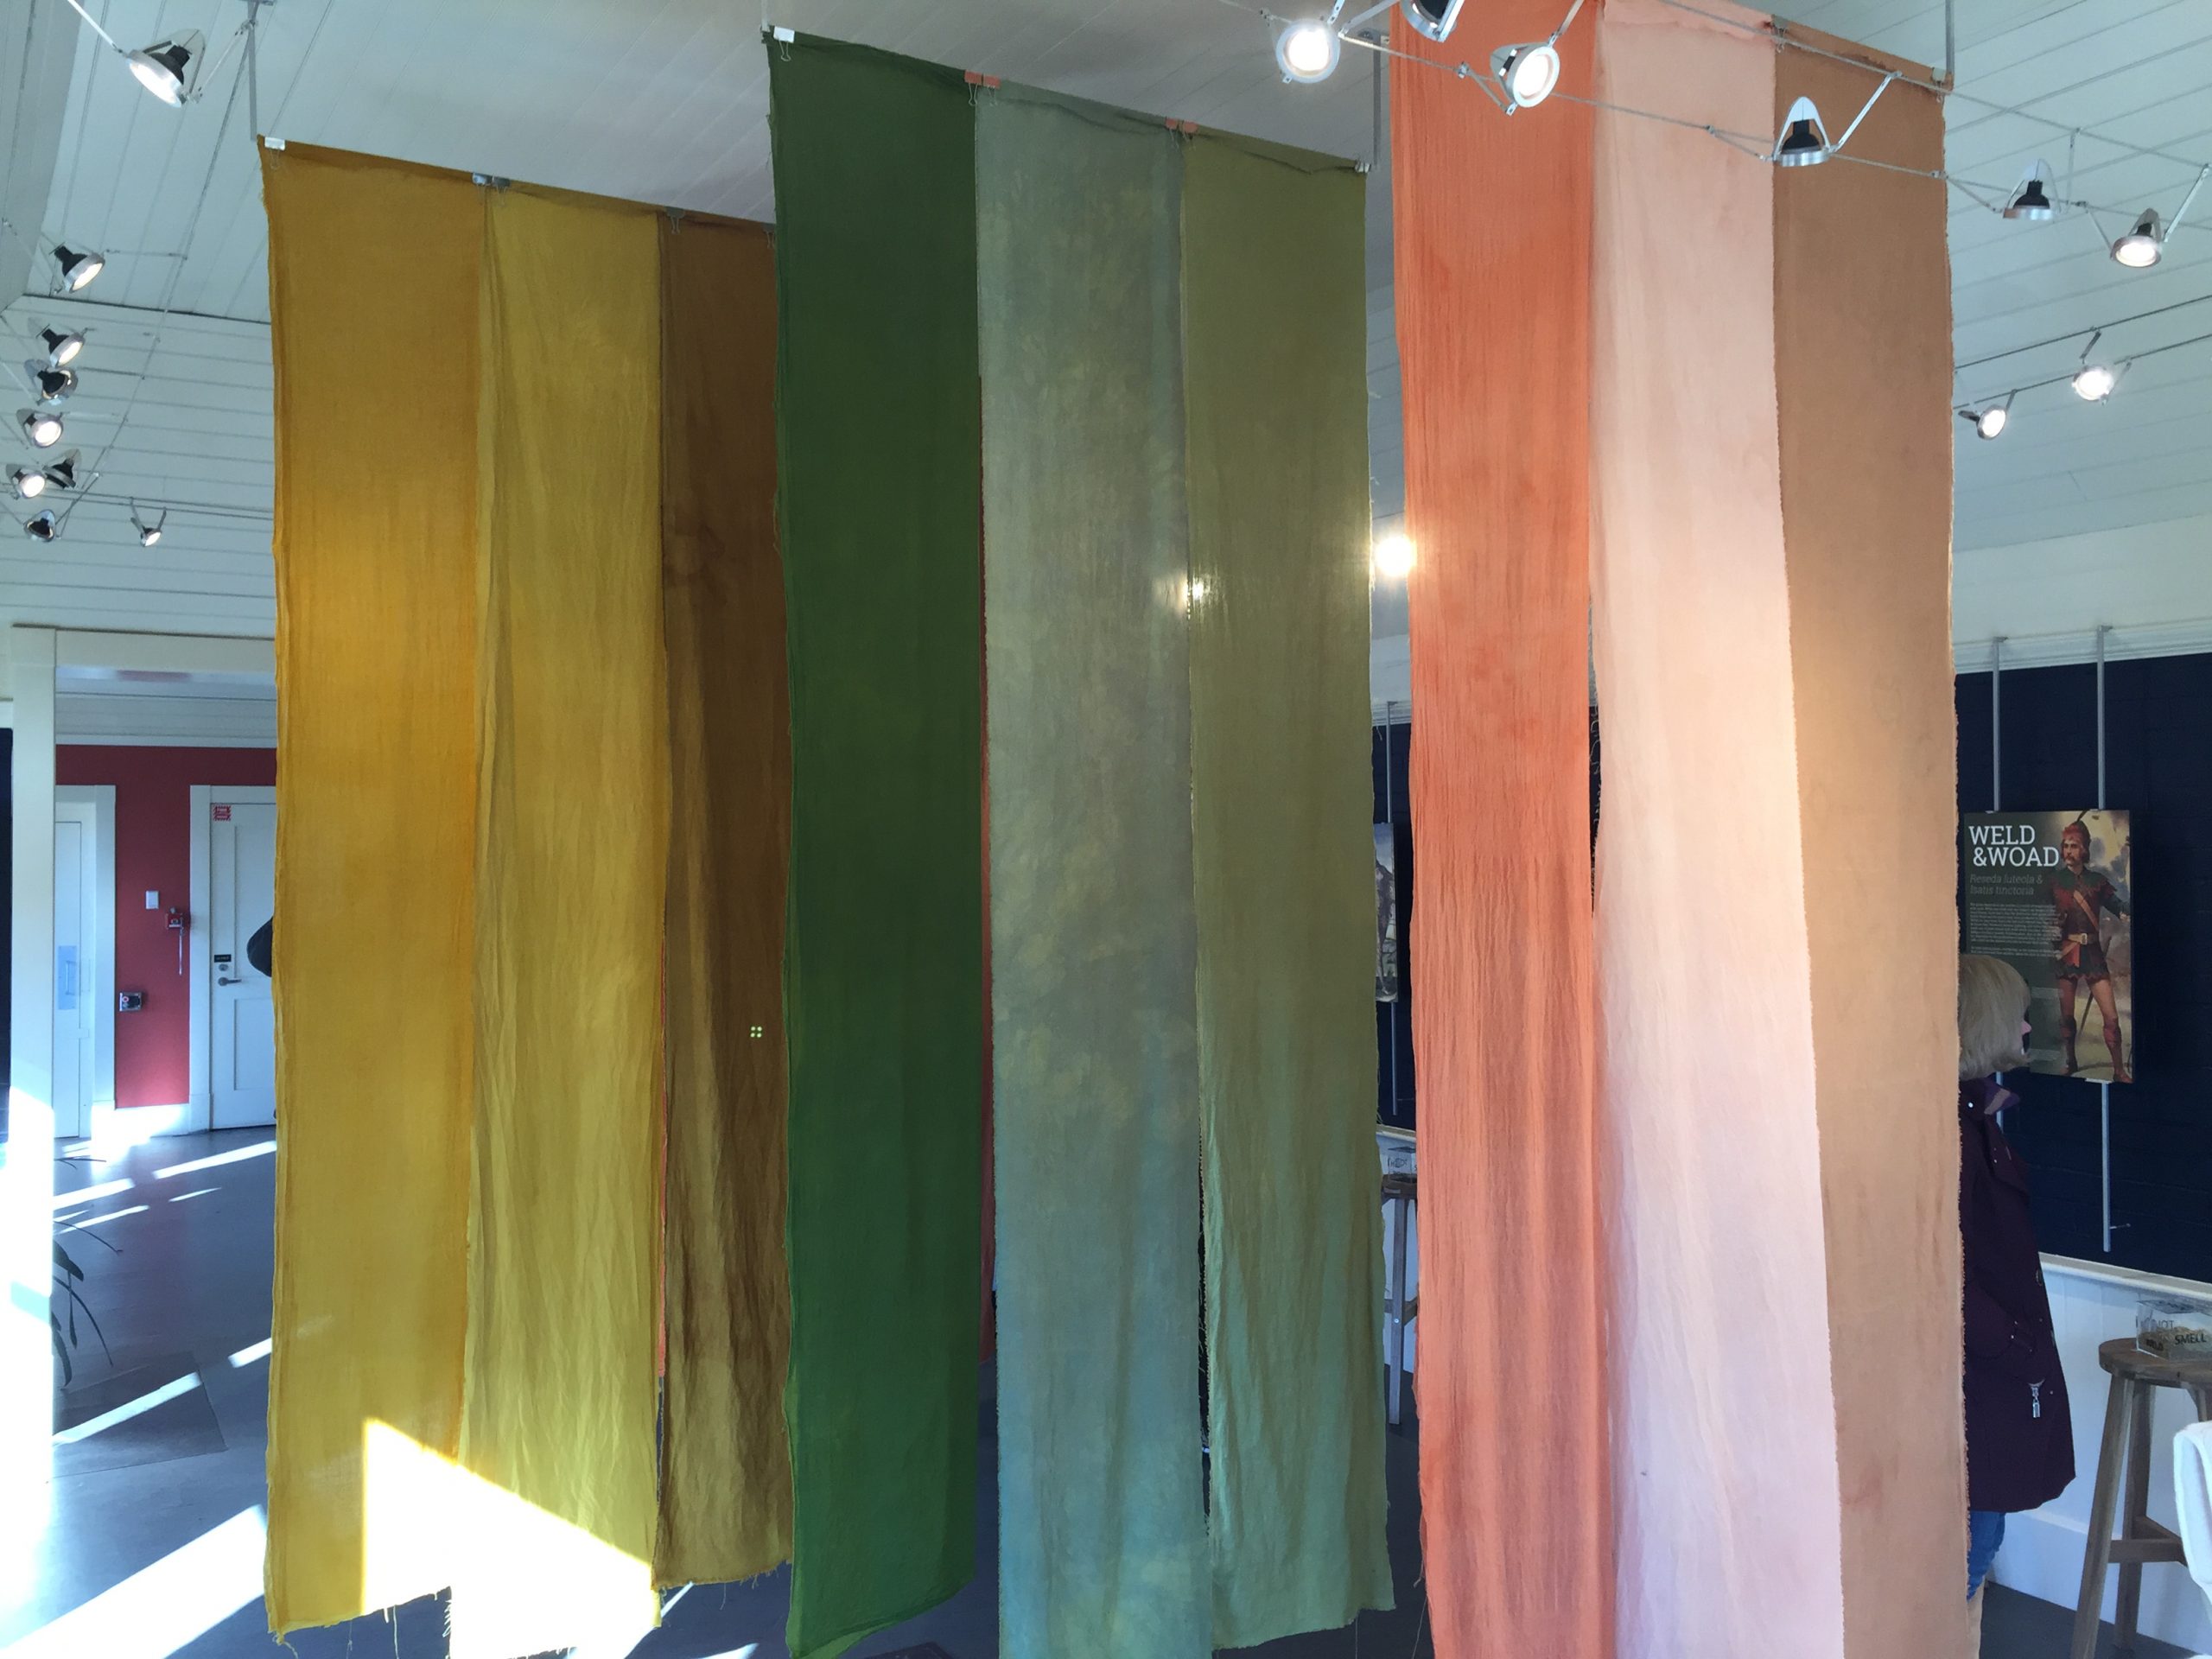
The first sequence of panels that you see as you enter the gallery space is the primary color sequence of blue, red, and yellow. The blues are from woad, the reds are from madder, and the yellows are from marigolds.

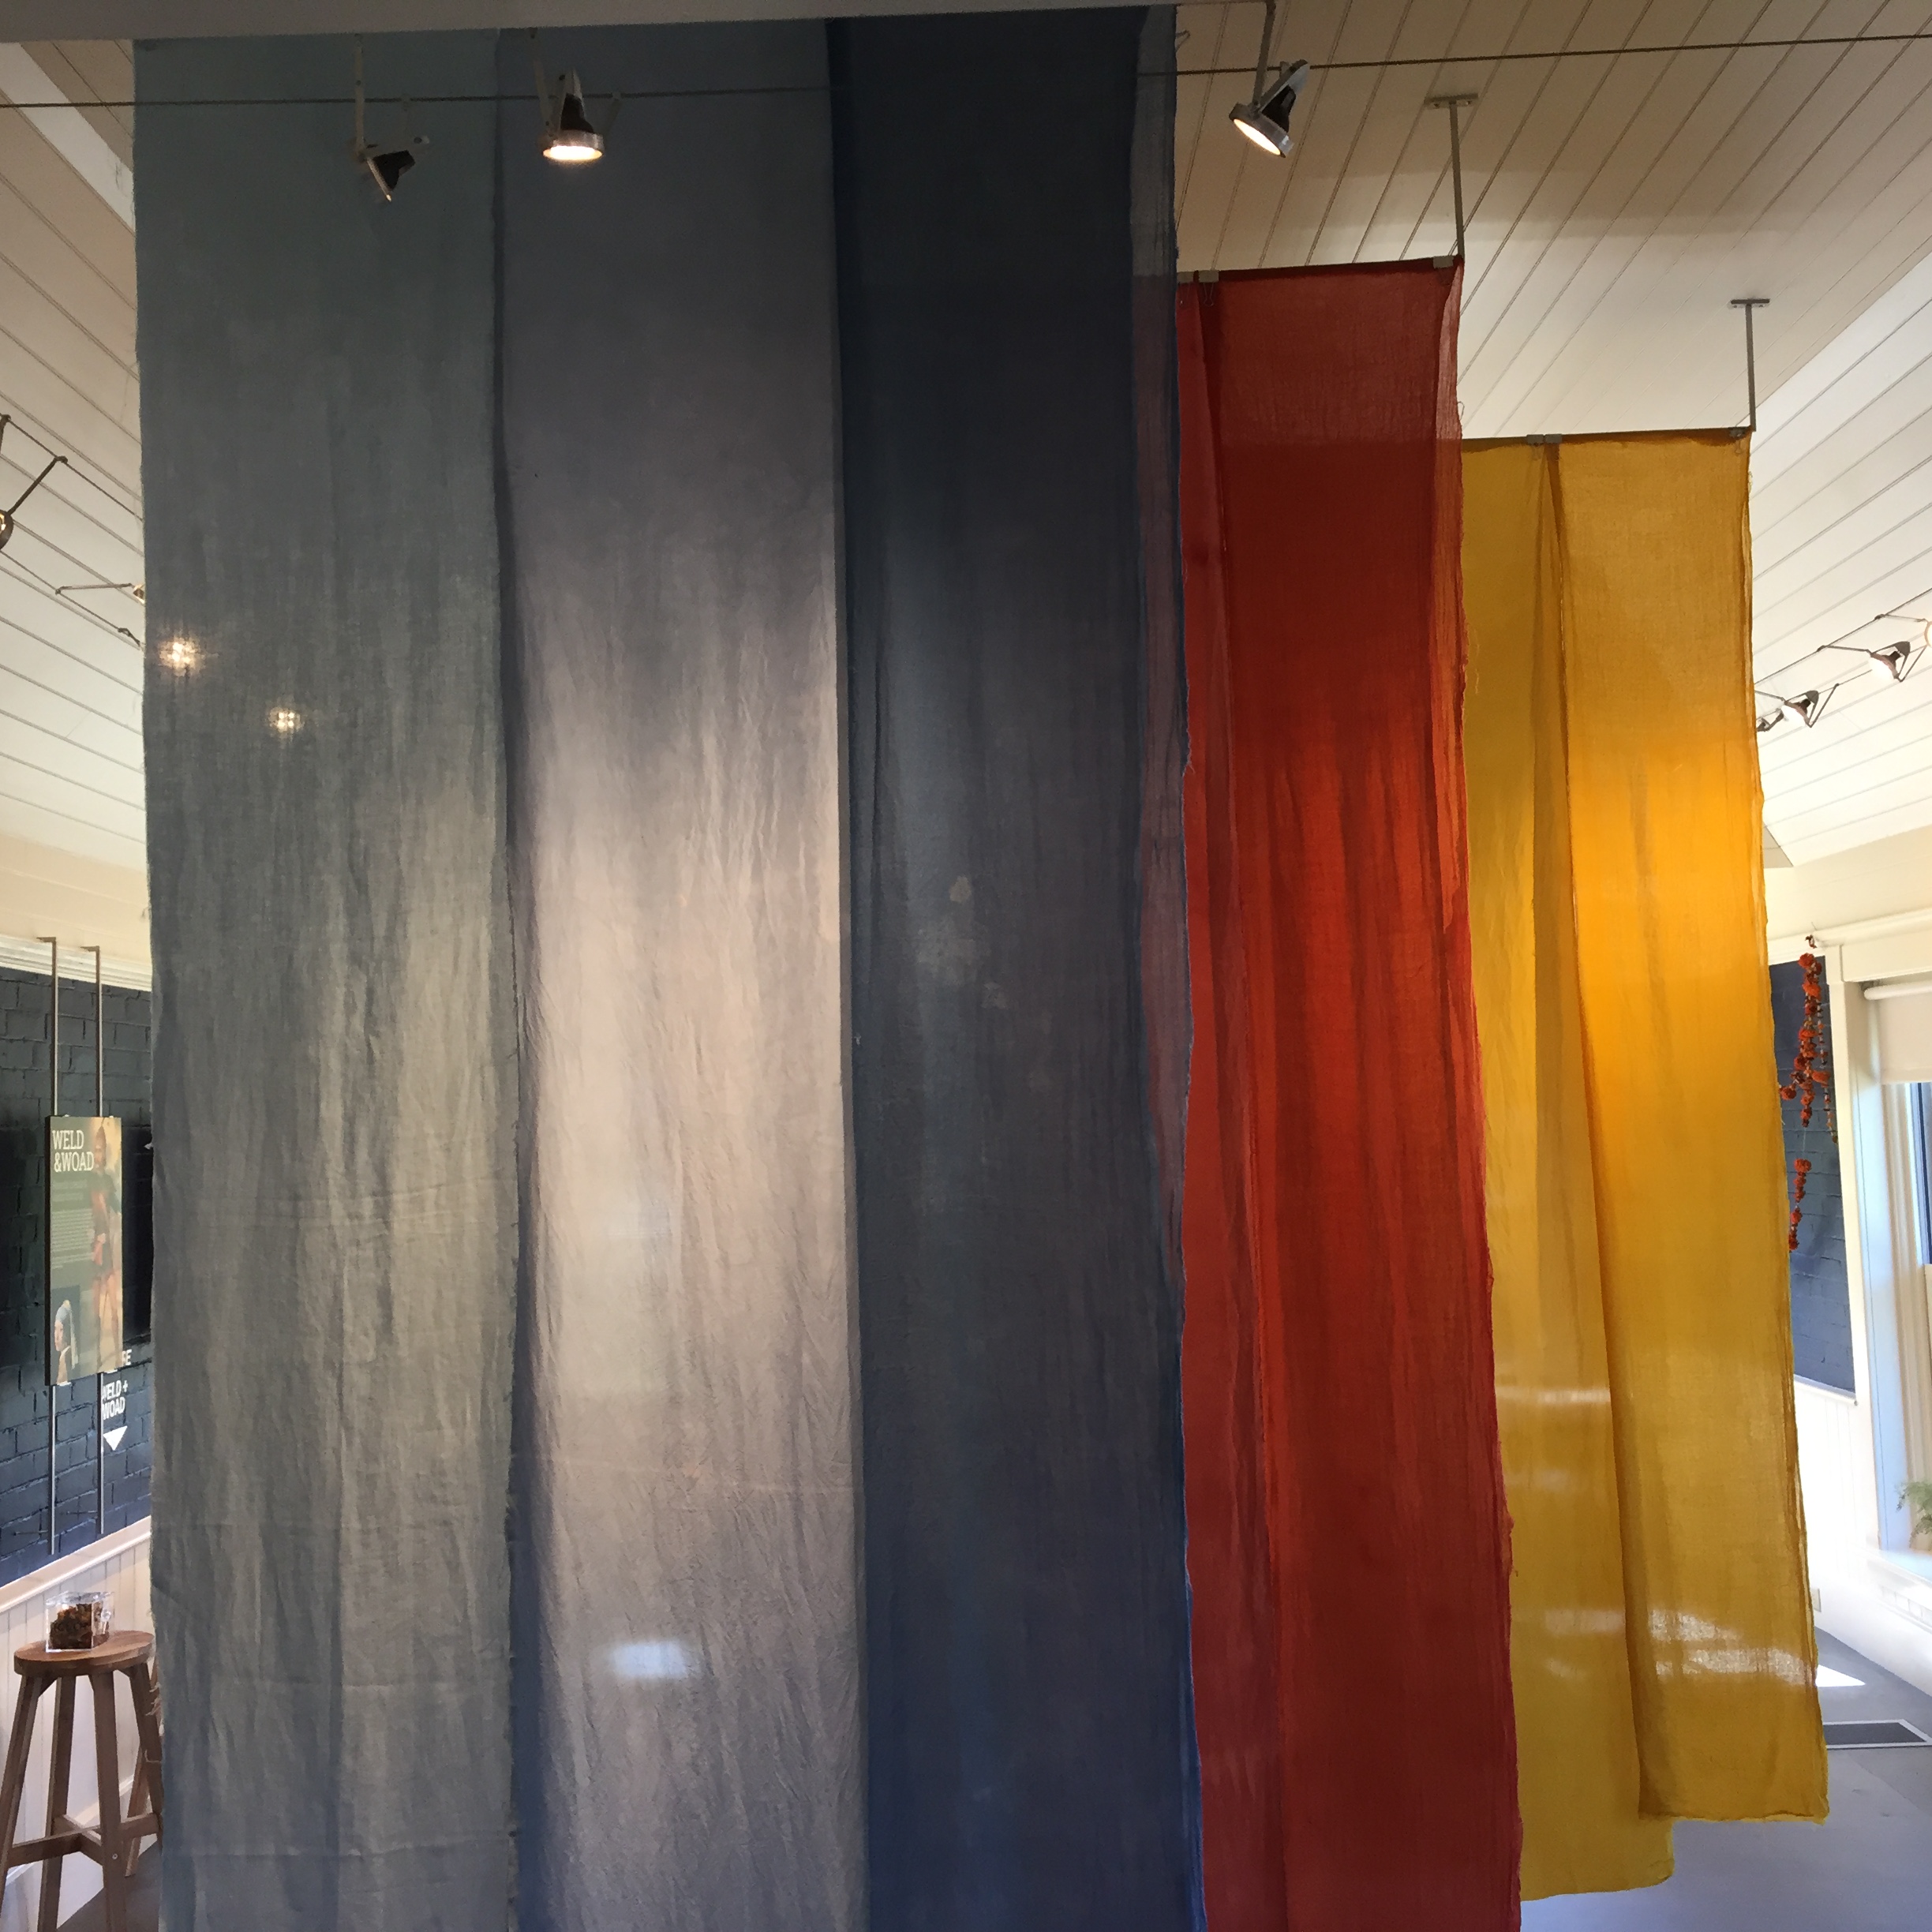
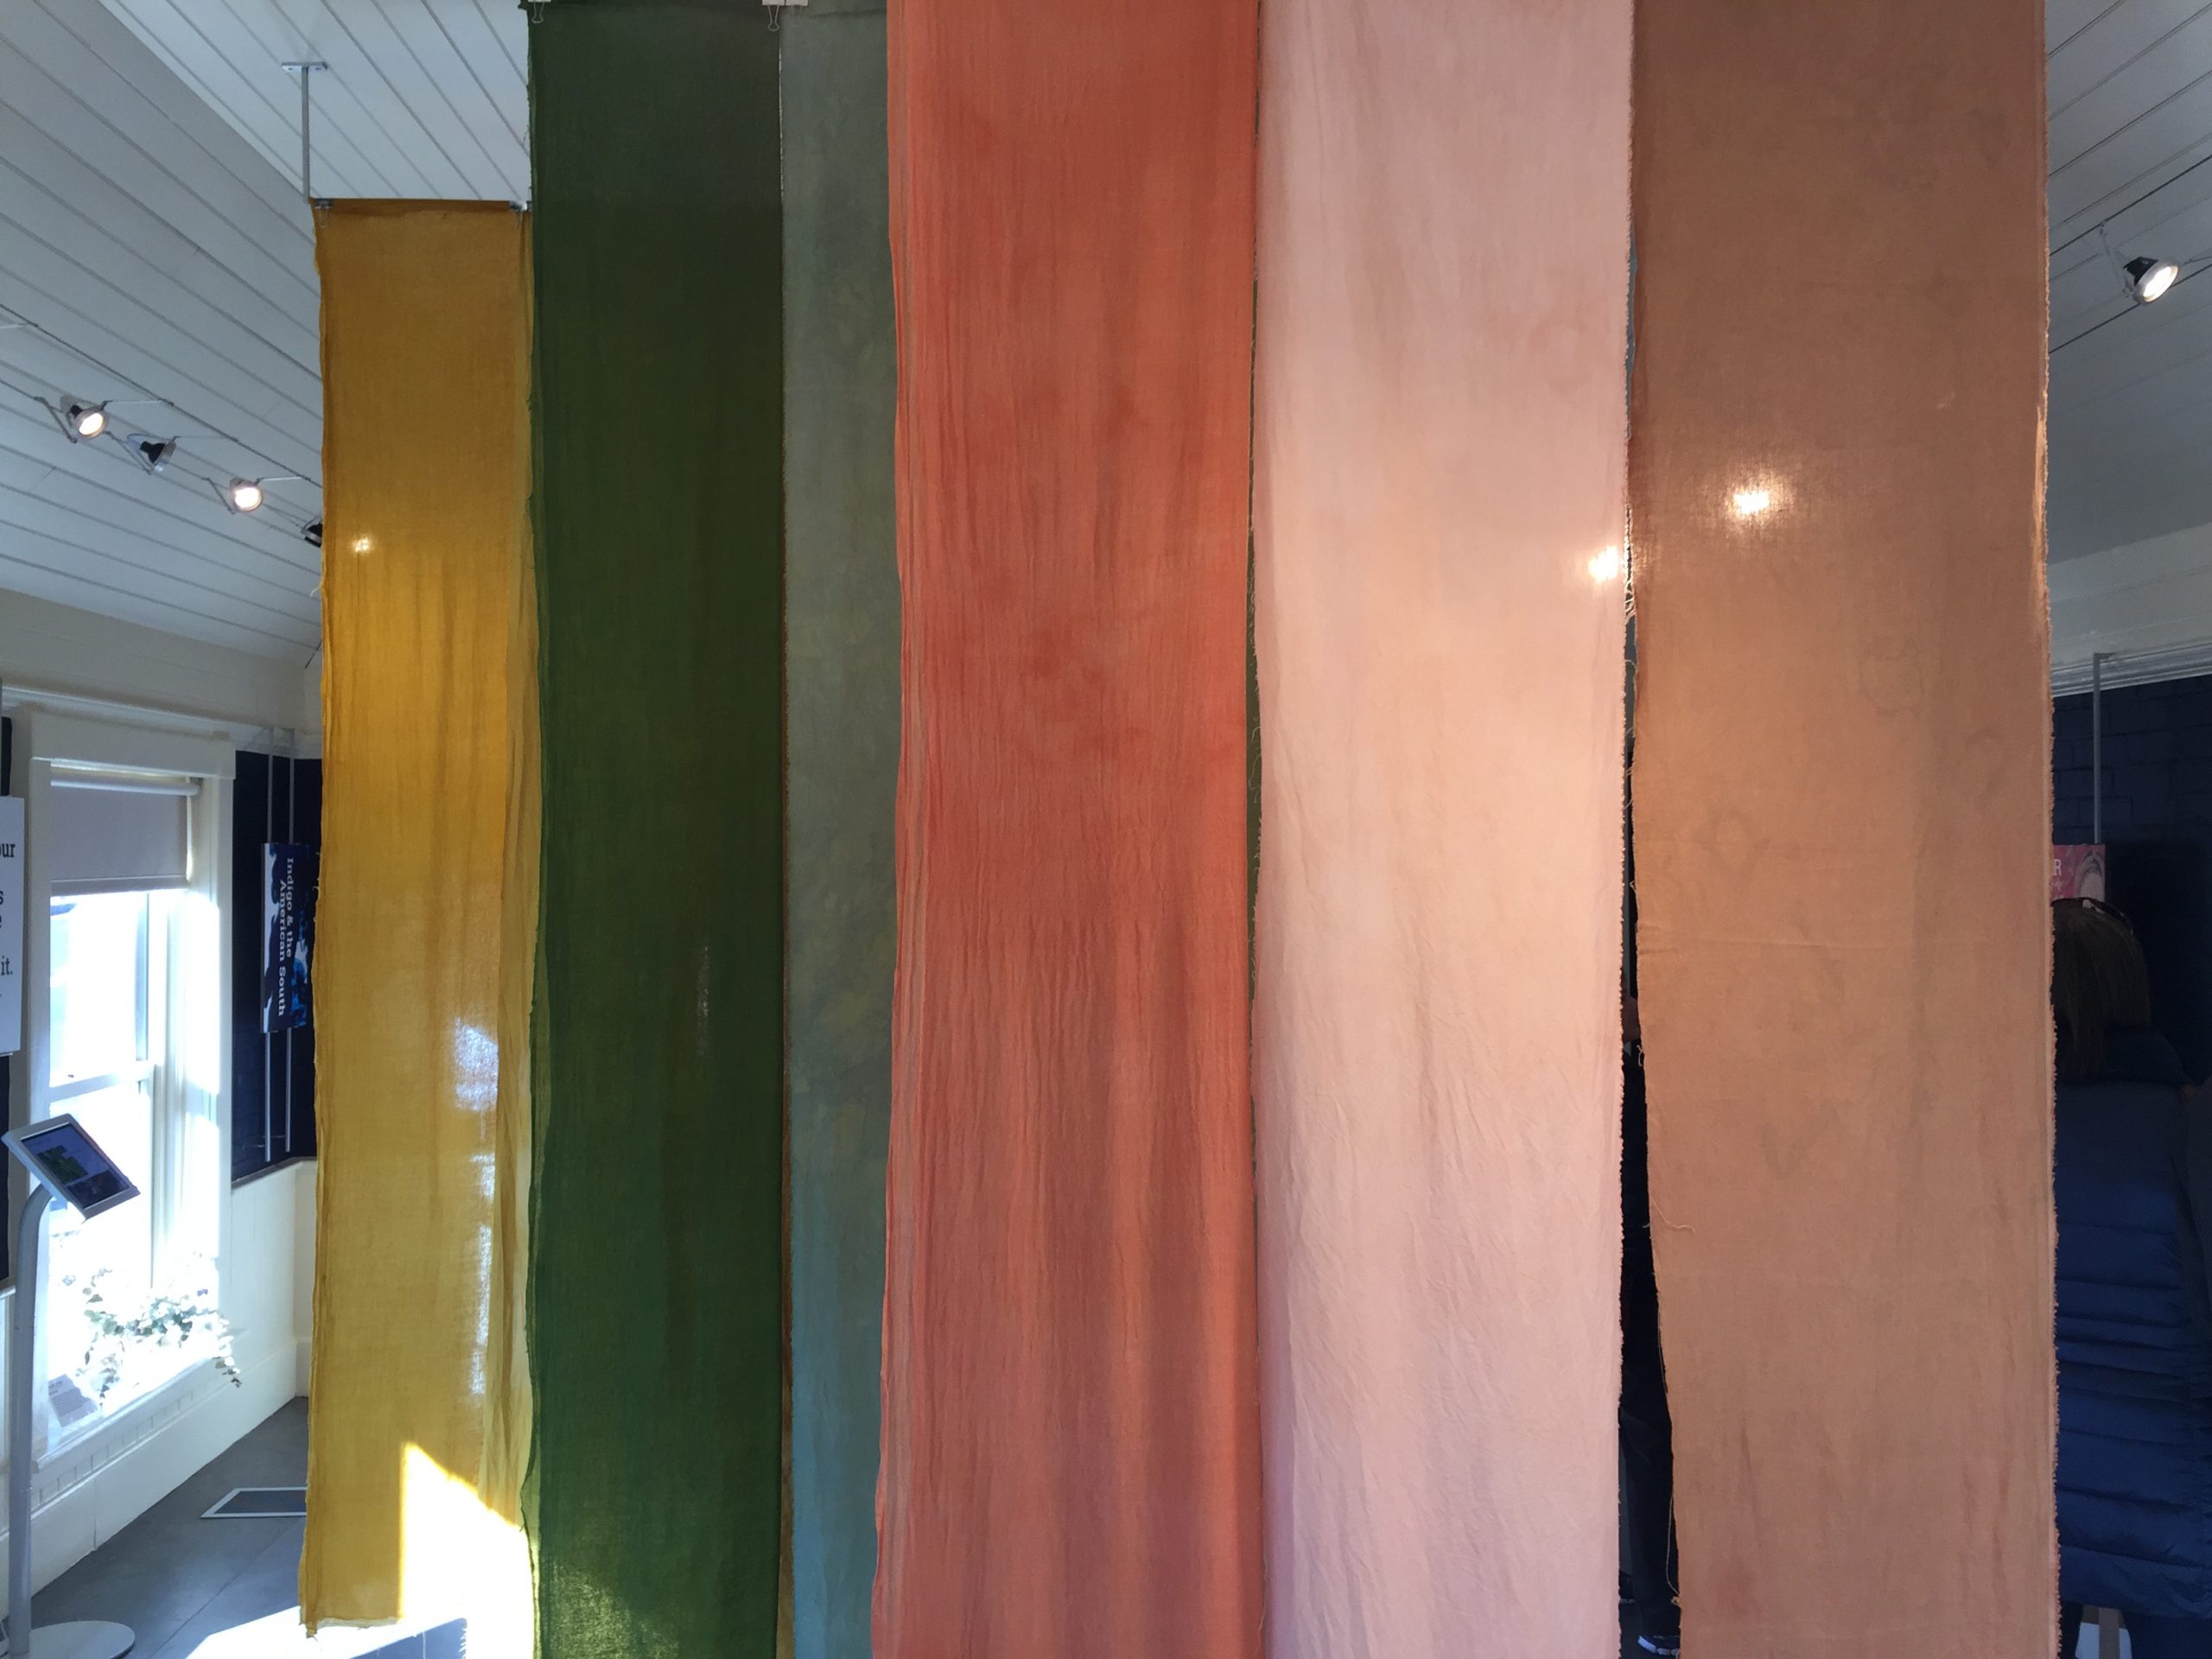
For each color I dyed three different fibers: linen, silk, and wool. In the photo above, the linen is on the left, silk is in the middle, and wool is on the right. Each panel is 9 feet long (or tall) and 16 inches wide. The wool gauze was very sheer, so those panels are doubled. I really love the color saturation of the two layers of cloth.

Depending on the lighting and the angle, the colors look different. Looking at it from the other direction (below) the wool is on the left, silk in the middle, and linen on the right.

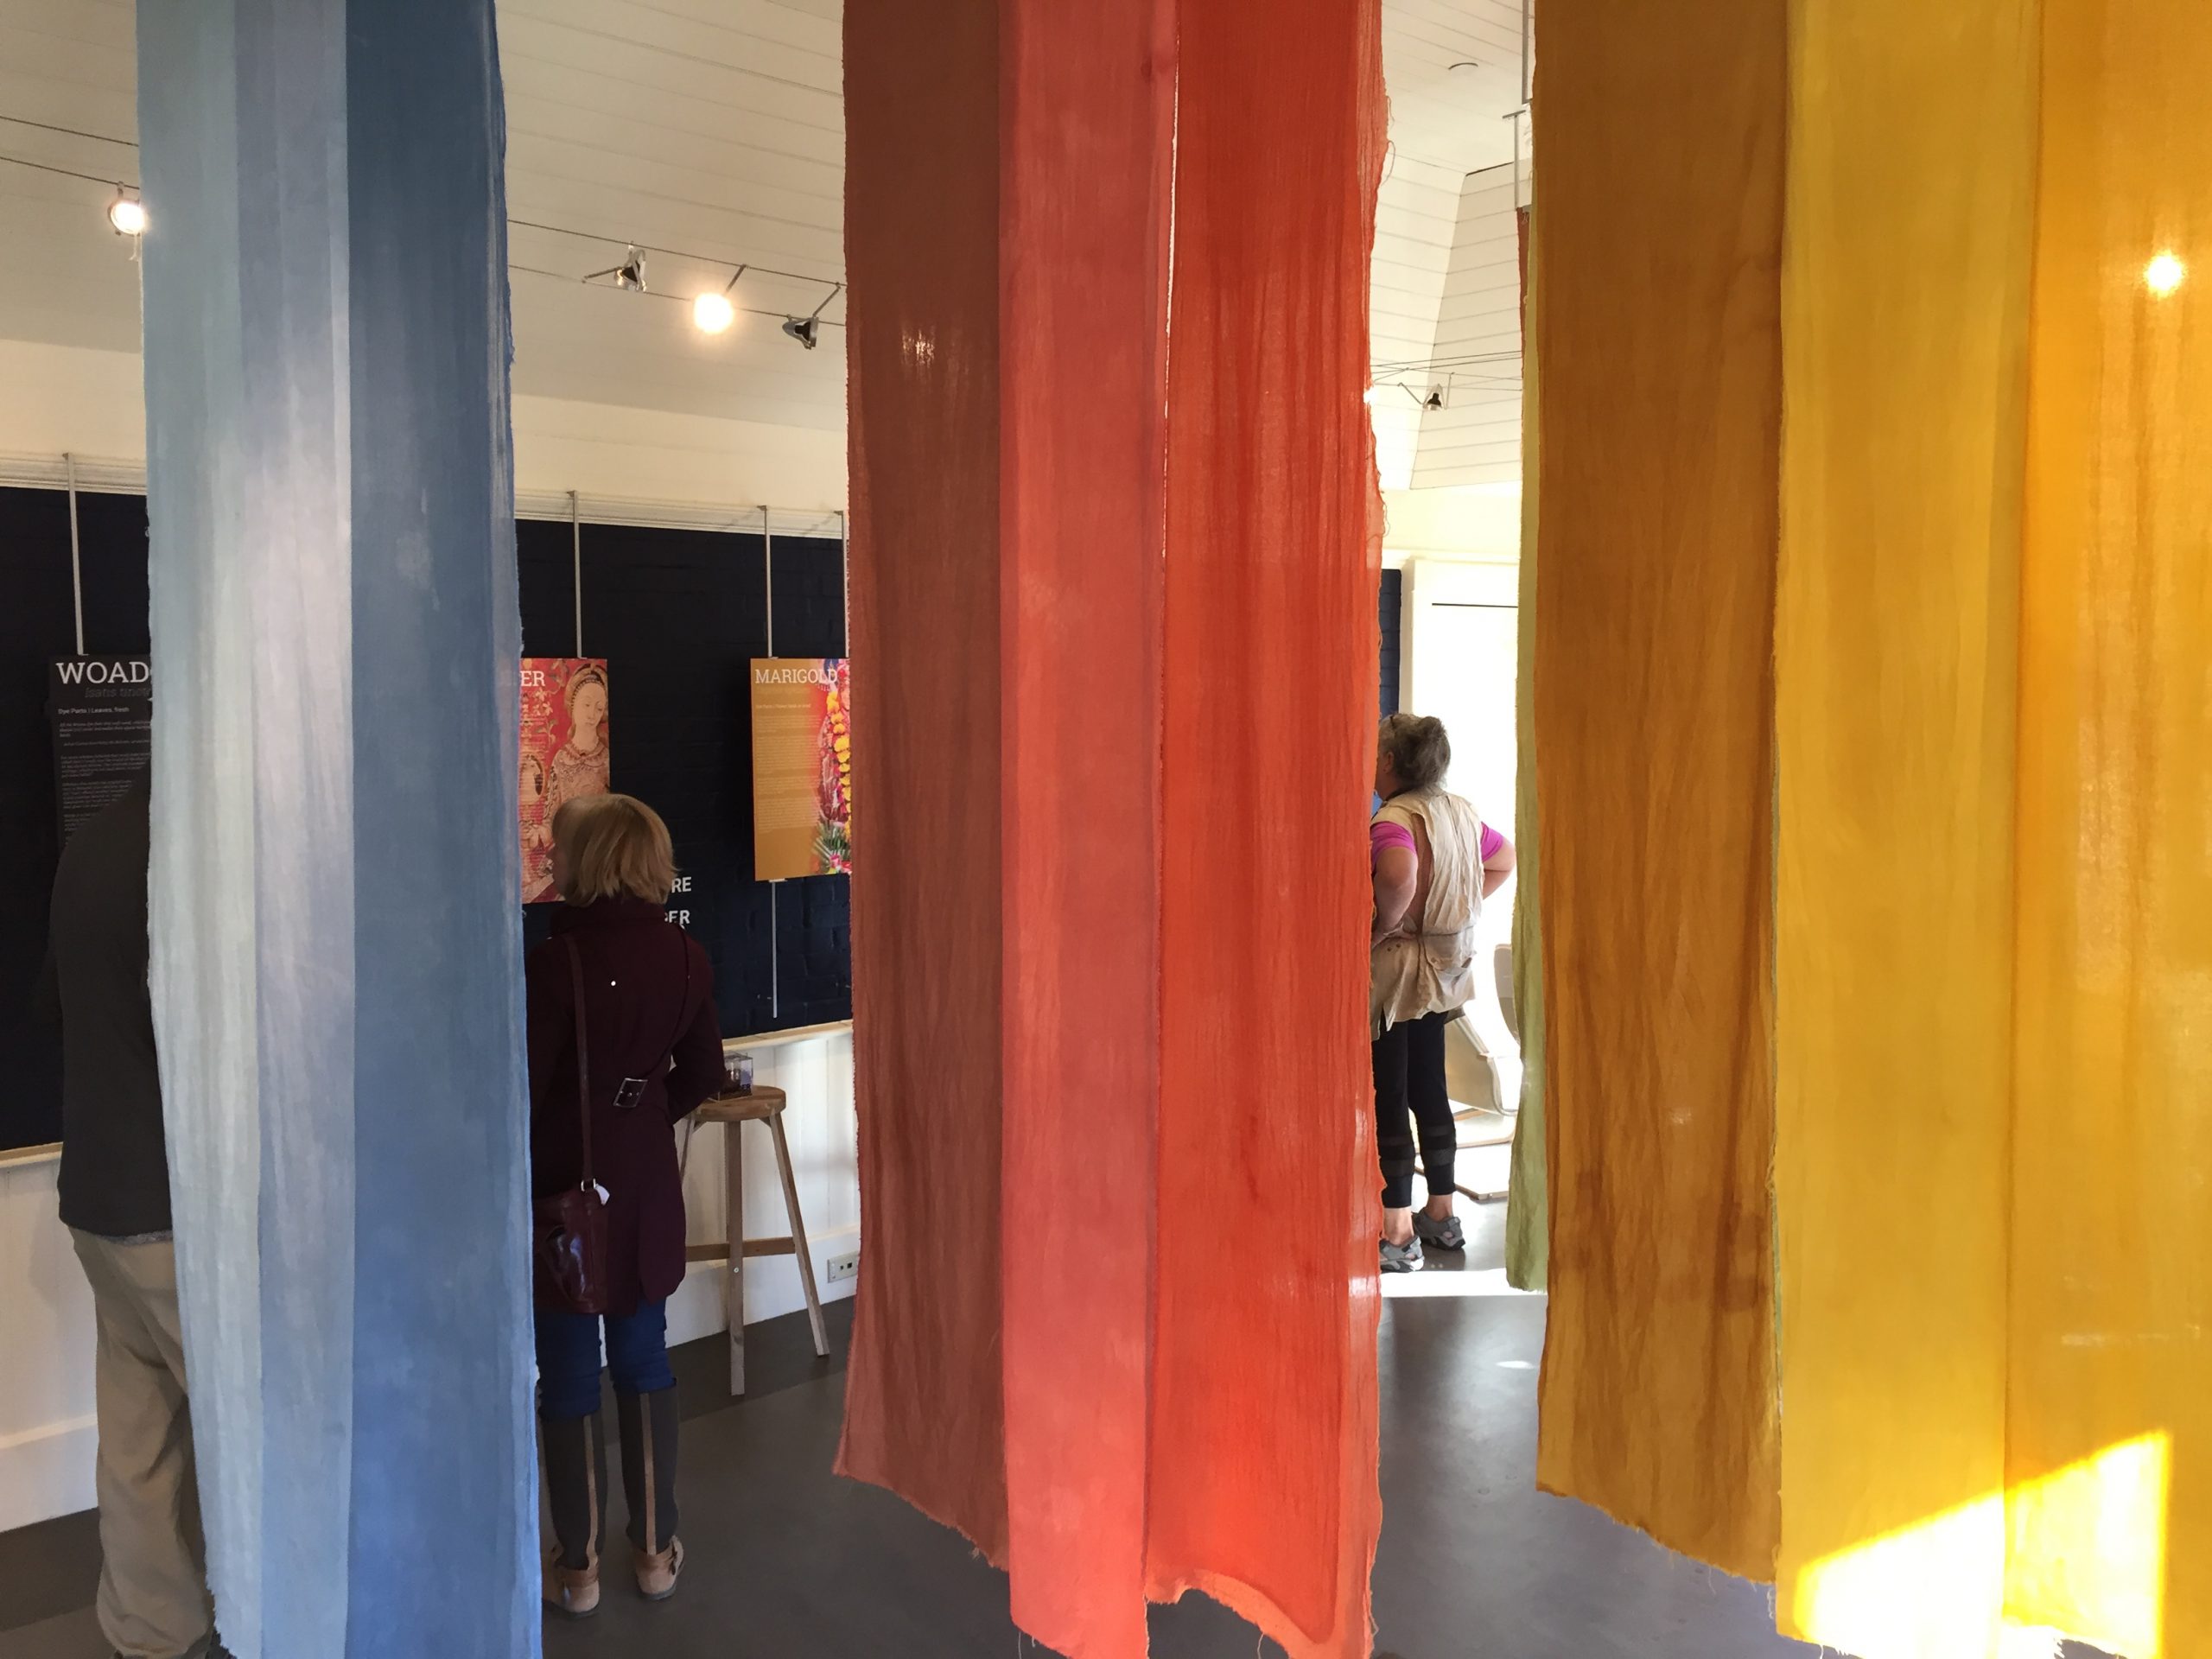
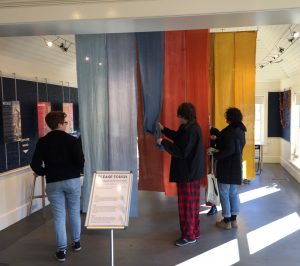
It’s really fun to see how people are interacting with the cloth and the space. A sign at the entrance invites visitors to touch the cloth. And people do!

The long panels create a delightfully immersive experience.

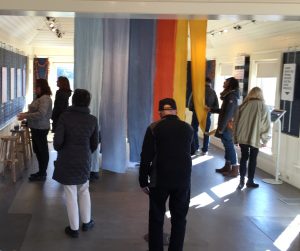
There is space to move between the panels so you can be surrounded by color.

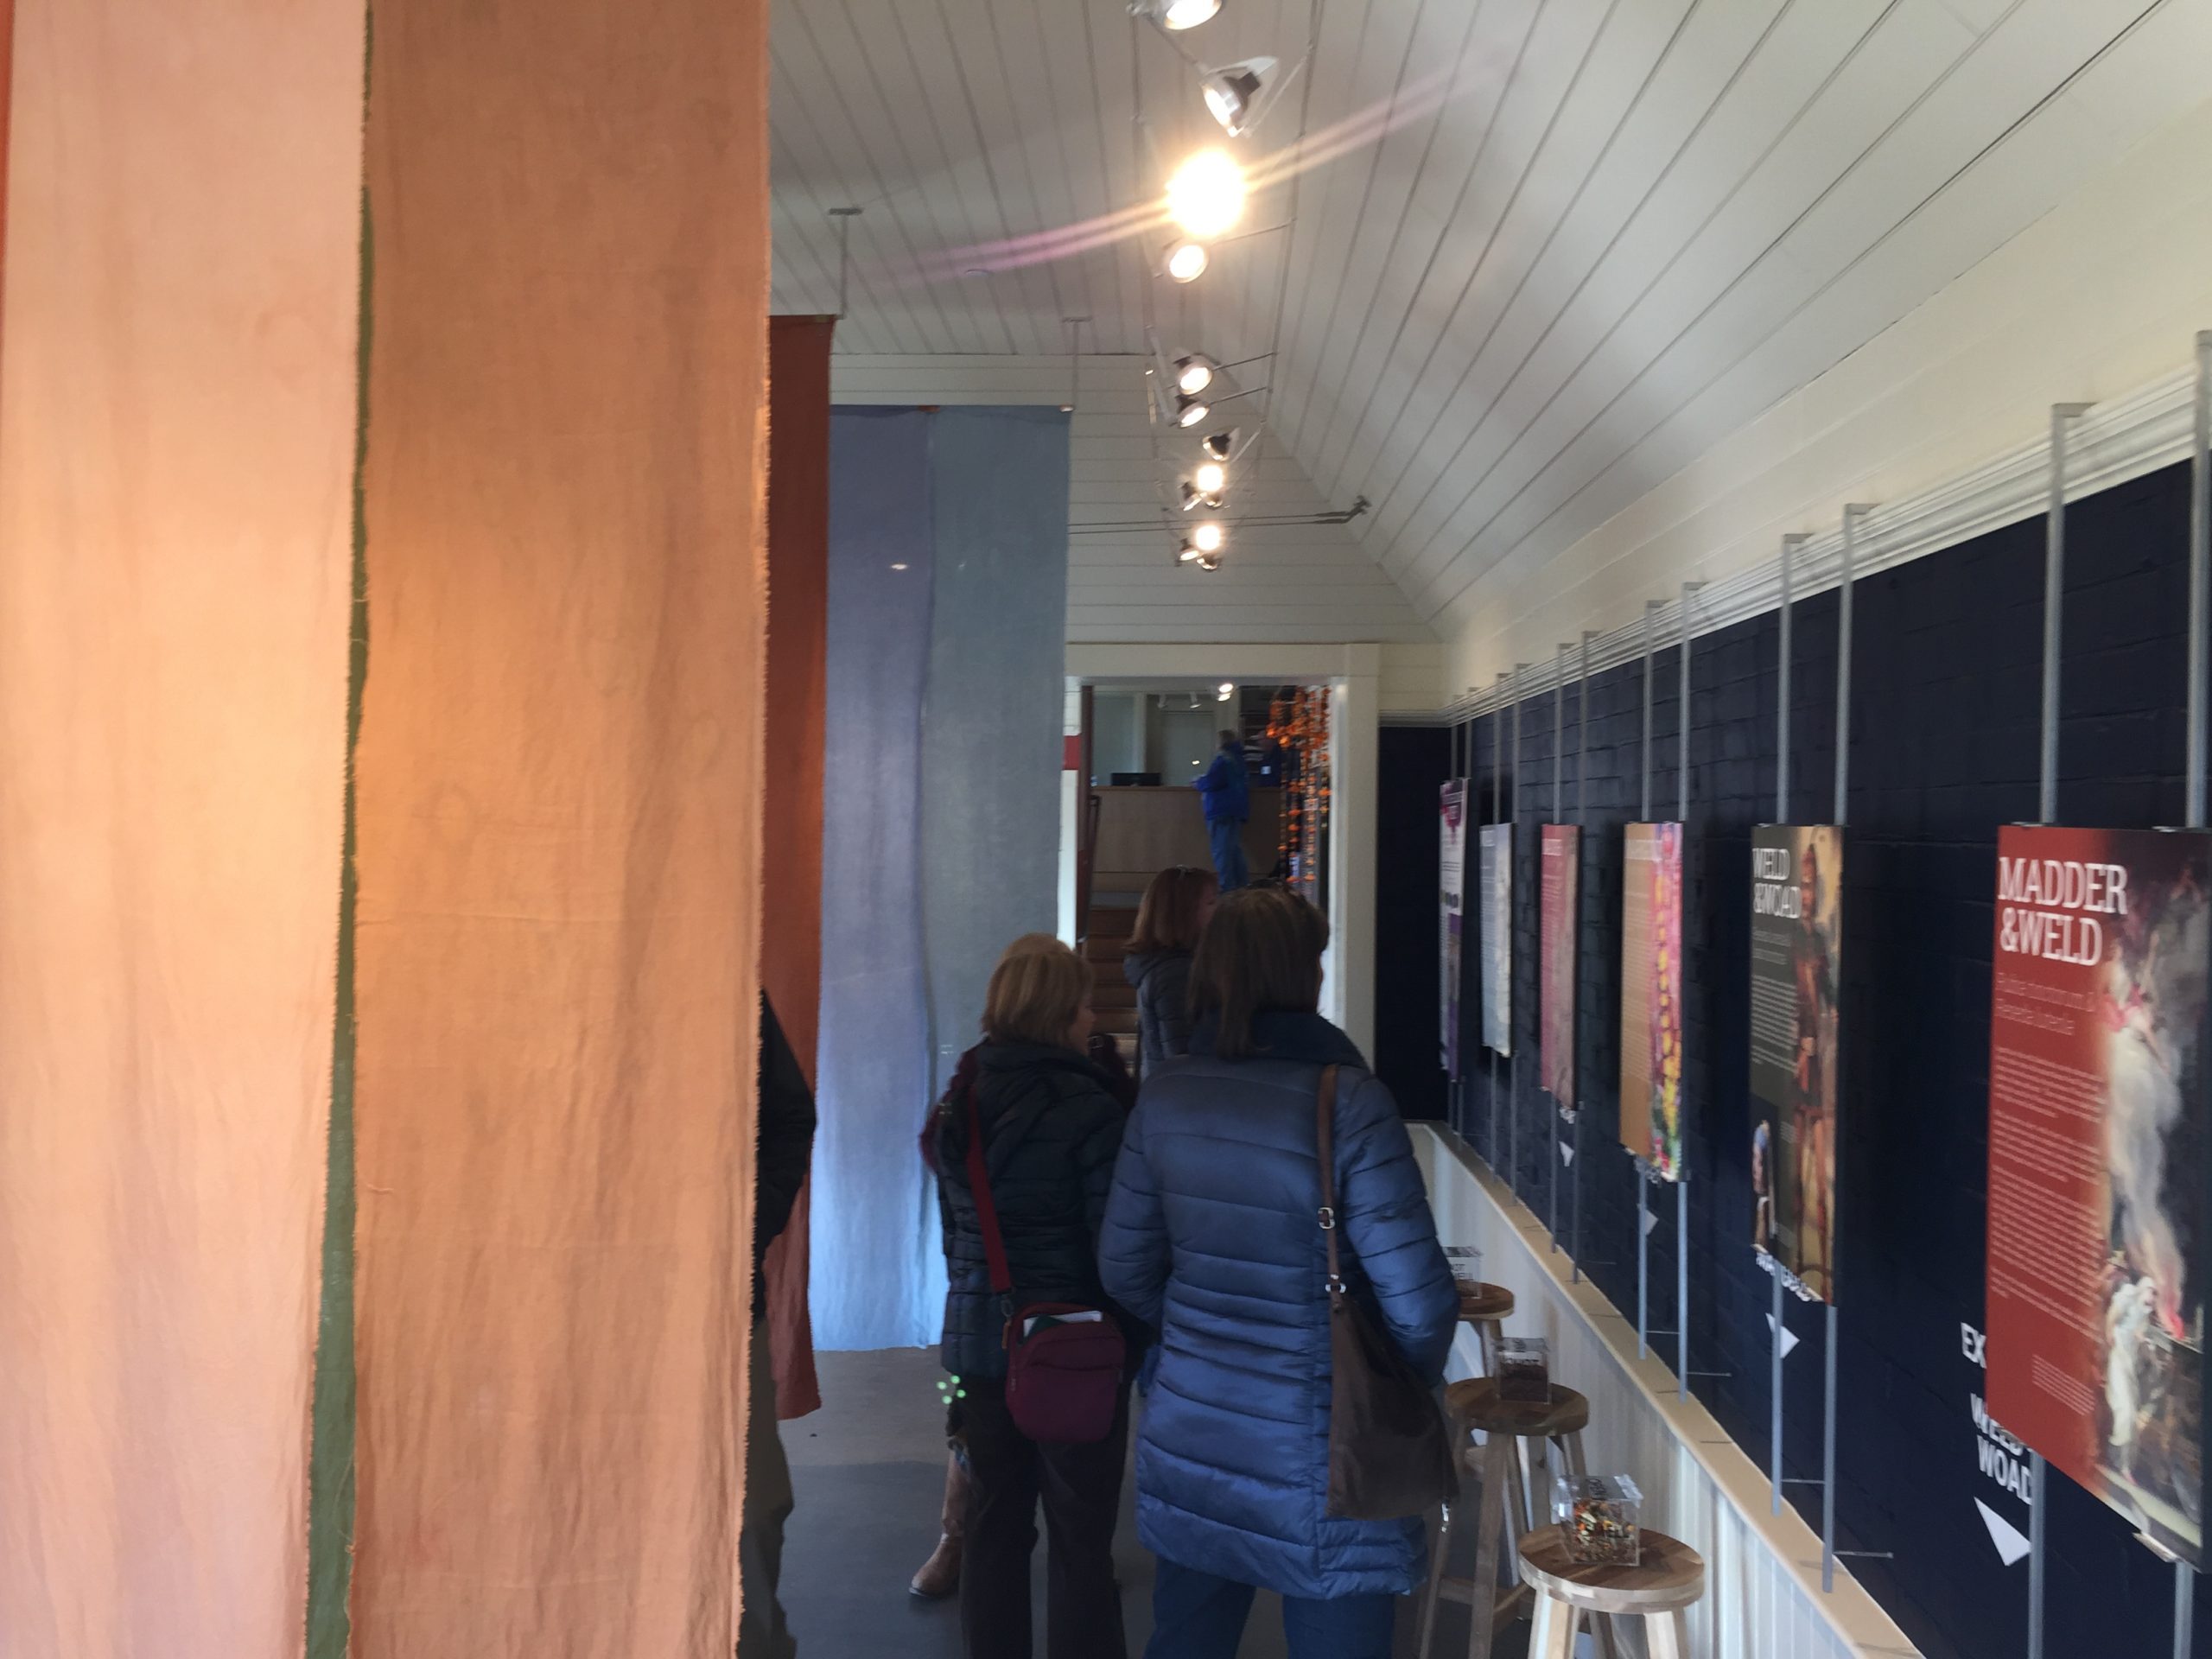
The interpretive panels are beautiful and informative, explaining further about the historical uses of each plant:

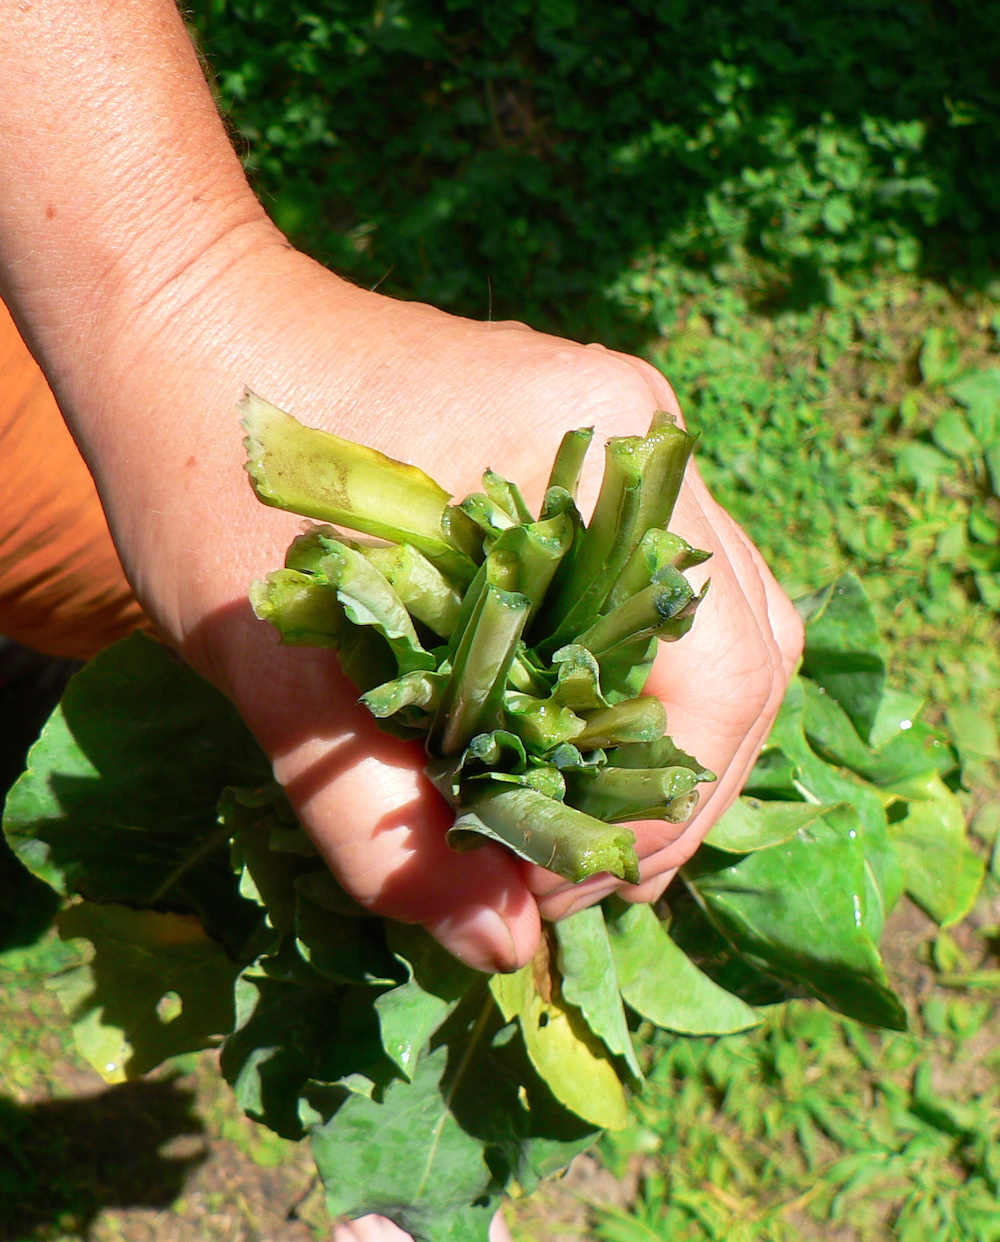
The interactive components are engaging and fun. My favorite are the clear boxes full of dried dye plant materials that you can open up and smell. Stinky weld, sea-weedy woad, fruity madder, mmm! You can see the boxes on the stools in the photo above.

There’s also an interactive screen with a slideshow about the steps in dyeing with woad. It’s a thrill to see that people take the time to look through it!

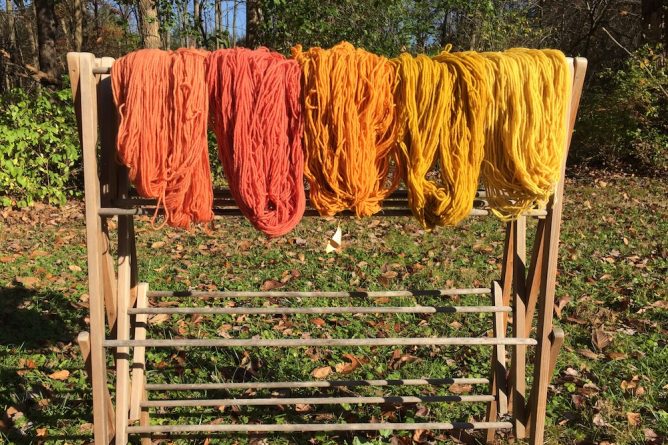
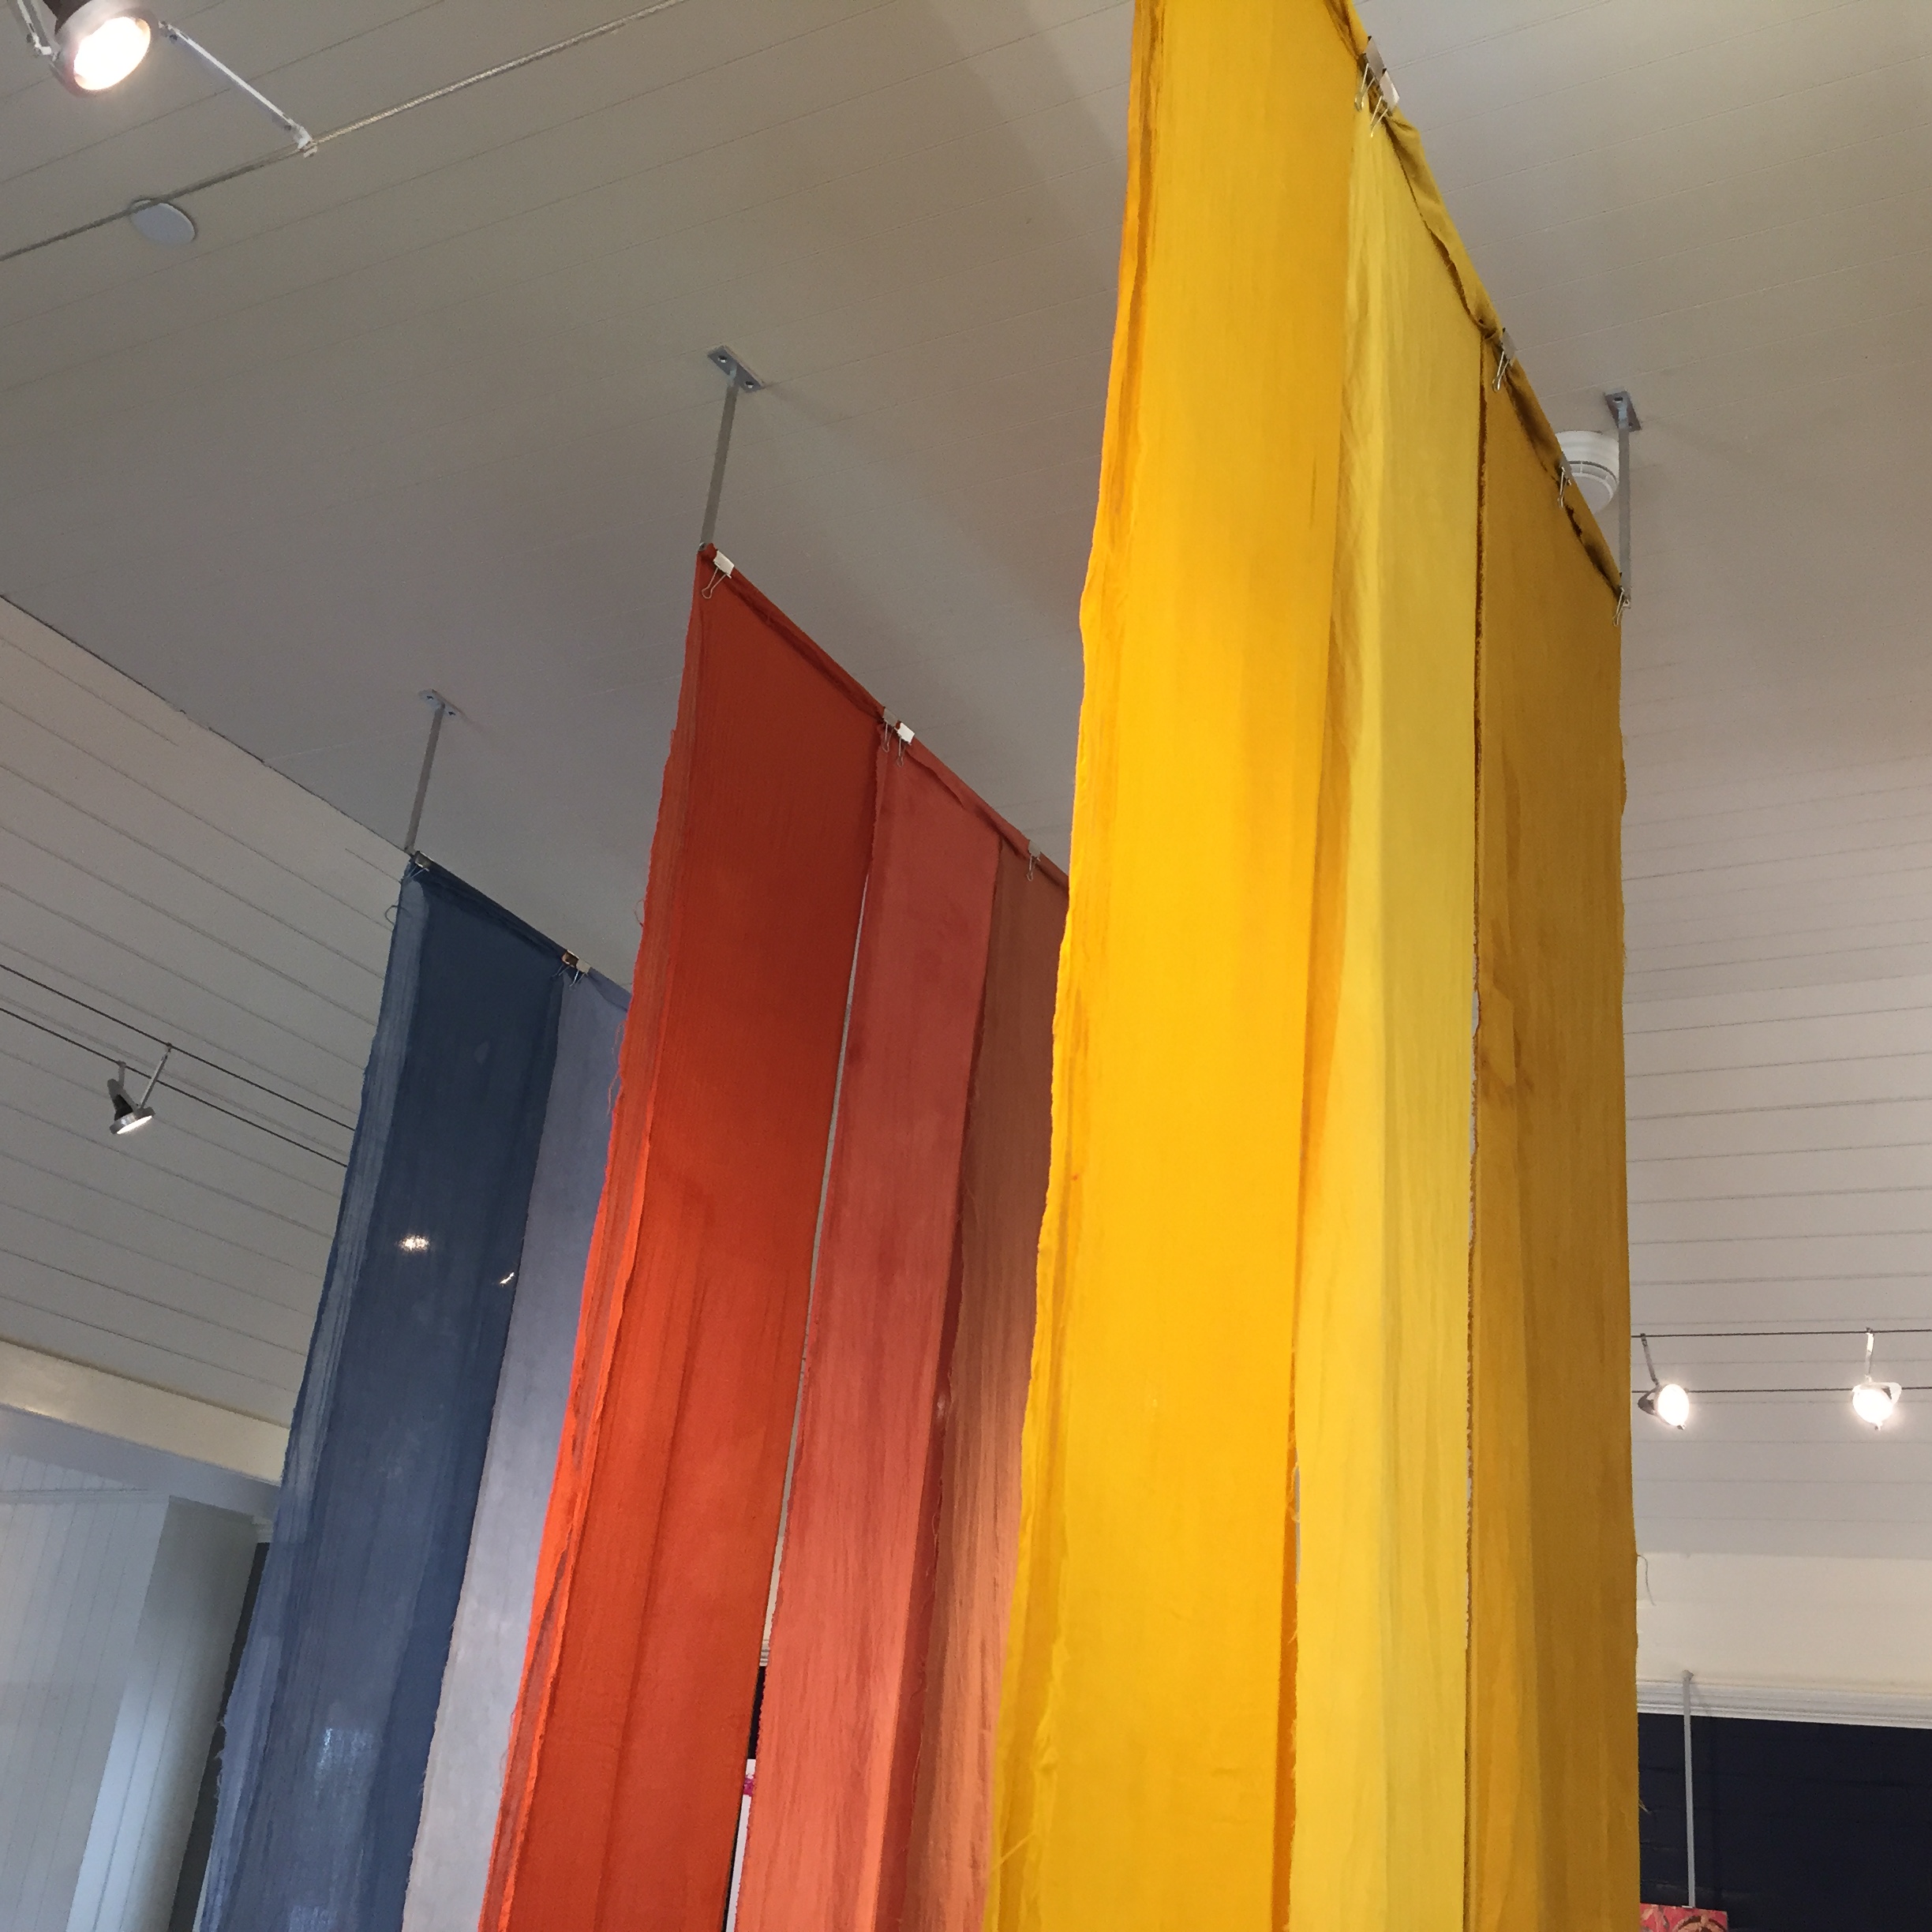
On the other end of the gallery are the orange and green panels. Honestly, they are more pink and peach than orange, but I still think they look lovely. The “orange” shades are from weld and madder together in the same dyebath. The greens are from woad overdyed with weld.

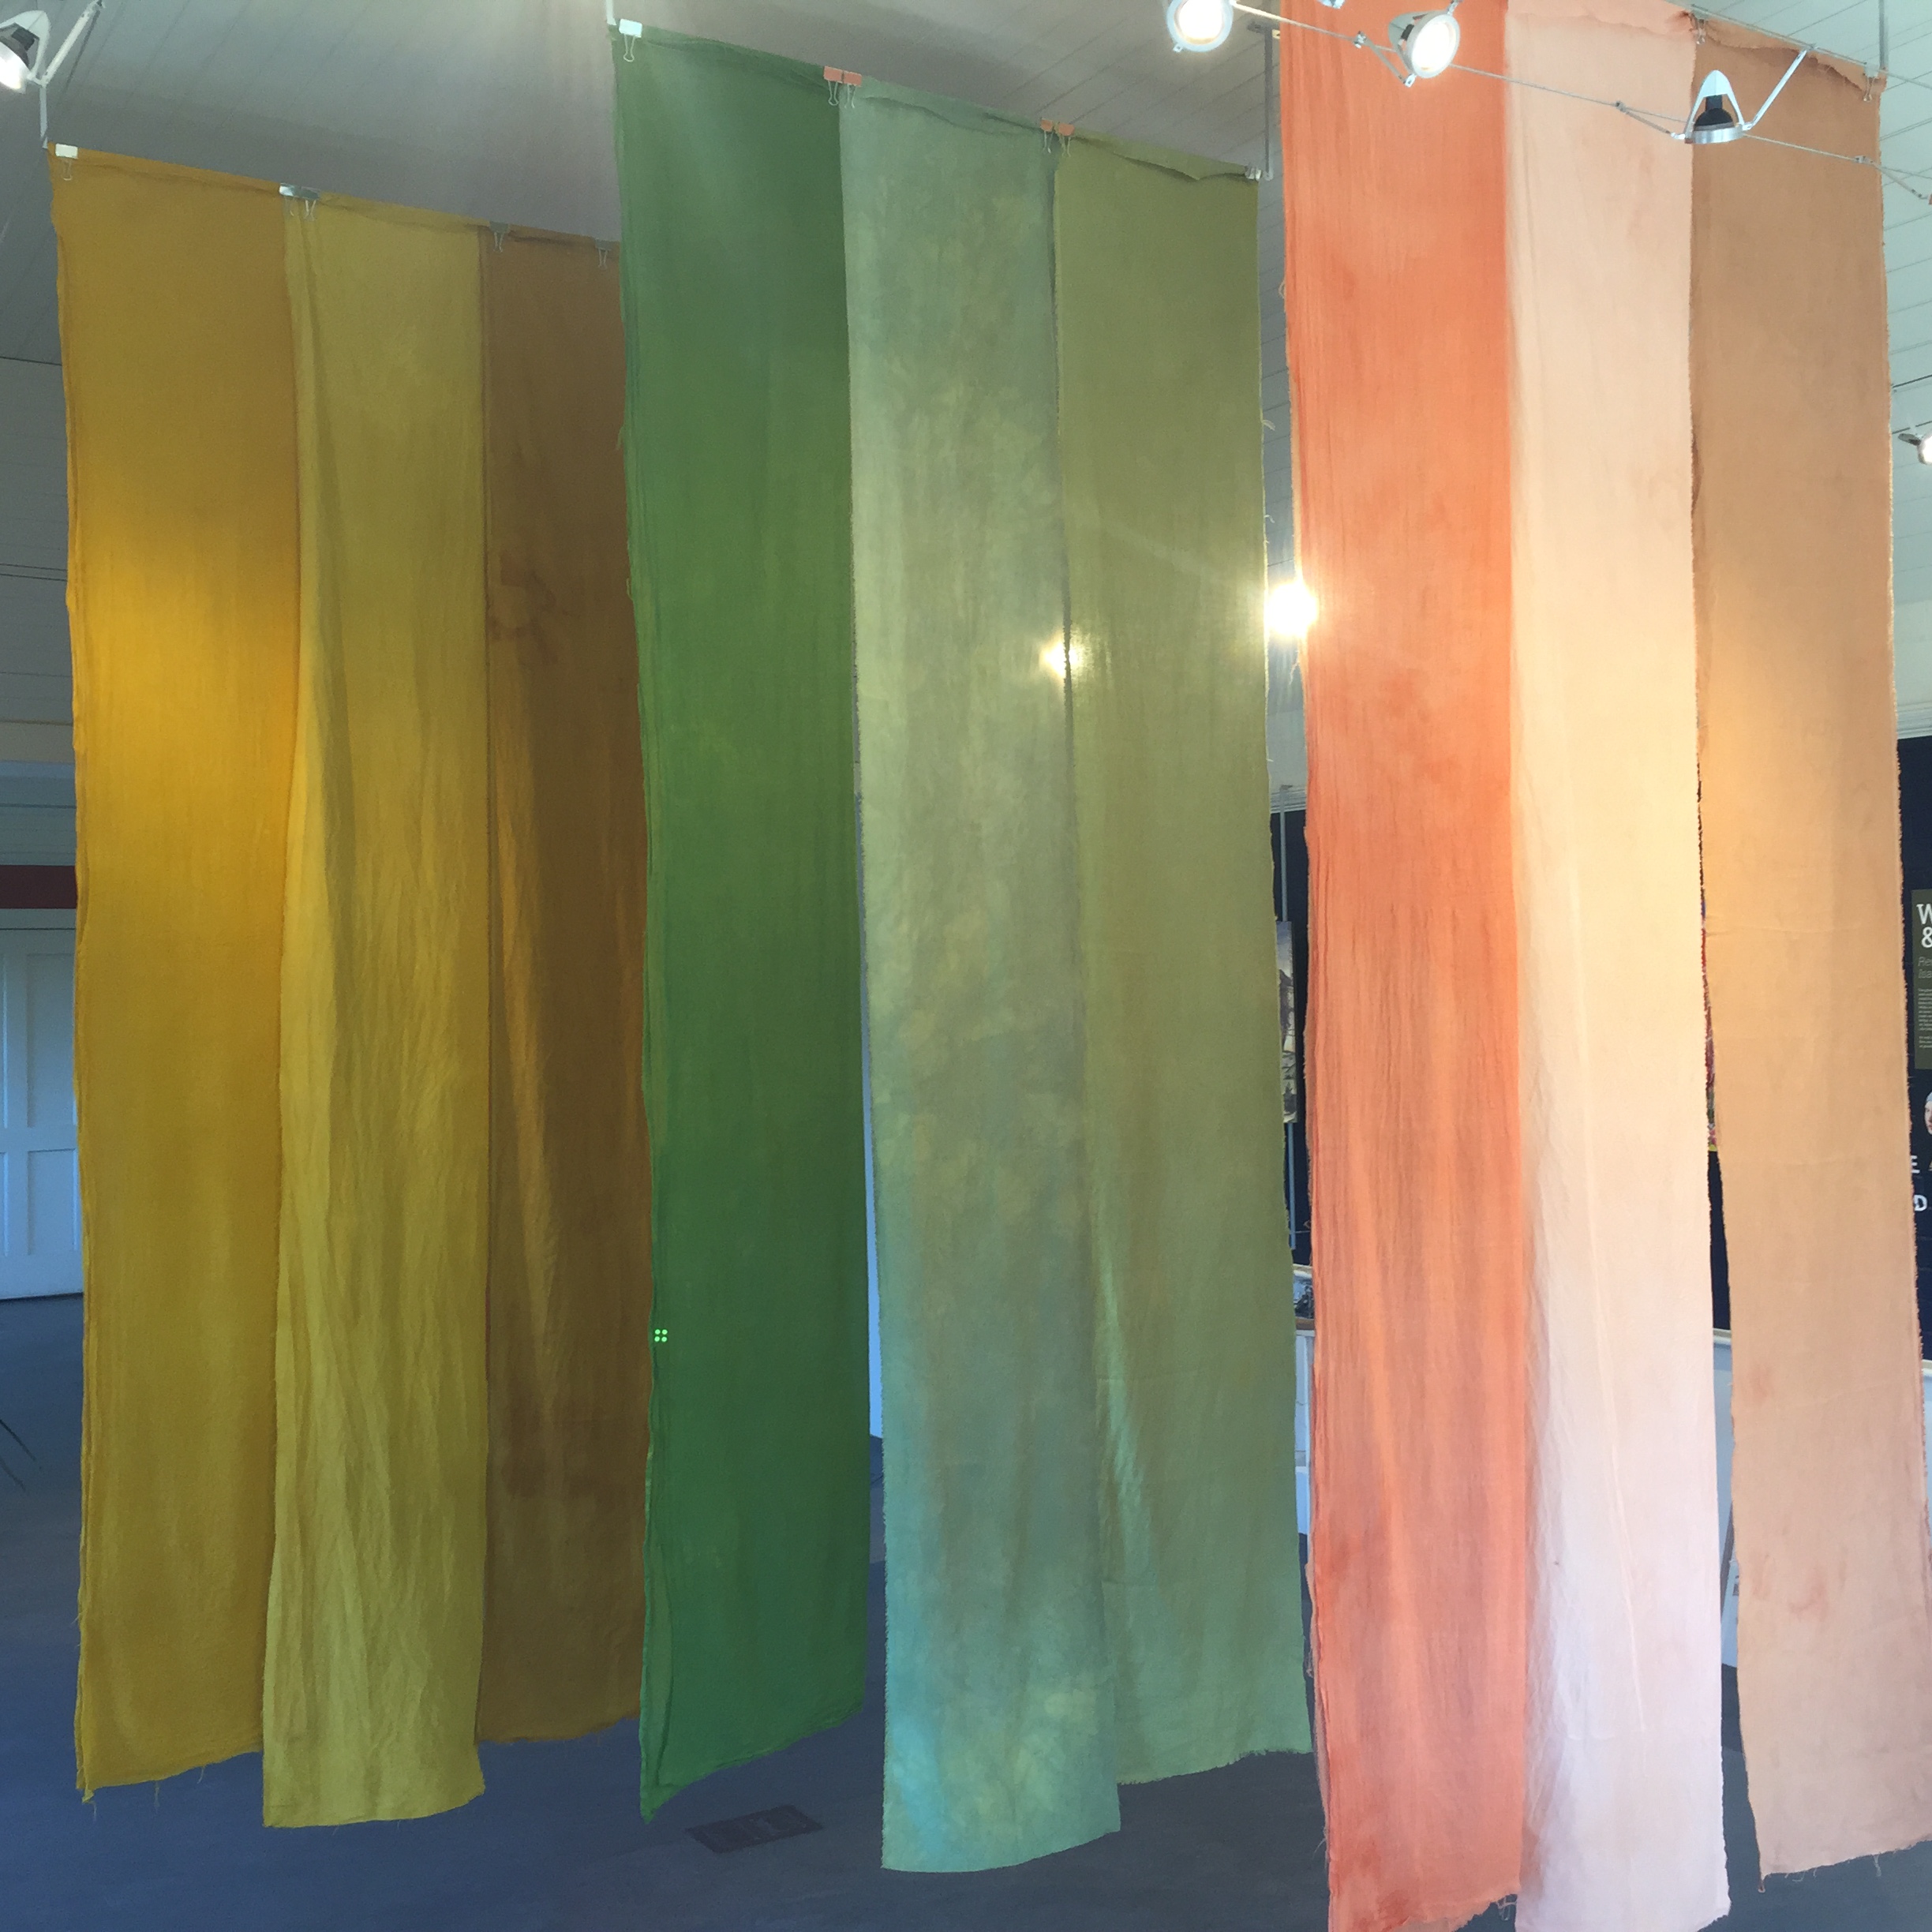
Again, depending on the angle and the lighting, the colors look different.

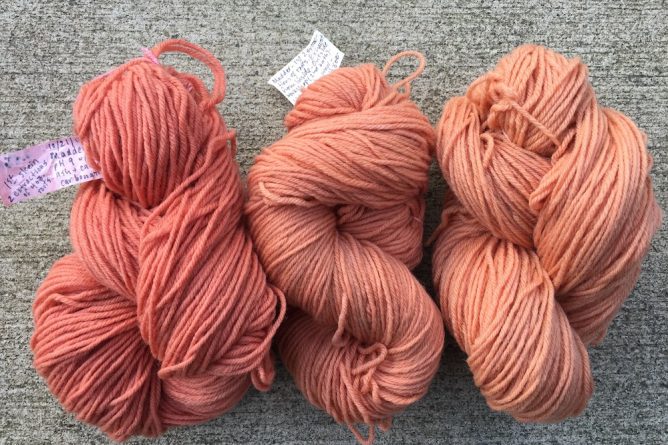
Not only does each fiber take up the dye differently, they each have a different texture, too. It’s just so rich and luscious!

March in the Dye Plant Garden

On March 15th I did a little spring cleaning in my school’s dye plant garden at Bramble Hill Farm. Here is the “before” picture:

That morning I pulled up the dead marigolds (bed furthest to right) and orange cosmos (bed furthest to the left).

The woad was up, but something had been nibbling it. I suspect rabbits, but I can’t be sure.

I checked back on things on March 27th. I noticed that one of the woad beds was faring a little better than the other (longer leaves) but was still suffering from some chomping:

Here was the bedraggled stand of amsonia on March 27th:

I didn’t get back over there until March 30th. I cut down the amsonia, which I grow because it is a bast fiber plant. Some years I cut it down earlier in the fall or winter, but this fall I obviously didn’t get around to it. Yay, the Amsonia fit in the back of the car. Barely!

I also cut down the dead bronze fennel, which was not worth saving at that point. Once I cut away the dead stalks and cleared away the fallen leaves, I was excited to see that there was already new growth!

If you bought some of the bronze fennel plants at my plant sale last summer at Sheep and Shawl, check to see if they’re up!

One of the things I love about gardening and dyeing with plants is the way that it requires me to look closely and be attentive. Close up, you can clearly see the new growth. It is eye-poppingly bright and practically shouting its presence. You can also see the architectural ruins of the old stalks, some darker blotches on the fresh fronds, which I think must be frost damage, and so many other intriguing details. At every stage of its growth, the fronds of the bronze fennel are just so soft and feathery.

However, from the view point five feet off the ground, there’s nothing that would catch the eye or demand that you stoop to look more closely:

On that last remaining stalk in the bronze fennel bed, I found an egg case. I think it’s another praying mantis egg case (ootheca!) so I didn’t cut it. Here’s the close up:

Welcome, spring!

Farm Aid Exhaust Baths

I have finally exhausted all the dye baths from Farm Aid! Here are some photos of the process, plus some of the ratios and measurements for each plant material. I didn’t keep close track of the times and temperatures during the demo itself because it was so busy. Each bath with the plant material heated for at least an hour, and some of them heated for longer.

As I mentioned in the first post, I used madder root, weld, orange cosmos, and marigolds. All the yarns at the demo were 4 ounces of 4-ply wool. They were pre-mordanted with aluminum sulfate at 1 tablespoon per 4 oz. fiber, and cream of tartar at 1 teaspoon per 4 oz. fiber. As I got further along with the exhaust process, I switched to alpaca yarns, pre-mordanted at the same ratios. All the exhaust baths were heated to about 140-160 degrees, kept at that temperature for an hour, then cooled overnight. Continue reading “Farm Aid Exhaust Baths”

Massachusetts Sheep and Woolcraft 2018

On Memorial Day Weekend I did a dyeing demonstration at Massachusetts Sheep and Woolcraft Fair in Cummington, MA. I’ve done demos there before, but this year was special. I was dyeing hand-spun yarns from a variety of sheep breeds, spun by Lisa Bertoldi of Weft Handwoven Linens, and supported by a grant from the Northeast Handspinners Association. (12/31/2023 Edited: Lisa’s website is no longer active, but you can read her bio on the Working Weavers Studio Trail website. Here’s a link to her old site, including some nice images of her dishtowels.)

Here was the table with examples of my own naturally dyed handspun yarns, some of my favorite books, fliers for the Northeast Handspinners Association, and a 6-pack of marigolds:

Continue reading “Massachusetts Sheep and Woolcraft 2018”

Inside-Outside Part Two

In this post I will describe more details about the dyebaths we made at the Inside-Outside Conference in Keene on October 21st. We ran four dyebaths with madder root, marigolds, weld, and orange cosmos.  As usual when I am running or leading an event, I didn’t get any photos. Hopefully the notes provided here will be useful even if they are lacking in visual information.

First of all, the fiber we were dyeing was woolen yarn. We dyed four skeins, each of which was 4 oz. I had pre-mordanted the skeins many weeks earlier with aluminum sulfate at a rate of 2 Tbsp. per 8 oz. (2 skeins could fit in a pot). The skeins had dried in the meanwhile, and had been soaked in water on the day of the workshop to “wet them out”, i.e. make sure they were thoroughly wet before dyeing. Continue reading “Inside-Outside Part Two”

Inside-Outside

On October 21st, 2017 I presented a workshop on growing and using dye plants with kids at the Inside-Outside Conference in Keene, NH. The conference was a collaboration of several local organizations, including Antioch University New England, the Monadnock Region Placed-Based Education Committee, the Harris Center for Conservation Education, the Caterpillar Lab, Symonds Elementary School (where the conference was held), and the Keene School District. The theme was “Promising Practices in Nature- and Place-Based Elementary Education.” You can view the brochure by clicking this link Inside Outside 091817.

The audience was K-6 educators from a variety of educational settings. I don’t mention this very often on this blog, but I actually am a teacher! I co-teach in a combined first and second grade at the Common School in Amherst, MA, where I’ve been working since 2004. Most of the time, I am in the classroom doing all the usual academic things: reading, writing, word study, math, science, social studies, arts and crafts. I do fiber and dye projects with kids when I can, and the rest of the time I squeeze it in on weekends and vacations. Continue reading “Inside-Outside”

First Woad Vat of 2014

Due to one thing and another, I am not growing a lot of woad this year. I’m a little bit sad about it, but there it is. Nonetheless, I ran my first woad vat of the summer on Friday August 8th and had some interesting results. In the morning I picked 3 and a half pounds of leaves, which I did not expect to make a very strong vat.

Some blue color appeared in the stems as I ripped up the leaves, which was a good sign.

blue woad stems

Continue reading “First Woad Vat of 2014”

Marigolds at the Massachusetts Sheep and Woolcraft Fair

I discovered something interesting about marigolds at Mass. Sheep and Wool. In a nutshell, an acidic dyebath yielded olive green whereas an alkaline dyebath yielded yellow.

Here’s how I found out. I made the marigold dyebath during the demonstration on Saturday May 24th. Here’s a photo of the marigolds in the dyebath:

marigolds in dyebath

Continue reading “Marigolds at the Massachusetts Sheep and Woolcraft Fair”