Close up of a swamp milkweed seed pod with a few seeds still inside.

Goings On in the Winter Garden

New year, new attempt to revive my beloved but neglected blog with a post about my garden in winter. These photos are from midday Saturday January 3rd, 2026.

Here are two slightly different perspectives. One view says, “Sticks are here, amidst other sticks.” Big sticks and little sticks, above and below, in many shades of copper and silver, laying this way and that.

Dormant plants in the dyeplant garden with snow on the ground.

The other view says, “Hill! Sky! Look to the distance!” There’s a broader, hilltop perspective. Both true and both lovely. I think this second view shows more of the tracks in the snow reflecting all the activity that’s going on, even in the dormancy of winter.

View of the snowy hill top garden with distant hills in the east.

As I approached the far side of the garden, an oval-shaped dark gray furry creature toodled away quickly from the garden towards the woods. I am pretty sure it was a vole judging from the velvety dark gray color, the trundling gait, and the other vole tunnel and channel tracks around the garden. I think this line of tracks was made by that hasty vole. I don’t have a before and after photo to confirm, but it’s in the very same spot. For more about identifying meadow vole tracks, see the lovely descriptions and images in this post by Mary Holland.

Small tracks in the snow left by a vole.

Quite a lot of teensy prints were clustered in the black-eyed Susan bed:

Lots of tiny prints in the snow with small black seeds from black eyed Susan scattered about.

It makes me wonder whether the seeds are a good source of food. I suspect so, though maybe there’s something else about this bed that makes it appealing. It’s on the southeast corner of the plot. Here are a couple images of dense, intensely dark black-eyed Susan seed heads:

Spherical intensely brown seed head of black eyed Susan against a white snowy background.

A singular spiky and spherical black eyed Susan seed head against a snowy white ground.

Despite my worry in the “Whodunit” post that the black-eyed Susans weren’t coming back and that possibly the bronze fennel was to blame, they have spread and thrived and have been happy as can be.

Next up, going around to the south-facing bed, are the marigolds. It was a bumper year for marigolds. In the background behind this dried flower head there are some tracks in the snow, but I didn’t look closely enough to figure out who made them:

Faint tracks in the snow behind a dried marigold seed head.

It’s interesting how the colors fade differently on different flower heads, and the different stages of growth they were in when they froze/dried out. The in-focus one in the photo below is bleached out, glossy, and luminous while the out-of-focus ones are a dull mildewy gray. And the dried head behind them still has petals clinging to it.

One very pale bleached out marigold seed head amidst other darker ones.

Then there are the star-like orange cosmos seed heads, one of my favorites, a little further toward the west on the south-facing bed:

Single orange cosmos seed head.

Next to the cosmos, in the southwest corner of the plot, are the dyers coreopsis. I grew them from seed last year, in various colors and sizes, with seeds I’d saved from a previous year, originally from Grand Prismatic Seed. I saved seed again for this summer, and there are still tons of seed heads left, as you can see:

Flopped over stalks of dyers coreopsis.

Single dyers coreopsis seed head against a snowy background.

Behind the dyers coreopsis towards the north side is the Japanese indigo bed (also grown from seed, also originally from Grand Prismatic). There’s a lot going on here, with blue-green dried leaves, red-brown stems, and some pinkish-tan dried flower clusters. So beautiful! I know that mice like Japanese indigo seeds (ask me how I know), but in this case they don’t seem to be seeking them out.

Tangle of pink and tan colored dried Japanese indigo stalks and some dried seed clusters.

In the center of the garden is the madder bed. It was a very productive year for madder seeds, both this this garden at Bramble Hill and in the second-year raised bed at Historic Deerfield. Hopefully that will be the subject of a future post.

I had a hard time convincing my phone that those hard, round, black blobs were truly the things I wanted to focus on, so the madder seeds aren’t quite as clear as I’d like. But here, hopefully, you can see the abundance, even after I collected a lot in the fall:

A mound of pale colored dried madder tops with dark-colored seeds scattered throughout.

A small cluster of three madder seeds with snow behind.

One sole intensely black madder seed that's not quite in focus.

On the the northeast corner of the garden is the perennial bronze fennel. No wonder it self-seeds everywhere!

Umbel-shaped bronze fennel seed head drooping over.

This next photo is the curled-up leaves of a woad plant. It’s like it got too hot and threw off the covers in the middle of the night! I’ve never read that woad plants generate heat, so something else is probably going on here.

Green, curled up leaves of a woad plant surrounded by white snow.

And last but not least, back on the east side of the garden, the swamp milkweed made a come-back over the past couple years. It has established itself in a couple new spots (another future blog post, hopefully).

Close up of a swamp milkweed seed pod with a few seeds still inside.


March in the Dye Plant Garden

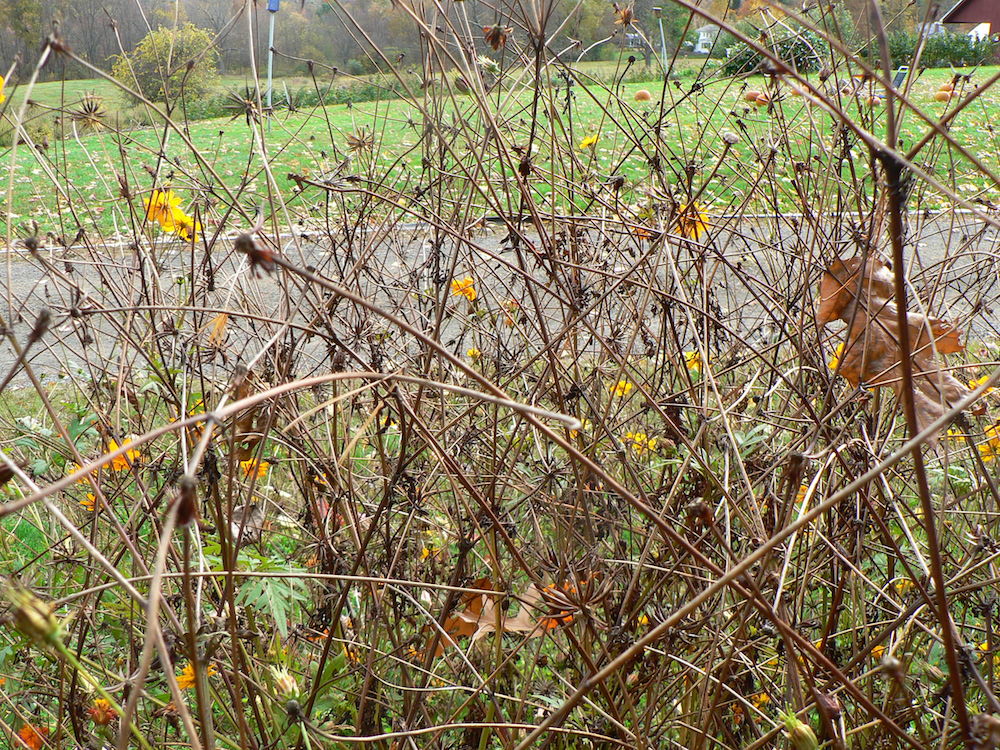
On March 15th I did a little spring cleaning in my school’s dye plant garden at Bramble Hill Farm. Here is the “before” picture:

That morning I pulled up the dead marigolds (bed furthest to right) and orange cosmos (bed furthest to the left).

The woad was up, but something had been nibbling it. I suspect rabbits, but I can’t be sure.

I checked back on things on March 27th. I noticed that one of the woad beds was faring a little better than the other (longer leaves) but was still suffering from some chomping:

Here was the bedraggled stand of amsonia on March 27th:

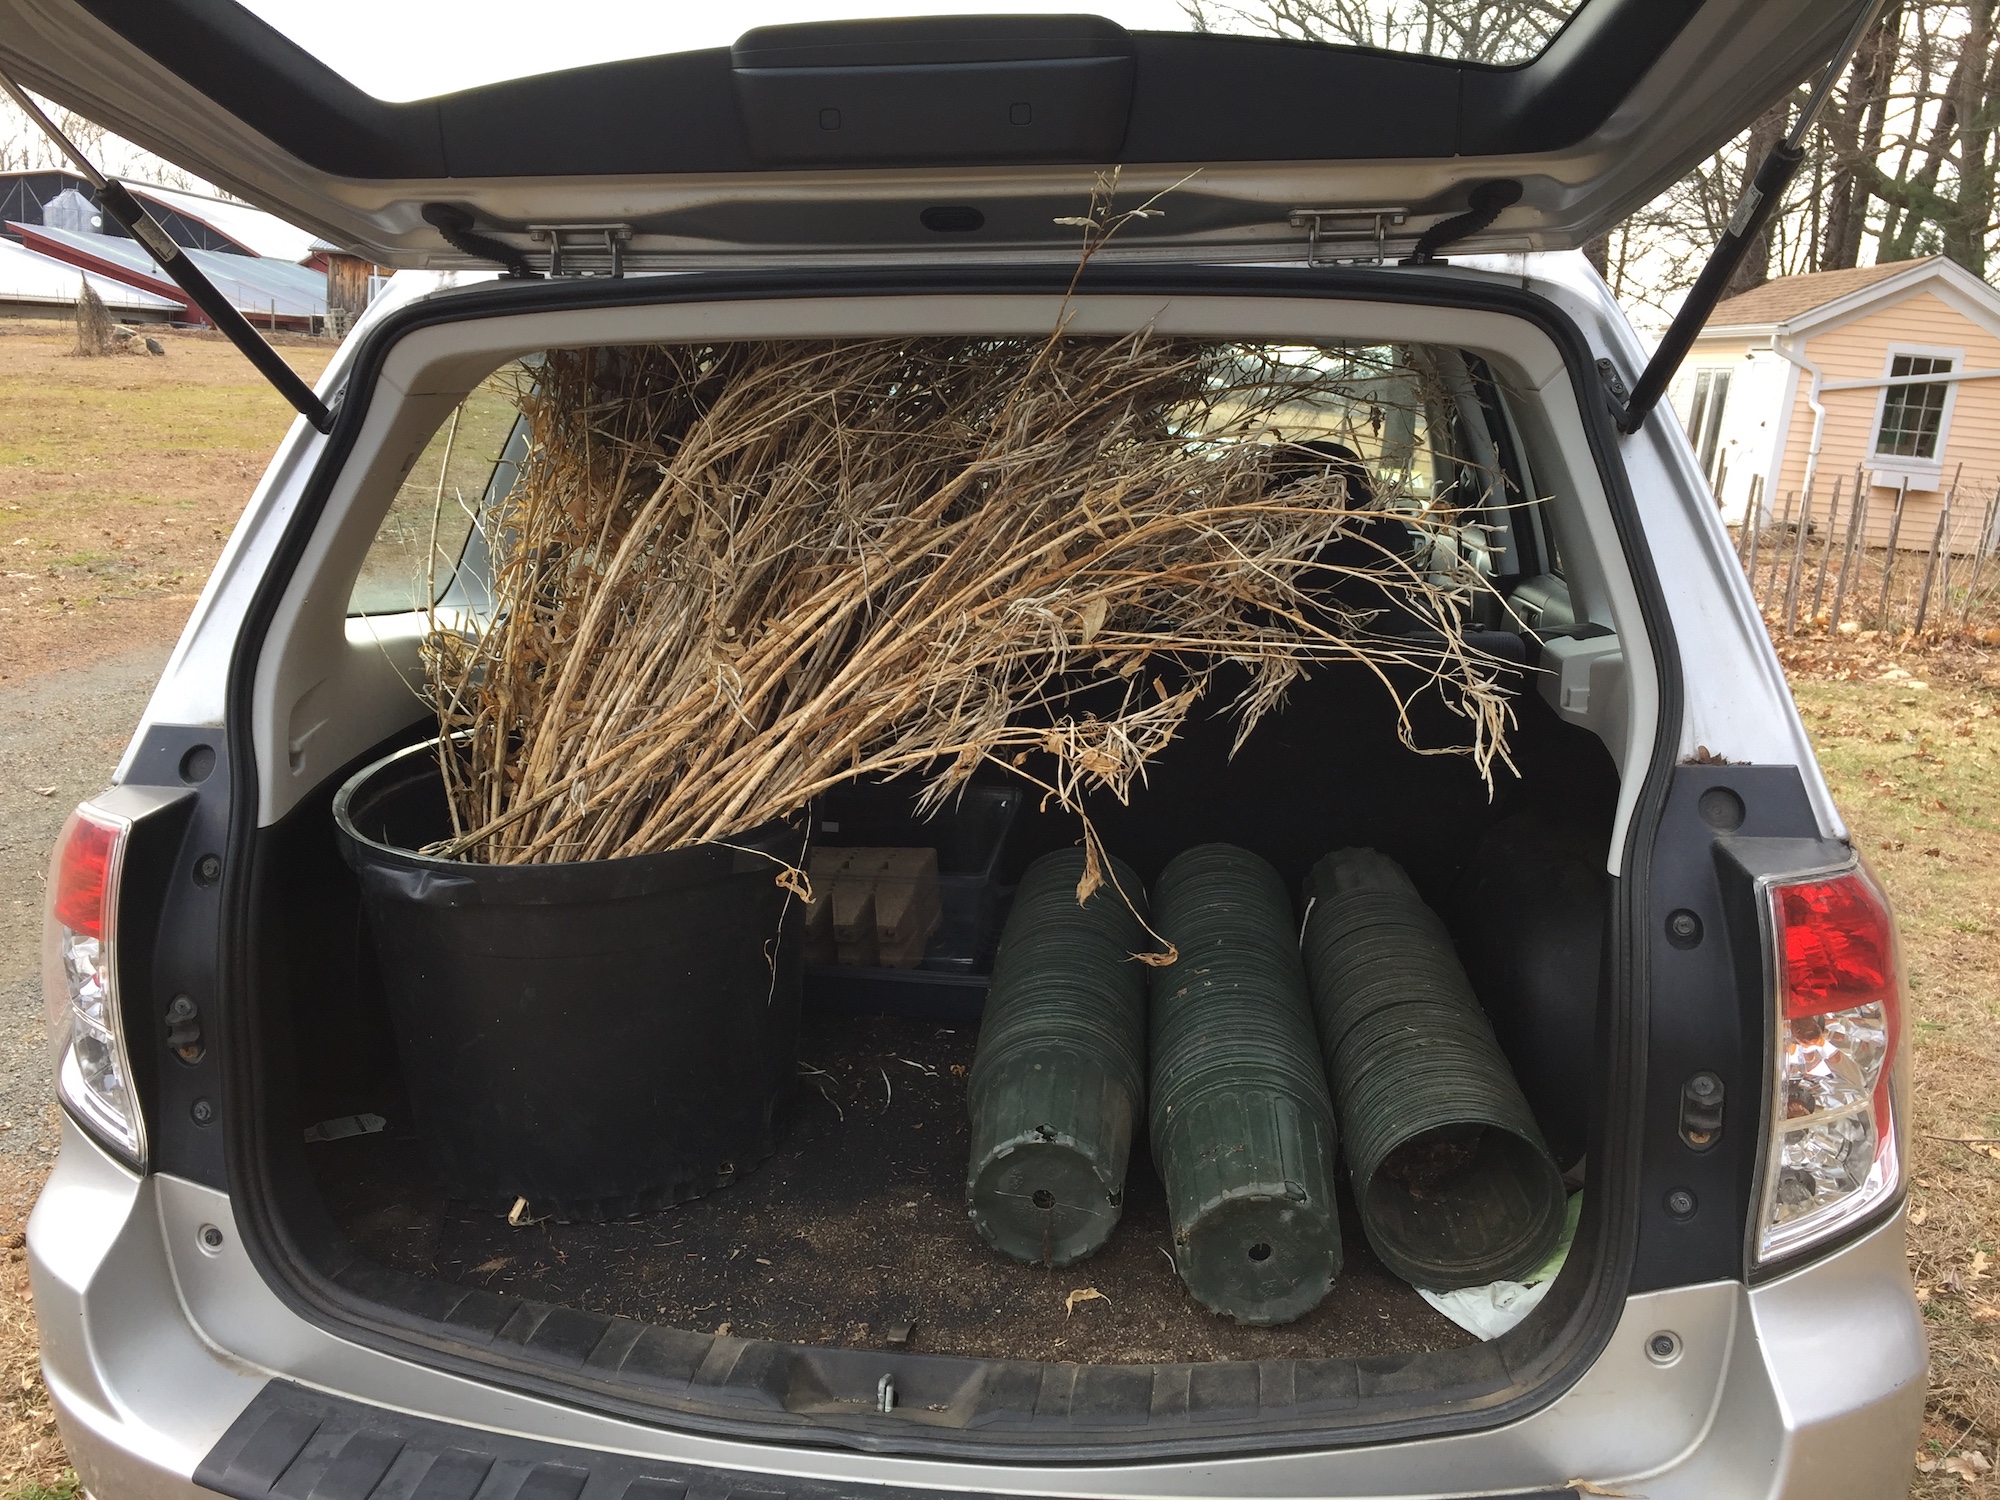
I didn’t get back over there until March 30th. I cut down the amsonia, which I grow because it is a bast fiber plant. Some years I cut it down earlier in the fall or winter, but this fall I obviously didn’t get around to it. Yay, the Amsonia fit in the back of the car. Barely!

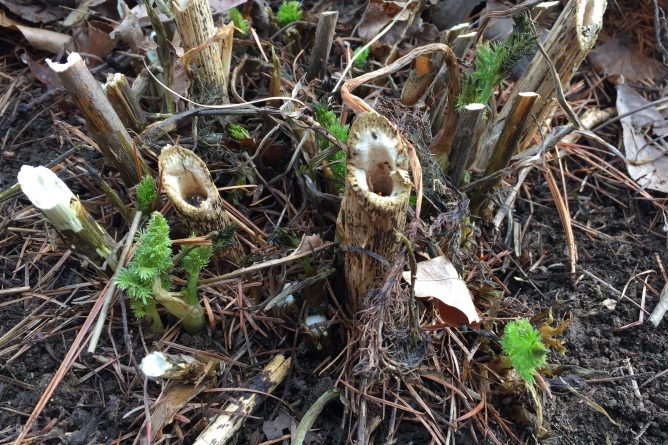
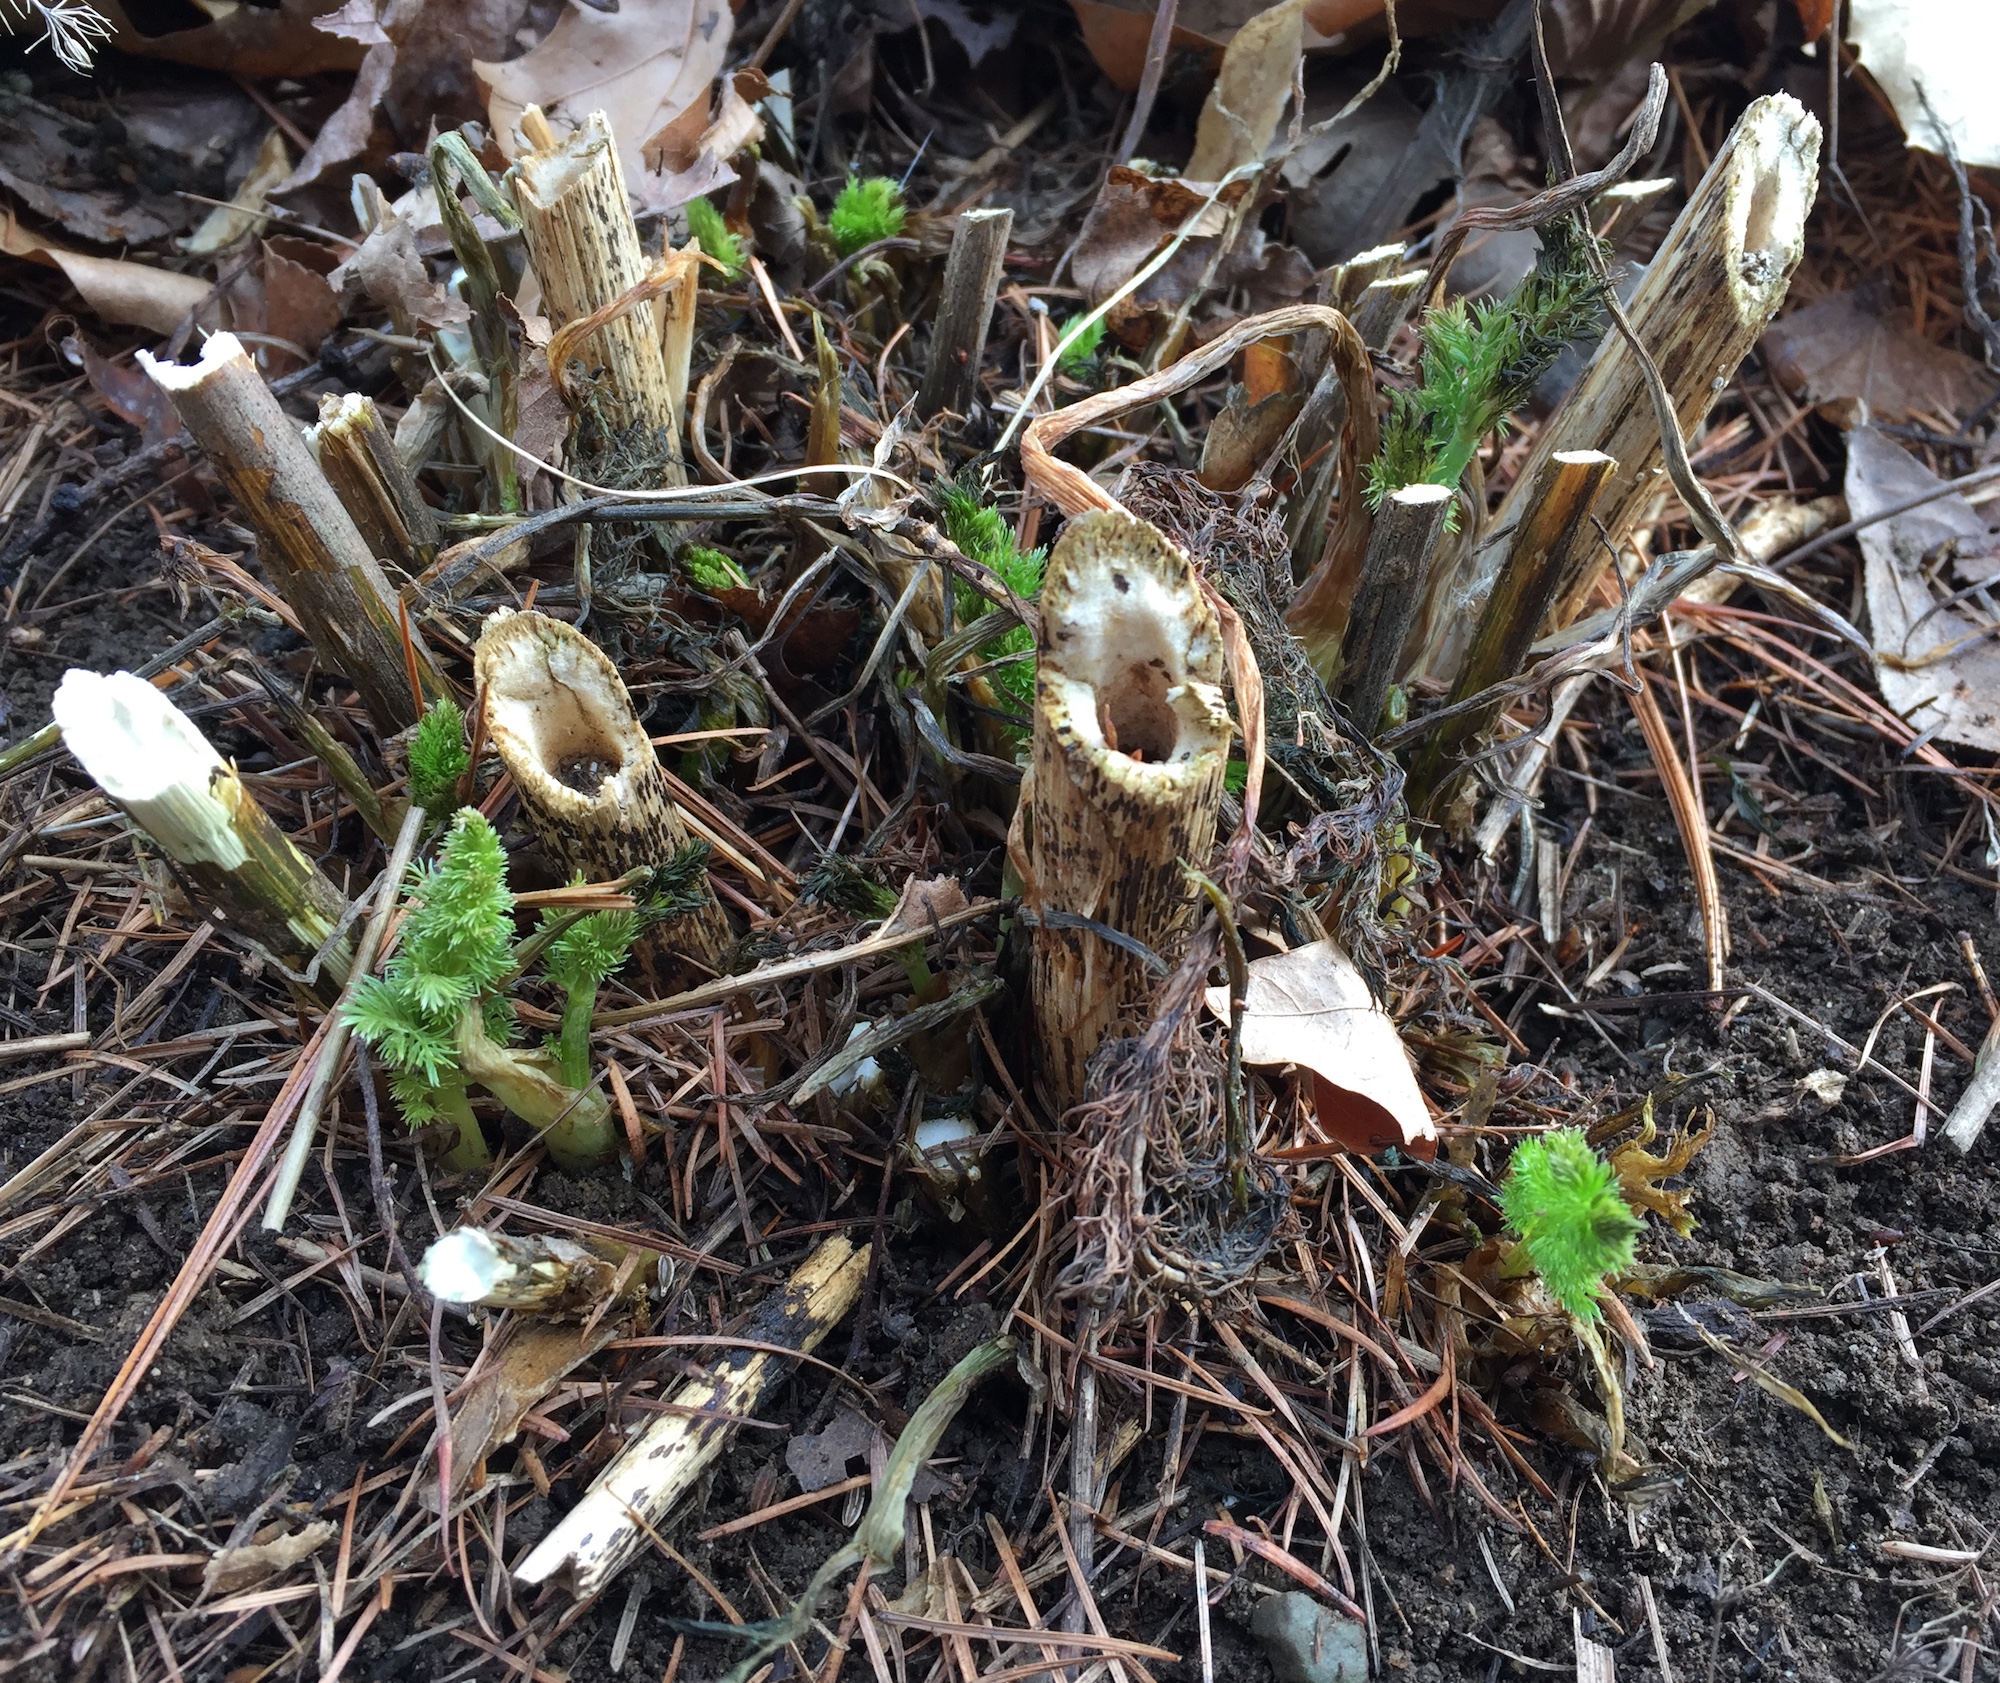
I also cut down the dead bronze fennel, which was not worth saving at that point. Once I cut away the dead stalks and cleared away the fallen leaves, I was excited to see that there was already new growth!

If you bought some of the bronze fennel plants at my plant sale last summer at Sheep and Shawl, check to see if they’re up!

One of the things I love about gardening and dyeing with plants is the way that it requires me to look closely and be attentive. Close up, you can clearly see the new growth. It is eye-poppingly bright and practically shouting its presence. You can also see the architectural ruins of the old stalks, some darker blotches on the fresh fronds, which I think must be frost damage, and so many other intriguing details. At every stage of its growth, the fronds of the bronze fennel are just so soft and feathery.

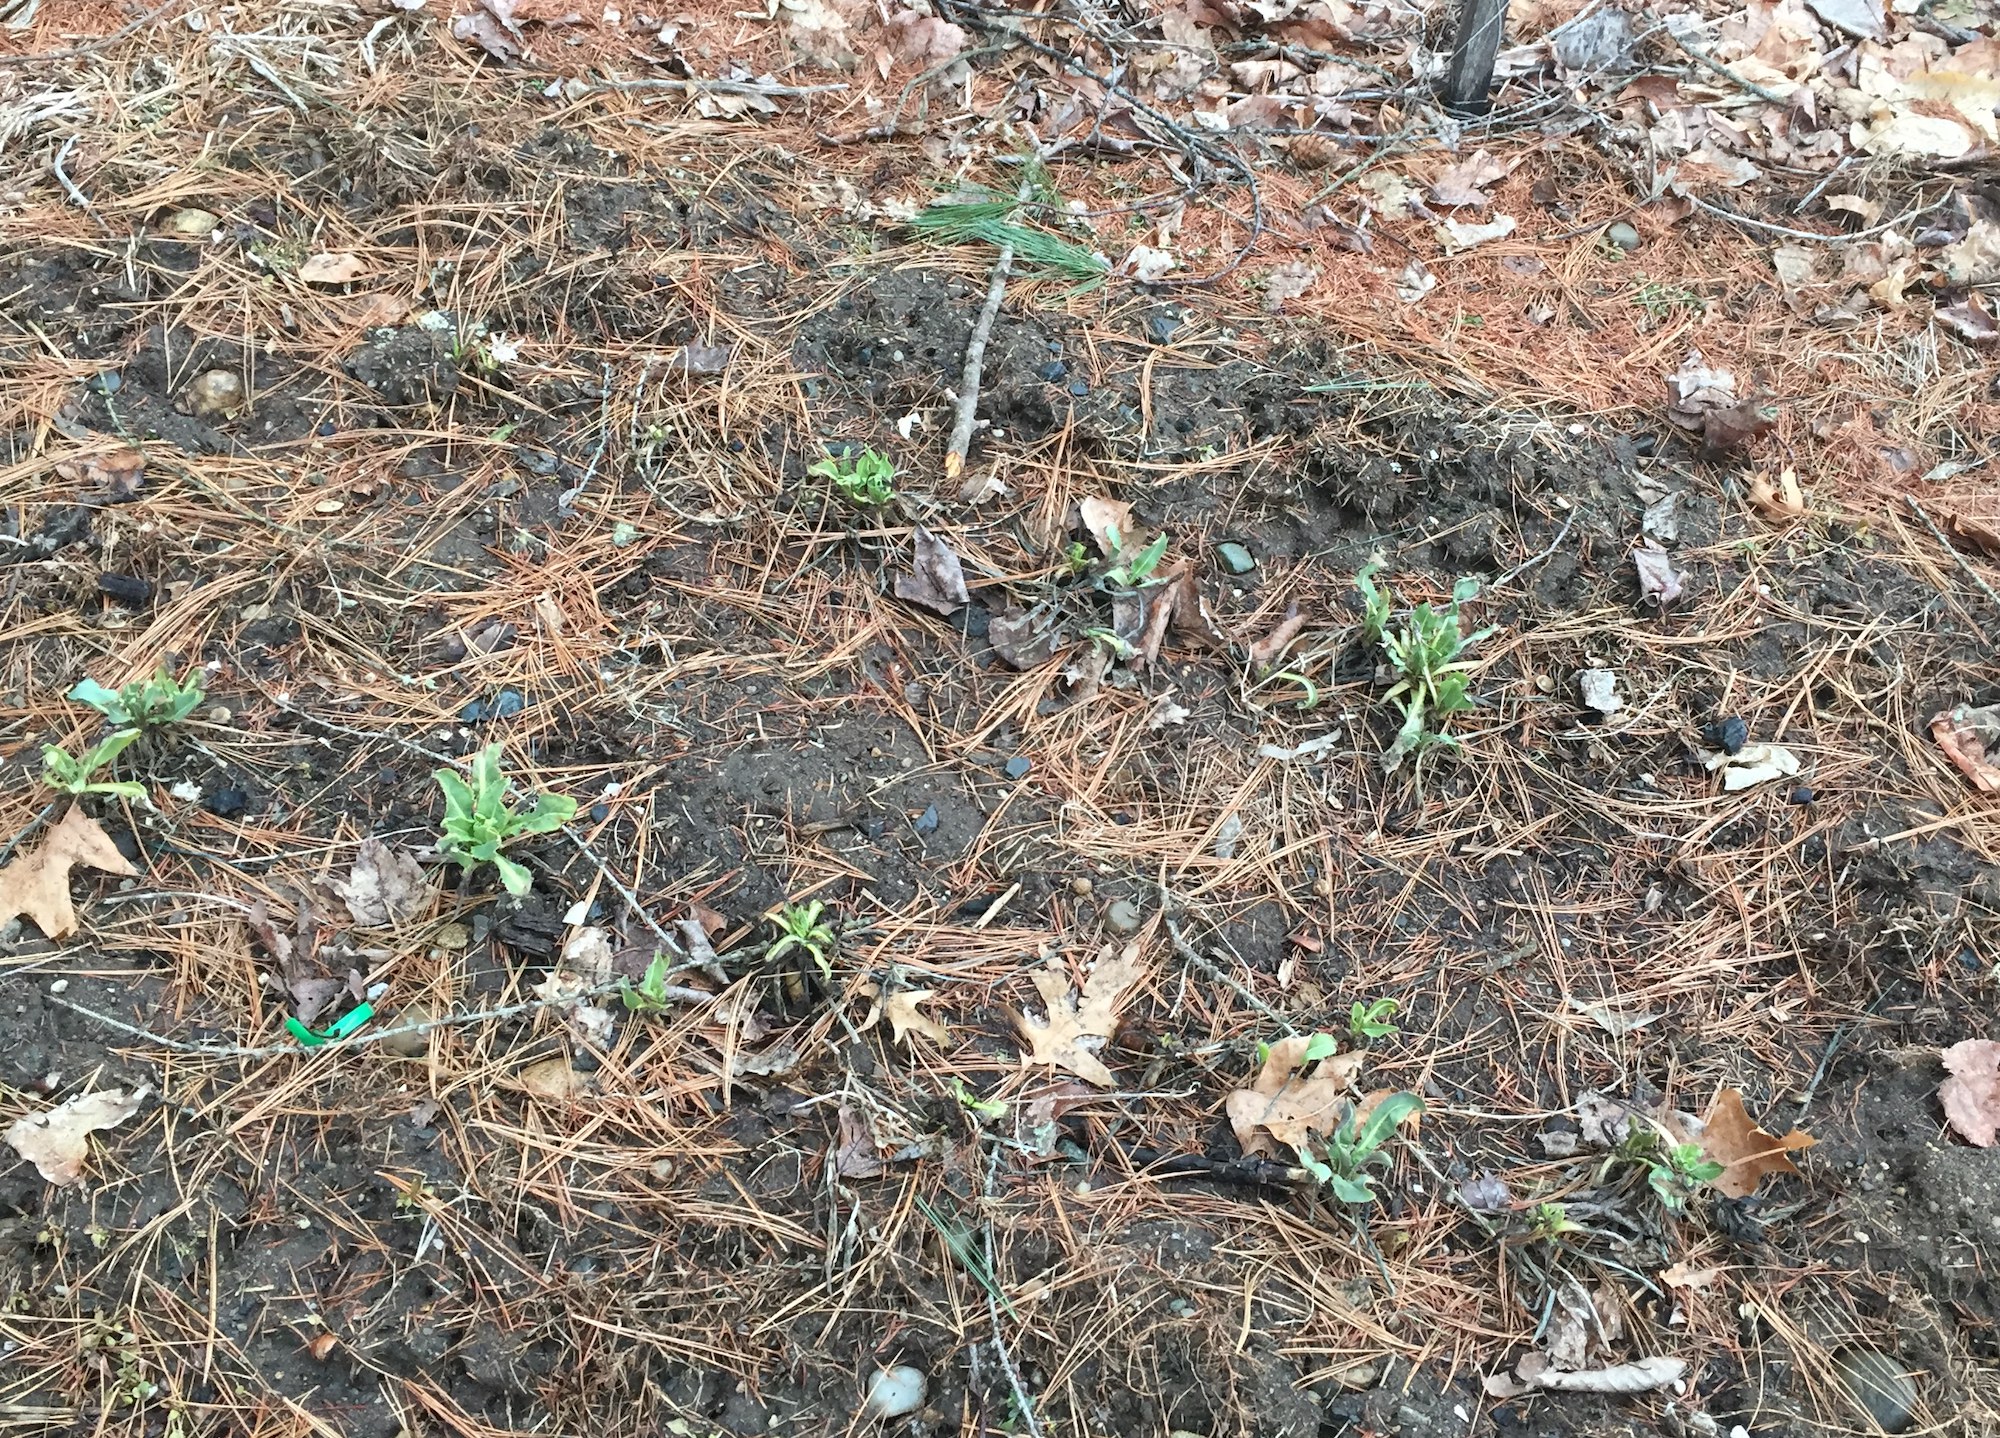
However, from the view point five feet off the ground, there’s nothing that would catch the eye or demand that you stoop to look more closely:

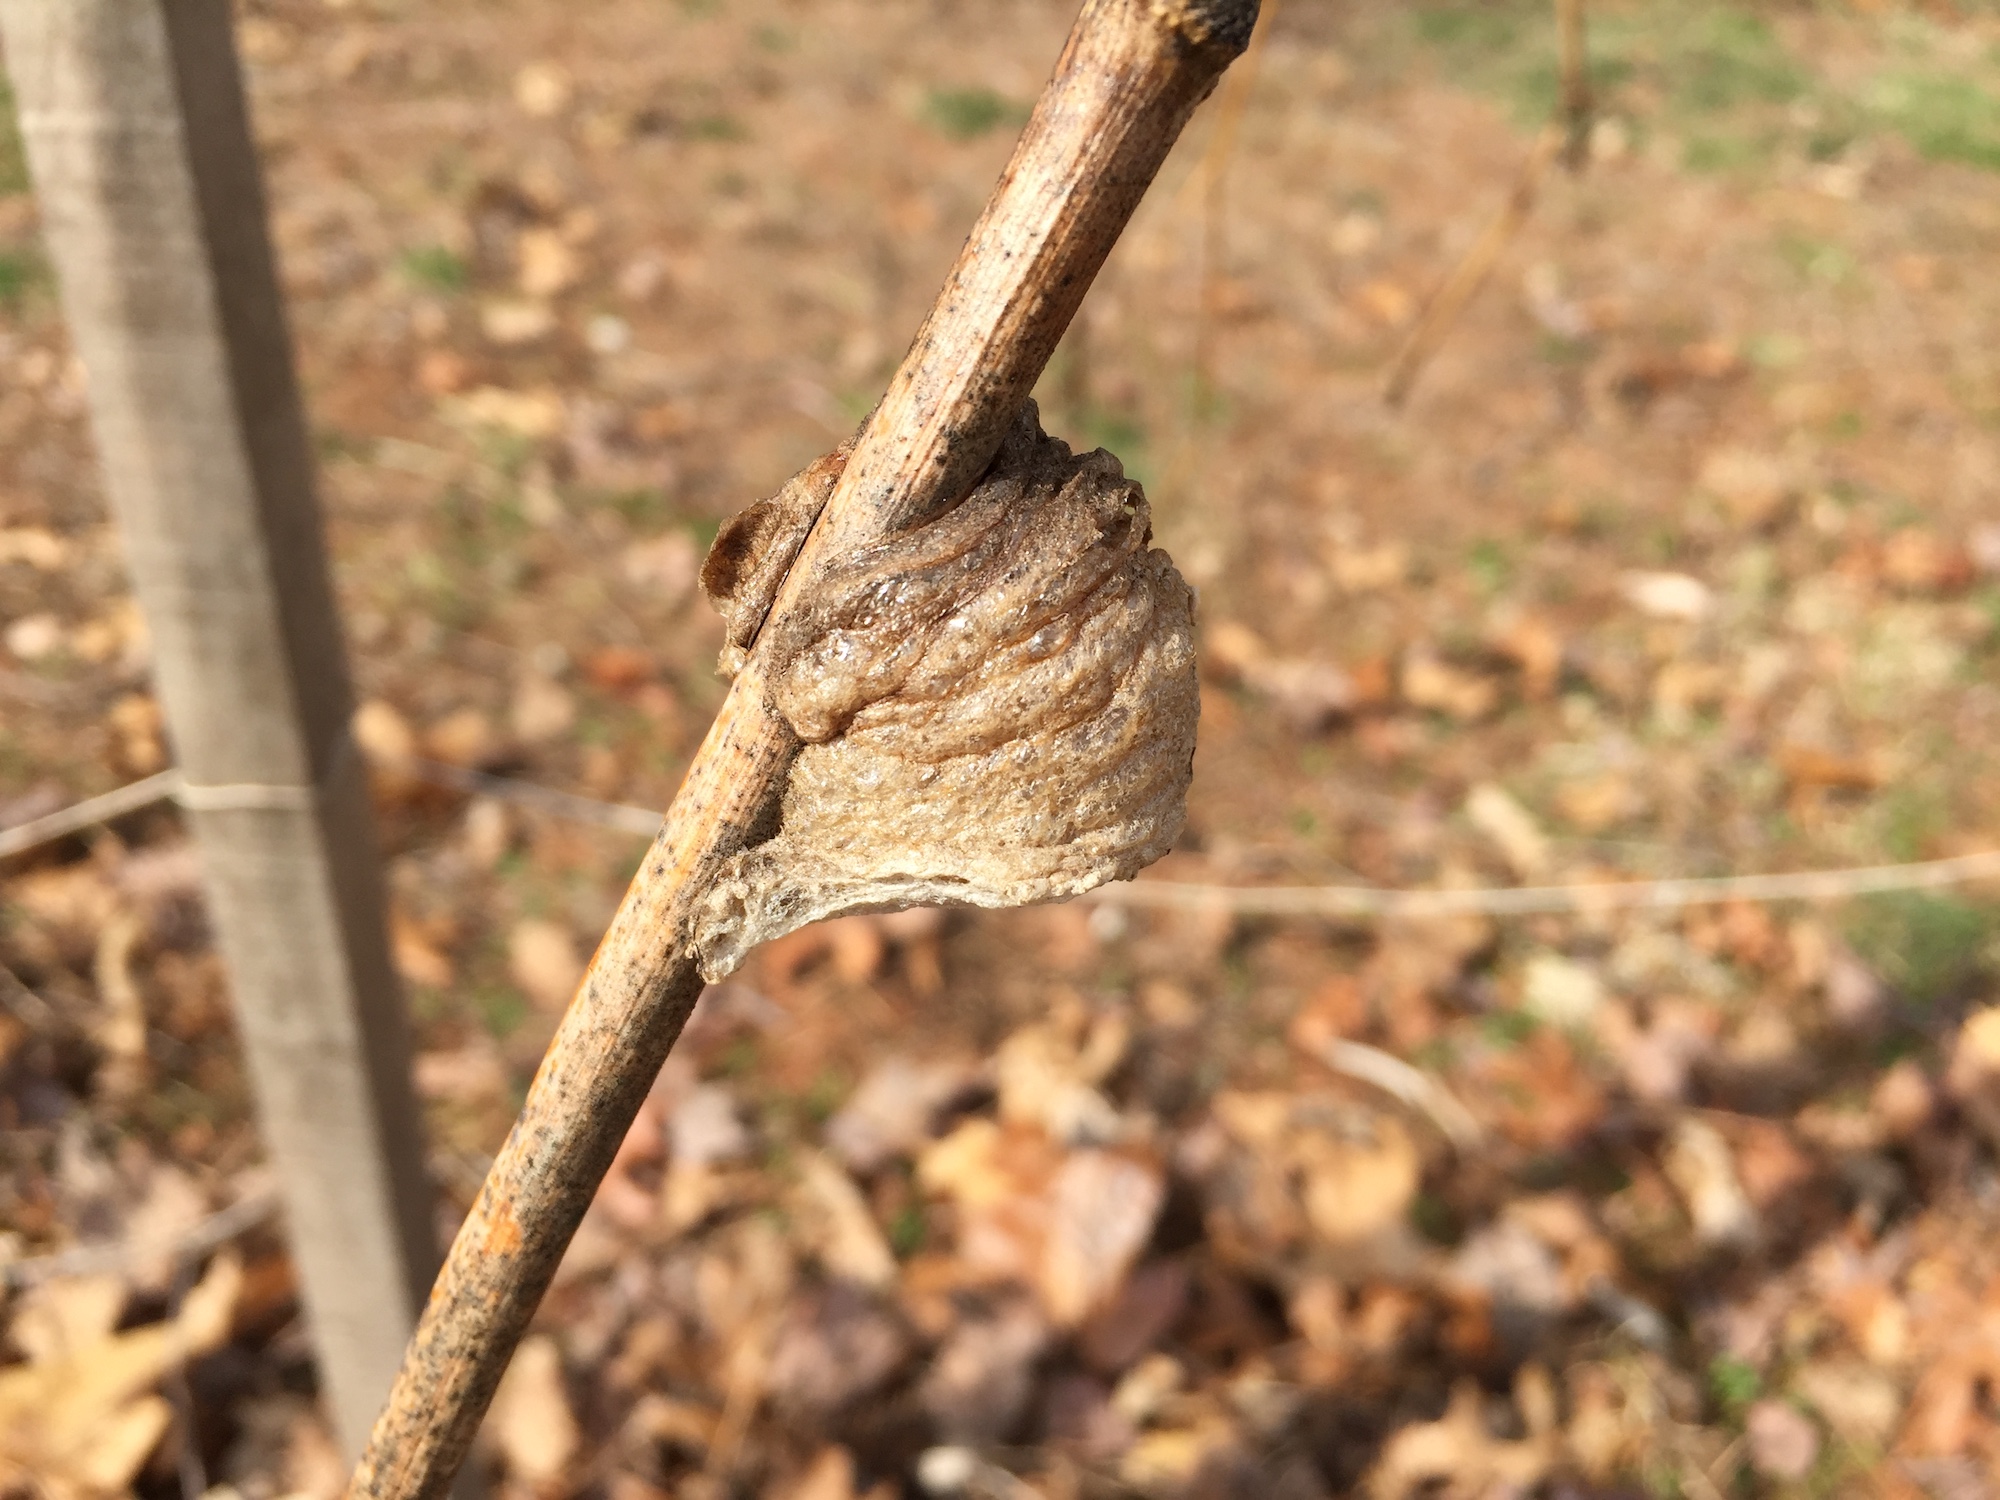
On that last remaining stalk in the bronze fennel bed, I found an egg case. I think it’s another praying mantis egg case (ootheca!) so I didn’t cut it. Here’s the close up:

Welcome, spring!

Farm Aid Exhaust Baths

I have finally exhausted all the dye baths from Farm Aid! Here are some photos of the process, plus some of the ratios and measurements for each plant material. I didn’t keep close track of the times and temperatures during the demo itself because it was so busy. Each bath with the plant material heated for at least an hour, and some of them heated for longer.

As I mentioned in the first post, I used madder root, weld, orange cosmos, and marigolds. All the yarns at the demo were 4 ounces of 4-ply wool. They were pre-mordanted with aluminum sulfate at 1 tablespoon per 4 oz. fiber, and cream of tartar at 1 teaspoon per 4 oz. fiber. As I got further along with the exhaust process, I switched to alpaca yarns, pre-mordanted at the same ratios. All the exhaust baths were heated to about 140-160 degrees, kept at that temperature for an hour, then cooled overnight. Continue reading “Farm Aid Exhaust Baths”

Inside-Outside Part Two

In this post I will describe more details about the dyebaths we made at the Inside-Outside Conference in Keene on October 21st. We ran four dyebaths with madder root, marigolds, weld, and orange cosmos.  As usual when I am running or leading an event, I didn’t get any photos. Hopefully the notes provided here will be useful even if they are lacking in visual information.

First of all, the fiber we were dyeing was woolen yarn. We dyed four skeins, each of which was 4 oz. I had pre-mordanted the skeins many weeks earlier with aluminum sulfate at a rate of 2 Tbsp. per 8 oz. (2 skeins could fit in a pot). The skeins had dried in the meanwhile, and had been soaked in water on the day of the workshop to “wet them out”, i.e. make sure they were thoroughly wet before dyeing. Continue reading “Inside-Outside Part Two”

Inside-Outside

On October 21st, 2017 I presented a workshop on growing and using dye plants with kids at the Inside-Outside Conference in Keene, NH. The conference was a collaboration of several local organizations, including Antioch University New England, the Monadnock Region Placed-Based Education Committee, the Harris Center for Conservation Education, the Caterpillar Lab, Symonds Elementary School (where the conference was held), and the Keene School District. The theme was “Promising Practices in Nature- and Place-Based Elementary Education.” You can view the brochure by clicking this link Inside Outside 091817.

The audience was K-6 educators from a variety of educational settings. I don’t mention this very often on this blog, but I actually am a teacher! I co-teach in a combined first and second grade at the Common School in Amherst, MA, where I’ve been working since 2004. Most of the time, I am in the classroom doing all the usual academic things: reading, writing, word study, math, science, social studies, arts and crafts. I do fiber and dye projects with kids when I can, and the rest of the time I squeeze it in on weekends and vacations. Continue reading “Inside-Outside”

Seeds and Life and Death

The fiber and dye plants at my plot at Bramble Hill have done a brilliant job of setting seed this fall. It’s very exciting. Since it is nearly All Hallows Eve, or Samhain, or El Dia de los Muertos, depending on your tradition, I have been thinking a lot about the relationship between the dead and the living.

Harvest and abundance, frosts and death. Seeds carry us through from one season to the next, from the death of fall to the life of spring.

Orange cosmos are usually prolific, but this year seemed especially so. Here are some images of the cosmos plants back on October 19th when I harvested the Japanese indigo. A chaotic tangle of flowers, stalks, and seeds. Death and rebirth.

orange cosmos chaos Continue reading “Seeds and Life and Death”

Exhausting the Orange Cosmos

These last two posts are very belated, so a reader may have totally forgotten that the weld and cosmos baths I’m talking about were left over from my workshop at the annual spring conference of Mass.Ag. in the Classroom back on March 8th.

Compared to the questions raised by the weld exhaust process, the exhaustion of the orange cosmos bath was relatively straightforward. I only dyed woolen yarns, mordanted with aluminum sulfate. Below you can see the first exhaust skein in the dyebath:

skein in cosmos exhaust dyebath

Here are the colors of yarns once they were rinsed and dried! Continue reading “Exhausting the Orange Cosmos”

Massachusetts Agriculture in the Classroom

On March 8th I presented two workshops at the annual conference of Massachusetts Agriculture in the Classroom. You can check out their website here. One workshop was on growing and processing flax, and on ways to incorporate flax into the school curriculum. The other was on growing a dye plant garden at school and using dye plants with kids.

Based on an idea from Joan Morris, shibori artist extraordinaire, I decided to make two swatch books for the dyeing workshop. Each book had five small cloth samples sewn together. The dimensions were 3 inches by 1.5 inches. One swatch book was made up of cellulose (i.e., plant-based) cloth samples, including three kinds of cotton cloth, a linen-rayon blend, and a 100% linen piece. The other was made of protein (animal-derived) cloth, including silk satin, raw silk, and three weights of wool. I mordanted the cellulose swatch books with aluminum acetate at 5% WOG (weight of the goods, or fiber). I mordanted the protein swatch books with aluminum sulfate, at 1 tablespoon per 4 ounces. The protein booklets weighed about 6oz. altogether, and interestingly the cellulose booklets weighed almost the same. Continue reading “Massachusetts Agriculture in the Classroom”

Animal, Vegetable, Mineral

The time is drawing near! Animal, Vegetable, Mineral: Work by Michelle Parrish and Amanda Quinby will go up on Tuesday at the Shelburne Arts Co-op, and will be open to the public from Wednesday October 2nd until Monday October 28th. Fall hours at the co-op are Sunday, Monday and Wednesday 11-5; Thursday, Friday and Saturday 11-8. The co-op is closed on Tuesdays. Here is a sneak peek of the ryas that will compose my portion of the show. The other portion of the show will be Amanda’s enchanting gilded panels, which have been on display at KW Home in Easthampton this month. Continue reading “Animal, Vegetable, Mineral”

Deciding on Colors for a New Rya

The other day I was trying to decide on colors for my next rya. My show at the Shelburne Arts Co-op goes up on October 1st, so the time is growing short. Plus, school is starting soon, which means much less time for weaving. I felt the need to get a sense of the work that I’d made thus far, so I spread the ryas out on the bed. Then I stood on a chair to get a good look. And here they are!

ryas on the bed more ryas on the bed

Then of course I had to dump a ton of yarns onto the bed and see what resonated with the collection as a whole. I ended up choosing another combination of oranges with greens at the center, this time, rather than the brown and blue combo I did before. Continue reading “Deciding on Colors for a New Rya”