Madder the Inexhaustible Root–Part One: Orange

Earlier in November, another teacher at school wanted to dye some cloth to create kid-sized monarch butterfly wings as part of her classroom study of butterflies. Her initial dyebaths, composed largely of marigolds combined with some orange cosmos and wild bedstraw roots, had not yielded the color she wanted. I suggested over-dyeing the cloth with madder roots, even though they weren’t from our garden at school. She decided to use some chopped roots that I had bought from Aurora Silk a few years ago, and was pleased with her results.

I asked her to save me the exhausted dyebath and the roots, which she very kindly did. I spent every spare moment of the next two weeks happily creating various shades of pink and orange on linen and cotton-linen blend yarns. I was well-satisfied with my efforts! Here they are:

drying rack madder yarns Continue reading “Madder the Inexhaustible Root–Part One: Orange”

Hopvine

My new book cloth is a variation of a miniature overshot motif called Hopvine. To create my threading I worked from two other drafts. One was “Modified Hopvine” from a sampler from the Hill Institute. The other was “Modified Hop Vine” from Marguerite Davison’s classic A Handweaver’s Pattern Book. The threading from Hill had too many ends in each pattern repeat to suit the scale of my book covers (5.5 inches by 8 inches) so I wanted to make the motif smaller. The Davison draft had fewer ends in a repeat but looked weirdly jittery in the drawdown in my weaving software.

So, I tinkered until I found a satisfying balance in the pattern, and am still tinkering with the treadling. The design consists of two different diamonds, one a longer and more pointed and the other a little more squat and rounded. I am not sure if these are supposed to evoke different elements of a hop vine, for example the leaves and the inflorescences. Or maybe the name of the pattern has a different origin. There are some nice images of hops plants here.

For those of you who recall my emboldening tabby travails of a year ago, you might be surprised to hear that I ran into the same problem of keeping a consistent tabby this time, also. Sigh. Continue reading “Hopvine”

Recent Books

Back in September, I finished a custom order of 8 books, which was very satisfying. I used only naturally-dyed pattern weft, in linen, cottolin, and cotton (the warp and tabby wefts were commercial). I had a variety of weld-dyed yellow, madder-dyed pink and terra-cotta, and woad-dyed blue yarns to work with. They were all woven in an overshot pattern called Young Lovers Knot, which I have been using for my book cloth for about a year now.

You may recall my frustration earlier in the spring when I was weaving the cloth, and I was bored of weaving the same pattern over and over again. I complained about it at the time, and then got re-inspired when I bought some new tabby weft colors. I also switched from weaving the design star fashion, which creates boxes and distinct diagonal lines as you weave, to weaving rose fashion, which makes the motifs rounded and gives a sense of concentric circles rippling outward. Continue reading “Recent Books”

Dishtowels for Pioneer Valley Weavers’ Guild

I am a member of two local weaving guilds, Pioneer Valley Weavers’ Guild and Weavers of Western Massachusetts. The Pioneer Valley Weavers did a community service project this year where members wove dishtowels to donate to the Big Brothers Big Sisters fundraising auctions this summer and fall.

I decided to use Ms and Os for my weave structure, to get some nice bumpy texture. Here are my dishtowels in process. Here is the warp threaded, sleyed, tied on, and ready to go:

Ms and Os dishtowel warp

It is a mixture of different sizes of cotton yarns, as I was trying to use old yarns from my stash. So, the black is 6/2, the light green and gold are 10/2, and the cream is 8/2. I think they are all mercerized, but they are still soft enough to be absorbent. The width is 22.3 inches in the reed, and it’s 536 ends sett at 24 epi, sleyed 2 per dent in a 12 dent reed. I wound a 4 yard warp, which I thought would be enough for three full sized towels. As it turned out, I only had enough for two towels and one smaller napkin or bread-basket sized cloth.

One towel has a pale yellow 22/2 cottolin weft:

pale yellow cottolin weft

I like this one because the values and proportions in the stripes work the way I imagined, and I like the lacy feeling.

I wove the other towel with a bright turquoise blue 6/2 cotton weft:

turquoise blue weft

The intensity/saturation of the turquoise interferes with the stripes. As Matthew put it, everything feels like it’s underwater. In future, to use this color weft again, I would redesign the stripes in a smaller scale and with different colors. I think that a more intense bright yellow would work better than the gold, for example. On the other hand, several people to whom I showed the finished towels said they preferred the turquoise one.

For the smaller napkin-sized piece, I alternated the turquoise and pale yellow, and I like the plaid effect a lot (the pale green stripe at the bottom is plain weave, which I sewed into the hem).

turquoise and pale yellow stripes

striped napkin

Above, the napkin-sized cloth looks round because it’s draped over a round foot stool, but I think you can see the plaid effect pretty well.


Exhausted Madder and Exhausted with my Warp

I have exhausted the madder bath I’ve been working on.

madder exhaust on bleached cottonThese are the 10/2 bleached cotton skeins which were double-mordanted with aluminum acetate and heated in the calcium carbonate fixing solution. Actually, I could probably run one more bath for an extremely pale pink, but I’m ready to move on with other projects.

Now that I have a pretty decent stash of naturally dyed cotton, linen, and cottolin, I have been using only naturally dyed pattern weft yarns for my current batch of book cloth (the warp and tabby yarns are commercial). Thus far, I have really enjoyed using yarns that I dyed myself. However, on Monday I was having a mightily difficult time choosing color combinations. I couldn’t figure out what my problem was, but I was dissatisfied with everything I tried.  Colors that I had been perfectly happy with before–my screaming yellow weld, for example–looked ugly and annoying.

After a while I realized that I was just tired of weaving the same pattern over and over again (Young Lovers Knot). I put on enough warp for about 20 pieces, with the idea that I was being efficient. But instead I was bored. I am never, ever bored. There is so much to do all the time, and so many interesting things in the world, how could I ever be bored? It took me a while to recognize the feeling, and I felt better when I figured it out.

So, I decided to mix things up a little. I bought some new spring-like colors of 20/2 cotton (the sadly discontinued line from UKI) and decided to use commercially dyed 10/2 for the pattern weft for a while. I also switched from weaving the Young Lovers Knot pattern “Star Fashion” (which gives it those nice diagonal lines) to weaving it “Rose Fashion” (which makes all the motifs more rounded). It was a nice change of pace, and the new colors got me motivated again. In fact, with the new tabby colors, my naturally dyed yarns have taken on all sorts of new possibilities. Here is a 20/2 linen madder-dyed skein from the recent dyebath woven with a rich purple commercially dyed 20/2 cotton tabby weft. It’s sort of easter-eggy but considering that crocuses, daffodils, and all the other bulbs are blooming now, it feels OK to me.

madder-dyed pattern weft with purple tabby

Madder Dyed Yarns

After a leisurely process of heating, soaking, and delayed rinse, the first four skeins of madder-dyed yarns are done. Here they are outside today, a bright and sunny day.

madder dyed yarnsI’ve done four dyebaths so far. The photo above shows successive dyebaths moving from right to left. The yarn on the cone is from the first dyebath. The yarns in the first three dyebaths were 20/2 linen and the fourth was 22/2 cottolin. The linen yarns were mordanted with alum acetate, and the cottolin was mordanted with alum acetate plus tannin. The weight of goods in each dyebath was about 2 ounces.

For the last couple exhaust baths I am preparing 10/2 cotton (bleached) because that’s what I have on hand at the moment. After some disappointing results with my last two umbilicate dyebaths, and out of a general desire to achieve greater depth and brightness of colors on cellulose fibers, I am going to try some new procedures. I’m especially frustrated with cotton at the moment, and for help I am turning to Jim Liles’ book The Art and Craft of Natural Dyeing: Traditional Recipes for Modern Use. In his instructions for scouring cotton, Liles writes, “… simmer or boil for an absolute minimum of 2 hours. Three or 4 hours is better in some cases, and in the old days cotton was sometimes scoured at the boil for 8 hours. Cotton is full of wax, pectic substances, and oil, all of which must be removed.” This is much longer than I’ve ever scoured before.

So, I boiled the skeins for two hours with anionic cationic scour 12/17/2023 Correction! (from Earthues) and soda ash. Then I rinsed them three times, and mordanted with alum acetate at 5% weight of the goods at 100 degrees for one hour, let the yarns steep in the mordant for a couple days, dried them, and am now re-mordanting in the same mordant bath. This procedure is a combination of my usual cellulose treatments (based on recommendations from Earthues) and recommendations from Jim Liles.

Double-mordanting with a period of drying in between is a new experiment for me. Liles gives instructions for making your own aluminum acetate, and writes that you should wait until the acetic acid smell has dissipated before proceeding with dyeing. Since I am using alum acetate that I did not have to make myself, I didn’t detect any acetic acid smell after mordanting the first time, so I went ahead with the second mordant bath after just drying the skeins for a day.

Next will come the “fixing solution” Liles recommends. To remove unbonded mordant, he recommends soaking with a solution of calcium carbonate or sodium phosphate for 30 minutes, then rinsing with water. I’m not sure from the book whether I can just use calcium carbonate, or whether it has to be soaked with cattle or sheep dung. It seems to me that if I have the calcium carbonate, I don’t need the dung (since that seems to be a source of sodium and calcium phosphate), but maybe it helps.

Since I am already pretty far along with this madder project, I’m not planning to make any changes to my usual dyeing, drying, or rinsing steps with the last exhaust baths this time around.

However, for my next madder project I will try one of Liles’ recipes for madder red. Reading through his recipes has been very eye-opening and I am fascinated by, and kind of surprised by, many of the things he writes about. For example, instead of just rinsing the madder-dyed goods, he describes a process where the dyed material is simmered or boiled with soap. This is supposed to make the color brighter and more clear. I watch the temperature very carefully while the roots are extracting and the yarn is in the dyebath to make sure it *doesn’t* boil or even simmer. It never occurred to me that high heat later in the process could be beneficial. Also, he writes that the dyebath ought to be acidic when dyeing cotton or linen with madder. Oops. Did you see my pH comments in the last post? Clearly I had the wrong idea about what that calcium carbonate was for. In fact, he writes that making the dyebath alkaline will produce a bluish-purple. Well, I didn’t get anything like purple this time with my alkaline dyebath, but maybe I can…. So many things to try.

Here’s the madder-dyed linen yarn getting woven into cloth with black 20/2 cotton tabby weft.

cloth with madder-dyed yarn coming around the breast beam

This shot is from underneath the breastbeam to show the cloth winding onto the cloth beam. I really like these colors together. The blue-green is woad overdyed with weld.

book cloth going onto cloth beam


February 29th, 2012

The Leap Day of the Leap Year

leap year snow

Today it is snowing. A much more typical wintry day than February 1st. Here’s what I have been doing so far today, fiber-wise:

I wove a section on my new warp, threaded once again with Young Lovers Knot, for a new batch of journals. Today I wove the section in the photo below. The blue is 22/2 cottolin dyed with woad and weld, and the tabby weft is teal 20/2 cotton, commercially dyed. When I first dyed the cottolin I was disappointed not to get a better green, but with the brighter colored tabby background it looks very nice anyway.

woad and weld dyed cottolin

I changed the treadling for the sections where I’m using 20/2 linen or 22/2 cottolin because no matter what I do, I can’t beat it square with these yarns. With 10/2 cotton or 10/2 tencel it’s not a problem. Linen is just less inclined to submit to compression. It’s one of the things I love about linen, it has a mind of its own. And really, it’s not meant for overshot pattern weft, so who can blame it? To accommodate the linen, I shortened the square (or table) by two picks.

I wet-spun spun some bleached flax top (from Louet, not my own). It’s tow (short fibers). I did about half this bobbin today. My legs got wet, but it went with the snowy theme outdoors, so I didn’t really mind.

wet spun tow

I was originally planning to spin a second bobbin and ply them, but I think I will leave it as singles and take out some of the extra twist when I wind it onto bobbins for weaving. My new plan is to spin the other half dry and then weave samples with them (using them for weft) to see if there is a noticeable difference between wet and dry spun tow.

I did the second extraction on two new dyebaths that I started over the weekend. One is madder (8 oz. roots bought from Aurora Silk a few years ago). The other is the Flavoparmelia lichens I collected this winter, plus the bark they were growing on. Since it is snowing, I heated these indoors today. Fortunately, they both smell amazing. Too bad you can’t smell them. The lichen smells like hot piney woods in the summer or a toasty fire in a cabin in the woods. The madder smells fruity, like red wine or blackberries getting boiled for jelly.

flavoparmelia dyebath

madder dyebathI plan to extract each one more time, then combine the extractions for stronger color. With the combined extractions, I am hoping to get a respectably rich color from the first madder bath, at least. The Flavoparmelia is an experiment, but I figure I’ll give it every opportunity to yield a strong color, if it can.

I am sticking with cellulose yarns for the time being, which are proving to be tricky. The colors are coming out lighter than I expect each time, with the exception of the CRAZY bright weld earlier in the fall/winter. Here’s how it’s looking woven up. These two photos show 20/2 linen half-bleach pattern weft with black 20/2 cotton tabby (on the black warp).

weld dyed linen

weld after woadThese two show the same weld-dyed yarn with a light blue 20/2 cotton tabby weft. It’s a very woady blue, but it’s commercial. (In these sections I had not yet shortened the square, hence it is rectangular.)

weld with blue tabby

weld with blue tabby closeup

Last but not least, I have stirred up my new umbilicate lichen vats to incorporate oxygen. I will post about that separately.

It’s been great to have an extra day to work on all these projects. We should have a leap day every year.


A Tale of Lichen and Weird Winter Weather (Part Five)

Part Five: Picking up Fallen Lichen in the Non-Snowy Woods

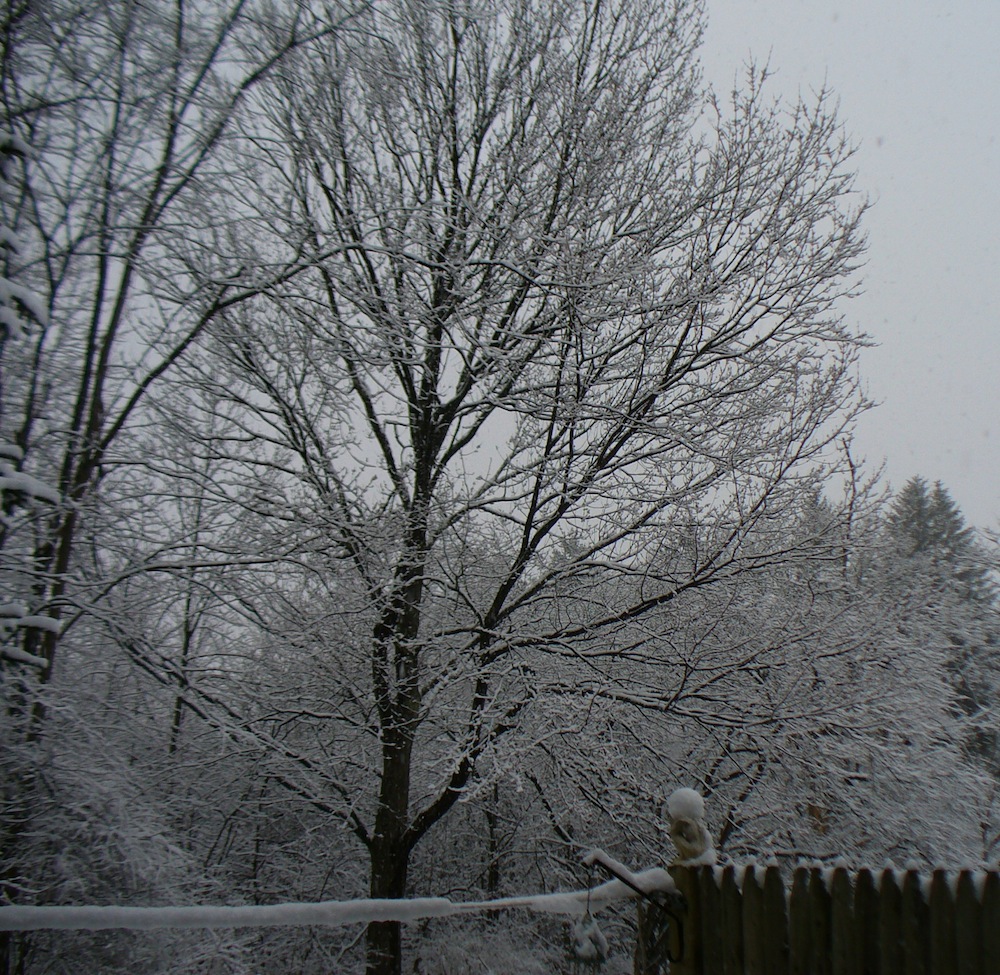
Right after the big storm in October, we had a spell of very warm weather and all the snow melted at the beginning of November. However, the broken trees and branches still lay everywhere. Lichen and salvage botany were very much still on my mind. Karen Diadick Casselman wrote in Lichen Dyes that in the woods behind her house, several species of lichen dropped daily to the ground, which provided an almost unlimited supply, should she choose to use them. (She went on to say that she focuses on studying lichens rather than on dyeing in volume.) I wondered how much lichen could be gathered if I picked up only what had fallen on the trail, road, or sidewalk as I went on my walks, and only what was most abundant. Well, in one week of walking almost every day, I had 4 cups of this lovely stuff (including quite a lot of bark, to which it was attached):

lichen on ground

lichen on oak bark

To be honest, I’m not positive it was all the same species, but visually all the little pieces looked very similar. I could sure collect a lot of it, but what exactly was it, and was it useful for dyeing?

Positively identifying it has been an on-going process. Today I completed the most recent step, having acquired a container of lye from my mom, whom I visited yesterday. Thanks, Mummy!

Earlier in the winter, I had gone through the dichotomous key for “foliose lichens that are not umbilicate, jelly-like, or yellow” in Lichens of North America. With a pretty good degree of confidence I continued on to the Parmelia key. The most likely candidates were Flavoparmelia caperata (a.k.a. Pseudoparmelia caperata, the Common Greenshield lichen), Flavopunctelia soredica, or Flavopunctelia flaventior. The time had come for chemical testing.

I hoped that using just bleach for the C test (short for calcium hypochlorite), I could tell the difference between F. caperata and F. soredica or F. flaventior. Here’s why. Both of the latter are supposed to react C+ red when spot tested on the medulla. That means when you scrape off the top layer (cortex) and expose the white layer underneath (medulla), then apply a dab of bleach to the white area, it will turn red. It didn’t. Here’s a photo comparing the foliose lichen in question with an umbilicate lichen that definitely did react C+ red.

comparing the color of C+ and C- reactions on lichen

The umbilicate is in the lower part of the photo, and shows a very bright red-orange reaction. The foliose lichen above shows very little color change. Depending on how dramatic the reaction is supposed to be, you could call it yellow, or you could call it nothing. On the medulla of the foliose lichen, there was more of a reaction (the spot on the upper right which is a little bit darker yellow), but it’s definitely not red.

Having ruled out F. soredica or F. flaventior, I was pretty happy to say that my abundant foliose lichen was Flavoparmelia caperata. But I didn’t actually prove what is was, only what is wasn’t. Enter the lye, which lets you do the K and KC tests (K stands for the potassium in potassium hydroxide)

F. caperata is supposed to be K- on the cortex and medulla, KC + gold on the cortex, and KC+ pink on the medulla. Here’s what my results this morning looked like. The first photo shows a piece of the lichen with the medulla exposed (the white area):

foliose lichen with exposed medulla

K minus cortexThe photo above shows the K- reaction on the cortex, and the one below shows K- on both the medulla and cortex. It’s slightly brighter green where I dabbed on the lye solution because it’s wet.

K minus on the cortex and medullaThe photo below shows the KC+ reaction on both the cortex and medulla. (KC means you apply a dab of lye solution, then a dab of bleach on the same spot.) However, I would not call the color on the medulla “pink,” exactly. It’s redder than the gold on the cortex, but it’s more orange, I’d say.

KC plus on cortex and medulla

On the other hand, my “red” reaction on the umbilicate was sort of orange, too. So, there you have it. Probably my abundant foliose lichen is Flavoparmelia caperata. It does not appear to be an interesting source of dye, unfortunately. I may go ahead and try it anyway. I’ll let you know.

A Tale of Lichen and Weird Winter Weather (Part Four)

Part Four: Dyeing with the Ancient Umbilicate Vat

Winding skeins, scouring, mordanting, tannin baths, etc. took a long time, so the dyeing didn’t actually happen until December. It was the first time I’d used lichens on cellulose fibers. According to Casselman, and others, lichens are substantive dyes, meaning they don’t require a mordant. But I’m inclined to agree with Joan Morris, who said in a workshop last summer, “With natural dyes, cellulose fibers need all the help they can get.” Cotton, linen, and other plant-derived fibers are not naturally inclined to slurp up color the way wool does, so you’ve got to give the fibers every opportunity to hold onto the dye molecules. I decided to mordant with alum acetate *and* treat the yarns with a tannin bath for good measure.

Here’s the vat liquor strained into a jar, undiluted, pH 12 or 13.

umbilicate lichen liquor in jar Here in the dyepot you can see the magenta color of the vat liquor.

umbilicate lichen liquor colorI diluted the vat liquor with water (6 cups vat liquor to 28 cups water) and the pH was 9. Into this stinky (rotten fishy) pot went my tannin and alum acetate-treated linen and cottolin skeins. Well, if you read my earlier post about weld and cellulose, you know that tannin can have a darkening and weirdening effect on color, even the gallotannin I’ve been using, which is very light. The darkening effect of iron is called “saddening,” so maybe I can call it saddening with tannin, too, but it’s not quite the same. Anyway, you can probably already picture the scene. Here it is:

umbilicate lichen with tannin on celluloseYes, I got a very interesting purplish brown. Basically brown. An unusual sort of brown. But brown. At first I was disappointed and felt very bad because, to me, dyeing with lichens is a weighty thing. I feel there is karma, or at least a moral burden, attached to it in a way I do not feel with goldenrod or Queen Anne’s Lace or other more happy-go-lucky sorts of plants. Venerable ancient organisms shouldn’t be wantonly ripped up and fermented for the making of browns.

Here though, I must digress. Later in December and January, I noticed this color regularly on my walks, especially in the woods when the sunlight was orange-pink early in the morning or just before sunset. Something about the light made the trunks of certain pines (red pine, I think) reflect exactly this purplish brown. I also saw it in tangles of old blackberry canes, and where red maple leaves had fallen and dried among oak leaves. When I noticed this, I felt grateful to the lichens for having opened my eyes to this color. It’s a real color in its own right, with a place in the world, not just an accident or a mistake. Now I love that color. OK, back to the story.

Back in December, still hoping for pink, I added a little soda ash to the exhaust bath to bump the pH up to 10, and used bleached cotton skeins mordanted only with alum acetate. I got a pale bluish pink, a very subtle color, and was happy.

umbilicate lichen no tannin on cotton

Weld on Cellulose Yarns

I have not been hibernating, but I am woefully behind on sharing my dye news. So, my first post of 2012 is actually a belated one that I began writing weeks ago.

Back in December, I decided to dye several skeins of cellulose yarns (linen, cotton, and cottolin) for future projects featuring naturally dyed yarns. So many colors to choose from…. I have tons of dried weld in the closet, which made yellow an obvious choice. To prepare for dyeing with weld, I went back through my old dye notebooks, and found a note that one summer some of the weld plants bolted and flowered in their first year, but only got to be about 2 feet tall. So, weld can flower the first year, but technically it’s a biennial.  In my experience, the plants get giant (5-6 feet) in their second year, hence all the dried weld in the closet. Hence yellow yarn.

There are a range of opinions about how to achieve the best results with natural dyes on cellulose (i.e., plant) fibers. Everyone agrees that a thorough scouring is necessary to begin. I washed the skeins in hot water with regular laundry detergent first, then used soda ash at 2% weight of goods and an anionic (edited: cationic, it turns out. My mistake.) scour from Earthues (ordered from the lovely and inspiring Nancy Zeller at Long Ridge Farm) at 6% WOG.

Some folks recommend an alum-tannin-alum sequence using aluminum sulfate and a tannin source. Others recommend just aluminum acetate with no tannin. I decided to follow instructions from Earthues (maybe not their most current recommendations) and treated the yarns with tannin first (Earthues’ gallotannin, from oak galls) at 5% WOG, then the next day mordanted with alum acetate at 5% WOG. My yarns were 22/2 unbleached cottlin and 20/2 linen half-bleach.

I used 9.36 oz. of dried weld (stems, leaves, and flowers) to make the dyebath, planning to dye about 12 oz. yarn.

Here I must digress for a moment. Back in December I checked out Anne Bliss’ sweet little book North American Dye Plants from the library. In her preface she acknowledges the support of her family in tolerating the “odoriferous stews” her research required. In our house we call the same phenomenon “stinky pots,” though “odoriferous stews” sounds much more grand. Weld is a stinky plant. The flowers are stinky in a good way. The rest of the plant is stinky in a stinky way. I don’t mind it so much because I have a high tolerance for the smells associated with natural dyes. But I try to spare my love the worst of the stenches by dyeing outside when the weather permits. Our neighbor’s cat loves all my smelly treasures, and we have many funny photos of him enjoying my fiber and dye experiments. Here’s one of Hansel luxuriating in the weld harvest of 2009.

OK, so stinky pots happen outside when weather permits. But since it was a rainy, albeit mild, December, the weld dyepot had to be indoors while it was heating (I brought up the temp to 180, held for an hour, then cooled overnight before straining). Fortunately it was not very smelly when I first heated it. Afterwards, it got outrageous! I did not extract the plant material multiple times, though some people recommend this. Once was enough.

With weld, many people recommend chalk to heighten the color, and/or dipping the fiber in an alkaline afterbath. I decided to add both calcium carbonate (at 3%WOG) and soda ash (at 2%WOG) to the strained dyebath before adding the skeins. The pH was between 9-10. I always do a delayed rinse, meaning I let the dyed yarns dry completely before rinsing them. I got intense, though kind of weird, color.weld-dyed skeins I would describe the linen skeins (on the left of the photo) as mustard. The cottolin (on the right) are a lighter greenish-yellow. I put a color wheel in the photo for comparison.

Weld has a reputation for yielding the most pure or “clear” yellow but you wouldn’t know it from this batch of yarn. I concluded that the tannin affected the color, and the fact that the fibers weren’t bleached also made a difference.

Seeing how intense the color was, I got overly ambitious and decided to use the exhaust bath to make green by overdyeing some cotton and cottolin skeins previously dyed blue with woad. This was my first attempt to make green with cellulose yarns (though I have made many successful greens on wool and alpaca by dyeing the fiber yellow first, then overdyeing with woad). Well, my results were really pathetic and disappointing. Here’s a photo comparing them to a woad dyed skein that I wisely did not mess with.woad overdyed with weld Sorry for the blur, but the colors are pretty accurate. The woad dyed skein is on the far right. They all started out that color. I treated them with the same tannin-alum sequence as the yellow skeins, thinking the tannin might create a nice teal. Sadly, no.

I attribute my lack of success to two factors. First, the weld bath must have been exhausted, and the very little color that was left attached unevenly to the fiber. Second, I must have had a chemistry problem, even though I was pretty sure I wouldn’t. The pH of the exhaust bath when I put the woad-dyed skeins was 8, which I didn’t think it was high enough to strip the blue off the yarn. But clearly it did.