A Tale of Lichen and Weird Winter Weather (Part Five)

Part Five: Picking up Fallen Lichen in the Non-Snowy Woods

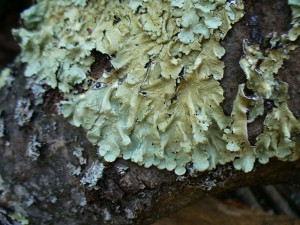
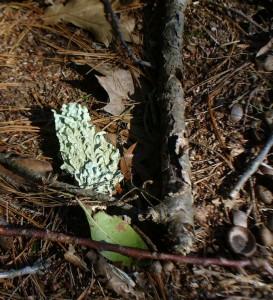
Right after the big storm in October, we had a spell of very warm weather and all the snow melted at the beginning of November. However, the broken trees and branches still lay everywhere. Lichen and salvage botany were very much still on my mind. Karen Diadick Casselman wrote in Lichen Dyes that in the woods behind her house, several species of lichen dropped daily to the ground, which provided an almost unlimited supply, should she choose to use them. (She went on to say that she focuses on studying lichens rather than on dyeing in volume.) I wondered how much lichen could be gathered if I picked up only what had fallen on the trail, road, or sidewalk as I went on my walks, and only what was most abundant. Well, in one week of walking almost every day, I had 4 cups of this lovely stuff (including quite a lot of bark, to which it was attached):

lichen on ground

lichen on oak bark

To be honest, I’m not positive it was all the same species, but visually all the little pieces looked very similar. I could sure collect a lot of it, but what exactly was it, and was it useful for dyeing?

Positively identifying it has been an on-going process. Today I completed the most recent step, having acquired a container of lye from my mom, whom I visited yesterday. Thanks, Mummy!

Earlier in the winter, I had gone through the dichotomous key for “foliose lichens that are not umbilicate, jelly-like, or yellow” in Lichens of North America. With a pretty good degree of confidence I continued on to the Parmelia key. The most likely candidates were Flavoparmelia caperata (a.k.a. Pseudoparmelia caperata, the Common Greenshield lichen), Flavopunctelia soredica, or Flavopunctelia flaventior. The time had come for chemical testing.

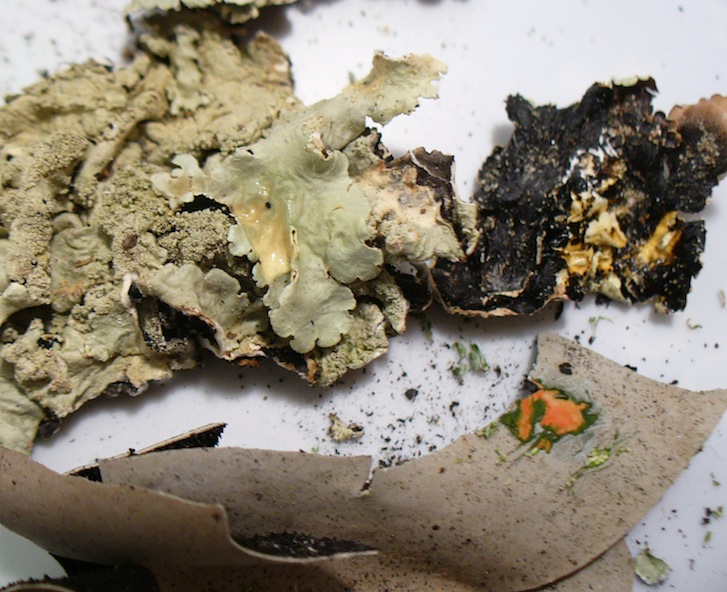
I hoped that using just bleach for the C test (short for calcium hypochlorite), I could tell the difference between F. caperata and F. soredica or F. flaventior. Here’s why. Both of the latter are supposed to react C+ red when spot tested on the medulla. That means when you scrape off the top layer (cortex) and expose the white layer underneath (medulla), then apply a dab of bleach to the white area, it will turn red. It didn’t. Here’s a photo comparing the foliose lichen in question with an umbilicate lichen that definitely did react C+ red.

comparing the color of C+ and C- reactions on lichen

The umbilicate is in the lower part of the photo, and shows a very bright red-orange reaction. The foliose lichen above shows very little color change. Depending on how dramatic the reaction is supposed to be, you could call it yellow, or you could call it nothing. On the medulla of the foliose lichen, there was more of a reaction (the spot on the upper right which is a little bit darker yellow), but it’s definitely not red.

Having ruled out F. soredica or F. flaventior, I was pretty happy to say that my abundant foliose lichen was Flavoparmelia caperata. But I didn’t actually prove what is was, only what is wasn’t. Enter the lye, which lets you do the K and KC tests (K stands for the potassium in potassium hydroxide)

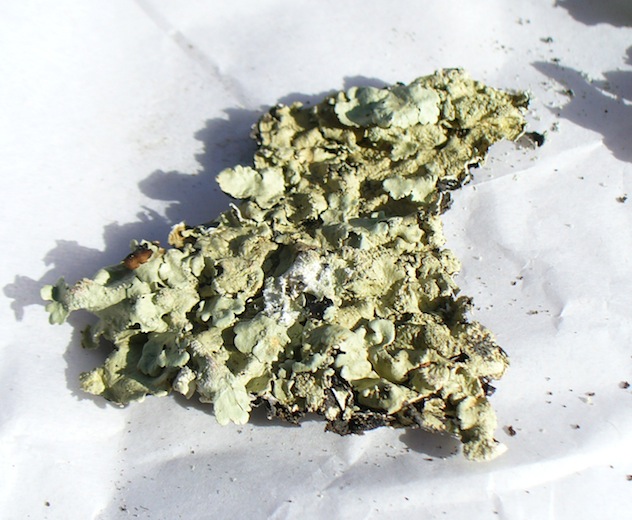
F. caperata is supposed to be K- on the cortex and medulla, KC + gold on the cortex, and KC+ pink on the medulla. Here’s what my results this morning looked like. The first photo shows a piece of the lichen with the medulla exposed (the white area):
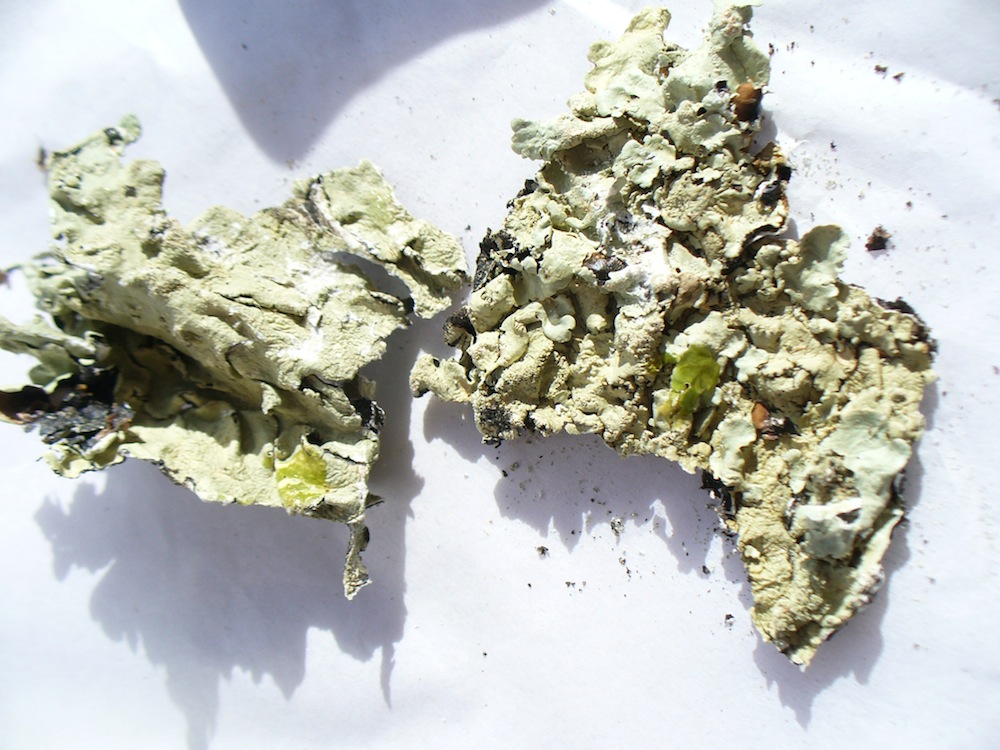
foliose lichen with exposed medulla

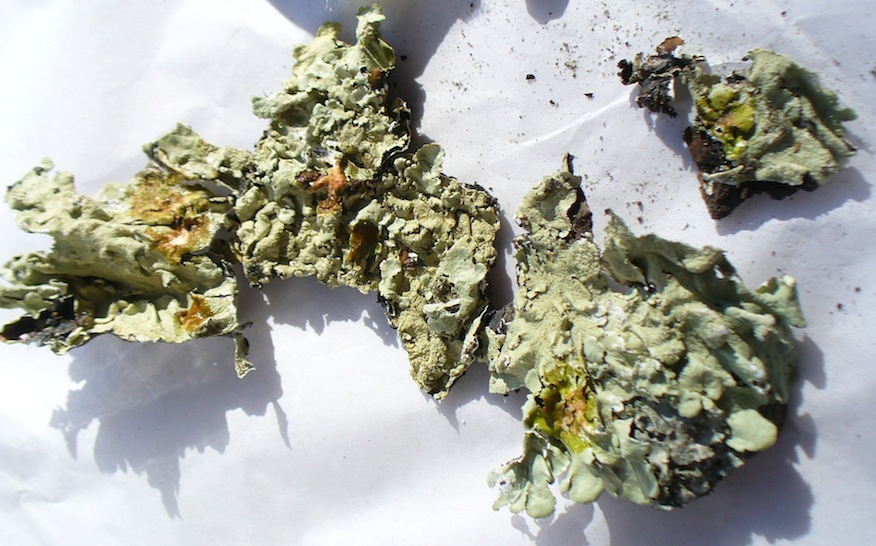
K minus cortexThe photo above shows the K- reaction on the cortex, and the one below shows K- on both the medulla and cortex. It’s slightly brighter green where I dabbed on the lye solution because it’s wet.
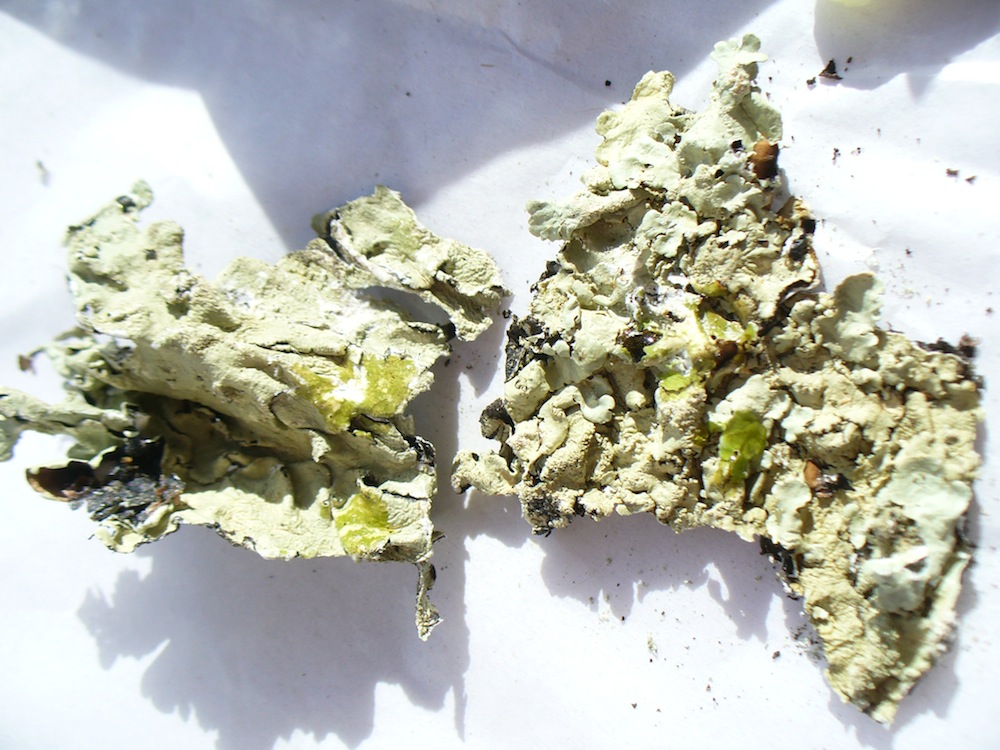
K minus on the cortex and medullaThe photo below shows the KC+ reaction on both the cortex and medulla. (KC means you apply a dab of lye solution, then a dab of bleach on the same spot.) However, I would not call the color on the medulla “pink,” exactly. It’s redder than the gold on the cortex, but it’s more orange, I’d say.

KC plus on cortex and medulla

On the other hand, my “red” reaction on the umbilicate was sort of orange, too. So, there you have it. Probably my abundant foliose lichen is Flavoparmelia caperata. It does not appear to be an interesting source of dye, unfortunately. I may go ahead and try it anyway. I’ll let you know.

A Tale of Lichen and Weird Winter Weather (Part Four)

Part Four: Dyeing with the Ancient Umbilicate Vat

Winding skeins, scouring, mordanting, tannin baths, etc. took a long time, so the dyeing didn’t actually happen until December. It was the first time I’d used lichens on cellulose fibers. According to Casselman, and others, lichens are substantive dyes, meaning they don’t require a mordant. But I’m inclined to agree with Joan Morris, who said in a workshop last summer, “With natural dyes, cellulose fibers need all the help they can get.” Cotton, linen, and other plant-derived fibers are not naturally inclined to slurp up color the way wool does, so you’ve got to give the fibers every opportunity to hold onto the dye molecules. I decided to mordant with alum acetate *and* treat the yarns with a tannin bath for good measure.

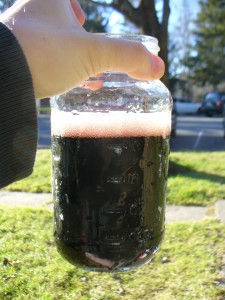
Here’s the vat liquor strained into a jar, undiluted, pH 12 or 13.

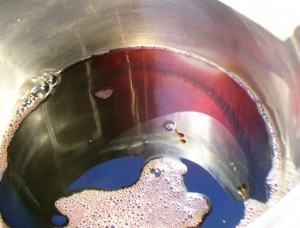
umbilicate lichen liquor in jar Here in the dyepot you can see the magenta color of the vat liquor.

umbilicate lichen liquor colorI diluted the vat liquor with water (6 cups vat liquor to 28 cups water) and the pH was 9. Into this stinky (rotten fishy) pot went my tannin and alum acetate-treated linen and cottolin skeins. Well, if you read my earlier post about weld and cellulose, you know that tannin can have a darkening and weirdening effect on color, even the gallotannin I’ve been using, which is very light. The darkening effect of iron is called “saddening,” so maybe I can call it saddening with tannin, too, but it’s not quite the same. Anyway, you can probably already picture the scene. Here it is:

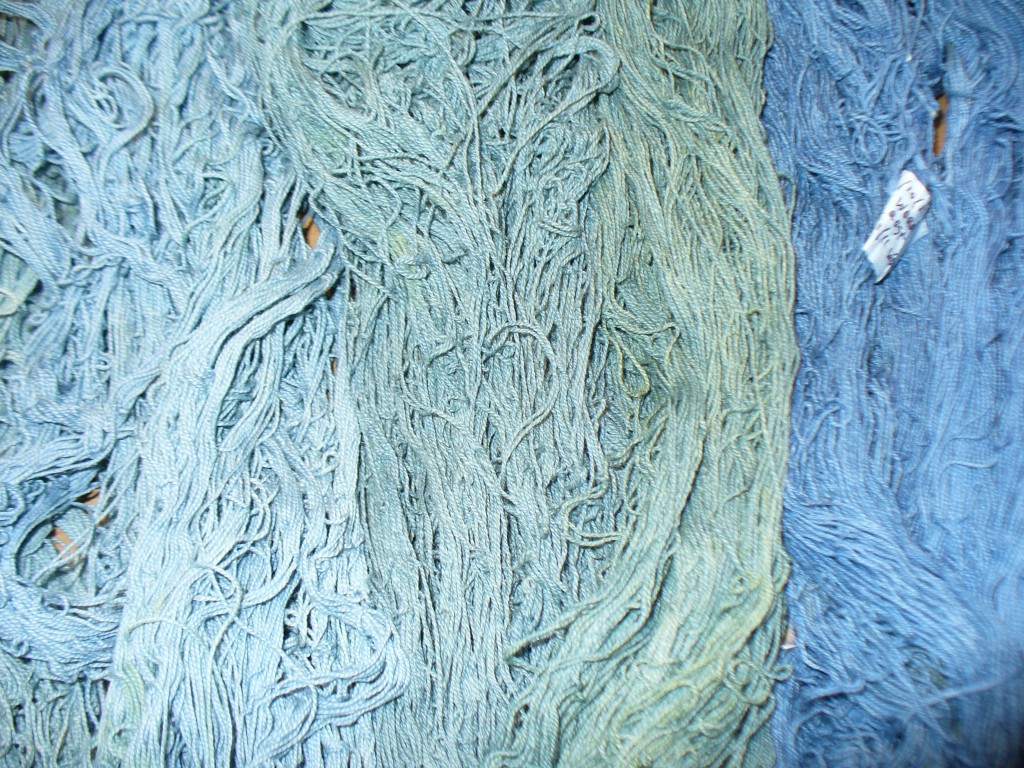
umbilicate lichen with tannin on celluloseYes, I got a very interesting purplish brown. Basically brown. An unusual sort of brown. But brown. At first I was disappointed and felt very bad because, to me, dyeing with lichens is a weighty thing. I feel there is karma, or at least a moral burden, attached to it in a way I do not feel with goldenrod or Queen Anne’s Lace or other more happy-go-lucky sorts of plants. Venerable ancient organisms shouldn’t be wantonly ripped up and fermented for the making of browns.

Here though, I must digress. Later in December and January, I noticed this color regularly on my walks, especially in the woods when the sunlight was orange-pink early in the morning or just before sunset. Something about the light made the trunks of certain pines (red pine, I think) reflect exactly this purplish brown. I also saw it in tangles of old blackberry canes, and where red maple leaves had fallen and dried among oak leaves. When I noticed this, I felt grateful to the lichens for having opened my eyes to this color. It’s a real color in its own right, with a place in the world, not just an accident or a mistake. Now I love that color. OK, back to the story.

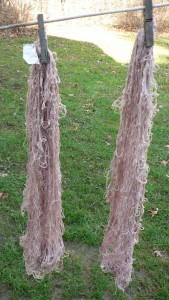
Back in December, still hoping for pink, I added a little soda ash to the exhaust bath to bump the pH up to 10, and used bleached cotton skeins mordanted only with alum acetate. I got a pale bluish pink, a very subtle color, and was happy.

umbilicate lichen no tannin on cotton

Chuang Tzu and Huck Lace Hearts

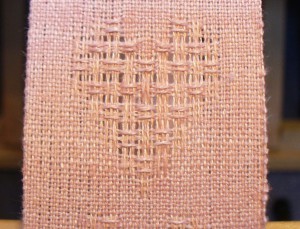
In anticipation of Valentine’s Day, I’ve been weaving bookmarks with heart motifs in huck lace. I really like them. They have a sweet, old-fashioned feeling.

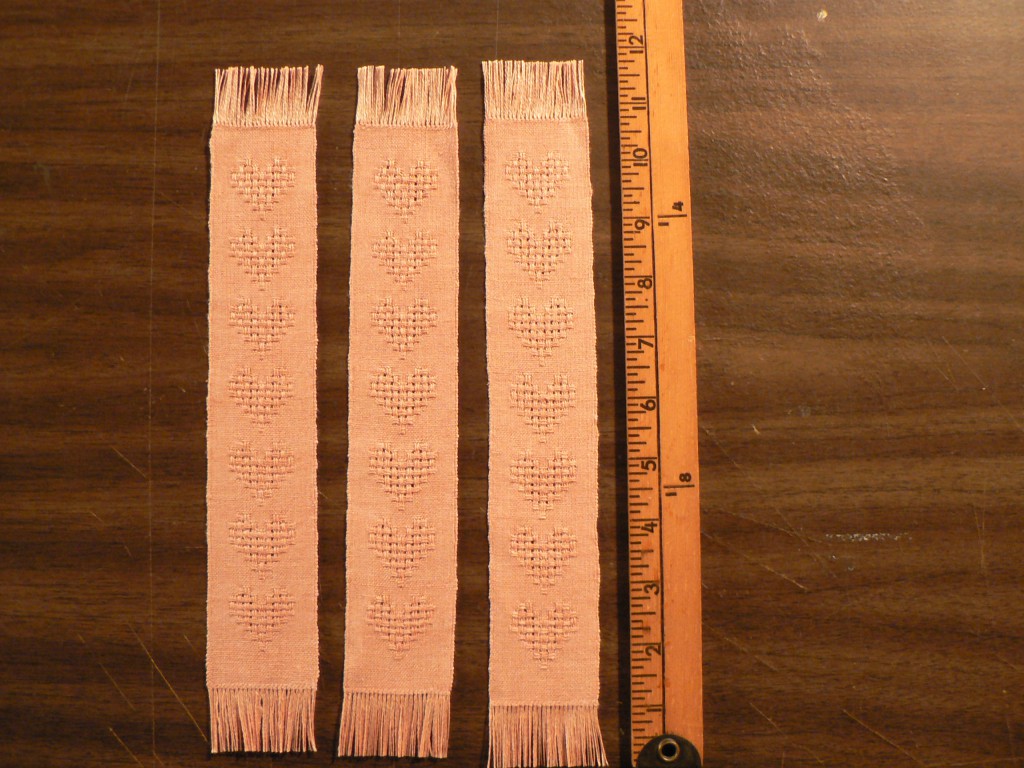
three huck heart bookmarks

Here are three next to a yardstick to show length. Click on the photo to see more detail. The weave structure of huck lace creates floats that pass over five threads, and these reflect light more than the plain weave background. The reflectivity or sheen helps differentiate the pattern.

I’m using 40/2 linen that I dyed with madder root last summer. The warp and weft are slightly different colors, and came from two successive dyebaths. The madder roots were leftover from an excellent, inspiring workshop last summer with Joan Morris at Long Ridge Farm (unfortunately a “what I did this summer” post that never got written). By the time I dyed these linen skeins, the roots had been extracted twice already, hence the light colors.

The warp is slightly more salmon colored, toward the orange side of red. The weft is lighter pink, more toward the blue side of red. To my eye the colors and values blend smoothly;  except along the hemstitching, I don’t see the difference. I was surprised to see in this photo, though, that the camera picked up the differences in color.

pink and salmon madder tones

The threads going across are the weft, and the ones going up and down are the warp. The sett is 36 epi (ends per inch), sleyed 3 per dent in a 12 dent reed. The bookmarks are two inches wide in the reed, an inch and three quarters after washing and ironing, and range from 10 and a half to 11 inches long including the fringe. I have woven 20 at this point.

Mostly these bookmarks have been fun and satisfying to weave. The only difficulty I’ve encountered is the hemstitching. The yarn untwists as I work and starts to disintegrate. Re-twisting and wetting it helps a little, but it’s still a tricky business, even though the bookmarks are only 2 inches wide. By the time I get to needle-weaving in the ends, there’s not much left to work with. That’s problem number one.

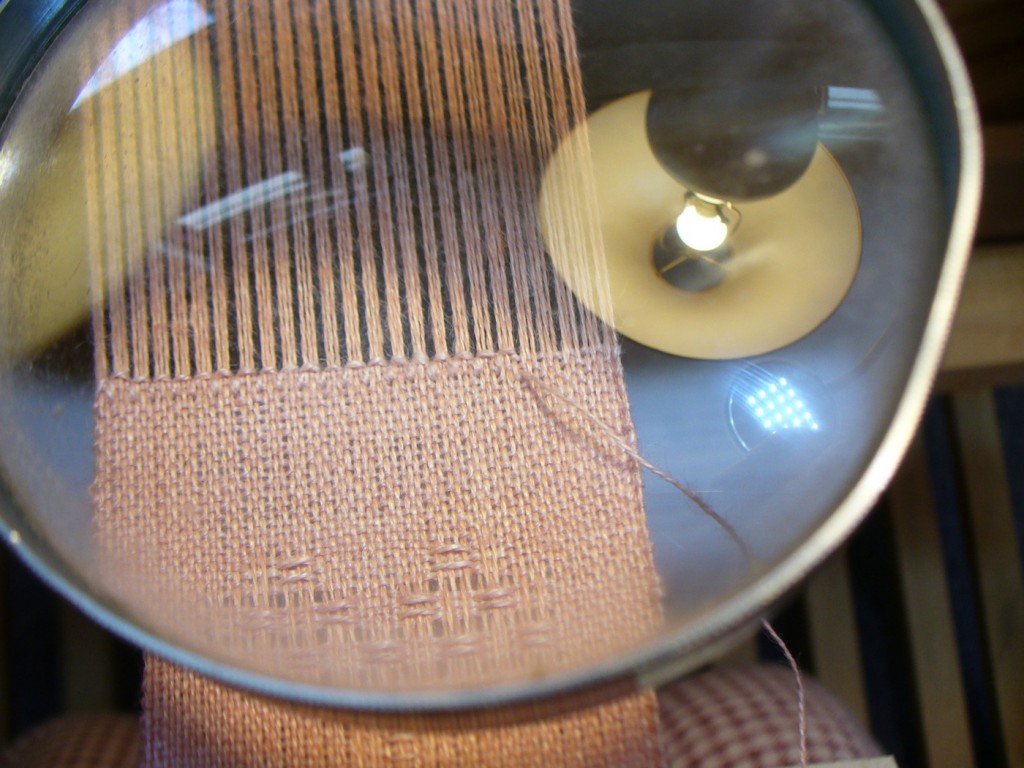
Problem number two is that, at 36 epi, it is hard to see what I’m doing. So, I’ve been using a magnifying glass to help. It would be more efficient to have one on a stand so I could keep both hands free, but I do OK with a handheld one. Sometimes the hemstitching goes smoothly. I feel skillful. Other times there’s fraying and lumps and wispyness. I feel inept.

magnified hemstitching


Here’s where Chuang Tzu comes in. If you’ve heard of Taoism, you’ve heard the sayings of Chuang Tzu: he’s the guy who inspired it all 2000+ years ago.

While I was enjoying a happy hemstitching experience and contemplating its pleasures, a story from Chuang Tzu came to mind. It’s about a butcher, or cook, who never needs to sharpen his knife. I’ve been a vegetarian for about 30 years, but I still like this story. Here’s a little excerpt from the Burton Watson translation. Cook Ting is cutting up an ox for Lord Wen-hui, who marvels at his skillfulness, and Cook Ting says …

“I’ve had this knife for nineteen years and I’ve cut up thousands of oxen with it, and yet the blade is as good as though it had just come from the grindstone. There are spaces between the joints, and the blade of the knife has really no thickness. If you insert what has no thickness into such spaces, then there’s plenty of room–more than enough for the blade to play about in.”

This is how it is with hemstitching. If you slip the needle through the spaces between the threads, it all goes smoothly. There is less abrasion on the thread, less interference with the structure of the cloth, and nothing wears out. I decided I needed a needle with less thickness. Voilá, easier hemstitching!  And the magnifying glass helps.

Cook Ting describes how he feels when he has successfully worked through a “complicated situation” …

“I stand there holding the knife and looking all around me, completely satisfied and reluctant to move on, and then I wipe off the knife and put it away.”

One more bookmark completed. I feel satisfied, then I advance the warp. The Tao of hemstitching.


Weld on Cellulose Yarns

I have not been hibernating, but I am woefully behind on sharing my dye news. So, my first post of 2012 is actually a belated one that I began writing weeks ago.

Back in December, I decided to dye several skeins of cellulose yarns (linen, cotton, and cottolin) for future projects featuring naturally dyed yarns. So many colors to choose from…. I have tons of dried weld in the closet, which made yellow an obvious choice. To prepare for dyeing with weld, I went back through my old dye notebooks, and found a note that one summer some of the weld plants bolted and flowered in their first year, but only got to be about 2 feet tall. So, weld can flower the first year, but technically it’s a biennial.  In my experience, the plants get giant (5-6 feet) in their second year, hence all the dried weld in the closet. Hence yellow yarn.

There are a range of opinions about how to achieve the best results with natural dyes on cellulose (i.e., plant) fibers. Everyone agrees that a thorough scouring is necessary to begin. I washed the skeins in hot water with regular laundry detergent first, then used soda ash at 2% weight of goods and an anionic (edited: cationic, it turns out. My mistake.) scour from Earthues (ordered from the lovely and inspiring Nancy Zeller at Long Ridge Farm) at 6% WOG.

Some folks recommend an alum-tannin-alum sequence using aluminum sulfate and a tannin source. Others recommend just aluminum acetate with no tannin. I decided to follow instructions from Earthues (maybe not their most current recommendations) and treated the yarns with tannin first (Earthues’ gallotannin, from oak galls) at 5% WOG, then the next day mordanted with alum acetate at 5% WOG. My yarns were 22/2 unbleached cottlin and 20/2 linen half-bleach.

I used 9.36 oz. of dried weld (stems, leaves, and flowers) to make the dyebath, planning to dye about 12 oz. yarn.

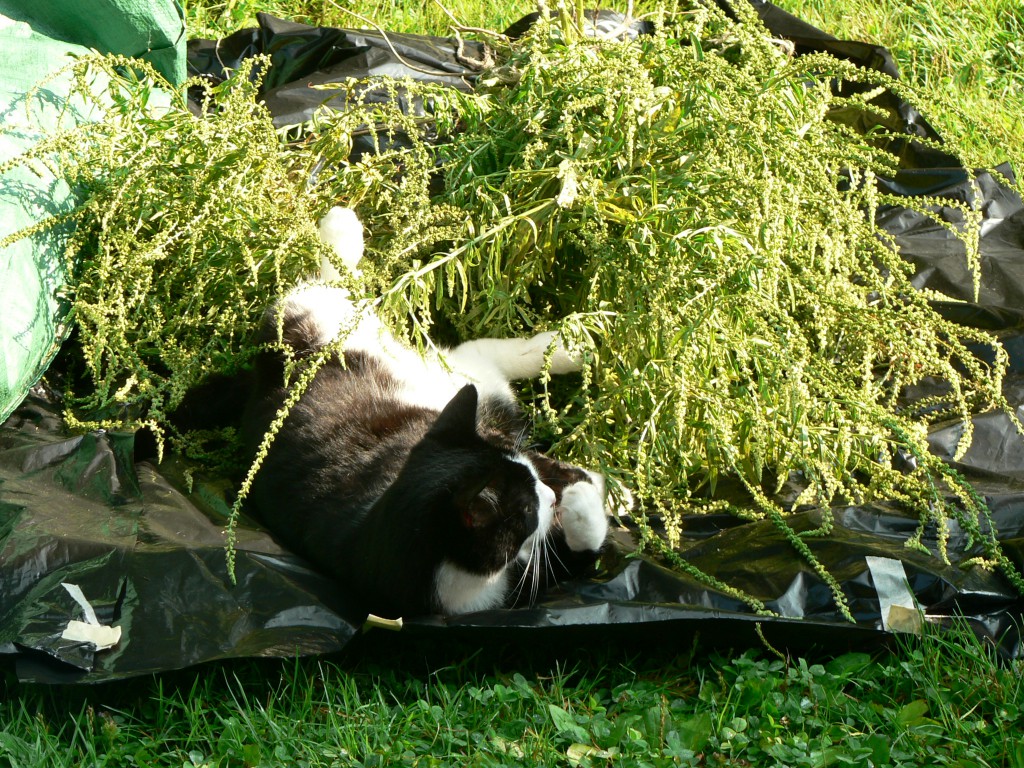
Here I must digress for a moment. Back in December I checked out Anne Bliss’ sweet little book North American Dye Plants from the library. In her preface she acknowledges the support of her family in tolerating the “odoriferous stews” her research required. In our house we call the same phenomenon “stinky pots,” though “odoriferous stews” sounds much more grand. Weld is a stinky plant. The flowers are stinky in a good way. The rest of the plant is stinky in a stinky way. I don’t mind it so much because I have a high tolerance for the smells associated with natural dyes. But I try to spare my love the worst of the stenches by dyeing outside when the weather permits. Our neighbor’s cat loves all my smelly treasures, and we have many funny photos of him enjoying my fiber and dye experiments. Here’s one of Hansel luxuriating in the weld harvest of 2009.

OK, so stinky pots happen outside when weather permits. But since it was a rainy, albeit mild, December, the weld dyepot had to be indoors while it was heating (I brought up the temp to 180, held for an hour, then cooled overnight before straining). Fortunately it was not very smelly when I first heated it. Afterwards, it got outrageous! I did not extract the plant material multiple times, though some people recommend this. Once was enough.

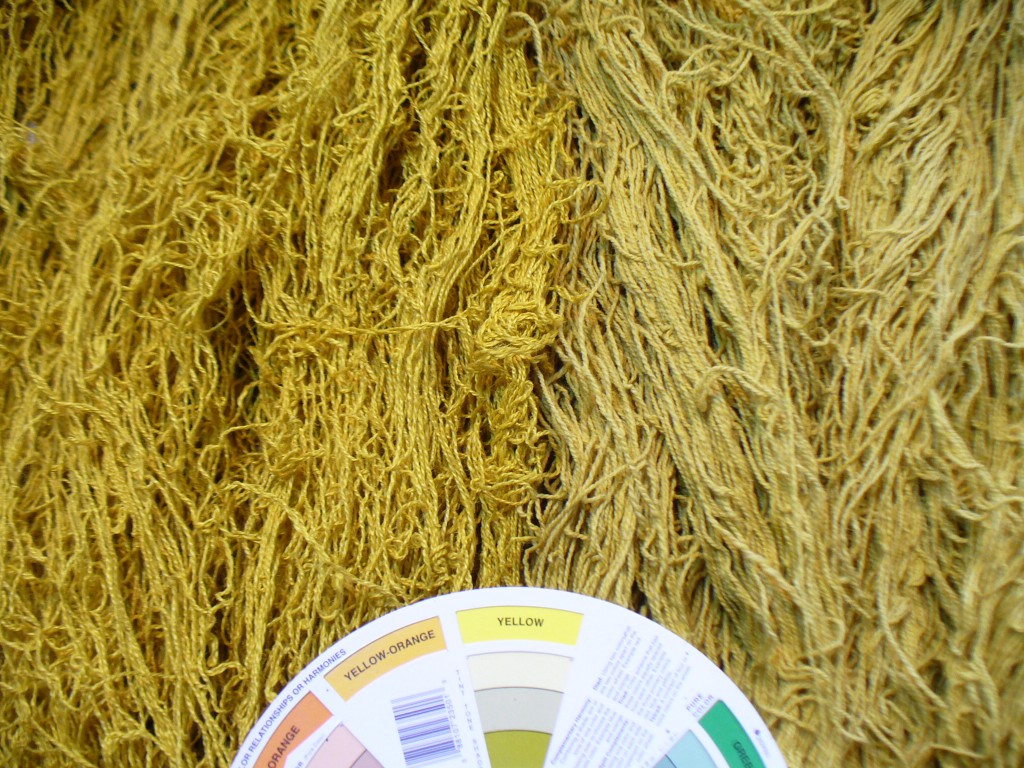
With weld, many people recommend chalk to heighten the color, and/or dipping the fiber in an alkaline afterbath. I decided to add both calcium carbonate (at 3%WOG) and soda ash (at 2%WOG) to the strained dyebath before adding the skeins. The pH was between 9-10. I always do a delayed rinse, meaning I let the dyed yarns dry completely before rinsing them. I got intense, though kind of weird, color.weld-dyed skeins I would describe the linen skeins (on the left of the photo) as mustard. The cottolin (on the right) are a lighter greenish-yellow. I put a color wheel in the photo for comparison.

Weld has a reputation for yielding the most pure or “clear” yellow but you wouldn’t know it from this batch of yarn. I concluded that the tannin affected the color, and the fact that the fibers weren’t bleached also made a difference.

Seeing how intense the color was, I got overly ambitious and decided to use the exhaust bath to make green by overdyeing some cotton and cottolin skeins previously dyed blue with woad. This was my first attempt to make green with cellulose yarns (though I have made many successful greens on wool and alpaca by dyeing the fiber yellow first, then overdyeing with woad). Well, my results were really pathetic and disappointing. Here’s a photo comparing them to a woad dyed skein that I wisely did not mess with.woad overdyed with weld Sorry for the blur, but the colors are pretty accurate. The woad dyed skein is on the far right. They all started out that color. I treated them with the same tannin-alum sequence as the yellow skeins, thinking the tannin might create a nice teal. Sadly, no.

I attribute my lack of success to two factors. First, the weld bath must have been exhausted, and the very little color that was left attached unevenly to the fiber. Second, I must have had a chemistry problem, even though I was pretty sure I wouldn’t. The pH of the exhaust bath when I put the woad-dyed skeins was 8, which I didn’t think it was high enough to strip the blue off the yarn. But clearly it did.

Thankful Barron Taylor

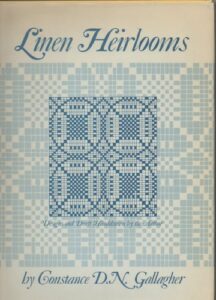
In case you are looking for it, I just renewed Linen Heirlooms by Constance Dann Gallagher (Newton Center, MA: Charles T. Branford Company, 1968) from our local library. The author gathered and analyzed handwoven linen textiles from New England, New York state, and Pennsylvania, dating from the 19th century. Many people donated items for her study. Her book contains drafts for each of the items, based on her analysis of the cloth, some photos, and information about the donors and weavers. She also explains the operation of 19th century looms, the processing of flax, and the weave structures represented in the collection. Many of the pieces, if not all, were made of fine handspun linen yarns. (OK, not like the ancient Egyptians, but at 30-60 epi still quite fine.)

Having been a little bit obsessed with flax lately, I have really enjoyed reading it. I have been amazed and inspired by the hours of labor and creative energy that went into each piece, the care with which the pieces were saved by the families who inherited them, and the effort that Ms. Gallagher put into the study. Eventually this collection became part of the Smithsonian Division of Textiles in Washington D.C.

The author herself inspires awe, being a Master Weaver who, according to the blurb on the book jacket, “combined marriage and a career in bacteriology and various types of medical research,” along with motherhood. Her fine linen pieces won awards at NEWS (which I attended for the first time this summer!). I have also found the stories about the weavers and their families touching and inspiring.

One weaver whose story especially captivated me is Thankful Barron Taylor (1801-1896). Thankful lived in Washington, Vermont. By the way, she is not the Thankful Taylor from Tennessee who was famous for having a snake in her belly. And also by the way, Thankful Barron Taylor’s mother was from our fair city, Amherst, MA. 12/17/2023 Edited to note that the link to the Rutherford County Historical Society article about Thankful Taylor seems to have issues, so I removed it.

Thankful was educated at home. At the age of 15 she was inspired by a preacher who quoted from the New Testament in the original Greek. She wanted to read the Greek scriptures, and asked the preacher if she could borrow his books. He said, “No way, José,” or words to that effect. Many years later she was able to acquire said scriptures in Greek along with a Greek-Latin Latin-Greek lexicon. Excellent! The only problem was she now had to learn Latin as well as Greek to translate the darn thing. “No problemo,” she said (or words to that effect). “I can do that while I spin, hombre!”

To give you a taste of why I find Thankful’s story so sweet, here are some tidbits from an article by Washington, VT compatriot Lena Roberts, cited in the book. “[Thankful] had a predilection for metaphysical and scientific works. She is in sympathy with Spinoza. […] She gave much attention to chemistry […]. She hatcheled and spun the flax and wove the canvas, on which she wrought in colors the combining proportions of the elements.”

Here I’m picturing a needlepoint or crewel work periodic table, and I want one.

“The study of botany, zoology and biology, with the aid of a microscope, have been pursued with avidity.” This in addition to raising a family and all the daily labors of a household. She earned $12 (which must have been a lot of cash in those days) to buy a dictionary by spinning yarn for several weeks.

According to an article from the Boston Globe in 1892, “[…] [A]fter the spinning wheel had earned the books, it had all the family to provide for. So study and work went hand in hand. The old lady would sit at her wheel, busily spinning, with her Latin grammar and her Greek grammar, and her Worcester’s dictionary propped open before her, and through the long afternoons the crooning conjugations of amo would mingle with the drooning whirr of the spinning wheel.”

OK, I’m sure this account is romanticized, but I still love Thankful Barron Taylor. Her pieces in the collection include a point twill and two 5 harness spot Bronson designs. She lived to the ripe old age of 95; December 17th, 2011 will mark the 115th anniversary of her death. Thank you, Thankful!