
On Wednesday November 14th I gave a presentation to the Weavers of Western Massachusetts (12/24/2023 Edited to add, they have a website now so I added a link!) about my Coptic bound books with handwoven cloth covers. It was very flattering to be invited to share my work with such an accomplished group of weavers, and I really appreciated the opportunity to talk about my process to an interested audience. It was a lot of fun. Continue reading “Guild Presentation”
Doubleweave Pick-Up
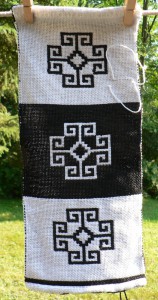
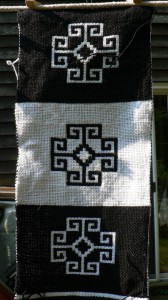
Doubleweave pick-up is a way to weave a reversible pattern by manually picking up the threads from the bottom layer and bringing them to the top. In those same areas, the threads from the top layer show up on the bottom. Before I go any further, here are the two sides of my sample so you can picture the end result as I describe the process.
Colonial Doubleweave
July has been a very busy time, what with all the watering (it’s been hot and dry), squishing of bugs, and weeding, not to mention flax harvesting. However, I recently did a tiny bit of weaving for my double-weave study group with the Pioneer Valley Weavers Guild, led by the elegant and brilliant Barbara Elkins.
Doubleweave is a versatile technique that lets you weave two layers of cloth at the same time. The layers can be joined at the right or left edges, joined at both edges, they can be totally separate, or they can exchange periodically (i.e., the bottom layer comes to the top and the top layer goes to the bottom). Our samples used four shafts, which is the minimum number you need.
The whole process has been full of visual surprises, beginning with winding the warp. For our samples, we wound a warp with two alternating colors. I chose black and white for maximum contrast. On the left, below, is the cross with my counting thread. You can see the separation of the white and black layers. On the right is the warp as I was beaming on. The alternating black and white ends get sorted into their respective layers when they go through the lease sticks. In the section of the warp that hasn’t yet been beamed on there is a cool transition between where they alternate and where they become separated. I warp back to front, so this un-separated section is in the front of the loom.


Dishtowels for Pioneer Valley Weavers’ Guild
I am a member of two local weaving guilds, Pioneer Valley Weavers’ Guild and Weavers of Western Massachusetts. The Pioneer Valley Weavers did a community service project this year where members wove dishtowels to donate to the Big Brothers Big Sisters fundraising auctions this summer and fall.
I decided to use Ms and Os for my weave structure, to get some nice bumpy texture. Here are my dishtowels in process. Here is the warp threaded, sleyed, tied on, and ready to go:

It is a mixture of different sizes of cotton yarns, as I was trying to use old yarns from my stash. So, the black is 6/2, the light green and gold are 10/2, and the cream is 8/2. I think they are all mercerized, but they are still soft enough to be absorbent. The width is 22.3 inches in the reed, and it’s 536 ends sett at 24 epi, sleyed 2 per dent in a 12 dent reed. I wound a 4 yard warp, which I thought would be enough for three full sized towels. As it turned out, I only had enough for two towels and one smaller napkin or bread-basket sized cloth.
One towel has a pale yellow 22/2 cottolin weft:
I like this one because the values and proportions in the stripes work the way I imagined, and I like the lacy feeling.
I wove the other towel with a bright turquoise blue 6/2 cotton weft:

The intensity/saturation of the turquoise interferes with the stripes. As Matthew put it, everything feels like it’s underwater. In future, to use this color weft again, I would redesign the stripes in a smaller scale and with different colors. I think that a more intense bright yellow would work better than the gold, for example. On the other hand, several people to whom I showed the finished towels said they preferred the turquoise one.
For the smaller napkin-sized piece, I alternated the turquoise and pale yellow, and I like the plaid effect a lot (the pale green stripe at the bottom is plain weave, which I sewed into the hem).


Above, the napkin-sized cloth looks round because it’s draped over a round foot stool, but I think you can see the plaid effect pretty well.
New Huck Lace Bookmarks–Still Pink, Still Heart-y
Since my madder-dyed linen heart-motif Huck lace bookmarks have been selling pretty well, and since Mothers Day is coming up soon, I decided to weave some more of them. Also, I thought my loyal readers might like a little break from photos of small flax green plants (as there will be a lot more on the way). So, here’s a photo of a bookmark in progress, showing the edge of the two-inch spacer I use to separate each one.
 There are a lot of steps involved in planning and weaving anything. There are more steps involved if you dye your own yarn and, like me, do not necessarily dye it for a specific project. For example, I had dyed three skeins of 40/2 linen with madder a while back, and had used two of them for my previous batch of bookmarks. Luckily, I keep copious records and I always “show my work,” since I was raised in that 1980s math-generation. So, I knew that I had used 2.16 ounces for the warp last time (with a little left over) and 1.56 ounces for the weft (with almost a full bobbin left over). With 3.72 ounces I wound a ten yard warp and wove 23 bookmarks, plus some weft to spare.
My third skein was 1.7 ounces, a very pale but pretty shade of bluish-pink (the others were more on the red/orange/salmon side of pink). That’s about half as much as I used in my last project, and the question was, how many bookmarks could that make? There are a few ways to find out. Here’s my way.
Yarn is usually sold with a certain amount of helpful information provided, e.g., its size and ply. Sometimes the vendor will also give you a measurement called “yards per pound” which tells you just what it sounds like: how many yards of that yarn it takes to weigh a pound (or an ounce, if you divide by 16). If you don’t know the yards per pound, you can figure it out (or get a good approximation) using a nifty tool called a McMorran yarn balance. You could use the yards per pound for the yarn, and the weight of your skein, to figure out how many yards your skein is.
However, when dealing with limited quantities of naturally dyed yarns (or handspun, naturally dyed yarn, even more so), I have found that the best way to be certain of what I have is to measure. Ideally I would have a niddy noddy that measured skeins by the yard or some other useful increment, but mine doesn’t. So, I often count out the length on a warping board, and that’s what I did this time. OK, done! I had 630 yards of pale pink. Since I had roughly half as much yarn as I used in the last batch, I estimated that I could wind a 5 yard warp and get about 11 bookmarks out of it. But how to be certain? (Certainty is important to me, to a point). Math to the rescue.
To calculate the amount of yarn I’d need for the warp, I first multiplied the width in the reed by the ends per inch (which really just tells you the number of ends in my project, which I actually knew already). My project has 75 ends (a bit more than 2 inches in the reed sett at 36 ends per inch, or epi). Then, I multiplied that by the number of yards in my desired warp, which means I’d need 375 yards for a 5 yard warp. To calculate the number of yards I’d need for the weft, I multiplied the length of each bookmark (12 inches) by the number of bookmarks I thought I could make (11), which meant I would need to weave 132 inches of warp. That’s the length part of the bookmark (two inches of each bookmark is just fringe, which doesn’t use any weft, so I figure this covers the take-up and then some…see below). Now for the width, 75 ends, which means I need a total of 9900 inches (75×132) or 275 yards of weft (divide 9900 by 36). Add that to the warp requirements, and you get 650 yards total. Well, I was 20 yards short, but luckily I had a bobbinful from last time that was definitely more than 20 yards.
My way is sort of a middle way. I could have gone with my initial estimate, which was accurate enough. Or, I could do a lot more fastidious calculations involving additional factors, including draw-in (how much the project pulls in as you weave compared to its width in the reed), take-up (how much it shortens in length due to the fact that the threads are traveling over and under one another; even though the distance taken up by each little bump is minute, it adds up over the length of the warp), and shrinkage (how much it shrinks when you wash it). I have notes about all these things from the last batch of bookmarks (“I have detailed files…“), but I glossed these considerations because eventually you just have to get started on the weaving before it actually IS Mothers Day.
So, I wound a 5 yard warp, dressed the loom, and began weaving away. The first two bookmarks were happy enough (the second was a little squat from beating too hard). Then near the end of the third, I got one broken end, and then immediately another. Grrr. Broken ends are when one, or more, of the yarns in the warp break. Then you have to stop and fix them, and it slows everything down. These bookmarks take me about an hour and a half *each* as it is (including winding the warp, dressing the loom, weaving, washing, ironing, trimming, but not including the dyeing because that labor is infinite and cannot even be quantified). So, I fixed them and then decided I needed to be more strategic about preventing any more broken ends.
A note here. I had problems with broken ends last time, too, and didn’t ever solve the problem. I blamed my yarn, and thought perhaps it was not high-quality. But then I had the good fortune to confer with another weaver who weaves with the same yarn, and he said he has no trouble with it and thinks it’s very good quality. He also hand-dyes his own yarns, but with synthetic dyes, so they are not subjected to the same high-temperature, high-alkaline treatment that mine are. The fault, we decided, was in my comparatively harsh treatment of the fibers in the scouring process (too much soda ash and boiling water is maybe a bad thing). Something to keep in mind as I perfect my cellulose techniques. In sum:
1. There was nothing intrinsically wrong with the yarn.
2. I only had myself to blame for its weakness.
3. I will certainly need to continue to use soda ash and may run into this problem again.
Thus, I’d better find a way to solve the problem.
Much of the information I have read about weaving with linen insists that you have to size the warp (or apply “paste”). I have never sized a warp. I admit my total ignorance, and even prejudice, on this matter. Partly, I just can’t believe it actually helps rather than make everything worse, though I don’t want to offend the hundreds of weavers who say it does help. But mostly I cannot imagine having a lot of sticky-when-wet-dusty-when-dry starch smearing all over my lovely loom and getting everything gross. NO!
So, instead I cast about in my memory for other ideas I had read about…. Linen fibers are stronger when damp. Weave in the basement? Don’t have one. Run a humidifier by the loom? Our apartment is built on a concrete slab by a stream in the floodplain of the Fort River, more generally located in the Connecticut River Valley in Massachusetts, on the east coast of the United States of America. I can’t imagine voluntarily adding extra moisture to the air. We have to run a dehumidifier in the summer to keep the mildew at bay. So, NO! Then I recalled someone saying that it used to be her job to spray the warp to keep it damp as her mother worked. So, I acquired a clean spray bottle (ours always get filled up with fish emulsion or borax or vinegar or somesuch thing, don’t ask me why).
 I put some water in it, and I sprayed the warp just at and above the fell line (where the beater presses the new rows, or picks, of weft into place). Bad idea. Everything got wobbly, the fibers swelled up, nobody could stay in their correct place and threads were pushing and pulling all over the place. It was a sad sight to see among my orderly little linen threads. So I let it dry. Then I decided to spray up where the beater rests when it’s upright (the white cloth in the photo is to absorb excess water and wipe off droplets from the shuttle race and reed).
 Then I pulled the beater forward and sprayed in amongst the heddles.
 This was the zone of weakness, where the breakages occurred, where there must have been a bad combination of abrasion and stress. In addition to keeping that region of the warp damp, I also kept the fell line closer to the breast beam and advanced the warp more often so I was always weaving with the widest possible shed. These techniques are good practice anyway, but when I’m feeling pressed for time I try to push it a little. You can’t really push linen. I re-sprayed each time I advanced the warp. And ta da! Success! I wove 5 more bookmarks with narry a broken end!
Last but not least, if you read my earlier post about hemstitching and Chuang Tzu, you may remember my trouble with fraying in the hemstitching process. I tried adding twist as I worked, using a magnifying glass, and other tricks. But the one that really seems to work is wetting the thread. Don’t get it too wet, or it swells up, and then the water absorbs into the woven cloth and it also swells up, and then even with a magnifying glass you can’t see where the holes are or get your needle through…. Enough water to make it damp. Once in a workshop at Long Ridge Farm, when she was describing how wet you want your cloth when you apply soybean-milk as a binder, Michele Wipplinger described it as feeling damp, but only just damp, not wet, and primarily cold. You feel for the temperature. It’s a bit like that with the hemstitching thread (which is a piece of extra weft yarn reserved for the purpose of securing the edges of my bookmarks. Six times the width of the bookmark is optimal. Five times is enough, but it cuts it a little close and is stressful.) You want it cool, damp, but not dripping wet. And bingo.
You can go buy my new batch of bookmarks at the Shelburne Arts Co-op in Shelburne Falls or at Saw Mill River Arts in Montague.
Exhausted Madder and Exhausted with my Warp
I have exhausted the madder bath I’ve been working on.
 These are the 10/2 bleached cotton skeins which were double-mordanted with aluminum acetate and heated in the calcium carbonate fixing solution. Actually, I could probably run one more bath for an extremely pale pink, but I’m ready to move on with other projects.
Now that I have a pretty decent stash of naturally dyed cotton, linen, and cottolin, I have been using only naturally dyed pattern weft yarns for my current batch of book cloth (the warp and tabby yarns are commercial). Thus far, I have really enjoyed using yarns that I dyed myself. However, on Monday I was having a mightily difficult time choosing color combinations. I couldn’t figure out what my problem was, but I was dissatisfied with everything I tried. Colors that I had been perfectly happy with before–my screaming yellow weld, for example–looked ugly and annoying.
After a while I realized that I was just tired of weaving the same pattern over and over again (Young Lovers Knot). I put on enough warp for about 20 pieces, with the idea that I was being efficient. But instead I was bored. I am never, ever bored. There is so much to do all the time, and so many interesting things in the world, how could I ever be bored? It took me a while to recognize the feeling, and I felt better when I figured it out.
So, I decided to mix things up a little. I bought some new spring-like colors of 20/2 cotton (the sadly discontinued line from UKI) and decided to use commercially dyed 10/2 for the pattern weft for a while. I also switched from weaving the Young Lovers Knot pattern “Star Fashion” (which gives it those nice diagonal lines) to weaving it “Rose Fashion” (which makes all the motifs more rounded). It was a nice change of pace, and the new colors got me motivated again. In fact, with the new tabby colors, my naturally dyed yarns have taken on all sorts of new possibilities. Here is a 20/2 linen madder-dyed skein from the recent dyebath woven with a rich purple commercially dyed 20/2 cotton tabby weft. It’s sort of easter-eggy but considering that crocuses, daffodils, and all the other bulbs are blooming now, it feels OK to me.

Where are the books now?
My blank books and bookmarks are now available for sale at two fine establishments, Shelburne Arts Co-op in Shelburne Falls, MA, and Sawmill River Arts by the Montague Bookmill in Montague.
In other news, I have been making plans for flax growing experiments this spring. Usually I don’t plant flax until mid-April or even early May, but spring has come very early this year. I have grand aspirations this year, and will be growing several varieties: a non-specified fiber flax variety from Richters, Evelin from Richters, Marilyn from the Hermitage, and a tiny quantity of Regina from Sand Mountain Herbs. Stay tuned for more updates about flax.
February 29th, 2012
The Leap Day of the Leap Year
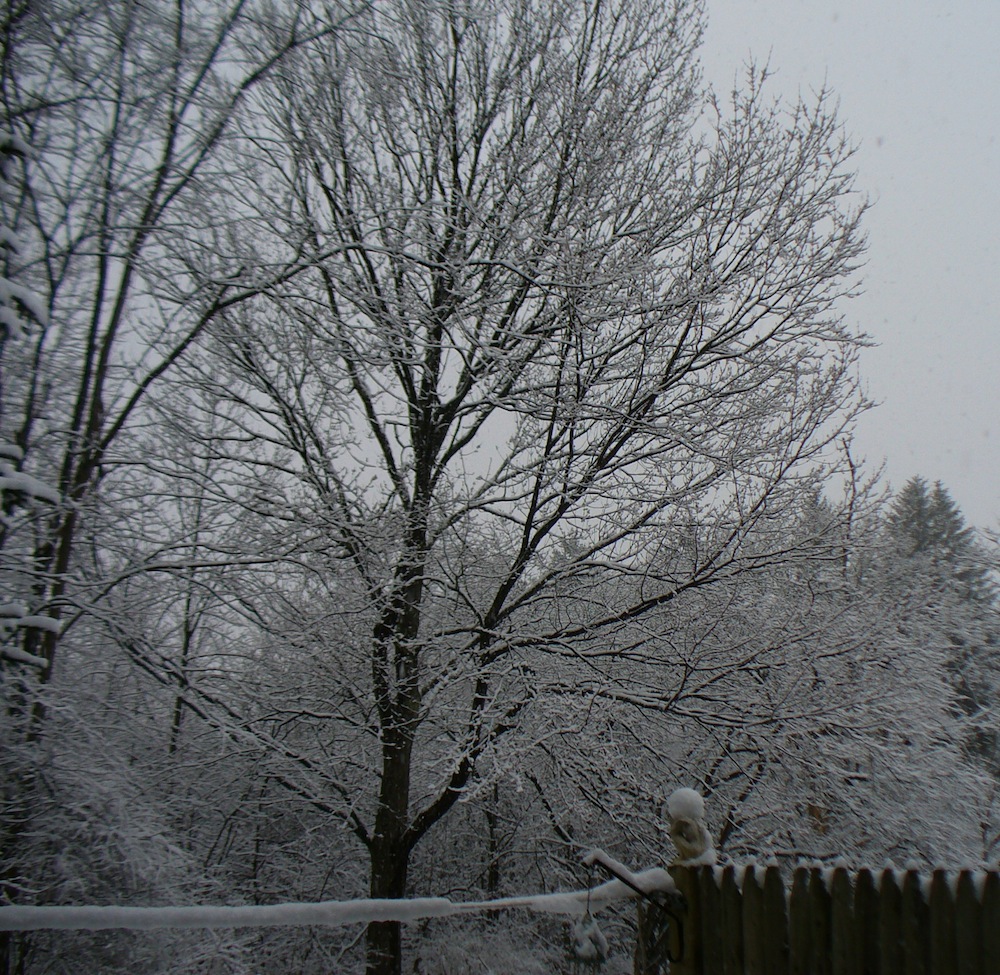
Today it is snowing. A much more typical wintry day than February 1st. Here’s what I have been doing so far today, fiber-wise:
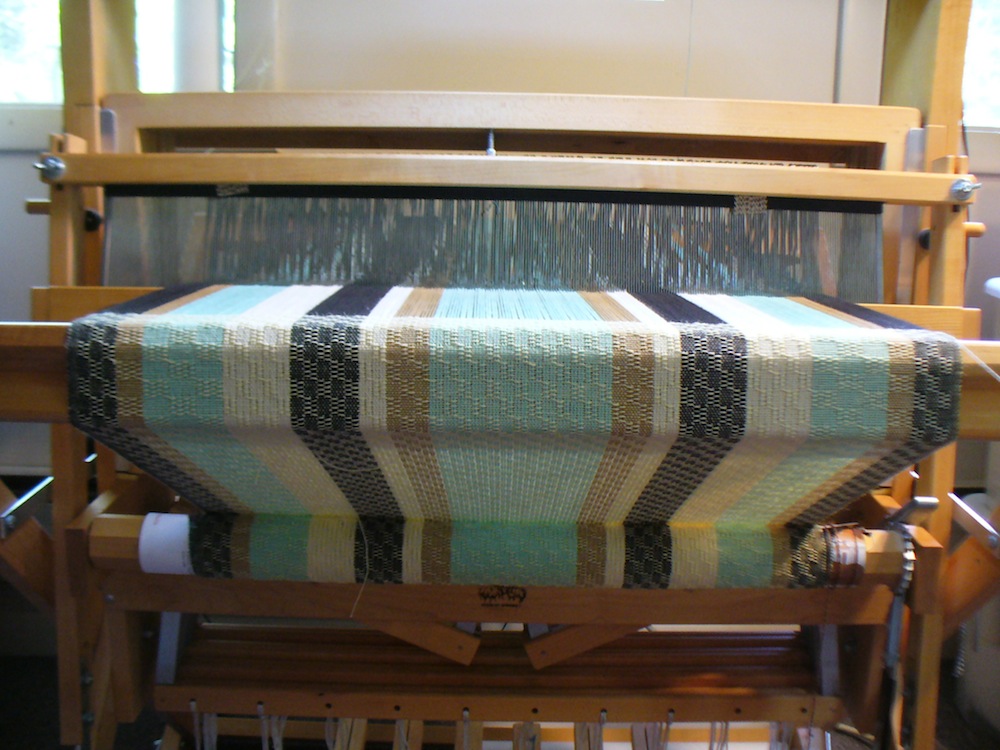
I wove a section on my new warp, threaded once again with Young Lovers Knot, for a new batch of journals. Today I wove the section in the photo below. The blue is 22/2 cottolin dyed with woad and weld, and the tabby weft is teal 20/2 cotton, commercially dyed. When I first dyed the cottolin I was disappointed not to get a better green, but with the brighter colored tabby background it looks very nice anyway.

I changed the treadling for the sections where I’m using 20/2 linen or 22/2 cottolin because no matter what I do, I can’t beat it square with these yarns. With 10/2 cotton or 10/2 tencel it’s not a problem. Linen is just less inclined to submit to compression. It’s one of the things I love about linen, it has a mind of its own. And really, it’s not meant for overshot pattern weft, so who can blame it? To accommodate the linen, I shortened the square (or table) by two picks.
I wet-spun spun some bleached flax top (from Louet, not my own). It’s tow (short fibers). I did about half this bobbin today. My legs got wet, but it went with the snowy theme outdoors, so I didn’t really mind.

I was originally planning to spin a second bobbin and ply them, but I think I will leave it as singles and take out some of the extra twist when I wind it onto bobbins for weaving. My new plan is to spin the other half dry and then weave samples with them (using them for weft) to see if there is a noticeable difference between wet and dry spun tow.
I did the second extraction on two new dyebaths that I started over the weekend. One is madder (8 oz. roots bought from Aurora Silk a few years ago). The other is the Flavoparmelia lichens I collected this winter, plus the bark they were growing on. Since it is snowing, I heated these indoors today. Fortunately, they both smell amazing. Too bad you can’t smell them. The lichen smells like hot piney woods in the summer or a toasty fire in a cabin in the woods. The madder smells fruity, like red wine or blackberries getting boiled for jelly.

 I plan to extract each one more time, then combine the extractions for stronger color. With the combined extractions, I am hoping to get a respectably rich color from the first madder bath, at least. The Flavoparmelia is an experiment, but I figure I’ll give it every opportunity to yield a strong color, if it can.
I am sticking with cellulose yarns for the time being, which are proving to be tricky. The colors are coming out lighter than I expect each time, with the exception of the CRAZY bright weld earlier in the fall/winter. Here’s how it’s looking woven up. These two photos show 20/2 linen half-bleach pattern weft with black 20/2 cotton tabby (on the black warp).

 These two show the same weld-dyed yarn with a light blue 20/2 cotton tabby weft. It’s a very woady blue, but it’s commercial. (In these sections I had not yet shortened the square, hence it is rectangular.)


Last but not least, I have stirred up my new umbilicate lichen vats to incorporate oxygen. I will post about that separately.
It’s been great to have an extra day to work on all these projects. We should have a leap day every year.
Textile Jigsaw Puzzle
What do weavers and dyers do when they are not weaving and dyeing? For one thing, textile-related puzzles! Matthew and I just finished this incredible puzzle.

Sorry, the overview of the whole puzzle is a bit blurry, but here are some details.


The puzzle is published by Pomegranate,1000 pieces, and very complicated. It took us quite a long time, but it was fun and it’s beautiful.
According to the description on the box, the image shows a portion of an offering cloth from the late 1700s found on the Island of the Sun in Lake Titicaca, Bolivia, made from handspun wool. The description specifically says that it probably was not a woman’s manta (shawl), because of its size. It is in the collection of the National Museum of the American Indian in Washington, D.C.
On the website of the National Museum of the American Indian, this same cloth is catalogued as a woman’s manta, 120x120x110 cm, made of cotton and camelid fiber yarns (meaning alpaca or llama). The site where it was found is described as the Temple of the Sun or Temple of the Virgins of the Sun on La Isla de la Luna, or Island of the Moon. I’m not sure which source is more accurate (I assume the museum catalogue). By the way, check out the “materials” list in the “object specifics” part of the collection search function. A list after my own heart.
The cloth features horizontal rows of abstract patterns (reminiscent of flags and bunting) alternating with fields of representational images including amazing animals like deer (or maybe alpaca or llamas), ducks, eagles, parrots and other birds, monkeys, people, and mer-creatures (one looks like it’s playing a guitar and is half-seal or perhaps half-manatee). There are lots of things which look like stacked up bowls, which we came to refer to as “ice cream sundaes,” and reminded us of those beautifully presented piles of fruit and other offerings at Buddhist temples. The overall feeling is a celebratory sense of teeming life and energy and abundance.
As a dyer, I was very interested in the colors. Shades of red and maroon dominate, with gold, yellow, white, purplish brown, and several shades of blue, of course all dyed with natural dyes. It was hard to tell how many colors had been used in the original cloth. The same shade of maroon looked different depending on whether it was surrounded by bright red or gold… or were they really two different shades of maroon? Tricky.
This is a color theory phenomenon called simultaneous contrast. The hue (color), chroma (intensity), and value (degree of light/white or dark/black) of a color look different depending on one color’s relationship to another. If you search for this on line you can find some great examples. I liked the examples on David Brigg’s website (though to view the videos you need Flash and some other plug-ins).
Chuang Tzu and Huck Lace Hearts
In anticipation of Valentine’s Day, I’ve been weaving bookmarks with heart motifs in huck lace. I really like them. They have a sweet, old-fashioned feeling.
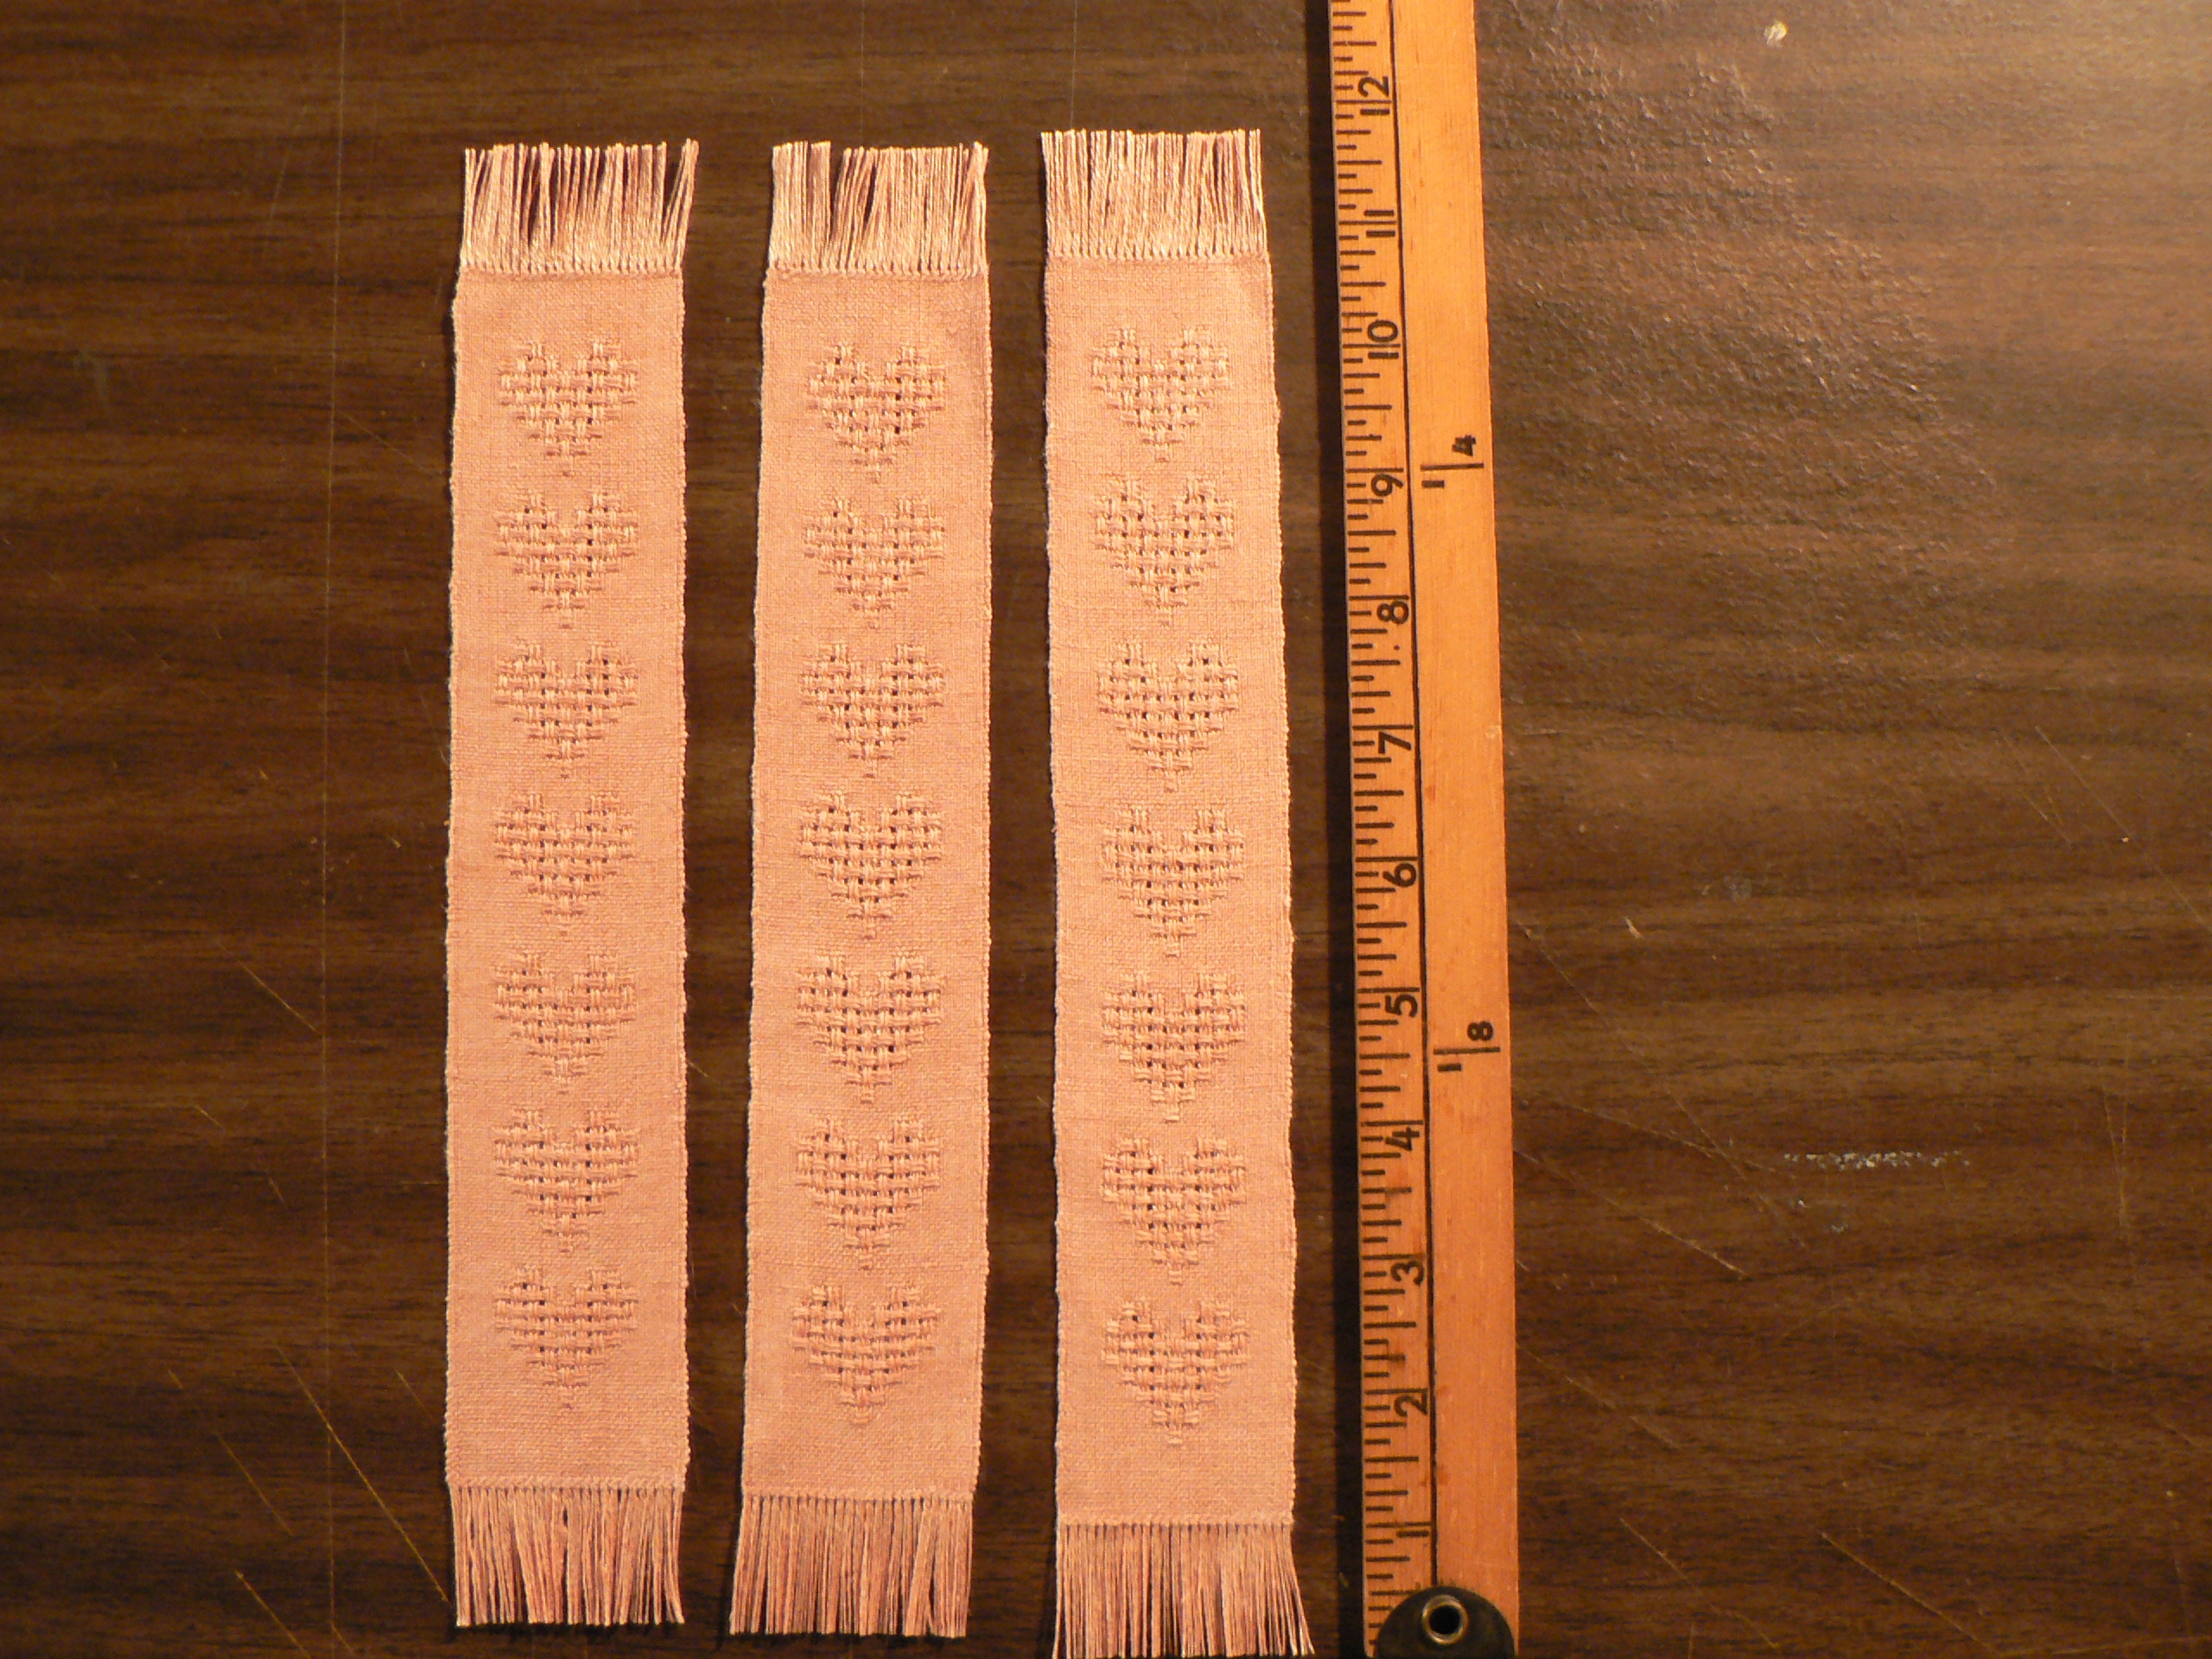
Here are three next to a yardstick to show length. Click on the photo to see more detail. The weave structure of huck lace creates floats that pass over five threads, and these reflect light more than the plain weave background. The reflectivity or sheen helps differentiate the pattern.
I’m using 40/2 linen that I dyed with madder root last summer. The warp and weft are slightly different colors, and came from two successive dyebaths. The madder roots were leftover from an excellent, inspiring workshop last summer with Joan Morris at Long Ridge Farm (unfortunately a “what I did this summer” post that never got written). By the time I dyed these linen skeins, the roots had been extracted twice already, hence the light colors.
The warp is slightly more salmon colored, toward the orange side of red. The weft is lighter pink, more toward the blue side of red. To my eye the colors and values blend smoothly; except along the hemstitching, I don’t see the difference. I was surprised to see in this photo, though, that the camera picked up the differences in color.

The threads going across are the weft, and the ones going up and down are the warp. The sett is 36 epi (ends per inch), sleyed 3 per dent in a 12 dent reed. The bookmarks are two inches wide in the reed, an inch and three quarters after washing and ironing, and range from 10 and a half to 11 inches long including the fringe. I have woven 20 at this point.
Mostly these bookmarks have been fun and satisfying to weave. The only difficulty I’ve encountered is the hemstitching. The yarn untwists as I work and starts to disintegrate. Re-twisting and wetting it helps a little, but it’s still a tricky business, even though the bookmarks are only 2 inches wide. By the time I get to needle-weaving in the ends, there’s not much left to work with. That’s problem number one.
Problem number two is that, at 36 epi, it is hard to see what I’m doing. So, I’ve been using a magnifying glass to help. It would be more efficient to have one on a stand so I could keep both hands free, but I do OK with a handheld one. Sometimes the hemstitching goes smoothly. I feel skillful. Other times there’s fraying and lumps and wispyness. I feel inept.

Here’s where Chuang Tzu comes in. If you’ve heard of Taoism, you’ve heard the sayings of Chuang Tzu: he’s the guy who inspired it all 2000+ years ago.
While I was enjoying a happy hemstitching experience and contemplating its pleasures, a story from Chuang Tzu came to mind. It’s about a butcher, or cook, who never needs to sharpen his knife. I’ve been a vegetarian for about 30 years, but I still like this story. Here’s a little excerpt from the Burton Watson translation. Cook Ting is cutting up an ox for Lord Wen-hui, who marvels at his skillfulness, and Cook Ting says …
“I’ve had this knife for nineteen years and I’ve cut up thousands of oxen with it, and yet the blade is as good as though it had just come from the grindstone. There are spaces between the joints, and the blade of the knife has really no thickness. If you insert what has no thickness into such spaces, then there’s plenty of room–more than enough for the blade to play about in.”
This is how it is with hemstitching. If you slip the needle through the spaces between the threads, it all goes smoothly. There is less abrasion on the thread, less interference with the structure of the cloth, and nothing wears out. I decided I needed a needle with less thickness. Voilá, easier hemstitching! And the magnifying glass helps.
Cook Ting describes how he feels when he has successfully worked through a “complicated situation” …
“I stand there holding the knife and looking all around me, completely satisfied and reluctant to move on, and then I wipe off the knife and put it away.”
One more bookmark completed. I feel satisfied, then I advance the warp. The Tao of hemstitching.