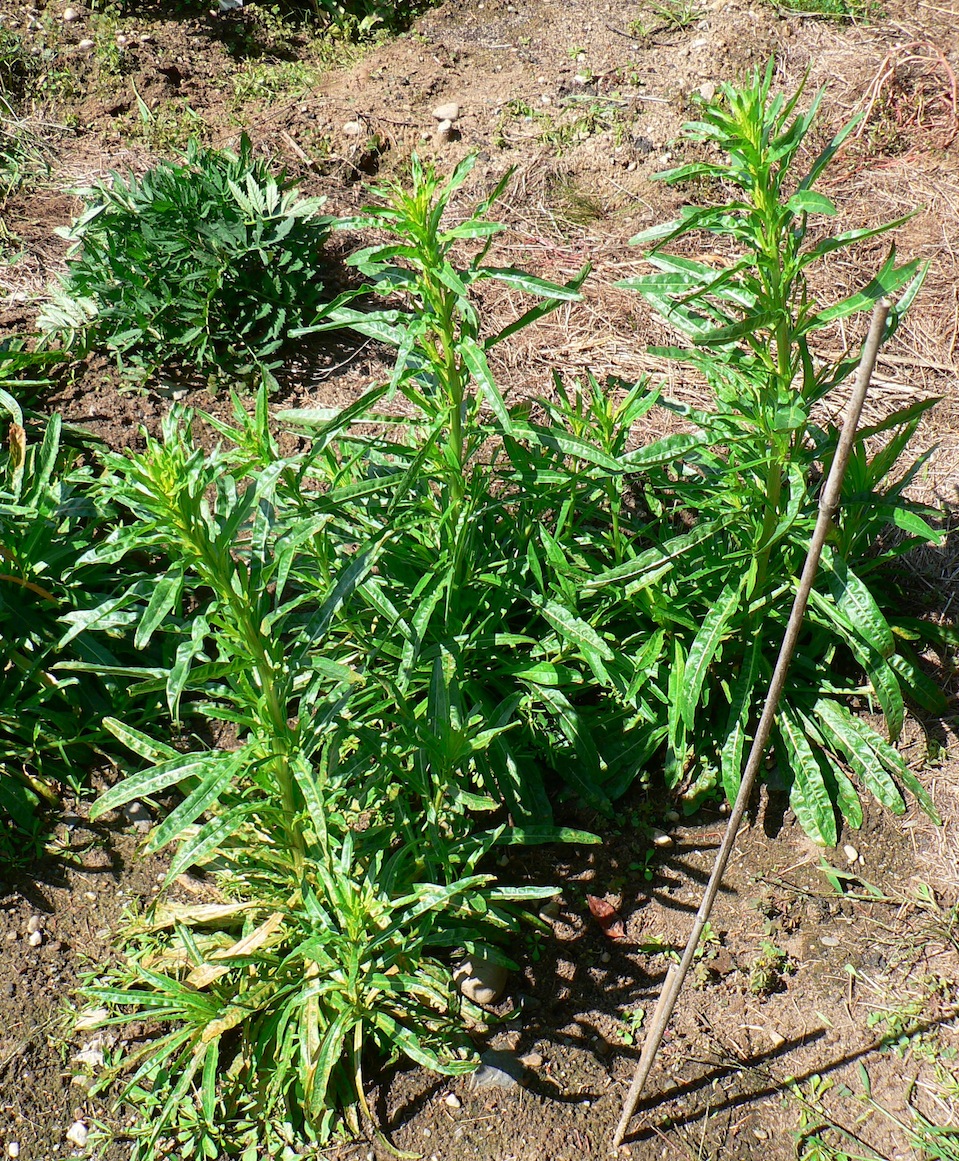
Weld is a biennial. The Latin name for weld is Reseda luteola. Luteolin is the molecule in weld that makes yellow. A plant that is a biennial typically lives for two years, and only flowers and sets seed in the second year. These weld plants were planted this spring, but as of July 18th several of them have already sent up tall stalks. They look suspiciously like they are starting to flower. This does happen sometimes, but it is still a little puzzling to me.
Below is a view of the weld bed with all the tall plants.
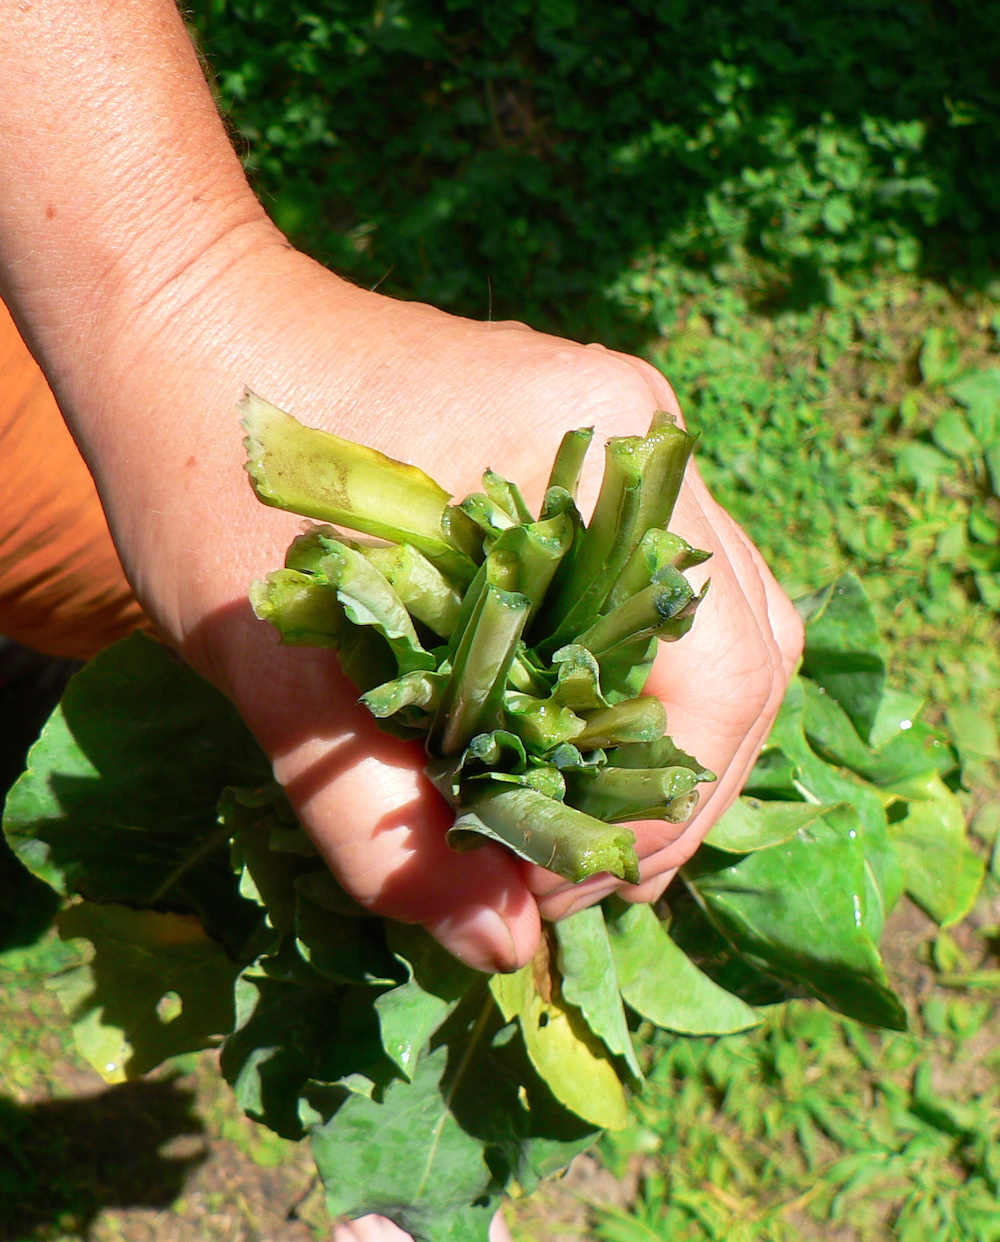
Due to one thing and another, I am not growing a lot of woad this year. I’m a little bit sad about it, but there it is. Nonetheless, I ran my first woad vat of the summer on Friday August 8th and had some interesting results. In the morning I picked 3 and a half pounds of leaves, which I did not expect to make a very strong vat.
Some blue color appeared in the stems as I ripped up the leaves, which was a good sign.
After those intense, vivid colors on 40/2 linen yarns from the first and second weld exhaust baths, I assumed there was still quite a bit of color left in the bath. I thought it would be fun to try a couple experiments. My first experiment was to put a mordanted cotton-linen blend skein in the weld bath overnight, but not to heat it at all.
Why would I even try this? Well, the answer is kind of a long story. Even though my usual method is to apply heat when extracting color and dyeing fiber, I am very aware of the fact that this requires energy. Way back in 2006 I was lucky enough to get the opportunity to travel to Kyrgyzstan along with feltmaker Karen Page, to work with a group of women in a village who wanted to develop a crafts business. My part of the project was to teach them what I knew about natural dyeing, and Karen’s job was to teach them new felting techniques. Continue reading “Exhausting the Weld Bath Part Two”→
After my dyeing workshop at Massachusetts Agriculture in the Classroom I had two strong dyebaths left over. One was weld and the other orange cosmos.
The original weld bath was made with 6oz. dried plant material from second year plants in bloom. I had originally divided the bath in half because I wanted to add calcium carbonate to the bath in which I dyed the cellulose cloth swatches, but not to the bath in which I dyed the protein swatch books. I’m not sure that the calcium carbonate would do anything bad to the wool or silk, but I consulted my notes from a workshop with Joan Morris and according to my notes we hadn’t added it to the protein dyebath. I decided not to experiment this time around. Continue reading “Exhausting the Weld Bath–Part One”→
On March 8th I presented two workshops at the annual conference of Massachusetts Agriculture in the Classroom. You can check out their website here. One workshop was on growing and processing flax, and on ways to incorporate flax into the school curriculum. The other was on growing a dye plant garden at school and using dye plants with kids.
Based on an idea from Joan Morris, shibori artist extraordinaire, I decided to make two swatch books for the dyeing workshop. Each book had five small cloth samples sewn together. The dimensions were 3 inches by 1.5 inches. One swatch book was made up of cellulose (i.e., plant-based) cloth samples, including three kinds of cotton cloth, a linen-rayon blend, and a 100% linen piece. The other was made of protein (animal-derived) cloth, including silk satin, raw silk, and three weights of wool. I mordanted the cellulose swatch books with aluminum acetate at 5% WOG (weight of the goods, or fiber). I mordanted the protein swatch books with aluminum sulfate, at 1 tablespoon per 4 ounces. The protein booklets weighed about 6oz. altogether, and interestingly the cellulose booklets weighed almost the same. Continue reading “Massachusetts Agriculture in the Classroom”→
Today it is snowing. A much more typical wintry day than February 1st. Here’s what I have been doing so far today, fiber-wise:
I wove a section on my new warp, threaded once again with Young Lovers Knot, for a new batch of journals. Today I wove the section in the photo below. The blue is 22/2 cottolin dyed with woad and weld, and the tabby weft is teal 20/2 cotton, commercially dyed. When I first dyed the cottolin I was disappointed not to get a better green, but with the brighter colored tabby background it looks very nice anyway.
I changed the treadling for the sections where I’m using 20/2 linen or 22/2 cottolin because no matter what I do, I can’t beat it square with these yarns. With 10/2 cotton or 10/2 tencel it’s not a problem. Linen is just less inclined to submit to compression. It’s one of the things I love about linen, it has a mind of its own. And really, it’s not meant for overshot pattern weft, so who can blame it? To accommodate the linen, I shortened the square (or table) by two picks.
I wet-spun spun some bleached flax top (from Louet, not my own). It’s tow (short fibers). I did about half this bobbin today. My legs got wet, but it went with the snowy theme outdoors, so I didn’t really mind.
I was originally planning to spin a second bobbin and ply them, but I think I will leave it as singles and take out some of the extra twist when I wind it onto bobbins for weaving. My new plan is to spin the other half dry and then weave samples with them (using them for weft) to see if there is a noticeable difference between wet and dry spun tow.
I did the second extraction on two new dyebaths that I started over the weekend. One is madder (8 oz. roots bought from Aurora Silk a few years ago). The other is the Flavoparmelia lichens I collected this winter, plus the bark they were growing on. Since it is snowing, I heated these indoors today. Fortunately, they both smell amazing. Too bad you can’t smell them. The lichen smells like hot piney woods in the summer or a toasty fire in a cabin in the woods. The madder smells fruity, like red wine or blackberries getting boiled for jelly.
I plan to extract each one more time, then combine the extractions for stronger color. With the combined extractions, I am hoping to get a respectably rich color from the first madder bath, at least. The Flavoparmelia is an experiment, but I figure I’ll give it every opportunity to yield a strong color, if it can.
I am sticking with cellulose yarns for the time being, which are proving to be tricky. The colors are coming out lighter than I expect each time, with the exception of the CRAZY bright weld earlier in the fall/winter. Here’s how it’s looking woven up. These two photos show 20/2 linen half-bleach pattern weft with black 20/2 cotton tabby (on the black warp).
These two show the same weld-dyed yarn with a light blue 20/2 cotton tabby weft. It’s a very woady blue, but it’s commercial. (In these sections I had not yet shortened the square, hence it is rectangular.)
Last but not least, I have stirred up my new umbilicate lichen vats to incorporate oxygen. I will post about that separately.
It’s been great to have an extra day to work on all these projects. We should have a leap day every year.
I have not been hibernating, but I am woefully behind on sharing my dye news. So, my first post of 2012 is actually a belated one that I began writing weeks ago.
Back in December, I decided to dye several skeins of cellulose yarns (linen, cotton, and cottolin) for future projects featuring naturally dyed yarns. So many colors to choose from…. I have tons of dried weld in the closet, which made yellow an obvious choice. To prepare for dyeing with weld, I went back through my old dye notebooks, and found a note that one summer some of the weld plants bolted and flowered in their first year, but only got to be about 2 feet tall. So, weld can flower the first year, but technically it’s a biennial. In my experience, the plants get giant (5-6 feet) in their second year, hence all the dried weld in the closet. Hence yellow yarn.
There are a range of opinions about how to achieve the best results with natural dyes on cellulose (i.e., plant) fibers. Everyone agrees that a thorough scouring is necessary to begin. I washed the skeins in hot water with regular laundry detergent first, then used soda ash at 2% weight of goods and an anionic (edited: cationic, it turns out. My mistake.) scour from Earthues (ordered from the lovely and inspiring Nancy Zeller at Long Ridge Farm) at 6% WOG.
Some folks recommend an alum-tannin-alum sequence using aluminum sulfate and a tannin source. Others recommend just aluminum acetate with no tannin. I decided to follow instructions from Earthues (maybe not their most current recommendations) and treated the yarns with tannin first (Earthues’ gallotannin, from oak galls) at 5% WOG, then the next day mordanted with alum acetate at 5% WOG. My yarns were 22/2 unbleached cottlin and 20/2 linen half-bleach.
I used 9.36 oz. of dried weld (stems, leaves, and flowers) to make the dyebath, planning to dye about 12 oz. yarn.
Here I must digress for a moment. Back in December I checked out Anne Bliss’ sweet little book North American Dye Plants from the library. In her preface she acknowledges the support of her family in tolerating the “odoriferous stews” her research required. In our house we call the same phenomenon “stinky pots,” though “odoriferous stews” sounds much more grand. Weld is a stinky plant. The flowers are stinky in a good way. The rest of the plant is stinky in a stinky way. I don’t mind it so much because I have a high tolerance for the smells associated with natural dyes. But I try to spare my love the worst of the stenches by dyeing outside when the weather permits. Our neighbor’s cat loves all my smelly treasures, and we have many funny photos of him enjoying my fiber and dye experiments. Here’s one of Hansel luxuriating in the weld harvest of 2009.
OK, so stinky pots happen outside when weather permits. But since it was a rainy, albeit mild, December, the weld dyepot had to be indoors while it was heating (I brought up the temp to 180, held for an hour, then cooled overnight before straining). Fortunately it was not very smelly when I first heated it. Afterwards, it got outrageous! I did not extract the plant material multiple times, though some people recommend this. Once was enough.
With weld, many people recommend chalk to heighten the color, and/or dipping the fiber in an alkaline afterbath. I decided to add both calcium carbonate (at 3%WOG) and soda ash (at 2%WOG) to the strained dyebath before adding the skeins. The pH was between 9-10. I always do a delayed rinse, meaning I let the dyed yarns dry completely before rinsing them. I got intense, though kind of weird, color. I would describe the linen skeins (on the left of the photo) as mustard. The cottolin (on the right) are a lighter greenish-yellow. I put a color wheel in the photo for comparison.
Weld has a reputation for yielding the most pure or “clear” yellow but you wouldn’t know it from this batch of yarn. I concluded that the tannin affected the color, and the fact that the fibers weren’t bleached also made a difference.
Seeing how intense the color was, I got overly ambitious and decided to use the exhaust bath to make green by overdyeing some cotton and cottolin skeins previously dyed blue with woad. This was my first attempt to make green with cellulose yarns (though I have made many successful greens on wool and alpaca by dyeing the fiber yellow first, then overdyeing with woad). Well, my results were really pathetic and disappointing. Here’s a photo comparing them to a woad dyed skein that I wisely did not mess with. Sorry for the blur, but the colors are pretty accurate. The woad dyed skein is on the far right. They all started out that color. I treated them with the same tannin-alum sequence as the yellow skeins, thinking the tannin might create a nice teal. Sadly, no.
I attribute my lack of success to two factors. First, the weld bath must have been exhausted, and the very little color that was left attached unevenly to the fiber. Second, I must have had a chemistry problem, even though I was pretty sure I wouldn’t. The pH of the exhaust bath when I put the woad-dyed skeins was 8, which I didn’t think it was high enough to strip the blue off the yarn. But clearly it did.
After sifting through a tiny fraction of the weld seeds I had collected and dried, I began to wonder whether I actually needed to separate them by color. More accurately, I began to hope that I didn’t have to, because even with the double-sift/shake-down method, progress was slow.
I decided to do a germination test. On July 3rd, I planted some yellow seeds, some brown, and some black. Lo and behold, a month later, none of the yellow or brown seeds had germinated, only the black ones had. These photos are from August 2nd.
Yellow Weld Seeds. No seedlings here.Brown Weld Seeds. No seedlings here, either.Black Weld Seeds. Ah ha!
Granted, it was a small-scale trial (I only filled 6 cells with each type of seed), but still I felt pretty satisfied that the lightest colored seeds are, in fact, immature, and not worth saving.
For many years I have been a teacher. In September you go back to school, and you get to tell people about what you did over the summer. I did a lot this summer, so this is the first installment of what will hopefully be several entries about my summer.
The Parable of the Weld Seed
You have probably heard the parable about the mustard seed, that from the tiniest seed the largest shrub grows. I get the point of this story, so I’ve been willing to overlook what I consider its botanical inaccuracy. But, being Literal Girl, I have always wondered why this saying is about mustard. Its seeds are pretty small, but not the smallest. You can’t really call it a shrub, and I don’t think that even very tiny birds could nest in its branches. The plant which deserves a parable about the smallness of its seeds, in my opinion, is weld.
Weld has eensy weensy seeds. In its second year it grows into a 5 or 6 foot giant, and while birds don’t nest in its branches, bees and other pollinators adore its flowers. Weld’s parable could be about persistence rewarded, or it might be a cautionary tale about obsessiveness. I’ll tell you my story and you can be the judge.
First year weld rosettes in September
Weld is a biennial. In my experience, it is slow to germinate and doesn’t produce much foliage the first year; it makes a flat rosette, which you can harvest but not in vast quantities.
The second year it bolts, blooms, and sets seeds. In A Dyer’s Garden, Rita Buchanan says you can trick it into flowering the first year if you plant it very early and expose it to frosts in the spring. This has happened in my garden once, but the plants didn’t get very big.
Weld in bloom. Flowers up top and seeds below. Note the happy bee.
Weld has a habit of continuing to add new buds and flowers to the tip of a flower stalk even after the lower ones have been pollinated and set seed. This makes it tricky to save seed from. But since one weld plant produces a zillion-jillion seeds, I can’t resist trying. Another annoying thing about it is that the seeds are safely encased in a tight little ruffle so they don’t shake loose easily. Well, you can crumble the little ruffle (I will find out the real botanical name for that and tell you later), but then the seeds are all mixed up with powdery ruffle-debris. Also, because some seeds on a stalk are mature and some are not, you get a jumble of black, brown, and yellow seeds plus the powdery debris, and some dried flowers and leaves. Very pretty.
But how to clean the seeds? I was pretty sure that only the black seeds were mature, since they tended to occur at the bottom of a stem and thus must be the oldest. I figured the others weren’t worth saving. When getting ready to plant in the spring of 2010, I diligently selected the darker colored seeds by shaking the seeds and debris onto a paper plate and picking up the darkest colored seeds with a damp finger (I licked it). Since you only need a few seeds to get a lot of plant material, I didn’t knock myself out with this method.
This summer I had the notion that I would save large quantities of dye plant seeds to package and sell. I cut the giant trunks of second year weld, and hung them to dry.
Me with an armful of weld. This is about a quarter of the harvest from four plants. Note cardboard.
Some seeds will fall out of their little ruffles, and if you’re doing small amounts you can catch them in a paper bag. Because of the quantity I was trying to process, I put a big sheet of corrugated cardboard underneath the drying flower stalks outside to catch any mature seeds that might fall. Because it sometimes rains, the big sheet of cardboard also became the thing to carry the flower stalks inside on to keep them dry. Then the big piece of cardboard became the thing I stored the weld flower stalks and seeds on while I got around to dealing with them. The big piece of cardboard took up space in the apartment or the car for a few weeks until sane people become tired of always having to be careful not to bump the big sheet of cardboard full of powdery-debris-that-mustn’t-be-spilled. The time had come to process the seeds.
So I began with my trusty finger-licking method, and a brush. It was tedious. Matthew (the sane person) pointed out that licking my fingers might not be an approved technique for seed saving, especially if I wanted to sell my seeds (“Want some free germs with that?”). A better method was called for. I did not want to try water flotation because getting all those seeds dry again seemed daunting. You can’t just sift out the seeds because they are the same size as the ruffle-debris. You can’t winnow because the seeds are so light. After much trial and error, we came up with the double-sift: first sift the too-big particles, then the too-small particles.
Getting ready for the first siftFirst sift results. Got rid of the leaves.Second sift with results in the tea strainer. Dried flowers removed.
This reduces the quantity of debris and increases the seed-to-debris ratio. At long last, I noticed that the debris could be separated from the seeds by tipping a piece of paper at an angle, and allowing the heavier particles to fall down. The seeds fell down and the dust stayed up.
Shake down method. Note seeds falling and debris staying at the top. Go gravity!
To some extent, the lighter colored seeds could be separated from the dark colored ones because the darker ones were heavier. So, I managed to get a certain amount of brown and black seeds collected. Still, it was slow going. It tried my patience. Then the voice of doubt began to whisper, did it really matter? Why waste my time separating them if I didn’t need to? Were the yellow and light brown seeds really immature? What if they’d germinate just fine? Stay tuned for the next chapter in the parable of the weld seed.
Mixed weld seeds after the double sift and shake down. Not a lot of black ones, alas.