
Once again, thanks to a snow day on Tuesday, I have made more progress on my new rya this week than I might have otherwise. Nevertheless, it is posing many challenges. The design is supposed to resemble an egg in a nest (Matthew’s idea–Thanks, Matthew!). Specifically, I’m thinking of a wood thrush egg, which is a very beloved bird to me. My colors are shades of tan and brown, dyed with black walnut, and blue-green for the egg, dyed with Queen Anne’s Lace and woad. Wood thrushes like to incorporate white material into their nests, so there is a very light colored layer around the outside of my design.
Well, the thing about most weaving, including rya, is that the warp is vertical and the weft is horizontal. You’re basically working with a grid. And the thing about a nest and an egg is that they are not rectangular. They are curvy. So, one big difficulty has been figuring out how to translate curves onto the graph-paper grid of my design, and hence to the rya itself.
In The Techniques of Rug Weaving, Peter Collingwood specifically advises, “avoid lines and curves that approach the horizontal” if weaving a long-pile rya such as mine. Ah well.
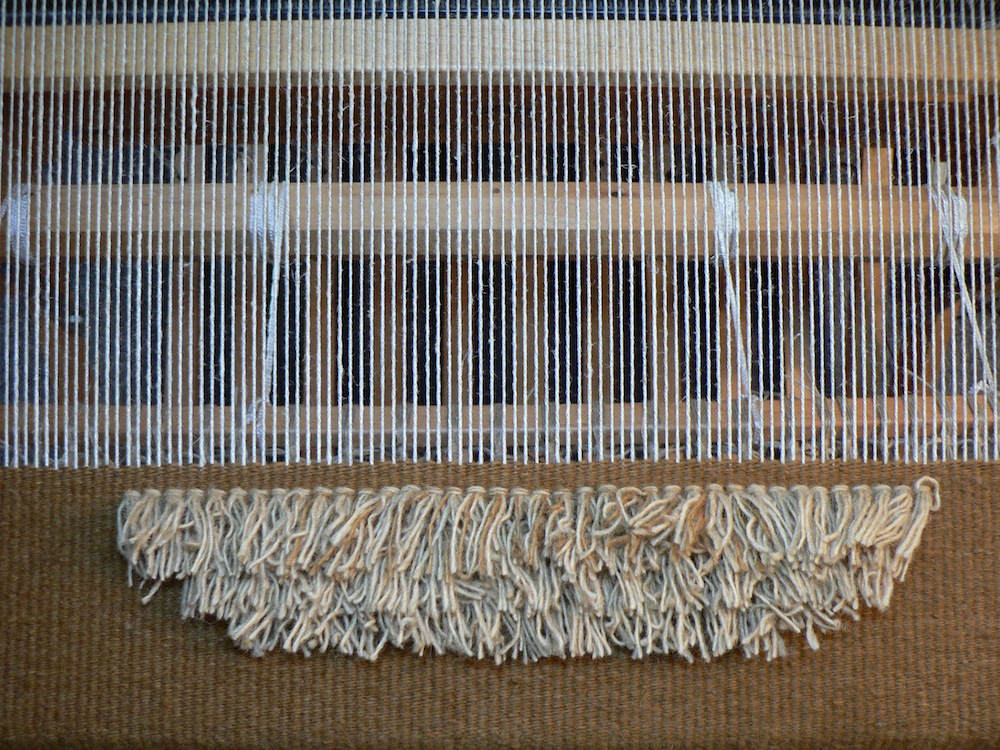
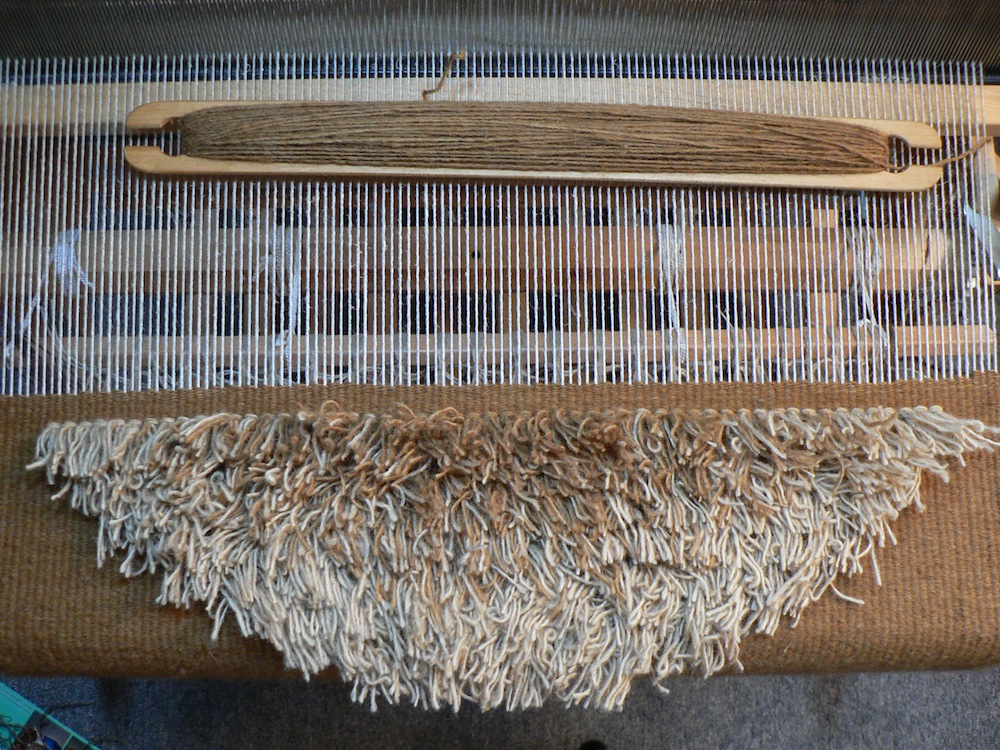
Here was the first attempt. The bottom is too flat.
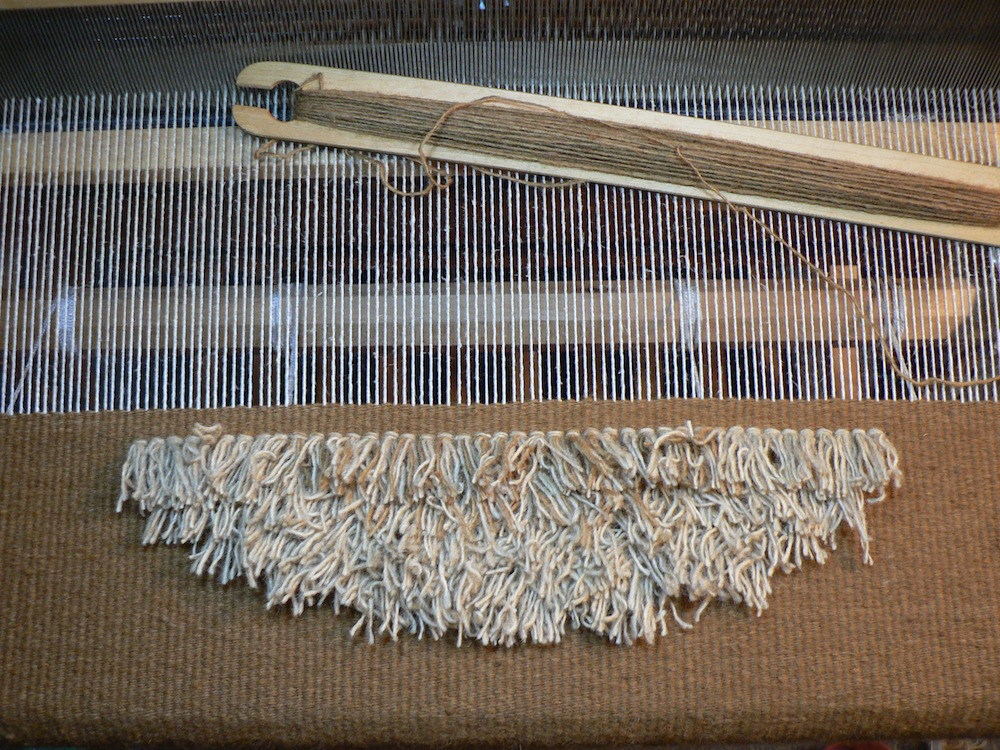
So, I unwove that and started with a narrower row of knots at the base. Much better.
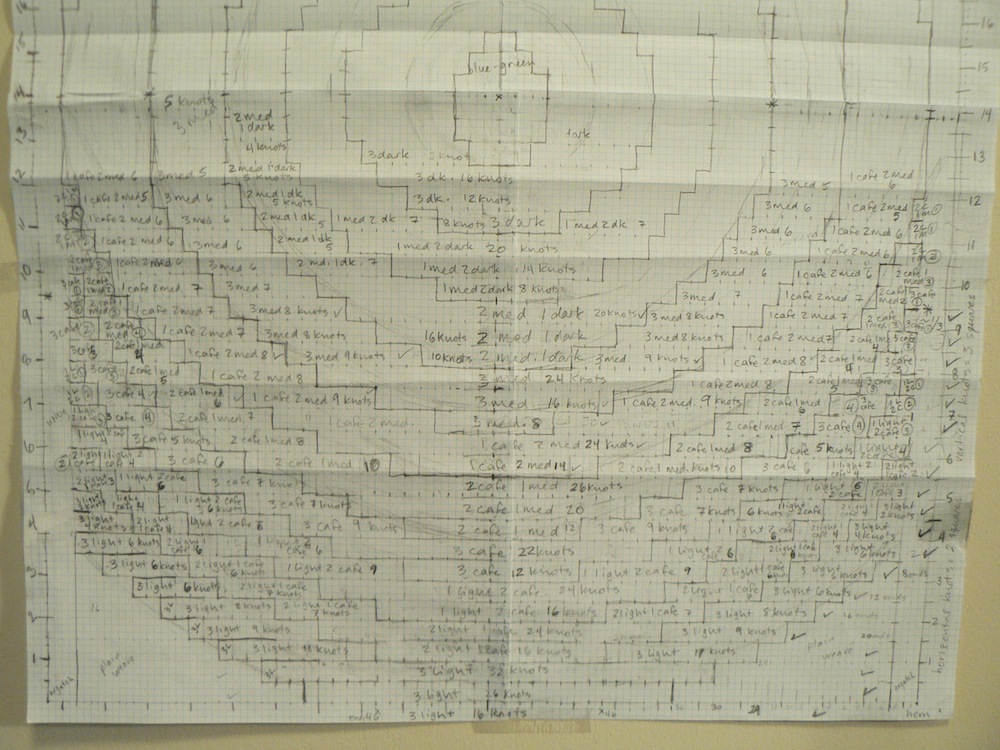
Here’s the lower section of the plan taped up to the loom as I work.
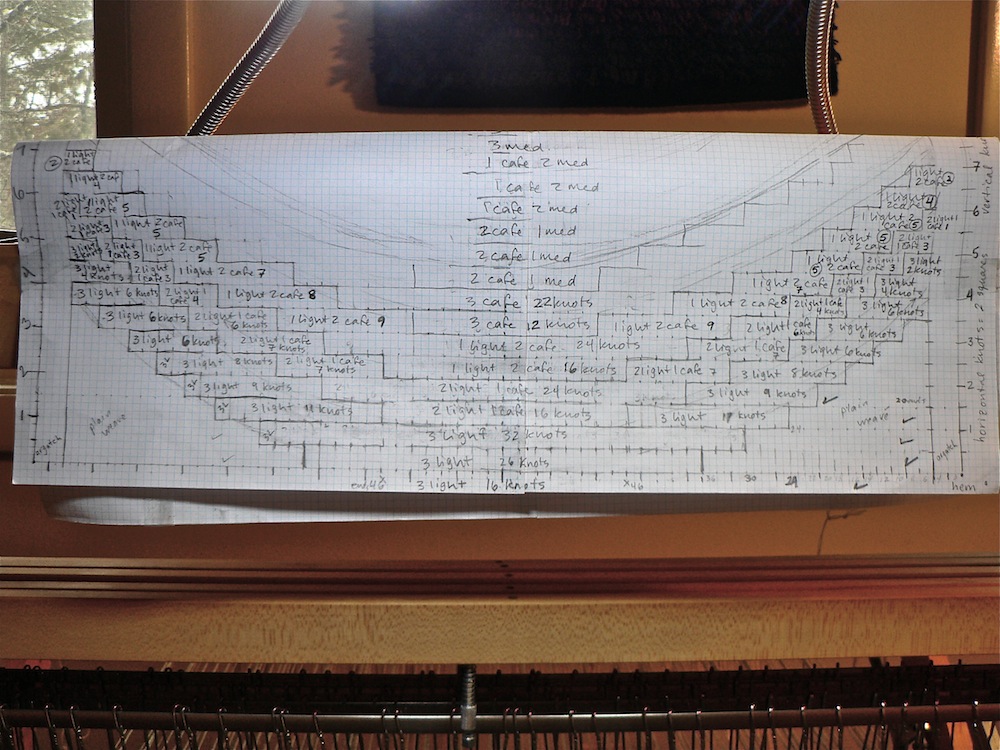
One technical consideration when planning a rya is that each row of knots is separated by several rows of plain weave. In my case, I am weaving 26 picks of plain weave between each row of knots. Because I’m using a singles wool yarn and the weft completely covers the warp, 26 picks is only 3/8 of an inch. The pile is about an inch and a quarter. In contrast, the knots are tied immediately adjacent to one another across the warp with no spaces in between. So, when planning your design you have to account for more distance in the height than in the width.
According to an article by Elisabeth Af Kleen in Handweaver and Craftsman (Summer 1962), there is such a thing as special rya graph paper with rectangular spaces instead of squares. I do not possess this graph paper, but I have improvised a system that works pretty well. I use graph paper with 1/8 inch squares, i.e., there are 8 squares per inch. My warp is sett at 6 ends per inch. For planning purposes, I treat 6 squares of graph paper as 1 inch on the rya. Going horizontally across the plan, two squares equals one knot (because each knot is tied around two warp ends). Going vertically, I treat 3 squares in height as one knot. It’s not a perfect system, but it works well enough and it gives me a pretty accurate prediction of the dimensions of the rug in real life.
To generate a reasonable plan I have been going back and forth between a small-scale sketch roughly divided into thirds, and the “life size” plan which marks every knot. Here they are hanging side by side.
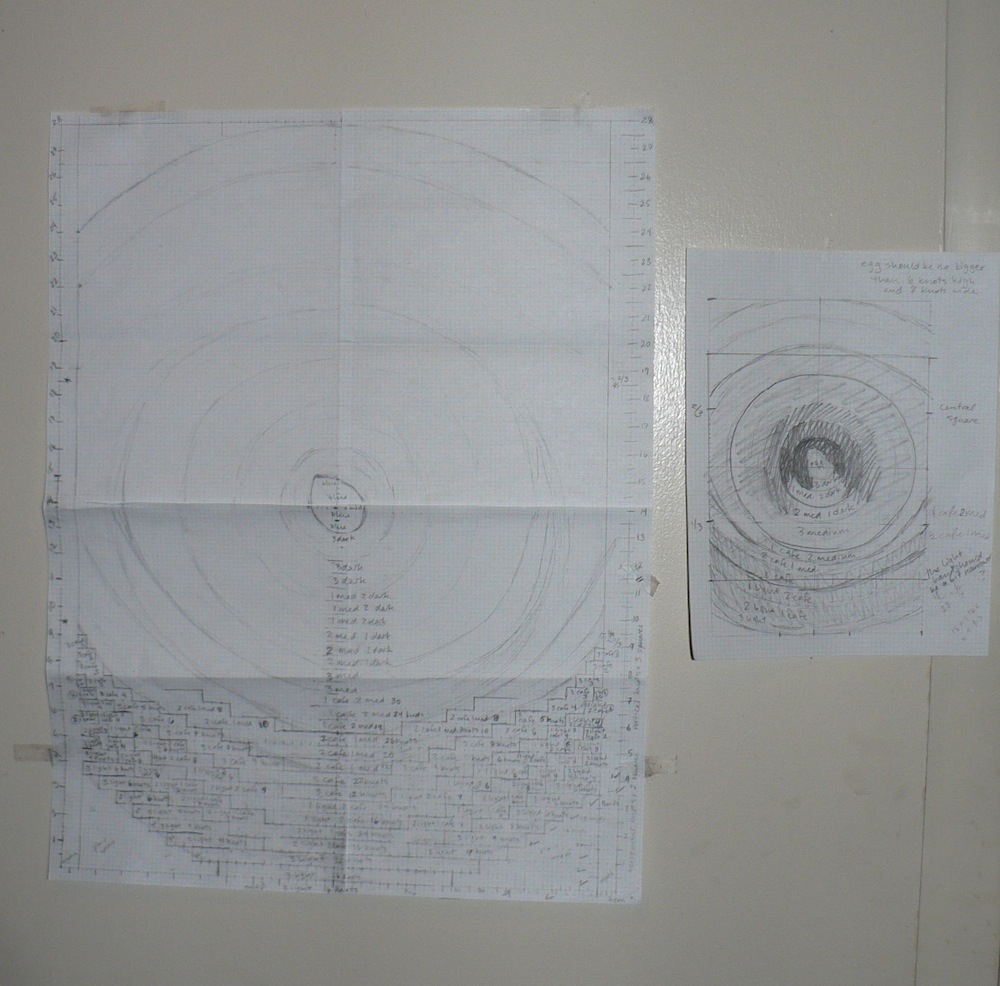
There is quite a bit of trial and error involved in translating the plan into reality, so I have to unweave and correct periodically. Here is the plan as of yesterday, now that I have roughly worked it up to the mid-way point.
Originally I envisioned the egg laying on an angle going from upper left to lower right, but it didn’t translate onto the fairly coarse-grained scale of my grid. It was just a randomly shaped inelegant blob. So instead I plan to weave it pointing straight up which at least has the capability of visually resolving into a symmetrical shape that’s wider on the bottom and pointier on top. However, the vertical orientation feels less dynamic to me. We’ll see.
Here is the rya after I made good progress on it on Tuesday, and below that is an image showing the knots tied around the guide rod before I cut them.
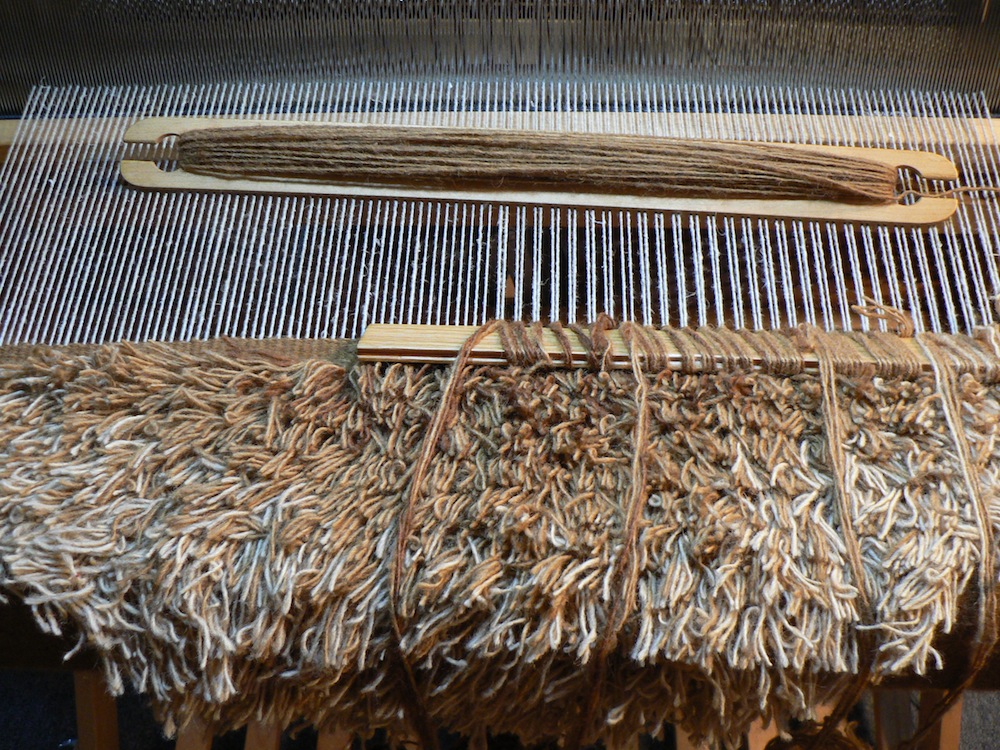
It feels more like a mushroom than a nest to me at the moment. It is hard to get a sense of the whole design while it’s still on the loom, but I’m chipping away at it optimistically.