Ahh, Wood Thrushes are Back

Yesterday morning, Thursday May 3rd, I went for a walk around 7:15, as I often do, but little did I know that it would turn out to be an exceptionally inspiring walk (despite the drizzle).

First, as I came out of the little boggy wooded area behind our apartment complex into the parking lot of the JCA, I heard and saw two crows cawing away vigorously. At first I thought, two crows having a debate, or maybe just exchanging insults. Then I heard a third crow, which made me think that something a bit more interesting was going on. What are all those crows yelling about? And then, I saw something slip into the brambles and small trees by the little sunken wetland area in the center of the parking lot. I walked closer slowly, and looked carefully, and it was a fox! A gray fox, I think: very small, delicate, mostly beige, with a black back and not-very-fluffy tail. The instant that I stopped walking, turned my body, and fixed my attention on the fox, the crows stopped cawing. It was an intense moment, since I realized they had probably been shouting about the fox, and had stopped now that I had noticed it, too. I wished I knew what they were thinking. “Fox! Fox! Fox! Fox! Oh, look, a monkey. Let’s be quiet and see what the monkey does.” I watched the fox as it picked its way around the edge of the wetland area, through the bleached masses of dead cattails, and short new green growth. Maybe it was looking for frogs or other little creatures to eat, but it didn’t seem to find anything and kept on going. Then it climbed out the other side of the wetland area, trotted toward the edge of the building, and went around the corner out of sight. We see quite a lot of wildlife around here, but it was still a special treat to get to watch a fox for several minutes. I continued on my walk, and there was more excitement to come.

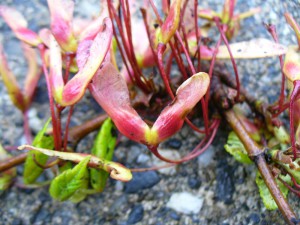
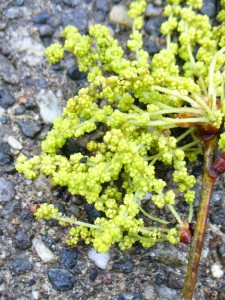
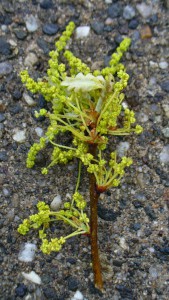
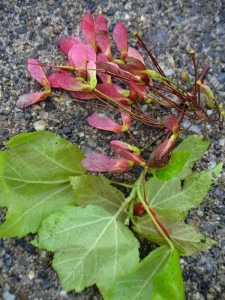
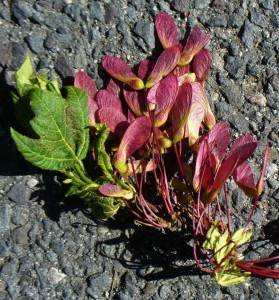
When I got into the woods at Amherst College, there were lots of interesting maple seeds and fallen tree-flowers on the path, so I picked up a few especially striking ones to photograph when I got home. At the moment I am very interested in the combination of bright yellow-greens and various shades of pink and maroon that are happening all over the place in small emerging leaves, flowering trees, and maple seeds. How do such bright colors blend so harmoniously? Are there optimal ratios? Which combinations do I like the best? Could I weave something with the same colors and achieve anything like the same effect? Here are some photos. The ones in bright sun I took the other day. The yellow inflorescences are from some kind of oak.
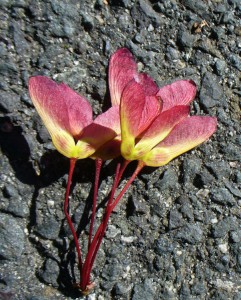
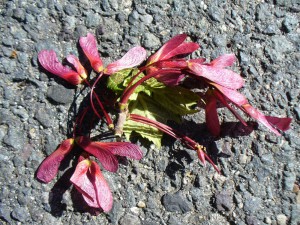
maple seeds close up

maple seeds with a greater proportion of yellow

oak inflorescenceoak inflorescence with tiny leaf

pink and lime green maple seeds

magenta maple seeds

maple seeds with yellow-green edgesyet more maple seedsAt one point I was noisily engaged in my own thoughts, making up a silly song that went like this: Don’t plant your flax in a hayfield/’cuz a hayfield is full of grass/no matter what you do/there are roots through and through/so don’t plant your flax in a hayfield. My songs are notoriously dumb, but I was mightily entertained by myself, and not paying much attention to the woods around me. But then I saw another maple seed bundle with a greater ratio of yellow to pink, and stopped to pick it up. At that moment, the noise in my head stopped, too, and my focus shifted back to the woods. And suddenly I heard a wood thrush! You can listen to lots of different recordings of wood thrush songs at the Macaulay Library archives.

The wood thrush has the most beautiful voice I have ever heard. It evokes intense longing and utter contentment at the same time. Bliss. I love wood thrush season, and am always happy when they come back and sad when they leave.

My wood thrush backstory goes like this. Several years ago I started hearing this beautiful flute-like bird at the garden in the evenings. I began to listen for it while I was there, and look forward to hearing it. It felt affirming, reassuring, companionable…. but I could never see the bird that was singing because the song always came from deep in the woods. There are good resources for birdsong identification on line, but you have to know what a bird looks like to narrow down your search. So, the identity of my bird remained a mystery for several years. I began hearing it other places, too, including right by our apartment complex, especially early in the morning and around sunset.

One spring day maybe three years ago, I was sitting outside at the school where I worked, supervising kids playing outdoors. Amazingly, I heard my bird! So I peered over at the edge of the playground, next to the woods at the Larch Hill conservation area. And lo and behold, there was my bird singing away on a branch right at the edge of the woods. I moved closer and got a good look at it. It was a rich reddish-brown, about the size of a robin, with a white-and-black spotted breast and big feet. I found photos, descriptions, and recordings of its song on the Cornell University ornithology website, and at last identified my mystery bird.

A few months ago, as I was trying to think of a name for my new little weaving business, I decided to name it after the wood thrush.

There are a few reasons that wood thrushes appeal to me as a personal symbol of the ethics and aesthetics of fiber. I am very invested in locally grown and harvested fibers and dyes. I work hard to learn as much as possible about growing and using locally available fiber and dye plants, and to incorporate them into my work. I aspire to expand the range of fibers and dyes that are available to folks around here. But only certain materials can be obtained or produced in Massachusetts. One very useful fiber in particular, cotton, needs a much hotter, longer growing season than we can offer. But there are good, sustainable cotton projects going on further south, including an organic cotton industry in Texas, and naturally colored cottons in Peru. These projects need to be supported. The evils of conventionally raised cotton would take a whole other post to enumerate, but a good place to start, if you want to read about it, is Stephen Yafa’s Big Cotton and Cotton.

Despite my fibershed ideal, I decided I would need to include far-away fibers in my fiber-diet. Here’s where the wood thrush comes in. Wood thrushes migrate to Central America in the winter, and only come up to New England in the summertime. So, that span of distance, from Massachusetts to Panama at least (if not as far as Peru), is linked together by my bird. Wood thrushes go where the good stuff is, while it’s in season, and that’s one way to think about fibers, too.

Here are some other wood thrush lessons I have learned. Their song is very beautiful, but it’s pretty quiet and they stick to the woods. To hear it, you have to spend time outdoors and be attentive to the world around you. Understanding where fiber raw materials come from, and how inseparable their growth and processing are from every other element of our environment, requires similar attention and observation. The wood thrush is not a flashy bird. In fact it’s sort of subtle and even conservative, like much of my weaving tends to be. Wood thrush populations are in decline due to a variety of factors including habitat loss and acid rain. Sustainable land management and reducing pollution are crucial to their survival, and to the survival of us all.

So, I was ecstatic to hear that the wood thrushes are back.


New Huck Lace Bookmarks–Still Pink, Still Heart-y

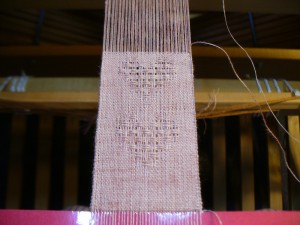
Since my madder-dyed linen heart-motif Huck lace bookmarks have been selling pretty well, and since Mothers Day is coming up soon, I decided to weave some more of them. Also, I thought my loyal readers might like a little break from photos of small flax green plants (as there will be a lot more on the way). So, here’s a photo of a bookmark in progress, showing the edge of the two-inch spacer I use to separate each one.

book mark with spacerThere are a lot of steps involved in planning and weaving anything. There are more steps involved if you dye your own yarn and, like me, do not necessarily dye it for a specific project. For example, I had dyed three skeins of 40/2 linen with madder a while back, and had used two of them for my previous batch of bookmarks. Luckily, I keep copious records and I always “show my work,” since I was raised in that 1980s math-generation. So, I knew that I had used 2.16 ounces for the warp last time (with a little left over) and 1.56 ounces for the weft (with almost a full bobbin left over). With 3.72 ounces I wound a ten yard warp and wove 23 bookmarks, plus some weft to spare.

My third skein was 1.7 ounces, a very pale but pretty shade of bluish-pink (the others were more on the red/orange/salmon side of pink). That’s about half as much as I used in my last project, and the question was, how many bookmarks could that make? There are a few ways to find out. Here’s my way.

Yarn is usually sold with a certain amount of helpful information provided, e.g., its size and ply. Sometimes the vendor will also give you a measurement called “yards per pound” which tells you just what it sounds like: how many yards of that yarn it takes to weigh a pound (or an ounce, if you divide by 16). If you don’t know the yards per pound, you can figure it out (or get a good approximation) using a nifty tool called a McMorran yarn balance. You could use the yards per pound for the yarn, and the weight of your skein, to figure out how many yards your skein is.

However, when dealing with limited quantities of naturally dyed yarns (or handspun, naturally dyed yarn, even more so), I have found that the best way to be certain of what I have is to measure. Ideally I would have a niddy noddy that measured skeins by the yard or some other useful increment, but mine doesn’t. So, I often count out the length on a warping board, and that’s what I did this time. OK, done! I had 630 yards of pale pink. Since I had roughly half as much yarn as I used in the last batch, I estimated that I could wind a 5 yard warp and get about 11 bookmarks out of it. But how to be certain? (Certainty is important to me, to a point). Math to the rescue.
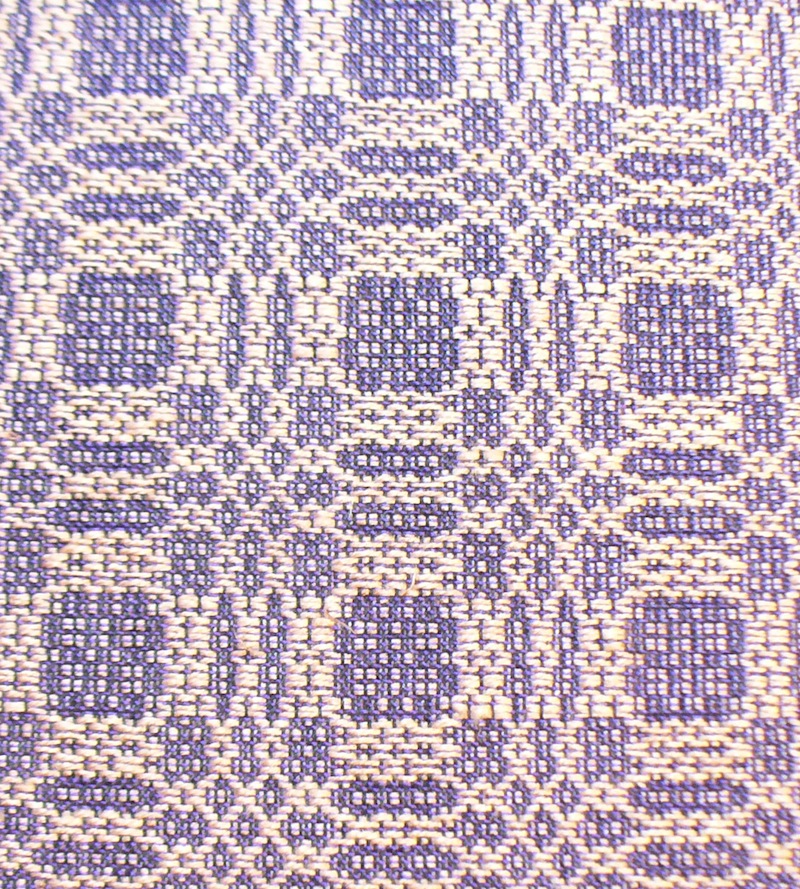
To calculate the amount of yarn I’d need for the warp, I first multiplied the width in the reed by the ends per inch (which really just tells you the number of ends in my project, which I actually knew already). My project has 75 ends (a bit more than 2 inches in the reed sett at 36 ends per inch, or epi). Then, I multiplied that by the number of yards in my desired warp, which means I’d need 375 yards for a 5 yard warp. To calculate the number of yards I’d need for the weft, I multiplied the length of each bookmark (12 inches) by the number of bookmarks I thought I could make (11), which meant I would need to weave 132 inches of warp. That’s the length part of the bookmark (two inches of each bookmark is just fringe, which doesn’t use any weft, so I figure this covers the take-up and then some…see below). Now for the width, 75 ends, which means I need a total of 9900 inches (75×132) or 275 yards of weft (divide 9900 by 36). Add that to the warp requirements, and you get 650 yards total. Well, I was 20 yards short, but luckily I had a bobbinful from last time that was definitely more than 20 yards.

My way is sort of a middle way. I could have gone with my initial estimate, which was accurate enough. Or, I could do a lot more fastidious calculations involving additional factors, including draw-in (how much the project pulls in as you weave compared to its width in the reed), take-up (how much it shortens in length due to the fact that the threads are traveling over and under one another; even though the distance taken up by each little bump is minute, it adds up over the length of the warp), and shrinkage (how much it shrinks when you wash it). I have notes about all these things from the last batch of bookmarks (“I have detailed files…“), but I glossed these considerations because eventually you just have to get started on the weaving before it actually IS Mothers Day.

So, I wound a 5 yard warp, dressed the loom, and began weaving away. The first two bookmarks were happy enough (the second was a little squat from beating too hard). Then near the end of the third, I got one broken end, and then immediately another. Grrr. Broken ends are when one, or more, of the yarns in the warp break. Then you have to stop and fix them, and it slows everything down. These bookmarks take me about an hour and a half *each* as it is (including winding the warp, dressing the loom, weaving, washing, ironing, trimming, but not including the dyeing because that labor is infinite and cannot even be quantified). So, I fixed them and then decided I needed to be more strategic about preventing any more broken ends.

A note here. I had problems with broken ends last time, too, and didn’t ever solve the problem. I blamed my yarn, and thought perhaps it was not high-quality. But then I had the good fortune to confer with another weaver who weaves with the same yarn, and he said he has no trouble with it and thinks it’s very good quality. He also hand-dyes his own yarns, but with synthetic dyes, so they are not subjected to the same high-temperature, high-alkaline treatment that mine are. The fault, we decided, was in my comparatively harsh treatment of the fibers in the scouring process (too much soda ash and boiling water is maybe a bad thing). Something to keep in mind as I perfect my cellulose techniques. In sum:

1. There was nothing intrinsically wrong with the yarn.

2. I only had myself to blame for its weakness.

3. I will certainly need to continue to use soda ash and may run into this problem again.

Thus, I’d better find a way to solve the problem.

Much of the information I have read about weaving with linen insists that you have to size the warp (or apply “paste”). I have never sized a warp. I admit my total ignorance, and even prejudice, on this matter. Partly, I just can’t believe it actually helps rather than make everything worse, though I don’t want to offend the hundreds of weavers who say it does help. But mostly I cannot imagine having a lot of sticky-when-wet-dusty-when-dry starch smearing all over my lovely loom and getting everything gross. NO!

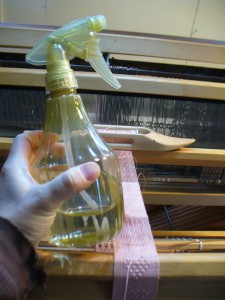
So, instead I cast about in my memory for other ideas I had read about…. Linen fibers are stronger when damp. Weave in the basement? Don’t have one. Run a humidifier by the loom? Our apartment is built on a concrete slab by a stream in the floodplain of the Fort River, more generally located in the Connecticut River Valley in Massachusetts, on the east coast of the United States of America. I can’t imagine voluntarily adding extra moisture to the air. We have to run a dehumidifier in the summer to keep the mildew at bay. So, NO! Then I recalled someone saying that it used to be her job to spray the warp to keep it damp as her mother worked. So, I acquired a clean spray bottle (ours always get filled up with fish emulsion or borax or vinegar or somesuch thing, don’t ask me why).

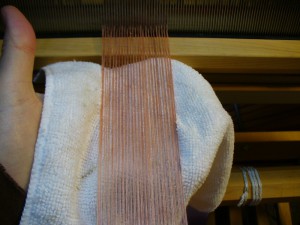
spray bottle with waterI put some water in it, and I sprayed the warp just at and above the fell line (where the beater presses the new rows, or picks, of weft into place). Bad idea. Everything got wobbly, the fibers swelled up, nobody could stay in their correct place and threads were pushing and pulling all over the place. It was a sad sight to see among my orderly little linen threads. So I let it dry. Then I decided to spray up where the beater rests when it’s upright (the white cloth in the photo is to absorb excess water and wipe off droplets from the shuttle race and reed).

spraying near the reed when the beater is uprightThen I pulled the beater forward and sprayed in amongst the heddles.

spraying among the heddlesThis was the zone of weakness, where the breakages occurred, where there must have been a bad combination of abrasion and stress. In addition to keeping that region of the warp damp, I also kept the fell line closer to the breast beam and advanced the warp more often so I was always weaving with the widest possible shed. These techniques are good practice anyway, but when I’m feeling pressed for time I try to push it a little. You can’t really push linen.  I re-sprayed each time I advanced the warp. And ta da!  Success! I wove 5 more bookmarks with narry a broken end!

Last but not least, if you read my earlier post about hemstitching and Chuang Tzu, you may remember my trouble with fraying in the hemstitching process. I tried adding twist as I worked, using a magnifying glass, and other tricks. But the one that really seems to work is wetting the thread. Don’t get it too wet, or it swells up, and then the water absorbs into the woven cloth and it also swells up, and then even with a magnifying glass you can’t see where the holes are or get your needle through…. Enough water to make it damp. Once in a workshop at Long Ridge Farm, when she was describing how wet you want your cloth when you apply soybean-milk as a binder, Michele Wipplinger described it as feeling damp, but only just damp, not wet, and primarily cold. You feel for the temperature. It’s a bit like that with the hemstitching thread (which is a piece of extra weft yarn reserved for the purpose of securing the edges of my bookmarks. Six times the width of the bookmark is optimal. Five times is enough, but it cuts it a little close and is stressful.) You want it cool, damp, but not dripping wet. And bingo.

You can go buy my new batch of bookmarks at the Shelburne Arts Co-op in Shelburne Falls or at Saw Mill River Arts in Montague.

Flax Is Up!

Well, apparently I have to include a lot of exclamation points in this flax growing experiment. I will cut that out. But it’s so exciting!

The flax began emerging on Friday April 20th. The first two to emerge were the Evelin at Amethyst Farm and the Marilyn at our community garden. That’s five days to germinate. By the next day, Saturday April 21st, everything was up everywhere. That’s six days. Not bad.

Here’s the progress as of yesterday, Tuesday April 24th (the 9th day since planting). My sense is that the generic variety did not have a very good germination rate. I will try to figure out an accurate way to estimate or calculate that, but the growth of the v.n.s. seedlings looks much more sparse than the other two. Another possibility is that the golden v.n.s. seeds on average weighed more than the brown seeded varieties, so that I actually planted fewer golden seeds even though the amount weighed the same. Maybe I should have done it by volume rather than weight. I will try to figure this out, also.

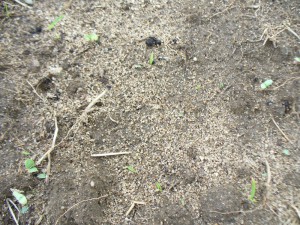
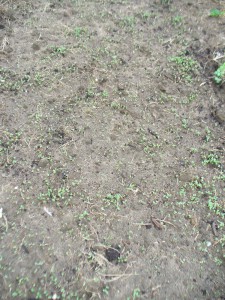
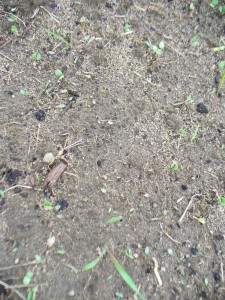
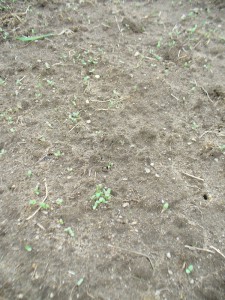
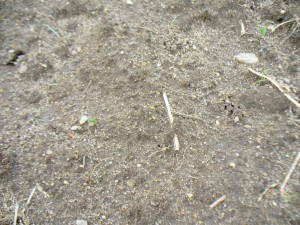
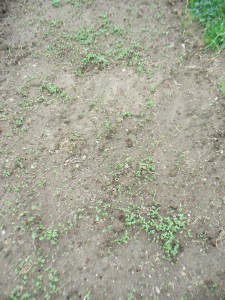
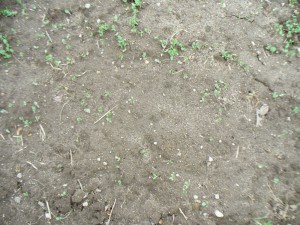
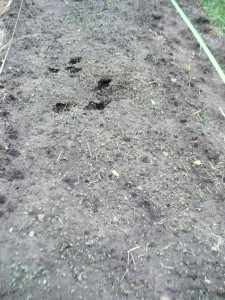
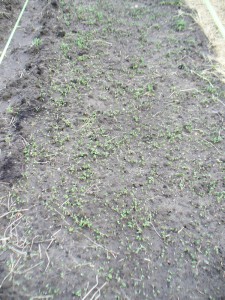
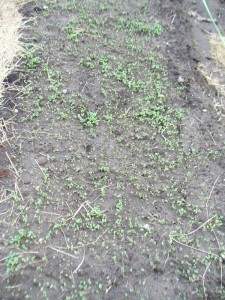
Here is an overview of part of the v.n.s. bed at Small Ones Farm, and below that, a close-up of a bald spot. To some extent, of course, bald spots are my fault for not sowing evenly.Small Ones vns overview

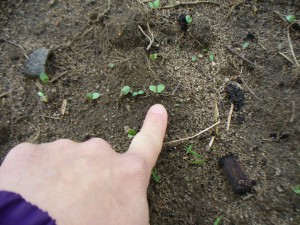
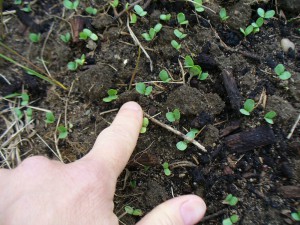
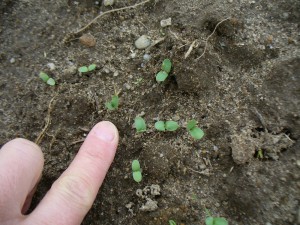
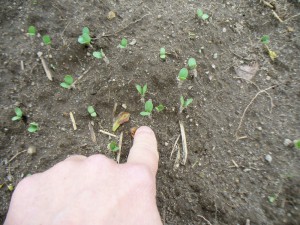
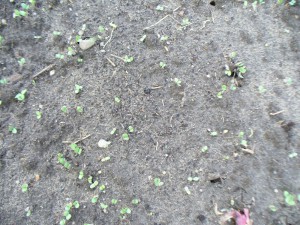
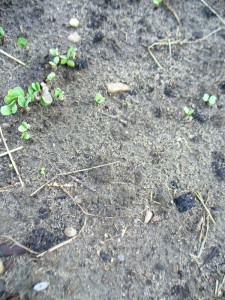
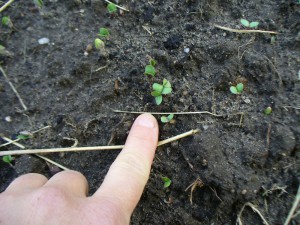
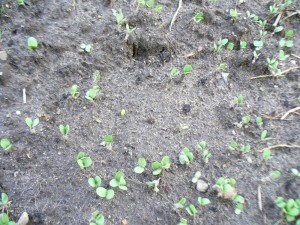
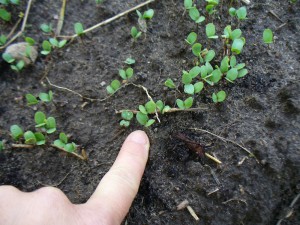
Small Ones vns bald spotsHowever, I think it is also because a lot of seeds just didn’t germinate. Here’s a closeup of v.n.s. seedlings at Small Ones Farm.

Small Ones vns close upBelow is an over-view of part of the Evelin bed at Small Ones Farm. Below that, you can see there were also bald spots in the Evelin, but I don’t think they were as big.

Small Ones Evelin overview

Small Ones Evelin not so baldAnd here’s a close-up of the Evelin at Small Ones Farm.

Small Ones Evelin close-upMoving on to Amethyst Farm, here is the v.n.s. at a distance, closer (yeah, not much there), and very close:

Amethyst Farm vns overview

Amethyst Farm vns bald spot

Amethyst Farm vns close-upHere’s the Evelin at Amethyst Farm, overview, then closer, then a close-up:

Amethyst Farm Evelin over-view

Amethyst Farm Evelin medium bald

Amethyst Farm Evelin close-up

And at our community garden, the v.n.s. (the holes are dog prints):

Amethyst Brook vns over-view

Amethyst Brook vns sparse but fewer big bald spots

Amethyst Brook vns close-upHere’s the Evelin at the community garden:

Amethyst Brook Evelin over-view

Amethyst Brook Evelin small bald bit

Amethyst Brook Evelin close-upAnd here is the Marilyn (the only treated seed I planted) at the community garden:

Amethyst Brook Marilyn over-view

Amethyst Brook Marilyn not bald

Amethyst Brook Marilyn close-upAnd that is the flax update. Stay tuned for future flax-growing excitement featuring visual aids such as rulers and a string grid (maybe 6 by 6 square inches) to count plant density. Woo hoo!


Flax Day, Not Tax Day!

Last Sunday, April 15th, I planted my flax at last! Usually, mid-April is the right time to plant here in the lower-lying lands of the Connecticut River valley, and I wouldn’t feel like I was getting it in late. Some years, the snow has barely melted by mid-April. However, this has not been a usual April any more than this winter was a usual winter. We have had no spring snow, not much rain, and with the very warm, very dry weather, I probably could have put in the flax a month ago. Nevertheless, April 15th was planting day, and a glorious day it was.

Planning out this flax project has been a multi-step process. In fact, the reason for my delay in posting about it (yes, sorry, it’s been a month since my last post) is that I kept waiting until certain steps had been completed, and of course then there’s the next step, and the next… And a month goes by.

I should probably start by explaining why I am growing flax and what my goals are. I have a vision of locally made cloth using locally grown fiber, naturally dyed with locally grown or gathered plant materials, and hand-woven. There is plenty of wool, alpaca, mohair, and other animal fiber around, but currently we have no locally grown plant fiber. I don’t mean there are no local plant sources of fiber; several plants around here are great for fiber, including milkweed, nettles, and even oriental bittersweet. But no one is growing or processing them in quantity. Flax is a beautiful, versatile fiber with 30,000 years of human use. It grows in my climate, unlike cotton, and is legal to grow, unlike hemp. So, it is my goal to contribute to the cause of local cloth by becoming very good at growing and processing flax, and ultimately to grow it in large quantities. Some day I even fantasize about being the “Flax Mother” of Massachusetts (minus the prison labor).

While I’m writing in the first person singular, I am not alone in this endeavor and rely on many people for help and support. I’ve been growing and learning how to process flax for several years, with a lot of trial and error. Initially I planted some at my mother’s place up in New Hampshire. Lacking advice and experience, I over-retted it and it was all gone. Next came advice, information, and comradeship from folks in the flax and linen study group at the Hill Institute in Florence, where I was working on my Master Weaver certificate. Since completing that program in 2010, I have been eager to increase my skills and knowledge at a quicker pace, to gain a certain level of expertise or mastery. Over the winter I was lucky enough to meet two wonderful women who are also interested in all aspects of growing, processing, spinning, and weaving flax and linen, both in terms of understanding how the crop was processed in the past, and how we might accomplish it today. Our meetings over the past few months have been incredibly helpful and inspiring. I have also appreciated email advice about flax seed and bee-pollination from Upinngil Farm in Gill.

The first step was figuring out where to plant. I wanted to plant in a variety of places so that I could compare the performance of each variety in more than one location. Many thanks to the generous farmers at Small Ones Farm in South Amherst and Amethyst Farm in East Amherst for letting me use a plot for this experiment and helping me with a water set-up! I also planted at our community garden at Amethyst Brook.

The second step was sourcing seeds, and deciding which varieties to plant. My plan is to gather some data to compare different varieties: How tall do they grow? How prolific are they? Do they tend to branch or lodge (fall over)? Do they grow and mature at different rates? Is one variety better suited to conditions around here? Does one produce finer fiber or fiber in more quantity?

In the past I have grown Marilyn from Landis Valley in Pennsylvania, and have been happy with it. However, it comes treated with a fungicide, and I wanted to try some other, preferably untreated types and other sources. From Richters in Canada I ordered a non-specified fiber variety with golden seeds, and Evelin, which has brown seeds. We also ordered Marilyn from the Brothers Zinzendorf at the Hermitage in PA, which was also treated, as it turns out. (I’m speculating that both Landis Valley and the Hermitage import their seed from the same place in Holland, but I’m not positive, so don’t quote me on this.) I was only able to acquire a small quantity of Regina from Sand Mountain Herbs so I decided to hold off on that one for now.

I decided to plant Evelin and the non-specified variety at Small Ones Farm and Amethyst Farm, and those two plus Marilyn from the Brothers Z. at the community garden. Not quite the multitude of varieties I had initially hoped to compare, but it’s a good start.

The next decision was how much to plant, which would determine the size of the beds I needed to dig. I decided to plant the same quantity (4 ounces) at each place, in beds of the same dimensions (4 by 14 feet). In theory, this will make it easier to compare the productivity and yield of the different varieties. Different sources recommend planting at different rates. I have typically planted at a rate of one pound of seed per 225 square feet, and have been pretty satisfied. But recommendations range from one pound per 100 square feet to one pound per 400 square feet. I planted at approximately one pound per 224 square feet this year.

Next was turning over the beds and pulling out grass roots, which took a while. I started back in March. You may wonder why flax needs to be planted so early in the spring. The primary reason is that the best quality fiber is produced in cool, moist conditions, and that the heat of summer causes the fibers to become coarse. Two other reasons are that if the soil is still wet from the winter (and if the spring is a normal, rainy spring) you don’t have to water much, and also it gives the flax an advantage against weeds, many of which are not up yet that early in the spring.

I have found that grass is the main competitor to flax in terms of weeds (these guys have the same problem). Last year at our community garden plot we had it rototilled instead of turning it all over by hand as I’ve done in the past. The advantage of digging it over with a pitchfork is that you can pull out a lot of the long grass roots. Rototilling just chops them up and spreads them evenly around. You may as well plant grass. Despite repeated weeding, the grass was so difficult to pull out (pulling it up also pulled out a lot of the flax plants) that it over-ran the beds, and I ended up not harvesting all of the crop.

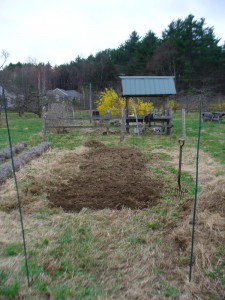
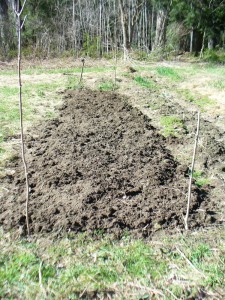
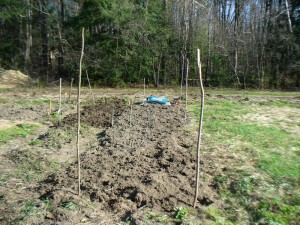
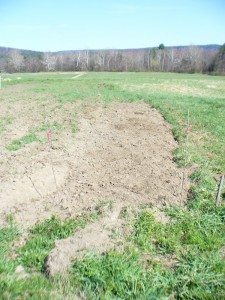
Many thanks to Farmer Bob for pointing out to me that early planting only gives flax an advantage over weeds that germinate from seed. If the roots are already in the soil, even densely crowded flax seedlings can’t do much to stop the grass from growing. I had experienced this grassy problem for myself, but hadn’t put two and two together about how plants propagate themselves and what that means in terms of weed control strategies. So, despite the fact that it was time-consuming, I dug over the beds with a pitchfork and pulled out as many grass roots as possible. Here’s the bed I dug on March 25th at Small Ones Farm:

March 25 at Small Ones FarmHere is the first bed at our community garden dug April 6th:

Amethyst Brook April 6Here is the whole thing at the community garden, completed April 13th, and below that, the completed bed at Amethyst Farm from the same day:

April 13 Amethyst BrookApril 13 Amethyst FarmThen I wanted to get the soil tested, which involved collecting samples, drying them, and dropping off the labeled bags at the UMass soil testing lab. I patiently waited for results, was excited when they came, then was a bit confused by them, and then had a series of queries back and forth to get help interpreting them. In subsequent years I will do this part of the process differently. Ideally I would like to know three different pieces of information: first, what the soil might need for additional nutrients; second, whether the amendments have addressed these deficiencies; third, after the flax is harvested, which nutrients were depleted by the flax (that is, which nutrients in particular flax uses up). In order to get all this info, however, I would have had to start earlier in the season. Live and learn.

So, I added some compost and manure to the soils that seemed to need it the most, and at last I was ready to plant! See the next post for more about planting, watering, and the exciting germination of my seeds!


Exhausted Madder and Exhausted with my Warp

I have exhausted the madder bath I’ve been working on.

madder exhaust on bleached cottonThese are the 10/2 bleached cotton skeins which were double-mordanted with aluminum acetate and heated in the calcium carbonate fixing solution. Actually, I could probably run one more bath for an extremely pale pink, but I’m ready to move on with other projects.

Now that I have a pretty decent stash of naturally dyed cotton, linen, and cottolin, I have been using only naturally dyed pattern weft yarns for my current batch of book cloth (the warp and tabby yarns are commercial). Thus far, I have really enjoyed using yarns that I dyed myself. However, on Monday I was having a mightily difficult time choosing color combinations. I couldn’t figure out what my problem was, but I was dissatisfied with everything I tried.  Colors that I had been perfectly happy with before–my screaming yellow weld, for example–looked ugly and annoying.

After a while I realized that I was just tired of weaving the same pattern over and over again (Young Lovers Knot). I put on enough warp for about 20 pieces, with the idea that I was being efficient. But instead I was bored. I am never, ever bored. There is so much to do all the time, and so many interesting things in the world, how could I ever be bored? It took me a while to recognize the feeling, and I felt better when I figured it out.

So, I decided to mix things up a little. I bought some new spring-like colors of 20/2 cotton (the sadly discontinued line from UKI) and decided to use commercially dyed 10/2 for the pattern weft for a while. I also switched from weaving the Young Lovers Knot pattern “Star Fashion” (which gives it those nice diagonal lines) to weaving it “Rose Fashion” (which makes all the motifs more rounded). It was a nice change of pace, and the new colors got me motivated again. In fact, with the new tabby colors, my naturally dyed yarns have taken on all sorts of new possibilities. Here is a 20/2 linen madder-dyed skein from the recent dyebath woven with a rich purple commercially dyed 20/2 cotton tabby weft. It’s sort of easter-eggy but considering that crocuses, daffodils, and all the other bulbs are blooming now, it feels OK to me.

madder-dyed pattern weft with purple tabby

Where are the books now?

My blank books and bookmarks are now available for sale at two fine establishments, Shelburne Arts Co-op in Shelburne Falls, MA, and Sawmill River Arts by the Montague Bookmill in Montague.

In other news, I have been making plans for flax growing experiments this spring. Usually I don’t plant flax until mid-April or even early May, but spring has come very early this year. I have grand aspirations this year, and will be growing several varieties: a non-specified fiber flax variety from Richters, Evelin from Richters, Marilyn from the Hermitage, and a tiny quantity of Regina from Sand Mountain Herbs.  Stay tuned for more updates about flax.


Madder Exhaust with Bleached Cotton

I decided to let the twice-mordanted bleached 10/2 cotton skeins air out until the vinegar smell was extremely faint, but not the full 4 to 7 days that Liles recommends. They dried from Thursday morning until Saturday morning, then I used a fixing solution. I used half an ounce of calcium carbonate, which suspends in the water more than dissolves, really. I didn’t use dung. I stirred it up with very hot water, added the dry skeins, put the pot on the stove, and heated up to about 150 degrees, stirring periodically, for 30 minutes.

Here are the extremely white skeins in the milky white fixing solution:

fixing solution with bleached cotton

It almost looks like I’ve dyed the skeins white. After 30 minutes, I pulled out the skeins and rinsed them twice, then I had to go to work so I left them to soak in plain water. In the evening I rinsed them twice again.

As it turned out, the fine, moldy-looking film which had been growing on the surface of the madder dyebath got displaced by increasingly large bubbles from fermentation (I assume–not sure about the microbiology here). The dyebath was a bit slimy but none the worse for wear, and it didn’t even smell too bad.

I know I said that I wasn’t going to try anything new this time around except for the scouring and mordanting steps, but I did try two other things. Liles suggests soaking the goods in the dyebath for at least half an hour before applying any heat, and then heating for at least 2 hours. He writes that alizarin, the main red-producing dyestuff in madder roots, is not very soluble in cold water, and just a little more so in hot water. Starting out cold, raising the temperature slowly, and heating for a prolonged period of time (Liles recommends up to 3 hours for cotton) allows the fiber to take up the alizarin as it slowly dissolves. I did soak the bleached cotton skeins before heating. I soaked the first two for 30 minutes, and the third for about 6 hours. Each has soaked overnight in the dyebath before drying and then rinsing. I will post a photo when they are all done.


I Do Detect the Smell of Acetic Acid

I have mordanted my bleached 10/2 cotton skeins a second time with aluminum acetate, which involved heating at 100 for an hour (it actually got up to 150 at one point, oops), cooling overnight in the mordant bath, and hanging outside to dry this morning. This afternoon they are not yet dry, but they do have a strong vinegar-like smell which I think must be the acetic acid Liles mentioned. So I gather I ought to wait until that smell dissipates, which could be several days, before I dye the yarn. Meanwhile, my madder bath is starting to get moldy. I have a pretty high tolerance for decomposition and stinky things, but in a few more days it will be yucky. What to do?

Madder Dyed Yarns

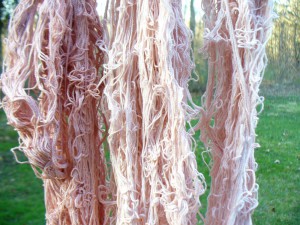
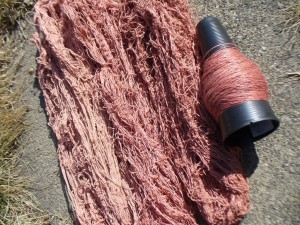
After a leisurely process of heating, soaking, and delayed rinse, the first four skeins of madder-dyed yarns are done. Here they are outside today, a bright and sunny day.

madder dyed yarnsI’ve done four dyebaths so far. The photo above shows successive dyebaths moving from right to left. The yarn on the cone is from the first dyebath. The yarns in the first three dyebaths were 20/2 linen and the fourth was 22/2 cottolin. The linen yarns were mordanted with alum acetate, and the cottolin was mordanted with alum acetate plus tannin. The weight of goods in each dyebath was about 2 ounces.

For the last couple exhaust baths I am preparing 10/2 cotton (bleached) because that’s what I have on hand at the moment. After some disappointing results with my last two umbilicate dyebaths, and out of a general desire to achieve greater depth and brightness of colors on cellulose fibers, I am going to try some new procedures. I’m especially frustrated with cotton at the moment, and for help I am turning to Jim Liles’ book The Art and Craft of Natural Dyeing: Traditional Recipes for Modern Use. In his instructions for scouring cotton, Liles writes, “… simmer or boil for an absolute minimum of 2 hours. Three or 4 hours is better in some cases, and in the old days cotton was sometimes scoured at the boil for 8 hours. Cotton is full of wax, pectic substances, and oil, all of which must be removed.” This is much longer than I’ve ever scoured before.

So, I boiled the skeins for two hours with anionic cationic scour 12/17/2023 Correction! (from Earthues) and soda ash. Then I rinsed them three times, and mordanted with alum acetate at 5% weight of the goods at 100 degrees for one hour, let the yarns steep in the mordant for a couple days, dried them, and am now re-mordanting in the same mordant bath. This procedure is a combination of my usual cellulose treatments (based on recommendations from Earthues) and recommendations from Jim Liles.

Double-mordanting with a period of drying in between is a new experiment for me. Liles gives instructions for making your own aluminum acetate, and writes that you should wait until the acetic acid smell has dissipated before proceeding with dyeing. Since I am using alum acetate that I did not have to make myself, I didn’t detect any acetic acid smell after mordanting the first time, so I went ahead with the second mordant bath after just drying the skeins for a day.

Next will come the “fixing solution” Liles recommends. To remove unbonded mordant, he recommends soaking with a solution of calcium carbonate or sodium phosphate for 30 minutes, then rinsing with water. I’m not sure from the book whether I can just use calcium carbonate, or whether it has to be soaked with cattle or sheep dung. It seems to me that if I have the calcium carbonate, I don’t need the dung (since that seems to be a source of sodium and calcium phosphate), but maybe it helps.

Since I am already pretty far along with this madder project, I’m not planning to make any changes to my usual dyeing, drying, or rinsing steps with the last exhaust baths this time around.

However, for my next madder project I will try one of Liles’ recipes for madder red. Reading through his recipes has been very eye-opening and I am fascinated by, and kind of surprised by, many of the things he writes about. For example, instead of just rinsing the madder-dyed goods, he describes a process where the dyed material is simmered or boiled with soap. This is supposed to make the color brighter and more clear. I watch the temperature very carefully while the roots are extracting and the yarn is in the dyebath to make sure it *doesn’t* boil or even simmer. It never occurred to me that high heat later in the process could be beneficial. Also, he writes that the dyebath ought to be acidic when dyeing cotton or linen with madder. Oops. Did you see my pH comments in the last post? Clearly I had the wrong idea about what that calcium carbonate was for. In fact, he writes that making the dyebath alkaline will produce a bluish-purple. Well, I didn’t get anything like purple this time with my alkaline dyebath, but maybe I can…. So many things to try.

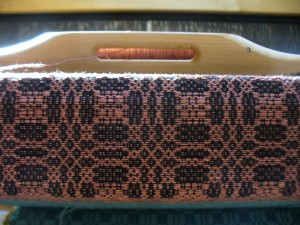
Here’s the madder-dyed linen yarn getting woven into cloth with black 20/2 cotton tabby weft.

cloth with madder-dyed yarn coming around the breast beam

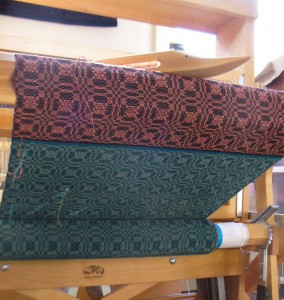
This shot is from underneath the breastbeam to show the cloth winding onto the cloth beam. I really like these colors together. The blue-green is woad overdyed with weld.

book cloth going onto cloth beam


Madder and Flavoparmelia Dyebaths

After three extractions and a lot of soaking in between, my madder and lichen baths are ready to go. I’m sticking with Flavoparmelia caperata for the ID on the bark-growing foliose lichen, though I’m sure I could be wrong.

For each dyebath, I combined all three extractions. Next for some tinkering.

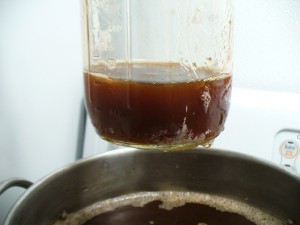
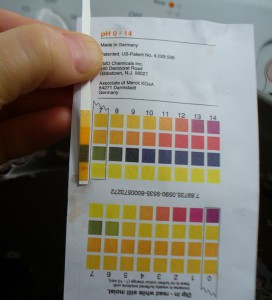
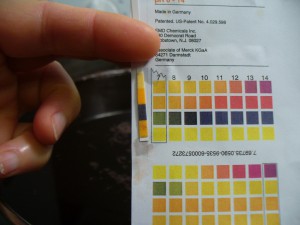
Here are the color and pH of the madder bath before I did anything to it. Brown.

initial madder bath color

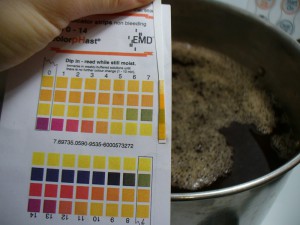
initial madder pH

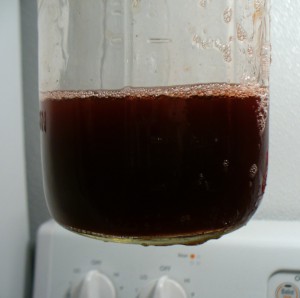
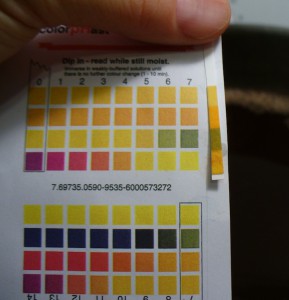
I would call that pH6 which is acidic, not where I want it to be to develop good reds. So, first I added more calcium carbonate (there was already one teaspoon in the roots as I extracted them). This did not produce much of a pH shift (see below). I’d still call that 6, though I don’t know what’s up with that bottom square. It’s not supposed to be so orange. Happily, the color darkened and shifted a little from brown to red.

madder bath color with chalk

madder bath pH with chalkI wanted to get the pH up a little, so I added 1/2 teaspoon dissolved soda ash at first, which got it up to pH 8 (photo on the left below). The dyepot contains about 2 gallons of liquid. I did not weigh my modifiers or figure out the percent on the weight of the dyestuff this time around (I extracted 8 ounces of roots). After another half teaspoon of dissolved soda ash, the pH was 9, which I was happy with (photo on right).

madder bath pH with half teaspoon soda ashmadder bath pH with 1 teaspoon soda ash


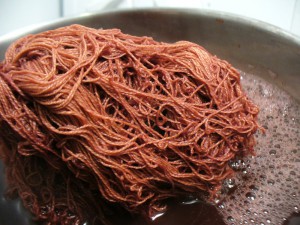
Since I’m dyeing linen, I’m not worried about making it too alkaline. I introduced a 2 ounce skein of 20/2 linen half bleach, which I had mordanted with alum acetate back in December, and re-mordanted yesterday for good measure. After 30 minutes heating, the color was promising:

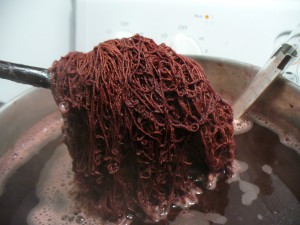
linen yarn in madder bath at 30 minutesHere is what it looked like once I got up to my target, and maximum, temperature of 160 degrees (over 160 you’ll get brown rather than red tones):

linen yarn in madder bath at 160 degreesI am very satisfied with this so far. My quest to create rich color on linen yarns seems to be advancing, though I shouldn’t speak too soon. The color is always lighter once it is dried and rinsed. I held the temp between 150 and 160 for an hour (and actually had to shut off the heat for a while to keep it from getting too hot). Next, the skein will sit and soak all day and overnight in the dyebath, and then it’ll drip dry before I rinse it. I find that delaying the rinse helps with fastness. So, that’s the status of the madder bath. As the week progresses, I expect to re-use the bath repeatedly and get a lot of pink, salmon, apricot, and so on until it’s exhausted.

The Flavoparmelia experiment is less exciting, but at least now I know not to bother with it again, so that’s useful information anyway. Here’s the initial color of the dyebath with all three extractions combined (I started with 5.4 ounces of lichens including a lot of bark).

initial color of Flavorparmelia bathThe pH was a bit weird. I didn’t take a photo (by now you’re probably tired of photos of pH strips). It looked like 6 at first, but as the liquid wicked up it shifted to 5. The initial color of the skein was light and not promising.

linen yarn in Flavoparmelia bath at 30 minutes pH 5Just for the heck of it I decided to see if the color was pH sensitive (since I already had the soda ash out anyway…). I put some of the hot dyebath liquid in a jar and added 1/4 teaspoon of soda ash. It darkened, so I decided to add this solution to the dyebath (I took out the skein first). Since this dyebath contains less liquid than the madder pot, about one gallon rather than two, even such a little soda ash had a noticeable effect on the pH, which went up to 8.

Flavorparmelia plus quarter teaspoon soda ash

linen yarn in Flavoparmelia dyebathlinen yarn in Flavoparmelia bath after 8 hours


OK, I guess there isn’t a big difference between these two photos. On the left is the yarn halfway through heating it, and on the right is how it looks after sitting and soaking for eight hours. I do not plan to exhaust this bath.