Chuang Tzu and Huck Lace Hearts

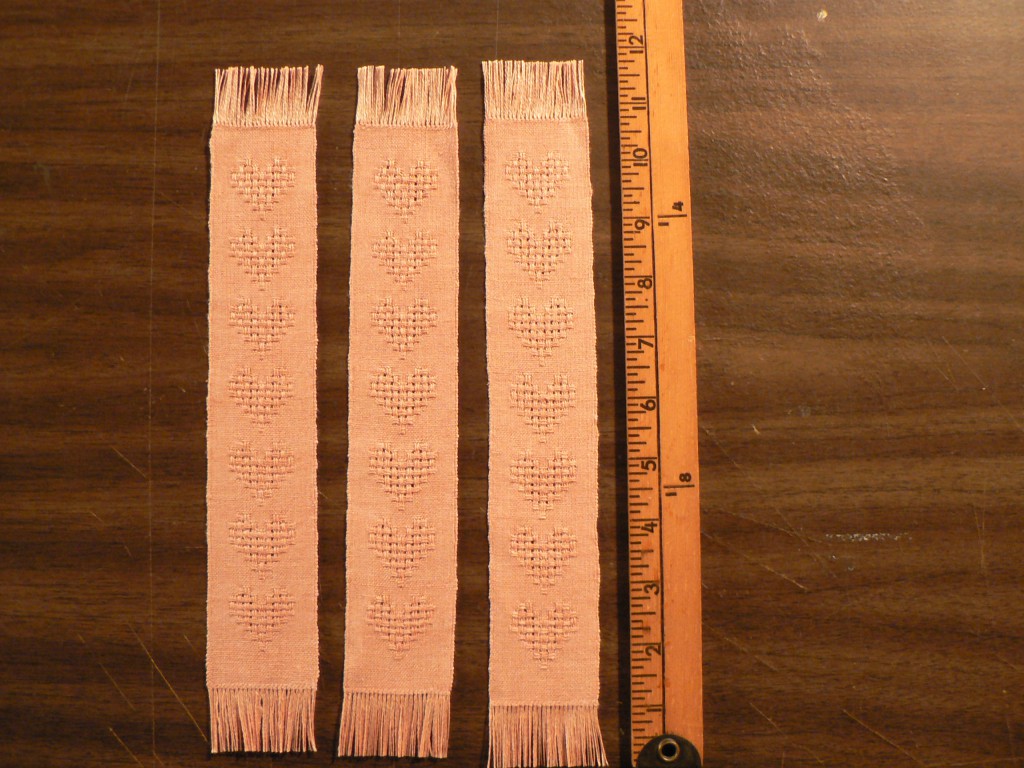
In anticipation of Valentine’s Day, I’ve been weaving bookmarks with heart motifs in huck lace. I really like them. They have a sweet, old-fashioned feeling.

three huck heart bookmarks

Here are three next to a yardstick to show length. Click on the photo to see more detail. The weave structure of huck lace creates floats that pass over five threads, and these reflect light more than the plain weave background. The reflectivity or sheen helps differentiate the pattern.

I’m using 40/2 linen that I dyed with madder root last summer. The warp and weft are slightly different colors, and came from two successive dyebaths. The madder roots were leftover from an excellent, inspiring workshop last summer with Joan Morris at Long Ridge Farm (unfortunately a “what I did this summer” post that never got written). By the time I dyed these linen skeins, the roots had been extracted twice already, hence the light colors.

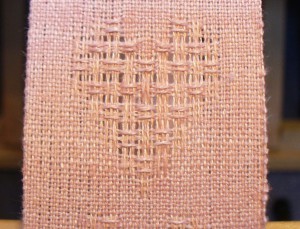
The warp is slightly more salmon colored, toward the orange side of red. The weft is lighter pink, more toward the blue side of red. To my eye the colors and values blend smoothly;  except along the hemstitching, I don’t see the difference. I was surprised to see in this photo, though, that the camera picked up the differences in color.

pink and salmon madder tones

The threads going across are the weft, and the ones going up and down are the warp. The sett is 36 epi (ends per inch), sleyed 3 per dent in a 12 dent reed. The bookmarks are two inches wide in the reed, an inch and three quarters after washing and ironing, and range from 10 and a half to 11 inches long including the fringe. I have woven 20 at this point.

Mostly these bookmarks have been fun and satisfying to weave. The only difficulty I’ve encountered is the hemstitching. The yarn untwists as I work and starts to disintegrate. Re-twisting and wetting it helps a little, but it’s still a tricky business, even though the bookmarks are only 2 inches wide. By the time I get to needle-weaving in the ends, there’s not much left to work with. That’s problem number one.

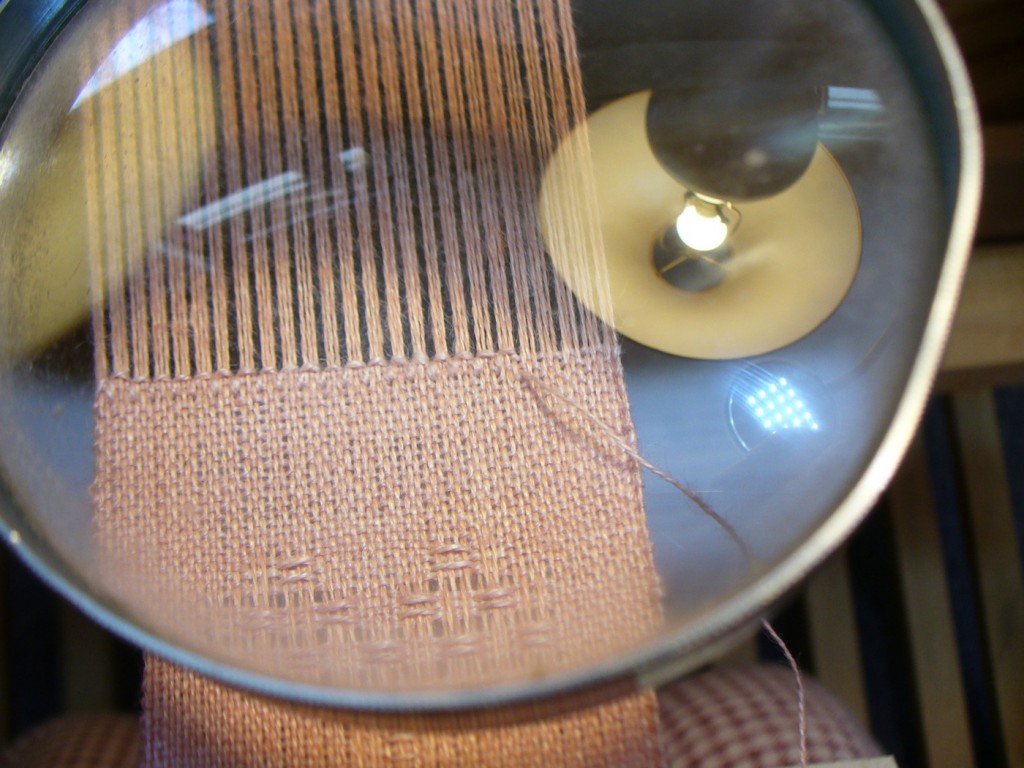
Problem number two is that, at 36 epi, it is hard to see what I’m doing. So, I’ve been using a magnifying glass to help. It would be more efficient to have one on a stand so I could keep both hands free, but I do OK with a handheld one. Sometimes the hemstitching goes smoothly. I feel skillful. Other times there’s fraying and lumps and wispyness. I feel inept.

magnified hemstitching


Here’s where Chuang Tzu comes in. If you’ve heard of Taoism, you’ve heard the sayings of Chuang Tzu: he’s the guy who inspired it all 2000+ years ago.

While I was enjoying a happy hemstitching experience and contemplating its pleasures, a story from Chuang Tzu came to mind. It’s about a butcher, or cook, who never needs to sharpen his knife. I’ve been a vegetarian for about 30 years, but I still like this story. Here’s a little excerpt from the Burton Watson translation. Cook Ting is cutting up an ox for Lord Wen-hui, who marvels at his skillfulness, and Cook Ting says …

“I’ve had this knife for nineteen years and I’ve cut up thousands of oxen with it, and yet the blade is as good as though it had just come from the grindstone. There are spaces between the joints, and the blade of the knife has really no thickness. If you insert what has no thickness into such spaces, then there’s plenty of room–more than enough for the blade to play about in.”

This is how it is with hemstitching. If you slip the needle through the spaces between the threads, it all goes smoothly. There is less abrasion on the thread, less interference with the structure of the cloth, and nothing wears out. I decided I needed a needle with less thickness. Voilá, easier hemstitching!  And the magnifying glass helps.

Cook Ting describes how he feels when he has successfully worked through a “complicated situation” …

“I stand there holding the knife and looking all around me, completely satisfied and reluctant to move on, and then I wipe off the knife and put it away.”

One more bookmark completed. I feel satisfied, then I advance the warp. The Tao of hemstitching.


Weld on Cellulose Yarns

I have not been hibernating, but I am woefully behind on sharing my dye news. So, my first post of 2012 is actually a belated one that I began writing weeks ago.

Back in December, I decided to dye several skeins of cellulose yarns (linen, cotton, and cottolin) for future projects featuring naturally dyed yarns. So many colors to choose from…. I have tons of dried weld in the closet, which made yellow an obvious choice. To prepare for dyeing with weld, I went back through my old dye notebooks, and found a note that one summer some of the weld plants bolted and flowered in their first year, but only got to be about 2 feet tall. So, weld can flower the first year, but technically it’s a biennial.  In my experience, the plants get giant (5-6 feet) in their second year, hence all the dried weld in the closet. Hence yellow yarn.

There are a range of opinions about how to achieve the best results with natural dyes on cellulose (i.e., plant) fibers. Everyone agrees that a thorough scouring is necessary to begin. I washed the skeins in hot water with regular laundry detergent first, then used soda ash at 2% weight of goods and an anionic (edited: cationic, it turns out. My mistake.) scour from Earthues (ordered from the lovely and inspiring Nancy Zeller at Long Ridge Farm) at 6% WOG.

Some folks recommend an alum-tannin-alum sequence using aluminum sulfate and a tannin source. Others recommend just aluminum acetate with no tannin. I decided to follow instructions from Earthues (maybe not their most current recommendations) and treated the yarns with tannin first (Earthues’ gallotannin, from oak galls) at 5% WOG, then the next day mordanted with alum acetate at 5% WOG. My yarns were 22/2 unbleached cottlin and 20/2 linen half-bleach.

I used 9.36 oz. of dried weld (stems, leaves, and flowers) to make the dyebath, planning to dye about 12 oz. yarn.

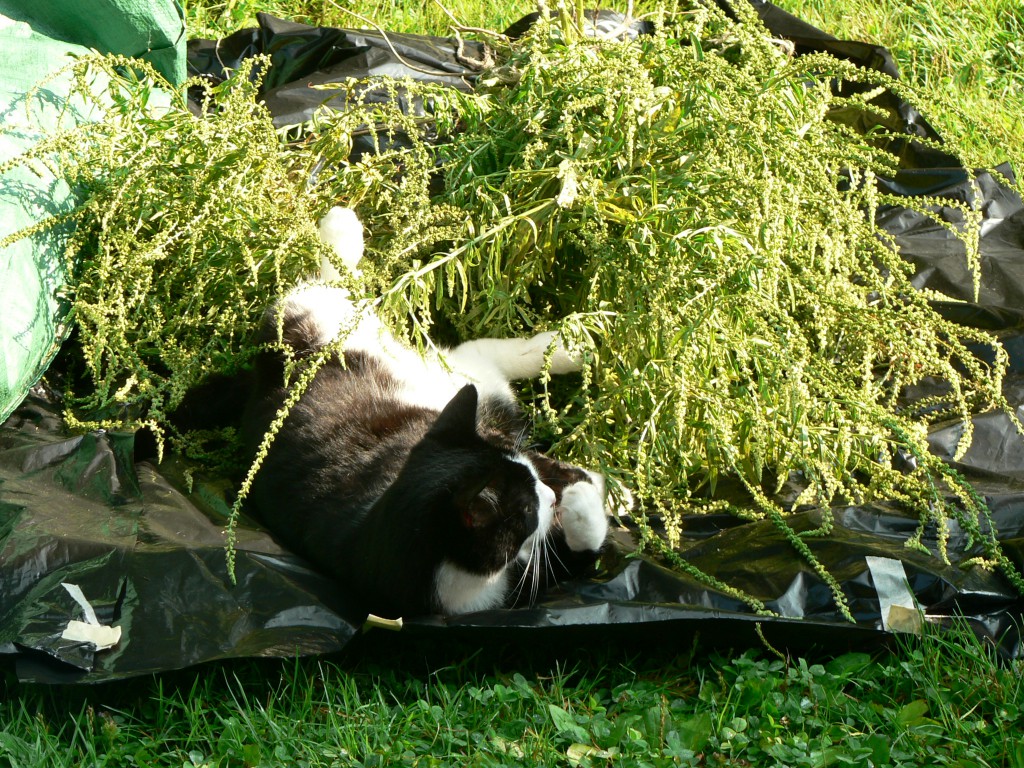
Here I must digress for a moment. Back in December I checked out Anne Bliss’ sweet little book North American Dye Plants from the library. In her preface she acknowledges the support of her family in tolerating the “odoriferous stews” her research required. In our house we call the same phenomenon “stinky pots,” though “odoriferous stews” sounds much more grand. Weld is a stinky plant. The flowers are stinky in a good way. The rest of the plant is stinky in a stinky way. I don’t mind it so much because I have a high tolerance for the smells associated with natural dyes. But I try to spare my love the worst of the stenches by dyeing outside when the weather permits. Our neighbor’s cat loves all my smelly treasures, and we have many funny photos of him enjoying my fiber and dye experiments. Here’s one of Hansel luxuriating in the weld harvest of 2009.

OK, so stinky pots happen outside when weather permits. But since it was a rainy, albeit mild, December, the weld dyepot had to be indoors while it was heating (I brought up the temp to 180, held for an hour, then cooled overnight before straining). Fortunately it was not very smelly when I first heated it. Afterwards, it got outrageous! I did not extract the plant material multiple times, though some people recommend this. Once was enough.

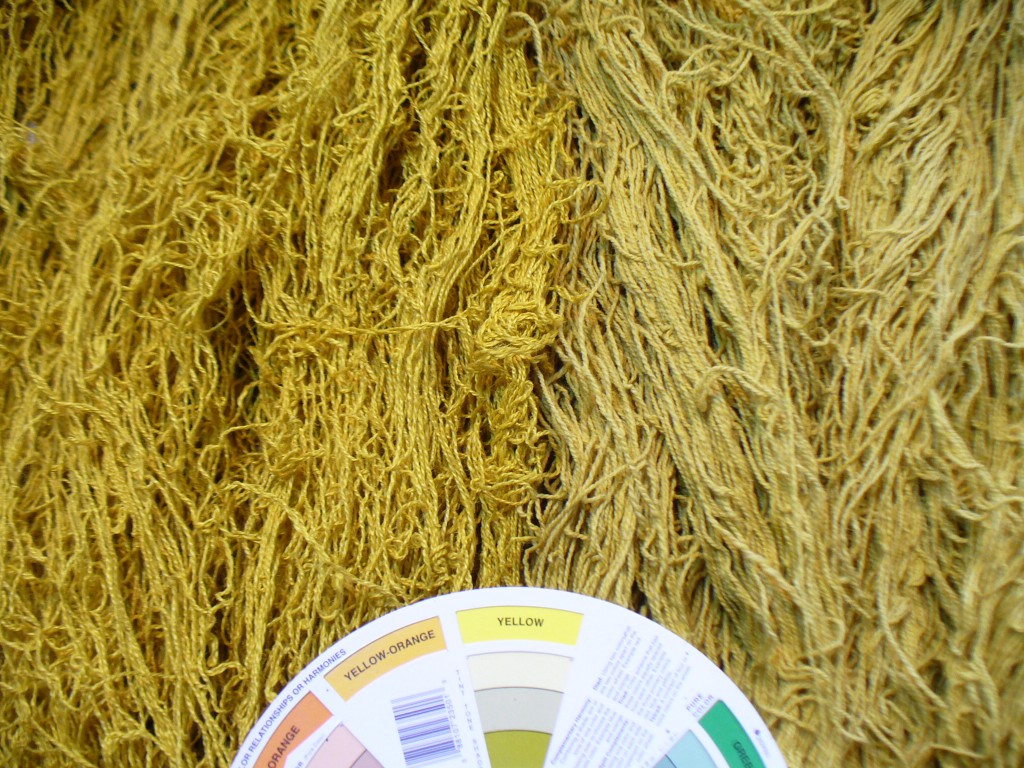
With weld, many people recommend chalk to heighten the color, and/or dipping the fiber in an alkaline afterbath. I decided to add both calcium carbonate (at 3%WOG) and soda ash (at 2%WOG) to the strained dyebath before adding the skeins. The pH was between 9-10. I always do a delayed rinse, meaning I let the dyed yarns dry completely before rinsing them. I got intense, though kind of weird, color.weld-dyed skeins I would describe the linen skeins (on the left of the photo) as mustard. The cottolin (on the right) are a lighter greenish-yellow. I put a color wheel in the photo for comparison.

Weld has a reputation for yielding the most pure or “clear” yellow but you wouldn’t know it from this batch of yarn. I concluded that the tannin affected the color, and the fact that the fibers weren’t bleached also made a difference.

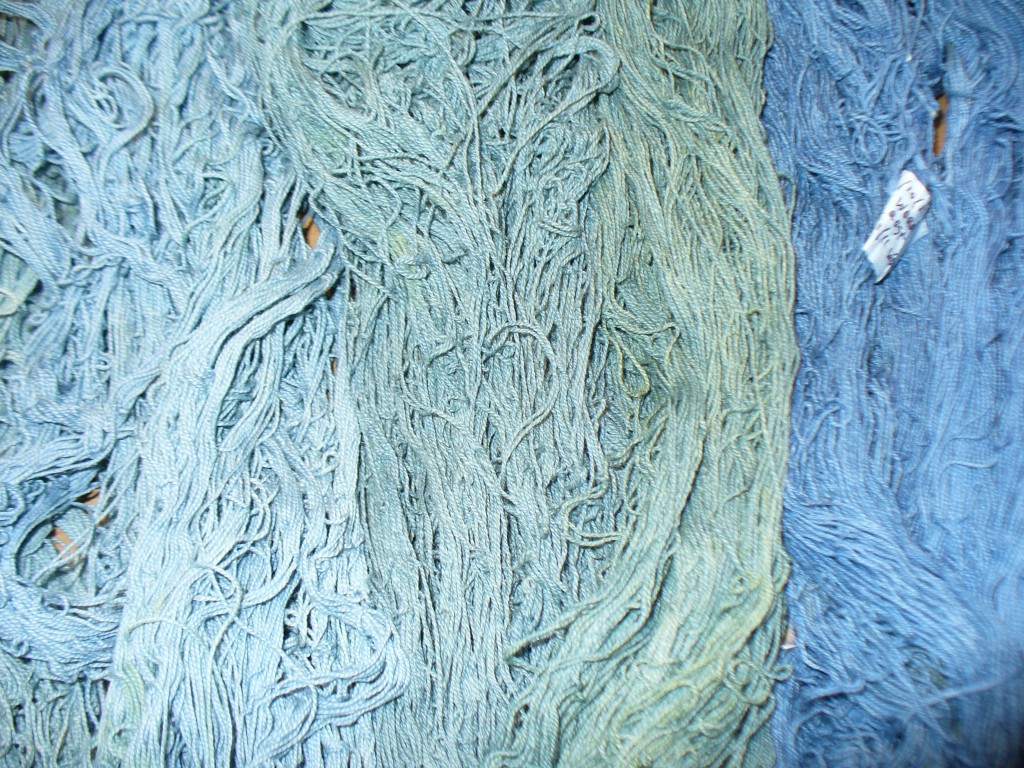
Seeing how intense the color was, I got overly ambitious and decided to use the exhaust bath to make green by overdyeing some cotton and cottolin skeins previously dyed blue with woad. This was my first attempt to make green with cellulose yarns (though I have made many successful greens on wool and alpaca by dyeing the fiber yellow first, then overdyeing with woad). Well, my results were really pathetic and disappointing. Here’s a photo comparing them to a woad dyed skein that I wisely did not mess with.woad overdyed with weld Sorry for the blur, but the colors are pretty accurate. The woad dyed skein is on the far right. They all started out that color. I treated them with the same tannin-alum sequence as the yellow skeins, thinking the tannin might create a nice teal. Sadly, no.
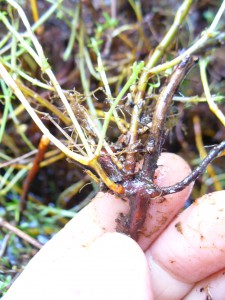
I attribute my lack of success to two factors. First, the weld bath must have been exhausted, and the very little color that was left attached unevenly to the fiber. Second, I must have had a chemistry problem, even though I was pretty sure I wouldn’t. The pH of the exhaust bath when I put the woad-dyed skeins was 8, which I didn’t think it was high enough to strip the blue off the yarn. But clearly it did.

Black Walnut Dye Project

OK, I haven’t sewn a new book in a couple weeks because I have been taking advantage of the extended fall weather and have been dyeing (outdoors) with some particularly stinky and stainy dyes: weld, black walnut, and an ancient umbilicate lichen vat from 2006. Each one deserves a post of its own, so I’ll start with the black walnut.

The black walnut has been an unintended exhausting marathon. That’s a pun. “Exhausting” is what you call it when you re-use the same dyebath (or dye liquor, or ooze, depending who’s talking about it) multiple times until there is no color left. One of my on-going projects is to weave a series of rya rugs using a limited palette of yarns that I have dyed with a given quantity of plant material.

To dye the yarn for the first rug, earlier this summer I dug 5.5 lbs. of Lady’s Bedstraw roots. This quantity ended up dyeing 2lbs. 12 oz. of wool in various shades of pink, peach, apricot, salmon, and, yes, warm beige. Beige in any of its various shades is not my (or, I think, any dyer’s) favorite color. Certainly it comes in handy when you need some neutral to balance out a design. But considering all the work involved in dyeing with plants, especially when you start with the raw materials themselves, it’s not really worth it just to make beige, even warm beige. There are plenty of beige sheep. Creating beige does not inspire awe, or joy, in the dyer. It also does not impress non-dyers with the power and magic of natural dyes. Since part of my concept with this project is to demonstrate the incredible range of color that a single plant–even a single dyebath–can generate, too much beige defeats the purpose.

This year, as you may recall, was a bumper year for black walnuts around here.  I decided to commemorate the bumper black walnut year with a rya rug, even though I often joke that dyeing white wool brown is a questionable pursuit (there is probably a fairytale about the foolish girl who spent her time and energy on this…). There are plenty of brown sheep. Nevertheless, I really love noticing and celebrating the natural world around me, whether events are daily and mundane or unusual and remarkable. Being aware of and participating in the cycles of plants, especially, is one of my great joys in life, and one of the reasons I am passionate about natural dyeing. Plus, you can get an incredible range of colors from black walnut. Thus began the mega-black walnut project.
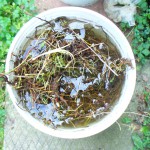
After the bedstraw experience, I decided I didn’t want as many beige skeins relative to the total quantity of yarn. So, I started with an admittedly huge amount of walnut hulls hoping for a lot of nice dark browns and not so many beiges.  OK, you can already tell at this point in the story that I was dreaming, but my vision was blocking my vision, so to speak, and I can only see that in hindsight. I started with nine and a half pounds of walnut hulls that had been soaking in buckets outside for several weeks. I usually think that boiling walnut hulls smell delicious, but these had an unpleasant “swamp” smell due to the fact that they had been decomposing in the relatively warm weather. So, this had to be an outdoors project, using the portable electric burner.

I don’t have large pots, so this whole operation is being run with small pots and small quantities. In fact, I’m thinking “Small Potatoes” may become the name of the series (assuming I ever actually weave these things). I divided the hulls between two pots and extracted the same hulls twice, creating 4 different dyebaths.

black walnut hulls and second dyebath

black walnut hulls and first dye bath

extracting black walnut

walnut hull in dyepot

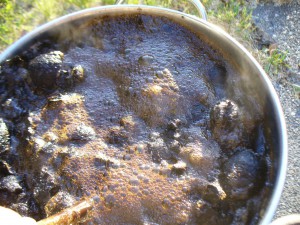
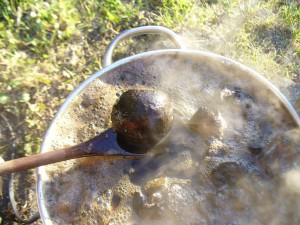
When extracting the hulls you can let them boil and it won’t hurt the color, but it will make a huge mess if it boils over, so I kept a close watch. Above see the transition from, “a watched pot never boils,” to “boiling!” On the spoon is a portion of a hull in the dyepot.

Below on the left you can see the white skins being mordanted with aluminum sulfate, and on the right, the rich color of the dye bath once the hulls were strained out.

black walnut dyebathmordanting yarn


Ah, turning white wool brown!

Those four original dyebaths have thus far dyed 4 pounds of wool, in successive batches of 4 ounces each, and I have yet to reach beige (I’ve gotten to tan). I have been mulling for many days now whether or not to continue. I already have plenty of wool for a rug, at least a rug of the size I initially envisioned. But I have not truly exhausted the baths. I think I could dye another pound of wool before I actually exhaust the color.

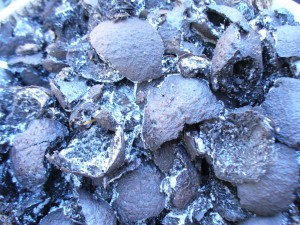
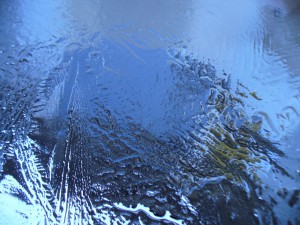
I took a hiatus from the walnut project when we had a cold snap, and my pots and buckets froze (too stinky to keep indoors). Here are hulls with frost on them (which I could even extract again, if I was crazy) and a frozen dyebath:

black walnut hulls with frost

frozen black walnut dyebath


But I think I have to continue to the point of true exhaustion. A bumper walnut year calls for an epic quantity of brown yarn, and perhaps an astonishingly big rug.
More About My Books

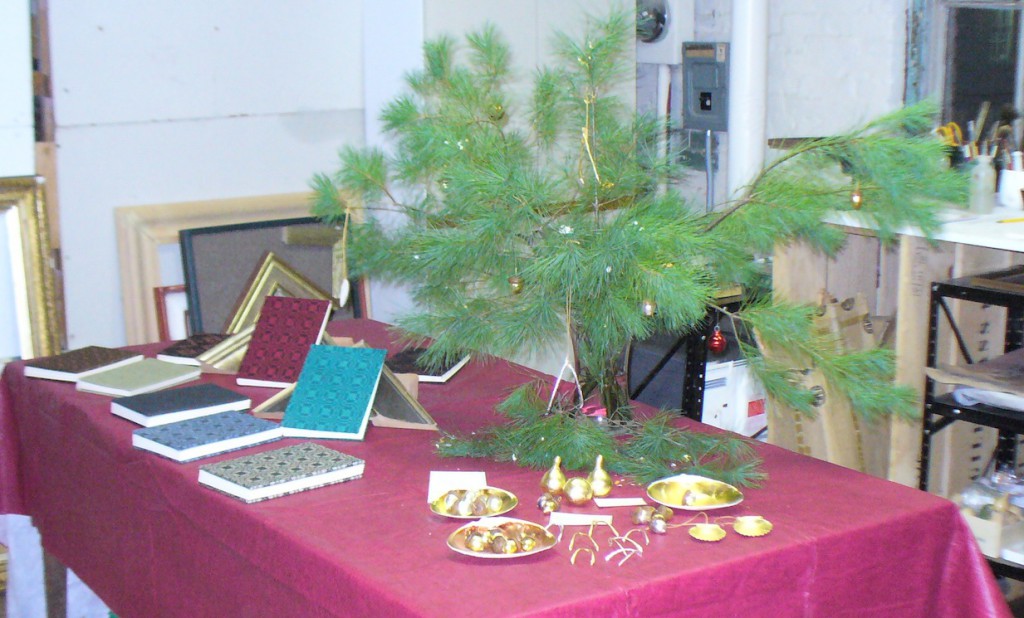
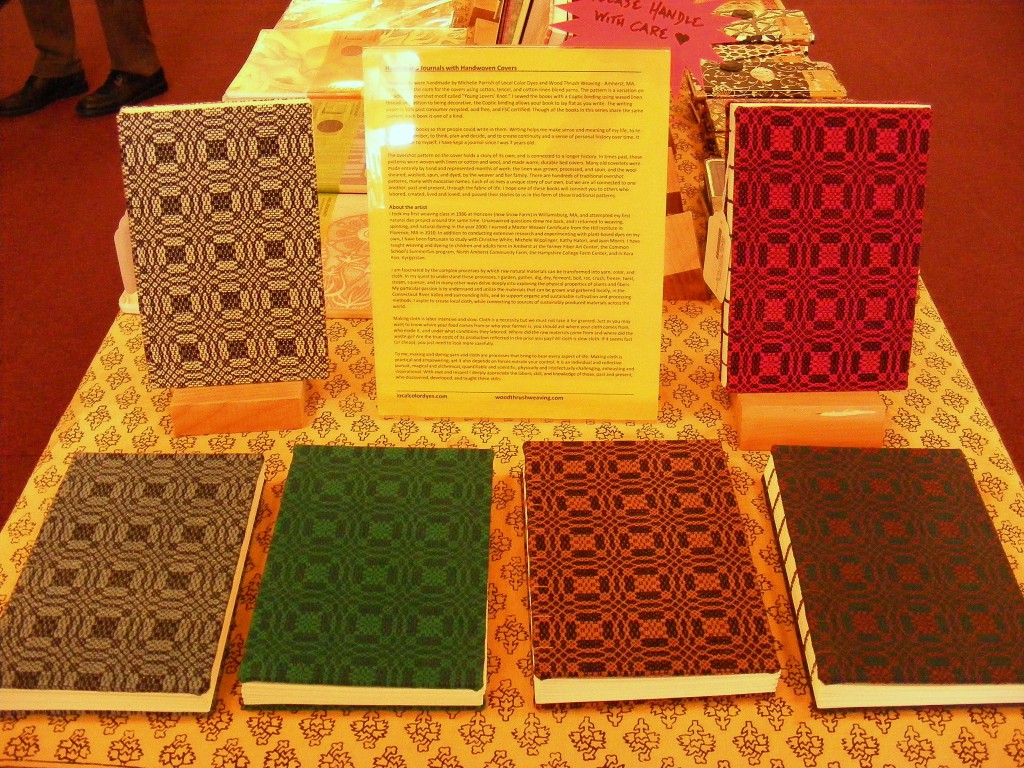
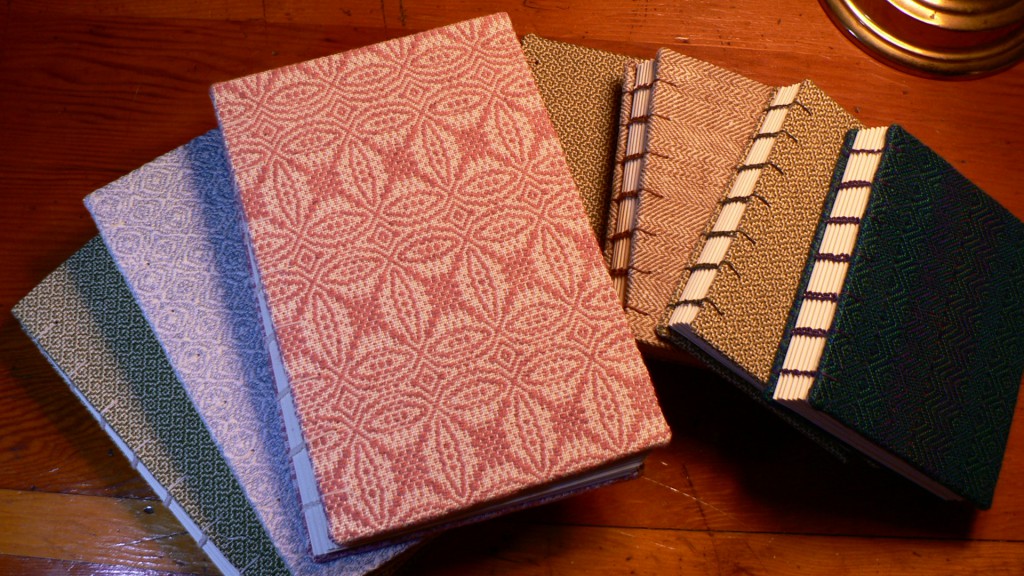
Well, the Cottage Street Studios open house was very interesting. Here’s a photo of my books and some of Amanda’s gilded acorns, wishbones, and gourds around a festive winter-time tree. handbound books with handwoven covers and gilden acornsShe also makes stunning gilded panels, frames, and other treasures. I met lots of great people and had inspiring conversations. My books have now moved to Food For Thought Books in Amherst where they are available for sale. Here they are on display at the bookstore:handmade books by Michelle Parrish at Food for ThoughtMaking these books is a multi-step process. I haven’t photographed every step, but I thought I should give an overview. Understanding the process helps people to understand the labor and expense involved in creating a handmade object.
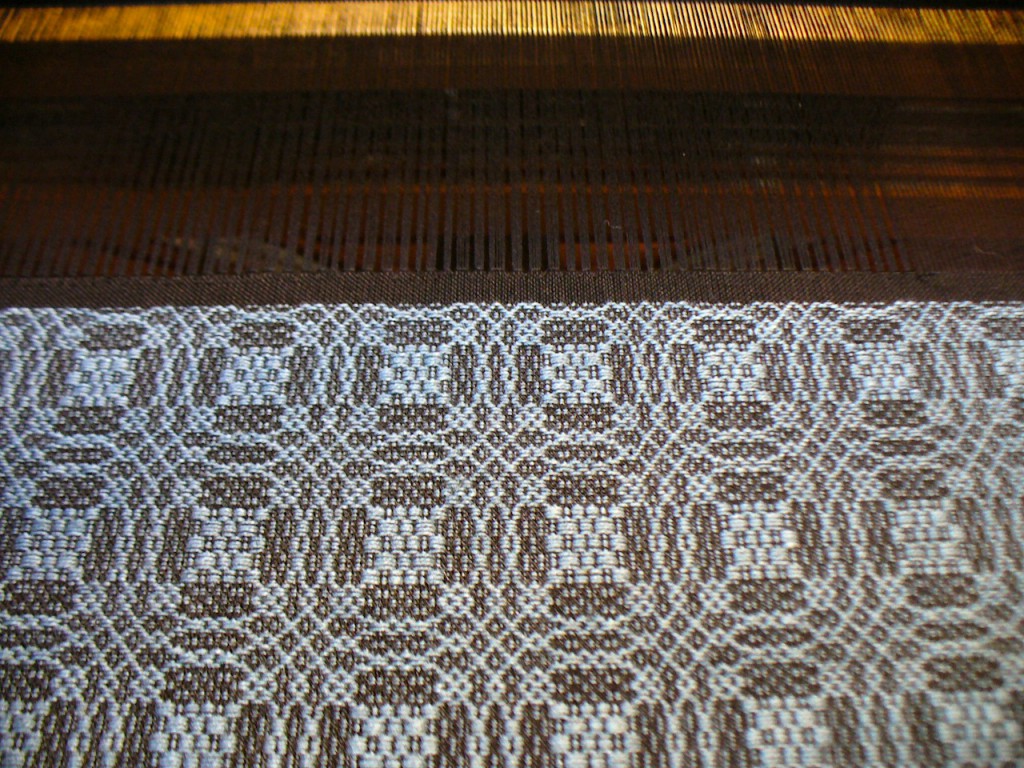
First I wove the cloth, using a variation of the traditional overshot pattern called Young Lovers’ Knot. This involved calculations about the sizes of the books and shrinkage of the cloth, as well as all the steps involved in dressing a loom. I put on a warp long enough to make 12 books. Even though I really loved the pattern and enjoyed playing around with different color combinations, I was happy to get to the end of the warp when I finally finished it; it took a long time to weave. The pattern requires two shuttles, one with a thin thread (20/2, same size as the warp) and one with a thicker thread that makes the pattern. So, it went slowly. Here’s the end of the warp.

woad-dyed blue cottolin Young Lovers Knot warp

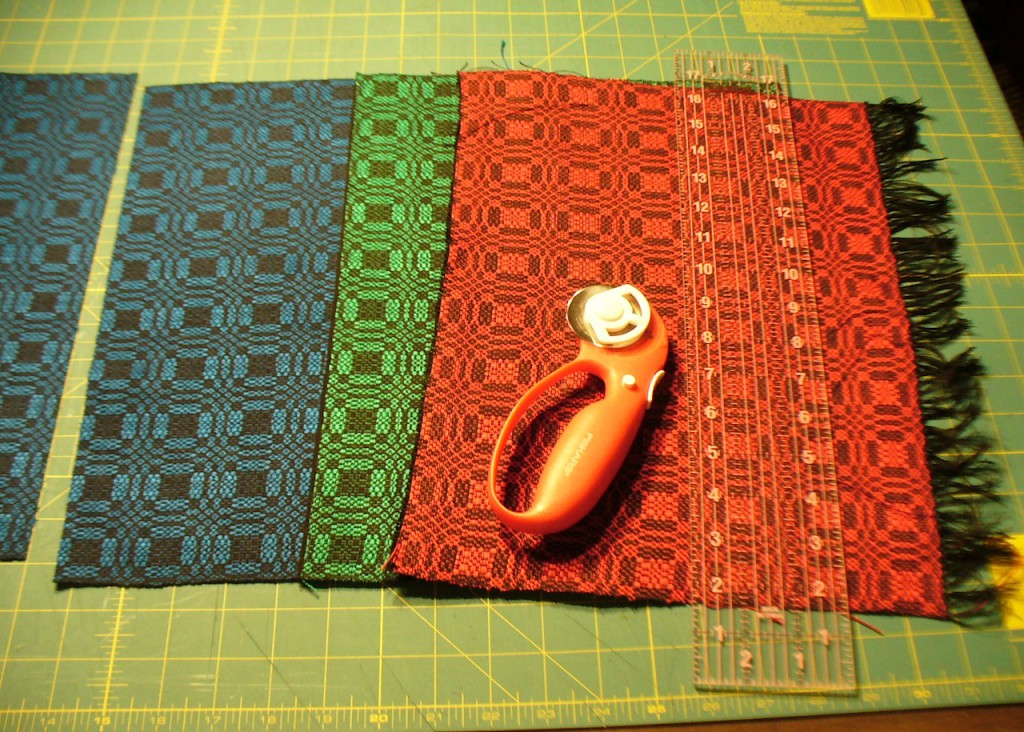
Then I washed, dried, and ironed the cloth, and cut it into sections.

handwoven cloth for book covers

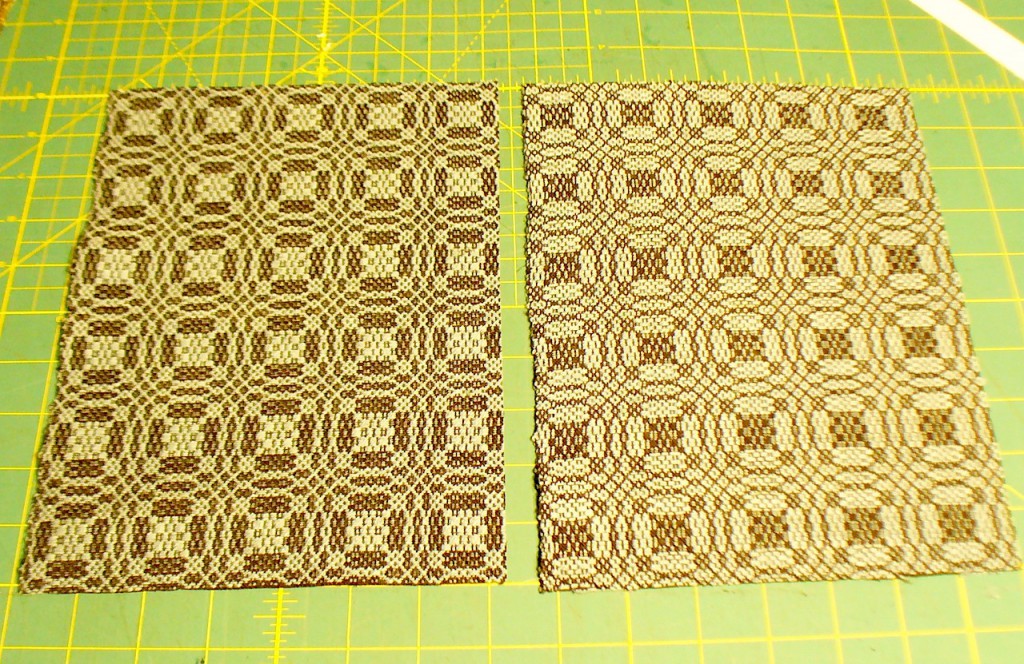
Then, for each book I decided whether to show the front or back of the cloth, because the two sides look very different. For example, in the photo of the black and white cloth, the piece on the left, with the white squares (tables) in the center of the round motif, shows the “right” side of the cloth. With this color combination, I preferred the back side.

front and back sides of overshot cloth

I used a paper template to center the pattern on the cover. I am a symmetry fan, so I was going for symmetry even if I didn’t always attain it. Cloth has a mind of its own. Once I framed the portion of the pattern that I liked, I cut the cloth to size, and glued the cloth onto book board (8.5 inches by 5.5 inches) with PVA glue.

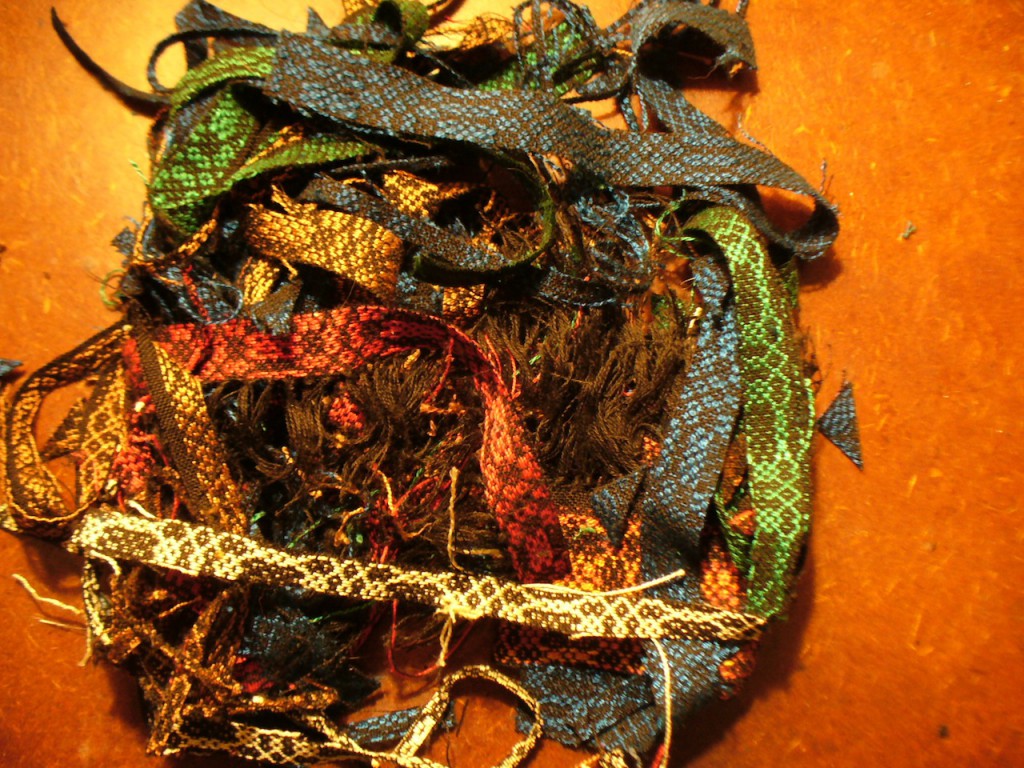
I managed to waste very little cloth in this process, which on the one hand I was pleased about because the cloth took so long to weave that I didn’t want to waste it. On the other hand, I might give myself more of an allowance next time (i.e., weave a couple more pattern repeats in width and length) to give me more design flexibility. Here are my scraps:

more scraps

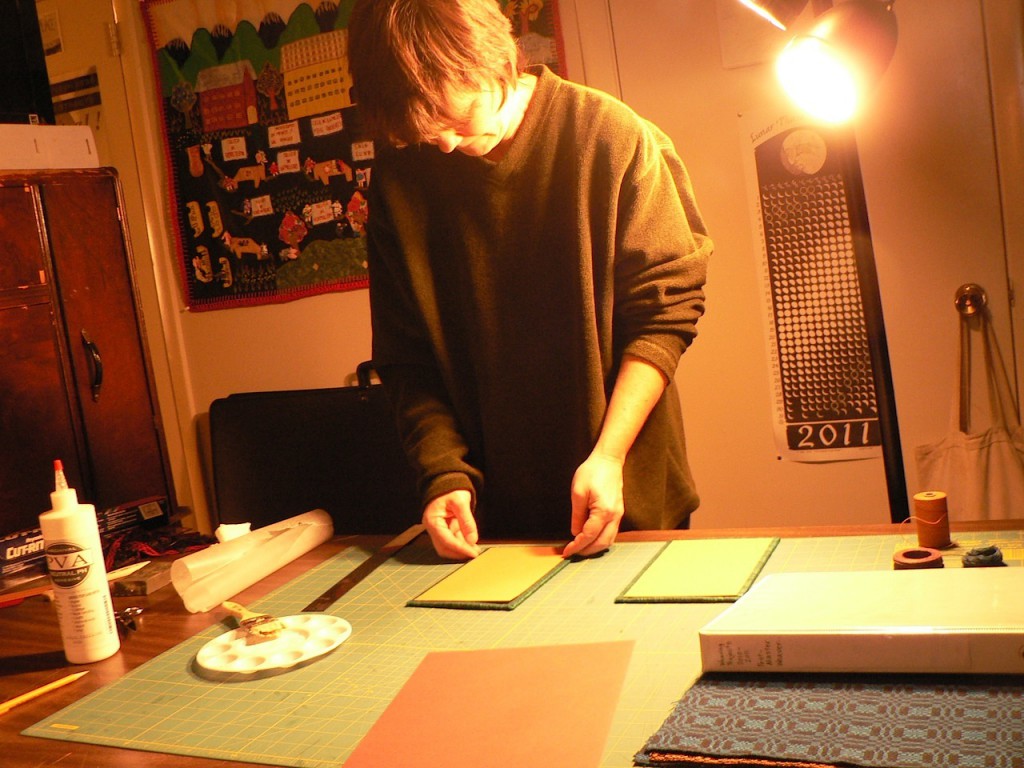
Then I trimmed the corners, and glued down the edges of the cloth on the inside of the cover. Then I pressed the covers. When they were dry, I cut and glued down nice papers on the inside of the covers. Matching paper colors and cloth colors is also a whole decision-making process. Here’s me gluing down the papers.The author making book coversThen I pressed the covers again until the glue was dry. Meanwhile, I folded the signatures, and put them under weights for a while. When the covers were dry, I punched holes in the signatures and holes in the covers with an awl, and sewed the whole thing together with 4 ply waxed linen thread. Ta-da, a book. Six are done, and six more are in the works.


New Handbound Books with Handwoven Covers

Today I am bringing my new crop of handbound books to the Cottage Street Open Studios, where my friend Amanda kindly invited me to offer them for sale alongside her gorgeous gilded pieces.

The cloth for the covers of my new books is woven in a traditional overshot pattern called Young Lovers’ Knot. I wanted the scale of the pattern to be small and intricate, so the warp and tabby weft are 20/2 cotton. The pattern wefts are 10/2 cotton, 10/2 tencel, and 22/2 cottolin. The cottolin is a blend, 60% cotton/40% linen, and I hand dyed it blue with woad from my garden. The rest are commercially dyed. The cloth took a ridiculously long time to weave. Then there was the problem of where to dry it since it was very long. It dried inside and outside.

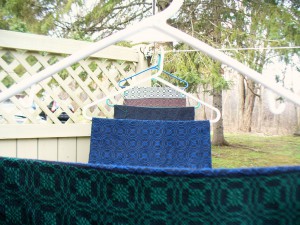
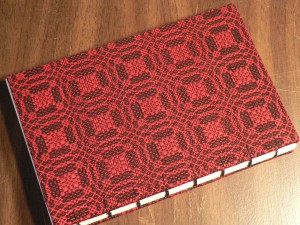
book cloth drying outsideI wove two pieces without the emboldening tabby, a red one and a green one. So, the cloth for this red book is a small piece of history, now made famous right here in this post!Red Book with Young Lovers Knot coverAfter the first two pieces, I resolved my emboldening tabby problem. To make sure your emboldening tabby stays consistent, you need an even number of picks at each turning point in the pattern, i.e., in the center and at the end. I had added a pick at the end of the pattern, but later decided to take out two picks in the center of the pattern. This created a shorter, less busy-looking square or “table” in the pattern.

Young Lovers Knot-shorter squareEach book is unique. Here are a few photos of the books:

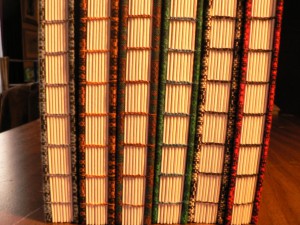
Coptic Bound Book Spines
Coptic bound spines
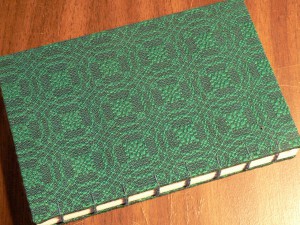
Green tencel and teal tabby
Green tencel pattern yarn and teal tabby
Woad-dyed cottolin
Woad-dyed cottolin
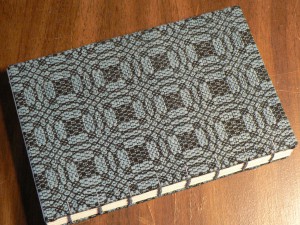
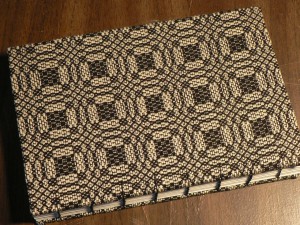
Black and white book

Small Ones Farm

Many thanks to Sally and Bob Fitz of Small Ones Farm for inviting me to table at their fruit CSA pick up days on Saturday October 1st and Wednesday October 19th. It was very inspiring to meet their members, and I had many stimulating conversations about CSAs, locally sourced materials, natural dyes, local wool, flax, and vegan cloth.

At my table I displayed a basket of naturally dyed wool yarns that were mostly handspun by me, over the years, using natural dyes. For the madder, I displayed the results of a dye bath using roots from Earth Guild. (I have also bought madder root from Tierra Wools and Aurora Silk.) For all the rest, I used plants I gathered or grew myself in Amherst or the surrounding area. When I first began spinning, the most economical way to acquire a lot of wool was to buy raw fleeces. I bought and have enjoyed working with Corriedale from the former Mad Women’s Farm in Amherst, Dorset/Border Leicester cross from Natural Roots in Conway, Coopworth from Shirkshire Farm in Conway, the mixed breed flock at Hampshire College, and Romney and mohair from a few farmers I met at the Webs fleece markets. After I got tired of washing and carding my own wool, I’ve enjoyed roving from Balkey farm in Northfield and others. I also had a smaller basket of naturally dyed linen (commercial 40/2 from Webs). The yarns (and my bundle of home grown flax) were for show and tell.

And for sale, I had handbound books with handwoven cloth covers.

hand bound books with hand woven covers
Some of my hand bound books with handwoven covers.

Dyeing with Lady’s Bedstraw

I ended up with 5 lbs. 11oz. of cleaned Lady’s Bedstraw roots. I extracted the roots in two batches because they didn’t all fit in one pot. The first pot held 4 pounds, and the second was 1 pound 11 oz. I extracted each batch of roots twice, and used the baths separately. With the first batch, I put in one and a half Tums for the calcium and I watched the temperature closely (not exceeding 150 degrees F.), but had forgotten about pH with the bedstraws. After straining out the roots, initially the color of the first skein was very drab and I was pretty disappointed. Then I checked the pH and was amazed to see it was pH5 despite the Tums. I took out the skein, added calcium carbonate and washing soda (I ran out of soda ash), and brought the pH up to between 9 and 10. I reintroduced the skein, and woo hoo, pink! A sort of 1980s Giant Foods raspberry sherbert shade.

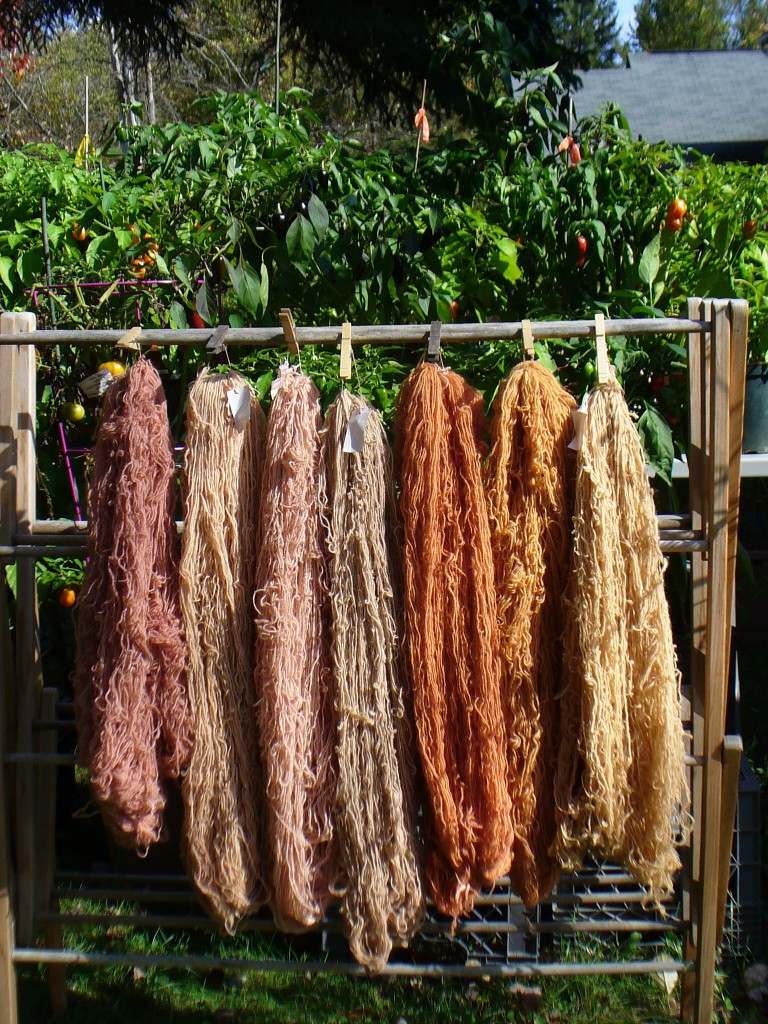
I extracted the second batch of roots with calcium carbonate and washing soda. In part, I think that explains the difference in the color between the two batches. I also think the smaller batch had more of the thicker (presumably older) woody roots relative to the thinner, presumably younger ones. Anyway, the colors are distinctly different. After many days of making and exhausting dyebaths with the roots, I have dyed 2 and a quarter pounds of singles rug wool. Here are some of the results (and in the background are some of our beautiful habañero plants):

yarns dyed with Lady's Bedstraw roots
Part way through the process, here are the yarns dyed with Lady’s Bedstraw roots. The pinker colored yarns on the left are from the first batch of roots, and the orange colored ones on the right are from the second.

I have exhausted a couple more baths since this photo was taken, yielding lighter colors. I also tried one pound of the tops, but got a pretty boring yellowish beige. There were about 4 more pounds of tops but I decided not to bother using them. I am currently soaking the roots for a third extraction. After they had softened up, I cut the woodier chunks into smaller pieces. I managed to break our non-food food processor trying to grind them up (annoying!) so chopped up small will have to do. I expect I can get one or two coral colored skeins before all is done.

Digging Lady’s Bedstraw

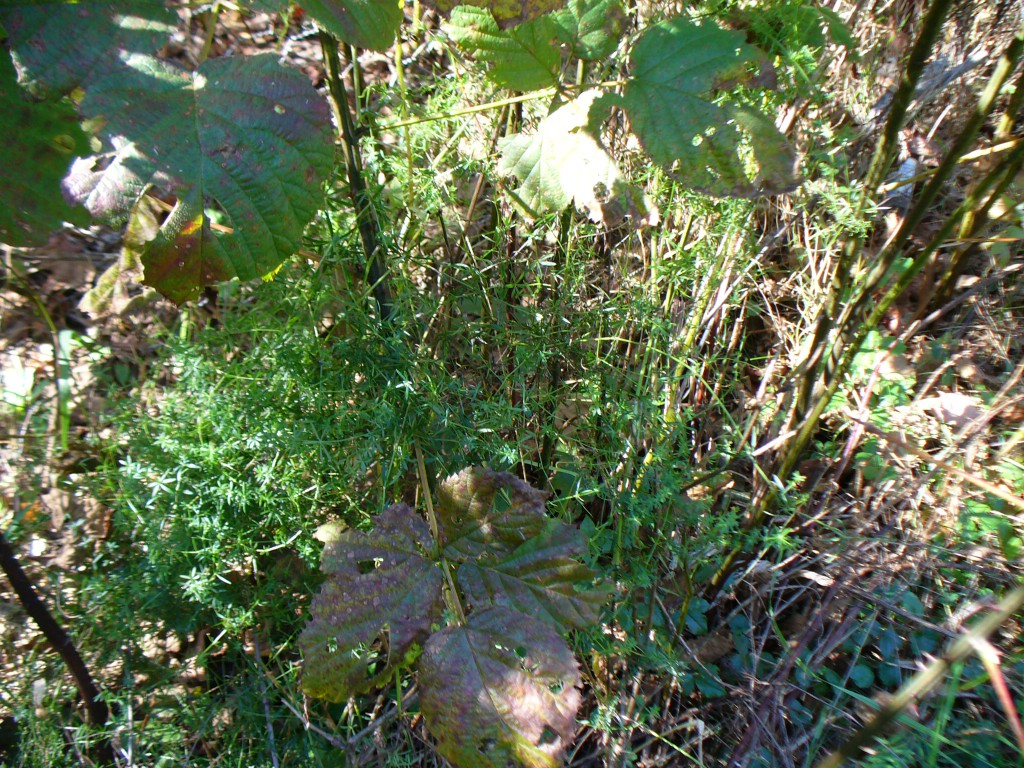
This past weekend I had a lovely visit with my mother at her farm in New Hampshire. While I was there, I finally dug up some Lady’s Bedstraw which I had planted about 10 years ago. At the same time that I planted a bed of Lady’s Bedstraw, otherwise known as Yellow Bedstraw or Galium verum, I also put in a bed of madder (Rubia tinctorum, both ordered as seedlings from Richters in Canada). I dug up the madder two years ago when I wanted to establish a new bed, but hadn’t gotten around to the bedstraw.

When I first planted it, my mother and I very diligently prepared the raised beds with lime and chicken manure and other amendments, and then they sat and mostly had to fend for themselves. The boards holding up the beds rotted. The blackberries moved in. The bedstraw held its own.

Galium verum with blackberries

People usually say to harvest the roots after 3 years. Better late than never. After so many years in the same location, the bedstraw has decided to expand its territory. We do not want it to spread too far in case it proves difficult to control.

I dug about a fifth of the bed on Sunday October 9th. The roots and tops were hard to separate, so I collected them together in bags.

bags of lady's bedstraw
bags of bedstraw
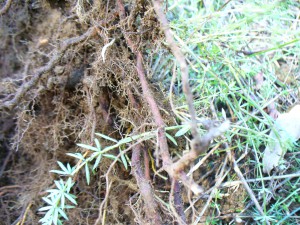
lady's bedstraw roots and plant tops growing
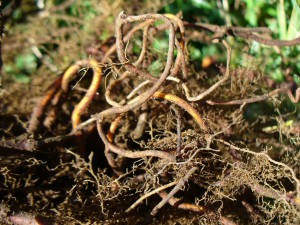
Yellow bedstraw roots freshly turned over
small lady's bedstraw roots
Twisty roots

Like other bedstraws and madder, the plants spread by setting down roots from the nodes on the stems, as well as by seed. A lot of the roots were small. A few were amazingly thick and interlocked. Even though it’s fall and the aerial parts of a plant are supposed to be dying back, there was plenty of fresh greenery.

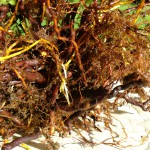
New shoots of lady's bedstraw
Plants are amazing. Tender new growth despite a couple frosts. I love that crazy yellow where the new shoots come out.

The combined weight of the bags was 17 lbs.! A lot of that was soil. Rinsing the soil off, separating the greenery from the roots, and cutting up the roots took me a couple days.

rinsing a bucket of bedstraw roots
Five gallon bucket of roots soaking to rinse off the soil. They didn’t all fit in this bucket.
clean wet bedstraw roots
Clean wet Lady’s Bedstraw roots
good bedstraw roots
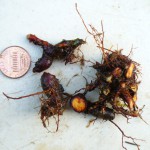
Some good sized roots, but see penny for comparison. There weren’t a lot of roots as thick as these.
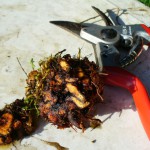
dense lady's bedstraw root cluster
A very dense root cluster. It took me a while to get to the heart of this.
lady's bedstraw woody root core
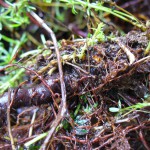
Woody root core


After washing and trimming, the roots weighed 5 pounds. I plan to use these roots, and perhaps the tops, for the first in a series of rya rugs. My idea is to dye the wool for each rug with locally grown or gathered natural dyes. The palette of each rug will be determined by certain parameters, for example, whatever 5 lbs. of Lady’s Bedstraw can dye.  Stay tuned for the dyeing results.

What I Did on My Summer Vacation

For many years I have been a teacher. In September you go back to school, and you get to tell people about what you did over the summer. I did a lot this summer, so this is the first installment of what will hopefully be several entries about my summer.

The Parable of the Weld Seed

You have probably heard the parable about the mustard seed, that from the tiniest seed the largest shrub grows. I get the point of this story, so I’ve been willing to overlook what I consider its botanical inaccuracy. But, being Literal Girl, I have always wondered why this saying is about mustard. Its seeds are pretty small, but not the smallest. You can’t really call it a shrub, and I don’t think that even very tiny birds could nest in its branches. The plant which deserves a parable about the smallness of its seeds, in my opinion, is weld.

Weld has eensy weensy seeds. In its second year it grows into a 5 or 6 foot giant, and while birds don’t nest in its branches, bees and other pollinators adore its flowers. Weld’s parable could be about persistence rewarded, or it might be a cautionary tale about obsessiveness. I’ll tell you my story and you can be the judge.

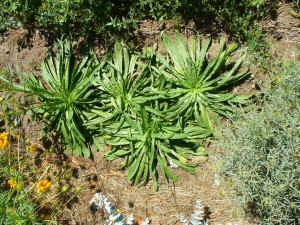
first year weld rosettes in September
First year weld rosettes in September

Weld is a biennial. In my experience, it is slow to germinate and doesn’t produce much foliage the first year; it makes a flat rosette, which you can harvest but not in vast quantities.

The second year it bolts, blooms, and sets seeds. In A Dyer’s Garden, Rita Buchanan says you can trick it into flowering the first year if you plant it very early and expose it to frosts in the spring. This has happened in my garden once, but the plants didn’t get very big.

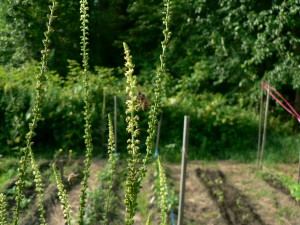
weld in bloom
Weld in bloom. Flowers up top and seeds below. Note the happy bee.

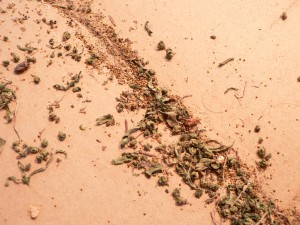
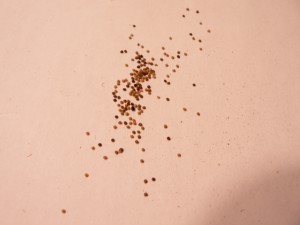
Weld has a habit of continuing to add new buds and flowers to the tip of a flower stalk even after the lower ones have been pollinated and set seed. This makes it tricky to save seed from. But since one weld plant produces a zillion-jillion seeds, I can’t resist trying. Another annoying thing about it is that the seeds are safely encased in a tight little ruffle so they don’t shake loose easily. Well, you can crumble the little ruffle (I will find out the real botanical name for that and tell you later), but then the seeds are all mixed up with powdery ruffle-debris. Also, because some seeds on a stalk are mature and some are not, you get a jumble of black, brown, and yellow seeds plus the powdery debris, and some dried flowers and leaves. Very pretty.

weld seeds before cleaning

But how to clean the seeds? I was pretty sure that only the black seeds were mature, since they tended to occur at the bottom of a stem and thus must be the oldest. I figured the others weren’t worth saving. When getting ready to plant in the spring of 2010, I diligently selected the darker colored seeds by shaking the seeds and debris onto a paper plate and picking up the darkest colored seeds with a damp finger (I licked it). Since you only need a few seeds to get a lot of plant material, I didn’t knock myself out with this method.

This summer I had the notion that I would save large quantities of dye plant seeds to package and sell. I cut the giant trunks of second year weld, and hung them to dry.

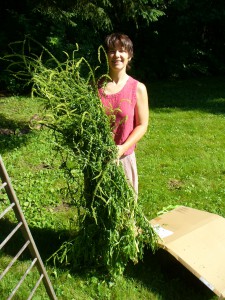
the author with weld plants in bloom
Me with an armful of weld. This is about a quarter of the harvest from four plants. Note cardboard.

Some seeds will fall out of their little ruffles, and if you’re doing small amounts you can catch them in a paper bag. Because of the quantity I was trying to process, I put a big sheet of corrugated cardboard underneath the drying flower stalks outside to catch any mature seeds that might fall. Because it sometimes rains, the big sheet of cardboard also became the thing to carry the flower stalks inside on to keep them dry. Then the big piece of cardboard became the thing I stored the weld flower stalks and seeds on while I got around to dealing with them. The big piece of cardboard took up space in the apartment or the car for a few weeks until sane people become tired of always having to be careful not to bump the big sheet of cardboard full of powdery-debris-that-mustn’t-be-spilled. The time had come to process the seeds.

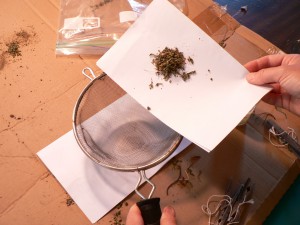
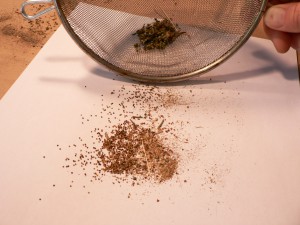
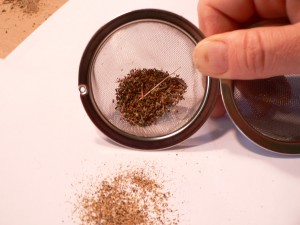
So I began with my trusty finger-licking method, and a brush. It was tedious. Matthew (the sane person) pointed out that licking my fingers might not be an approved technique for seed saving, especially if I wanted to sell my seeds (“Want some free germs with that?”). A better method was called for. I did not want to try water flotation because getting all those seeds dry again seemed daunting. You can’t just sift out the seeds because they are the same size as the ruffle-debris. You can’t winnow because the seeds are so light. After much trial and error, we came up with the double-sift: first sift the too-big particles, then the too-small particles.

Getting ready to sift weld seeds
Getting ready for the first sift
results of first sift of weld seeds
First sift results. Got rid of the leaves.
results of second sift of weld seeds
Second sift with results in the tea strainer. Dried flowers removed.

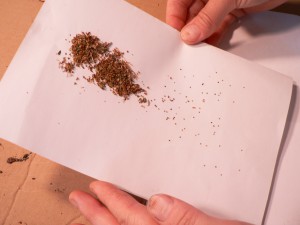
This reduces the quantity of debris and increases the seed-to-debris ratio. At long last, I noticed that the debris could be separated from the seeds by tipping a piece of paper at an angle, and allowing the heavier particles to fall down. The seeds fell down and the dust stayed up.

shaking weld seeds down an inclined plane
Shake down method. Note seeds falling and debris staying at the top. Go gravity!

To some extent, the lighter colored seeds could be separated from the dark colored ones because the darker ones were heavier. So, I managed to get a certain amount of brown and black seeds collected. Still, it was slow going. It tried my patience. Then the voice of doubt began to whisper, did it really matter? Why waste my time separating them if I didn’t need to? Were the yellow and light brown seeds really immature? What if they’d germinate just fine? Stay tuned for the next chapter in the parable of the weld seed.

mixed mature and immature weld seeds
Mixed weld seeds after the double sift and shake down. Not a lot of black ones, alas.


Happy Fall Equinox!

Going Nuts…

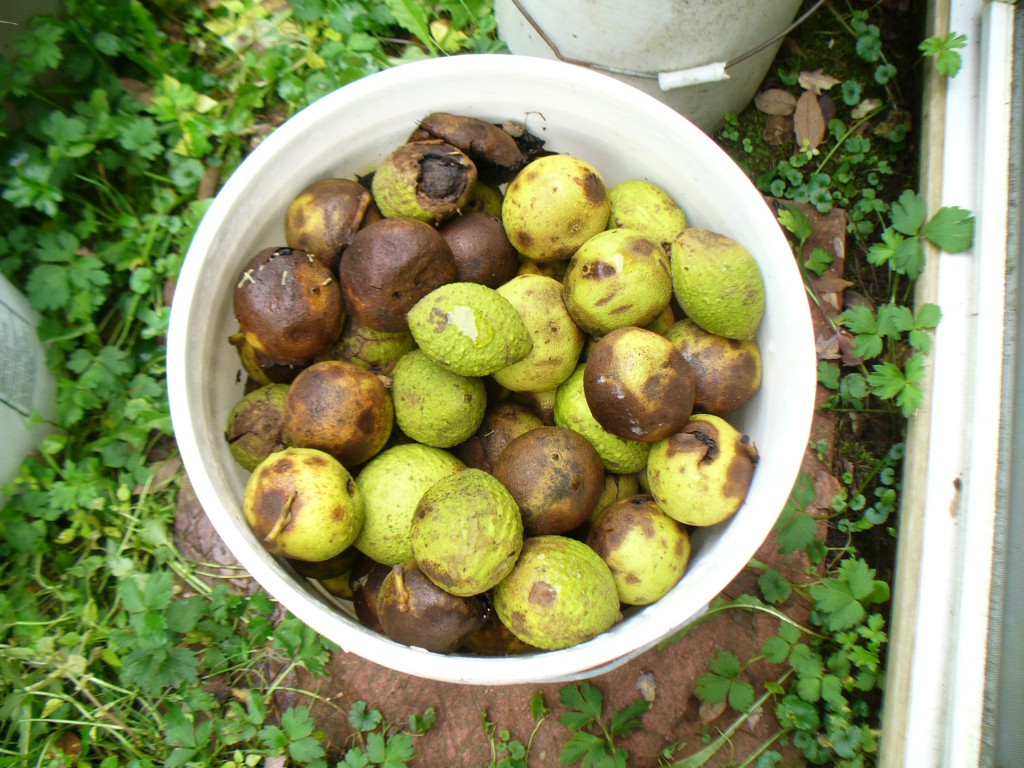
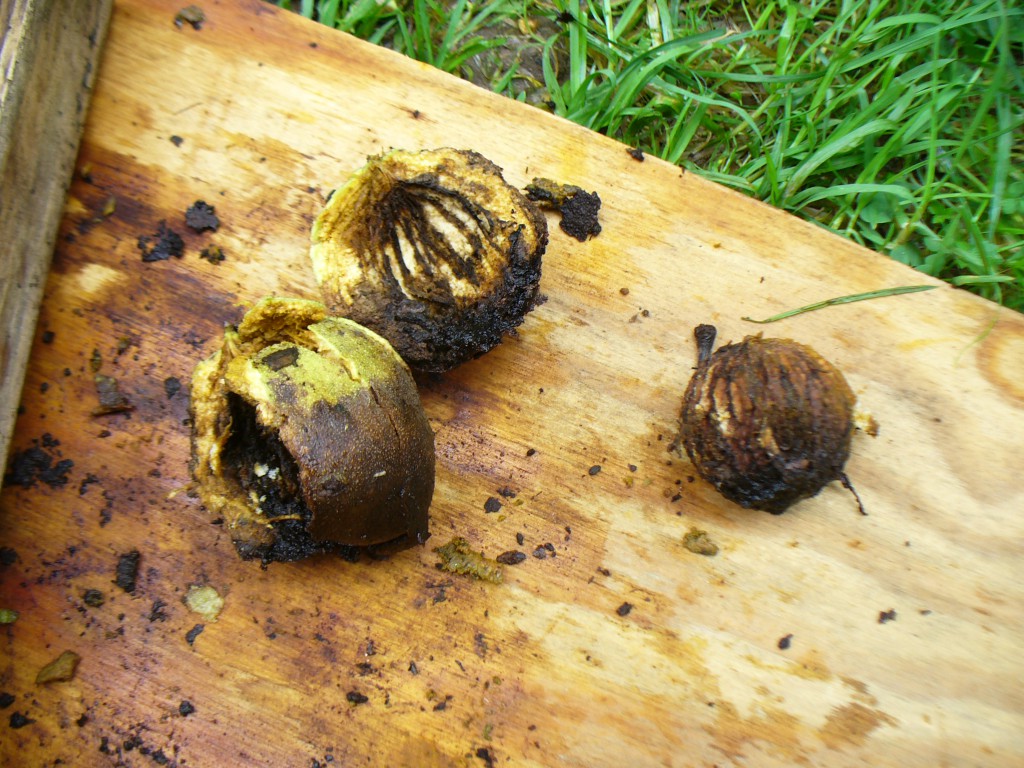
This fall we are having a bumper crop of black walnuts here in Amherst. All summer I’ve been eyeing the big green spheres hanging high in the trees around town, anticipating the happy day when they would start to fall to the ground. The happy day has arrived. At the moment I have a 5 gallon bucket of hulls outside soaking, and three more full of nuts waiting to be processed.

bucket of black walnuts
Bucket of black walnuts still in the hull (12/17/2023 Edited to add: Looking more closely at this image, I think I had a mx of black walnut and butternut, here. The black walnuts are round and the butternuts are pointy.)

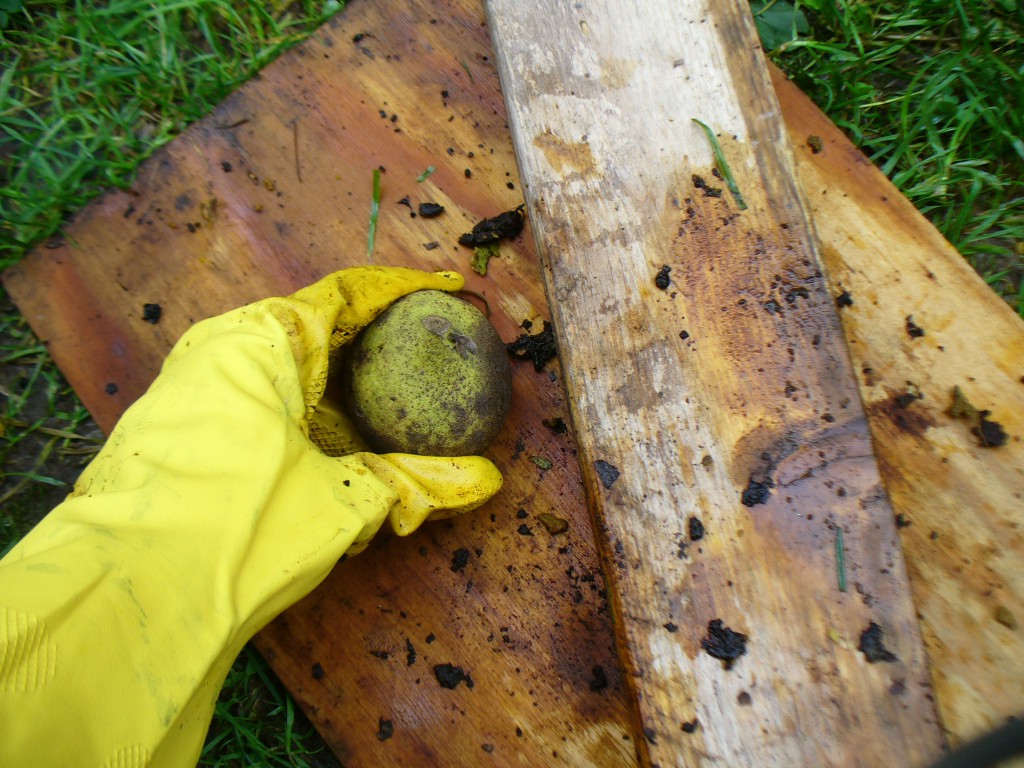
Thanks to a former student of mine, I now have a quick and fun way to get the hulls off the nuts. I used to laboriously cut off the hulls with a knife. This is time consuming and a bit dangerous. The hulls are thick and tough. After once staining my hands a really ghastly shade of mottled zombie skin, I always wore thick gloves for this task. But wearing gloves makes my hands sort of clumsy, and the hulls are juicy, and the knife can get slippy…. Fortunately, about 4 years ago, one of my students invited me to collect black walnuts from his mom’s back yard. While I was there, he showed me his method for getting the hulls off: place the nuts on a cinder block and whack them with a piece of 2×4. The hulls pop right off! You can bash ’em with a brick, too.

removing black walnut hulls
Ready to bash a walnut with my 2×4. You can smash several at a time, of course.
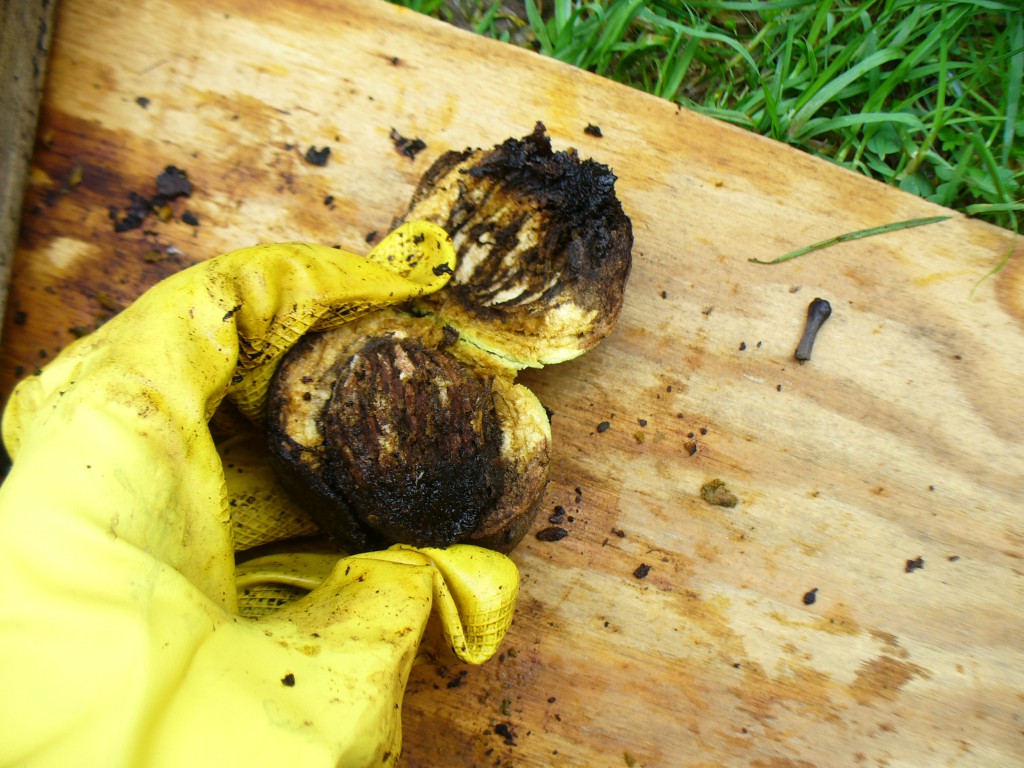
black walnut in hull
There’s the walnut inside the hull.
black walnut separated from hull
Hull on the left, black walnut on the right.

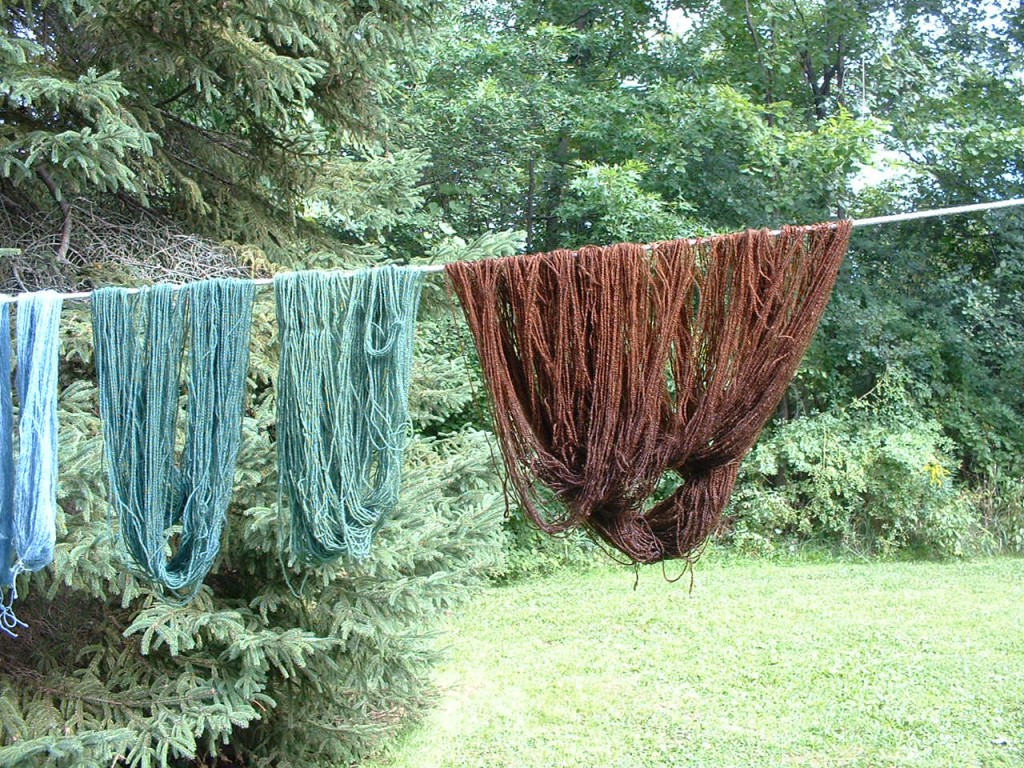
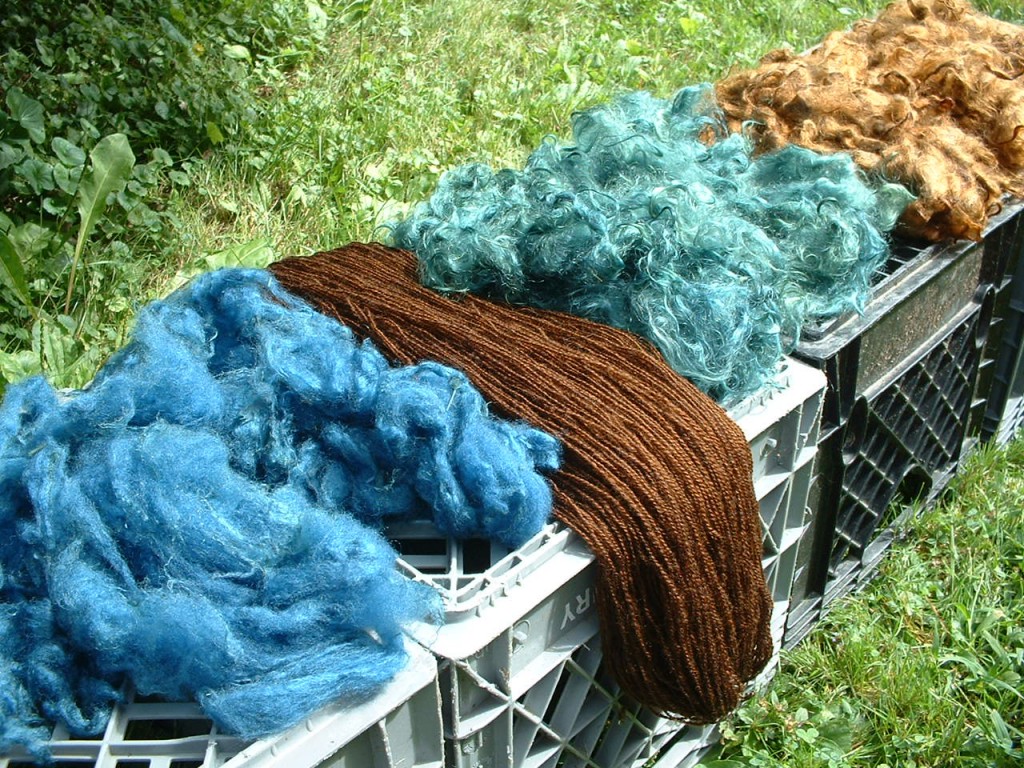
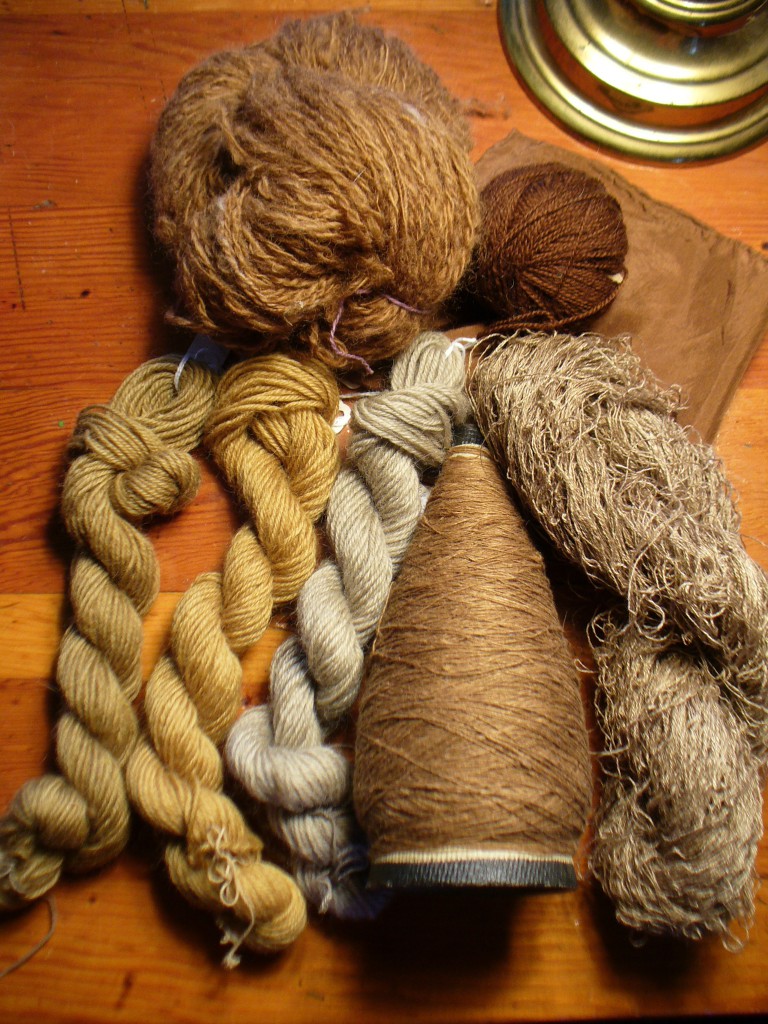
After all this bashing, what color do you get from black walnut hulls? Various shades of brown from rich and reddish to silvery grey. I have sometimes wondered whether it is foolhardy to dye white wool brown, when there is plenty of brown wool to be had. But I find black walnuts hard to resist. They are fragrant and abundant. And forgiving; you can let them rot in a bucket for months with no harm done. I let them freeze outside over the winter, which has been bad for the buckets but no problem for the walnut hulls. Some people find them a nuisance when they’ve been littering the ground for a few days, and get all smooshed up and brown and squishy. So really, why not use them? Since I have become more interested in dyeing plant fibers over the past couple years, my new quest this fall is to get a good dark color on linen yarn. Here are some images of walnut dyed wool and linen from seasons past. I’ll keep you posted on my dark-brown-linen ambitions.

black walnut yarn drying
Brown skein on the right is black walnut on handspun Corriedale mordanted with aluminum sulfate and cream of tartar
yarns and fleece dyed with black walnut and woad
Corriedale skein again, with black walnut exhaust on upper right (mixed breed fleece from Hampshire College Farm Center). Blues are from woad.
black walnut on wool, silk, and linen yarns
Black walnut on wool and linen yarns and silk hankie

On Saturday, October 1st, I will be introducing others to the pleasures of black walnut hull-bashing, and the fragrant scent of simmering hulls, at Small Ones Farm in South Amherst. I’m hoping people get as much of a kick out of it as I do.