A Tale of Lichen and Weird Winter Weather (Part Five)

Part Five: Picking up Fallen Lichen in the Non-Snowy Woods

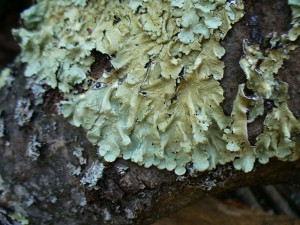
Right after the big storm in October, we had a spell of very warm weather and all the snow melted at the beginning of November. However, the broken trees and branches still lay everywhere. Lichen and salvage botany were very much still on my mind. Karen Diadick Casselman wrote in Lichen Dyes that in the woods behind her house, several species of lichen dropped daily to the ground, which provided an almost unlimited supply, should she choose to use them. (She went on to say that she focuses on studying lichens rather than on dyeing in volume.) I wondered how much lichen could be gathered if I picked up only what had fallen on the trail, road, or sidewalk as I went on my walks, and only what was most abundant. Well, in one week of walking almost every day, I had 4 cups of this lovely stuff (including quite a lot of bark, to which it was attached):

lichen on ground

lichen on oak bark

To be honest, I’m not positive it was all the same species, but visually all the little pieces looked very similar. I could sure collect a lot of it, but what exactly was it, and was it useful for dyeing?

Positively identifying it has been an on-going process. Today I completed the most recent step, having acquired a container of lye from my mom, whom I visited yesterday. Thanks, Mummy!

Earlier in the winter, I had gone through the dichotomous key for “foliose lichens that are not umbilicate, jelly-like, or yellow” in Lichens of North America. With a pretty good degree of confidence I continued on to the Parmelia key. The most likely candidates were Flavoparmelia caperata (a.k.a. Pseudoparmelia caperata, the Common Greenshield lichen), Flavopunctelia soredica, or Flavopunctelia flaventior. The time had come for chemical testing.

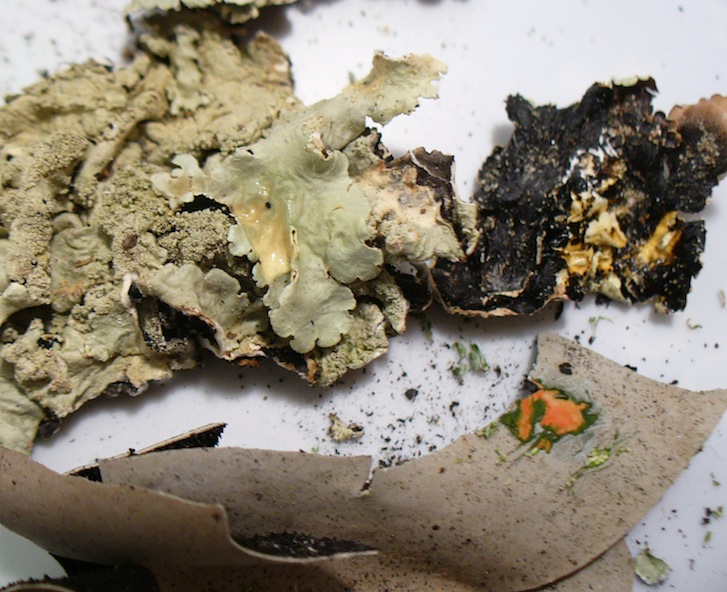
I hoped that using just bleach for the C test (short for calcium hypochlorite), I could tell the difference between F. caperata and F. soredica or F. flaventior. Here’s why. Both of the latter are supposed to react C+ red when spot tested on the medulla. That means when you scrape off the top layer (cortex) and expose the white layer underneath (medulla), then apply a dab of bleach to the white area, it will turn red. It didn’t. Here’s a photo comparing the foliose lichen in question with an umbilicate lichen that definitely did react C+ red.

comparing the color of C+ and C- reactions on lichen

The umbilicate is in the lower part of the photo, and shows a very bright red-orange reaction. The foliose lichen above shows very little color change. Depending on how dramatic the reaction is supposed to be, you could call it yellow, or you could call it nothing. On the medulla of the foliose lichen, there was more of a reaction (the spot on the upper right which is a little bit darker yellow), but it’s definitely not red.

Having ruled out F. soredica or F. flaventior, I was pretty happy to say that my abundant foliose lichen was Flavoparmelia caperata. But I didn’t actually prove what is was, only what is wasn’t. Enter the lye, which lets you do the K and KC tests (K stands for the potassium in potassium hydroxide)

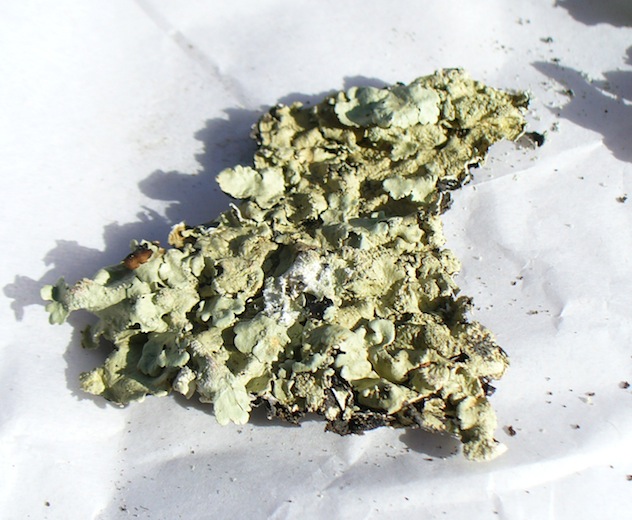
F. caperata is supposed to be K- on the cortex and medulla, KC + gold on the cortex, and KC+ pink on the medulla. Here’s what my results this morning looked like. The first photo shows a piece of the lichen with the medulla exposed (the white area):
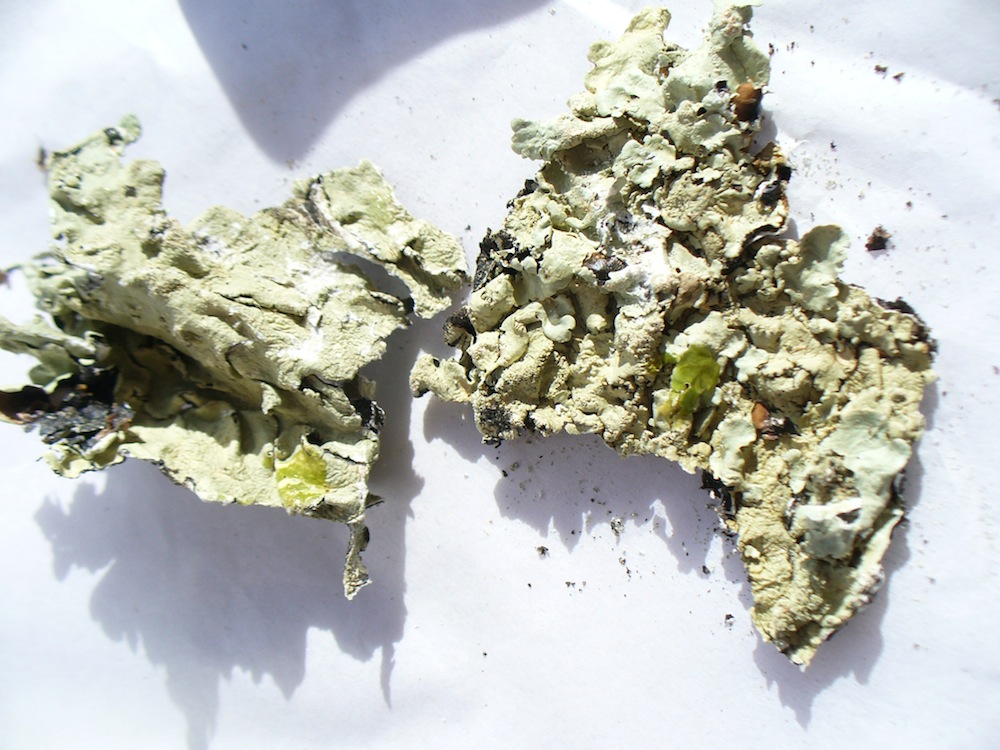
foliose lichen with exposed medulla

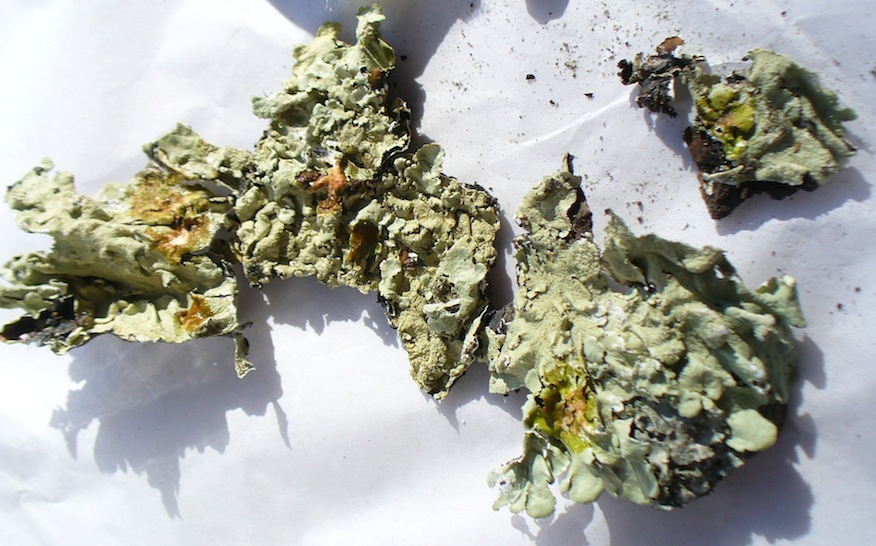
K minus cortexThe photo above shows the K- reaction on the cortex, and the one below shows K- on both the medulla and cortex. It’s slightly brighter green where I dabbed on the lye solution because it’s wet.
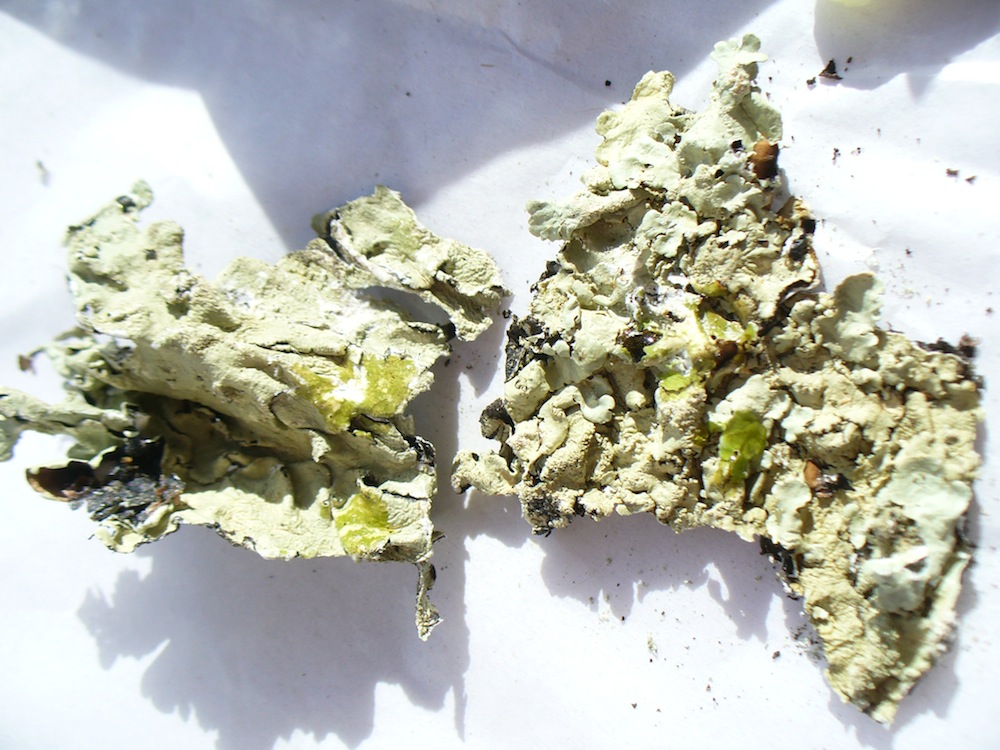
K minus on the cortex and medullaThe photo below shows the KC+ reaction on both the cortex and medulla. (KC means you apply a dab of lye solution, then a dab of bleach on the same spot.) However, I would not call the color on the medulla “pink,” exactly. It’s redder than the gold on the cortex, but it’s more orange, I’d say.

KC plus on cortex and medulla

On the other hand, my “red” reaction on the umbilicate was sort of orange, too. So, there you have it. Probably my abundant foliose lichen is Flavoparmelia caperata. It does not appear to be an interesting source of dye, unfortunately. I may go ahead and try it anyway. I’ll let you know.

A Tale of Lichen and Weird Winter Weather (Part Four)

Part Four: Dyeing with the Ancient Umbilicate Vat

Winding skeins, scouring, mordanting, tannin baths, etc. took a long time, so the dyeing didn’t actually happen until December. It was the first time I’d used lichens on cellulose fibers. According to Casselman, and others, lichens are substantive dyes, meaning they don’t require a mordant. But I’m inclined to agree with Joan Morris, who said in a workshop last summer, “With natural dyes, cellulose fibers need all the help they can get.” Cotton, linen, and other plant-derived fibers are not naturally inclined to slurp up color the way wool does, so you’ve got to give the fibers every opportunity to hold onto the dye molecules. I decided to mordant with alum acetate *and* treat the yarns with a tannin bath for good measure.

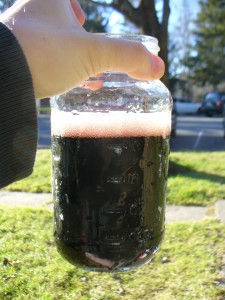
Here’s the vat liquor strained into a jar, undiluted, pH 12 or 13.

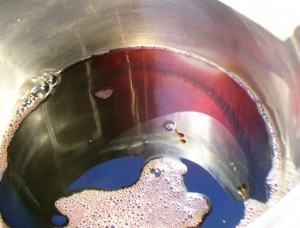
umbilicate lichen liquor in jar Here in the dyepot you can see the magenta color of the vat liquor.

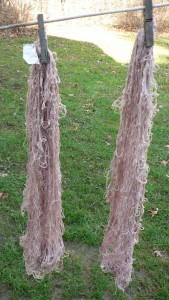
umbilicate lichen liquor colorI diluted the vat liquor with water (6 cups vat liquor to 28 cups water) and the pH was 9. Into this stinky (rotten fishy) pot went my tannin and alum acetate-treated linen and cottolin skeins. Well, if you read my earlier post about weld and cellulose, you know that tannin can have a darkening and weirdening effect on color, even the gallotannin I’ve been using, which is very light. The darkening effect of iron is called “saddening,” so maybe I can call it saddening with tannin, too, but it’s not quite the same. Anyway, you can probably already picture the scene. Here it is:

umbilicate lichen with tannin on celluloseYes, I got a very interesting purplish brown. Basically brown. An unusual sort of brown. But brown. At first I was disappointed and felt very bad because, to me, dyeing with lichens is a weighty thing. I feel there is karma, or at least a moral burden, attached to it in a way I do not feel with goldenrod or Queen Anne’s Lace or other more happy-go-lucky sorts of plants. Venerable ancient organisms shouldn’t be wantonly ripped up and fermented for the making of browns.

Here though, I must digress. Later in December and January, I noticed this color regularly on my walks, especially in the woods when the sunlight was orange-pink early in the morning or just before sunset. Something about the light made the trunks of certain pines (red pine, I think) reflect exactly this purplish brown. I also saw it in tangles of old blackberry canes, and where red maple leaves had fallen and dried among oak leaves. When I noticed this, I felt grateful to the lichens for having opened my eyes to this color. It’s a real color in its own right, with a place in the world, not just an accident or a mistake. Now I love that color. OK, back to the story.

Back in December, still hoping for pink, I added a little soda ash to the exhaust bath to bump the pH up to 10, and used bleached cotton skeins mordanted only with alum acetate. I got a pale bluish pink, a very subtle color, and was happy.

umbilicate lichen no tannin on cotton

A Tale of Lichen and Weird Winter Weather (Parts One, Two and Three)

This is a long story. I will tell it in parts.

Part One: The Snow Storm

At the end of October, 2011, we had a big snowstorm. The snow was wet and heavy, and snapped and broke tons of trees and branches. There were sad broken trees all over the place, and it took a very long time for all the wood to get cut and stacked or moved away. In the woods, depending on how much people-traffic there is, a lot of trees and branches are resting where they fell to this day. And many of these trees and branches were, and are, covered in lichens. It was an unusually early storm with an unusually destructive impact–the first installment of the weird winter, weather-wise.

Part Two: Karen Diadick Casselman

Around this same time, I was planning a series of cellulose dye projects. One of the dyestuffs I wanted to use was an umbilicate lichen fermentation vat that had been sitting in the closet for an indeterminate length of time. Well, it was determinate. Since July 2006. I know, ridiculous. I blame my Master Weaver certificate. After so long, I figured it was time for a refresher on lichen dyeing, so I re-read Karen Diadick Casselman’s Lichen Dyes.

It is an inspiring book on several levels. I especially appreciate her guidelines on the ethics of gathering and using lichens, and her promotion of “salvage botany.” After rereading her book, I was embarrassed to realize how far I had fallen short of the Code of Ethics she outlines, and was motivated to try harder. She suggests learning to identify five species of lichen, including the Latin names, before you collect or use any. I haven’t done this.  I’m lucky to own an incredible resource, Lichens of North America by Brodo, Sharnoff and Sharnoff (a score at Raven Used Books in Northampton many years ago), so I don’t really have an excuse. Among her other recommendations, which I do follow:

“Focus your attention only on found (unattached) lichens.”

“Use for dyeing only those lichens that are conspicuously abundant.”

“Avoid using lichens to make unexceptional dye colors (e.g., beige).”

I take to heart, in particular, this admonition and astonishing, awe-inspiring fact:

“Learn to appreciate that large umbilicate lichens may be hundreds of years old. Respect these organisms as you would any other botanical specimen of mature years.”

Part Three: A Little Personal Lichen Back-story

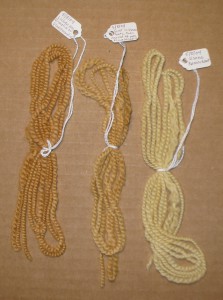
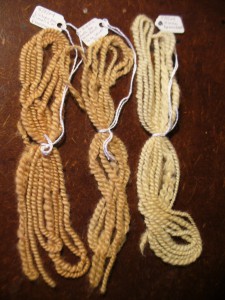
My first lichen experiments were in 2004. I used two different types that had fallen from the trees onto a lawn on Cape Cod. With the boiling water method and no mordant on wool (Finn), one type produced a warm creamy yellow, and the other golden brown. I never did positively identify them. The one which made yellow was possibly some type of Usnea (my best guess was Usnea strigosa), the other possibly a Flavoparmelia (F. caperata?) or Rimelia (R. reticulata?).

Here are the same samples on two different color backgrounds. The sample in the center was first dyed in the yellow bath, then the golden brown one:


Both lichens yielded colors that were much better than beige, but I felt like I could get these colors in other ways, so I didn’t try them again.

Some lichens make amazing colors in the magenta, red, and pink range, with an ammonia fermentation vat. It is very hard to get these colors with natural dyes, unless you use cochineal. Cochineal is not local to New England. Plus, it’s pregnant female bugs and that just makes me feel bad. So, using these special lichens seems worthwhile to me.

These awesome lichens are called umbilicates. An umbilicate lichen attaches to its substrate (what it grows on) by an umbilicus, which is like a little foot or holdfast, or an umbilical cord. I’m sorry to say that I am still not positive if I have been using Umbilicaria americana or U. mammulata, or perhaps both (apparently they often grow together).

These umbilicates are not too hard to find, if you do a lot of hiking around in the woods. They grow on steep rock faces, and where they are happy you can sometimes find tons covering the whole surface. It’s a simultaneously earthly and alien sight.

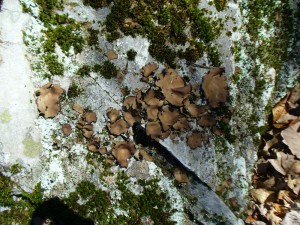
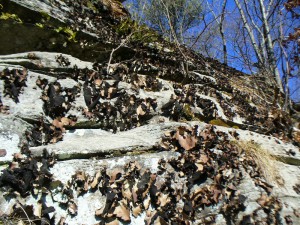
Here are some happy lichens growing on a small south-facing cliff yesterday (February 6th, 2011):

umbilicate lichen on rock

umbilicate lichen on cliffIf you tear around the edge and leave the umbilicus attached, the lichen can keep growing. 12/17/2023 Editor’s note: Yikes! My deepest apologies for ever doing this! Don’t do this! Edge-pieces will fall on the ground all by themselves, and you can pick up the fallen pieces if you look around the base of the rocks.) My practice had been to gather infrequently and sparingly from several different spots. This was how I gathered the jar-full that had been sitting in the closet in an ammonia solution fermenting for oh so long. I have used them a few times very successfully on wool.

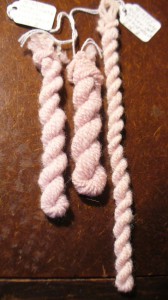
Here are the samples of my umbilicate dyebaths on wool, using the ammonia fermentation method that Casselman outlines in her book.

umbilicate lichen pale pink on wool


umbilicate lichen pinks on wool

The top picture demonstrates that too much fiber will give pale colors, so don’t be greedy with umbilicate vats. This process requires a bit of discipline and restraint.  In the bottom picture, the difference in color between the samples on the right and the ones on the left is due to pH. The ones of the left were immersed in a high pH bath (not as high as the vat itself, but still very alkaline). For the ones on the right, I added vinegar as well as water to the vat solution, and got the pH down to 7. In general, higher pH (alkaline) will give more blue colors, and lower pH (acidic) will give more reds.

There’s more to come in the lichen saga, so stay tuned.


Dear Reader

It has come to my attention that some people read my blog. Hello out there! I have enabled comments (which were formerly closed). If you leave a comment and it doesn’t appear immediately, it’s because I am moderating comments to keep out spam. I will try to check for comments daily. If spam becomes a problem I may close them again, but let’s give it a try.

More journals

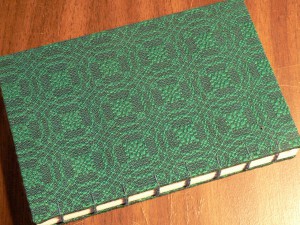
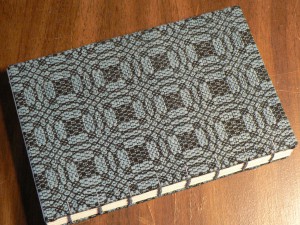
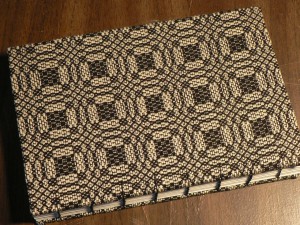
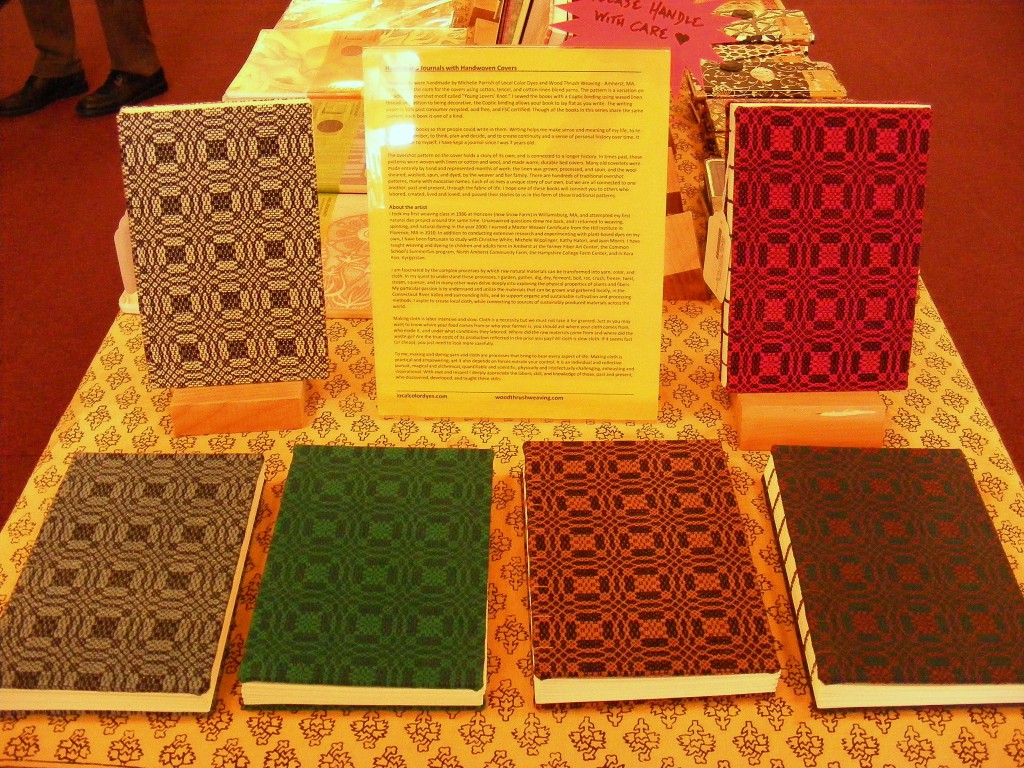
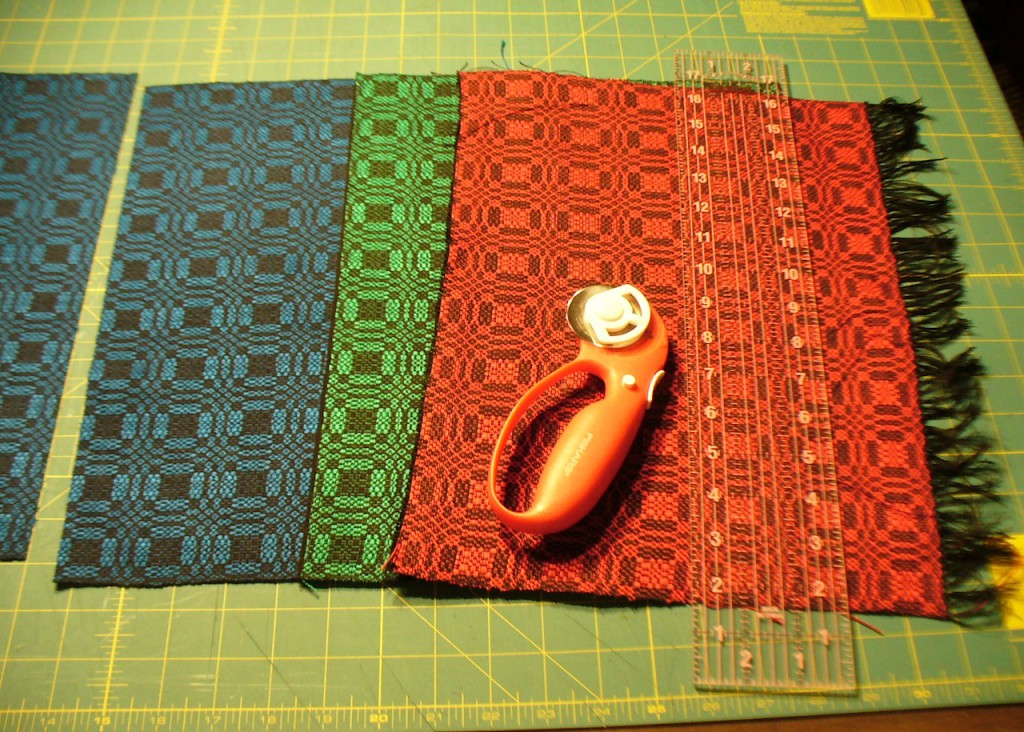
This weekend I sewed together the last of the books from the Young Lovers Knot warp. Three have blue 10/2 tencel for the pattern weft (the color is called Moroccan Blue from Textiva Yarns) with black 20/2 tabby weft. One has a copper-colored 10/2 cotton pattern weft (a UKI color called Mead) with black 20/2 tabby, and one has green 10/2 tencel (Emerald Green from Textiva Yarns) pattern weft with 20/2 black tabby.


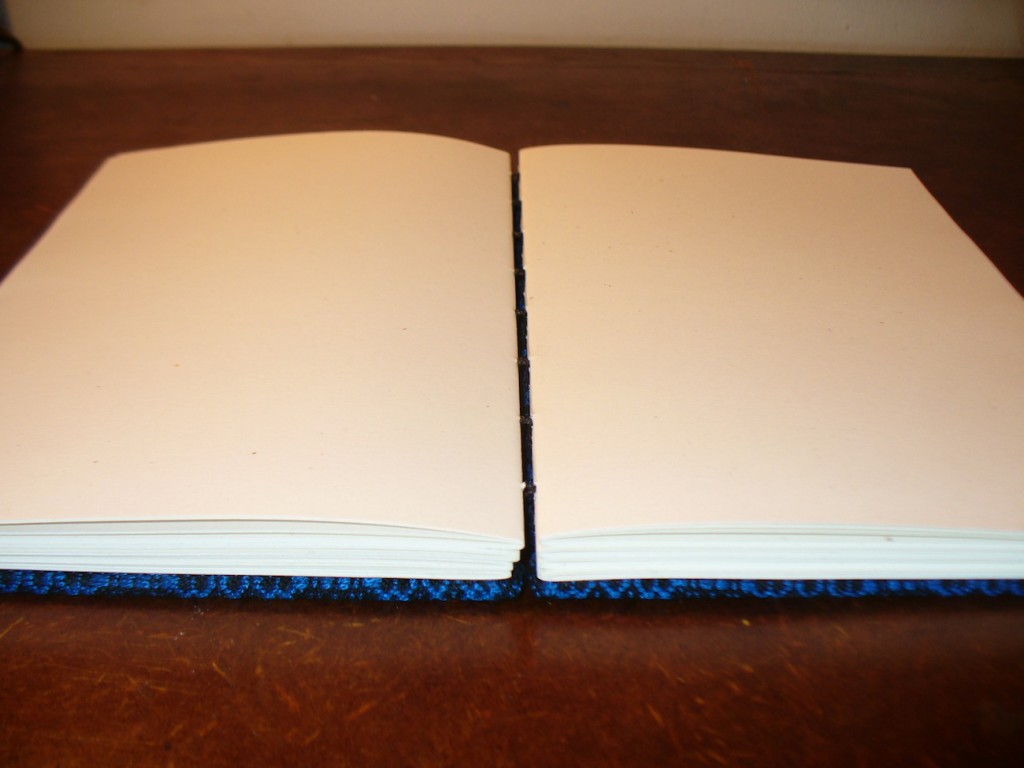
Here are a few more details about them. The coptic binding lets the journal open flat as you write. This is an advantage because you can write anywhere (e.g., sitting snug in bed with your journal propped on your knees). Also, you don’t waste any paper because you can write all the way to the edges.

journal opens flat

These journals are meant for writing, rather than drawing or painting. The paper is smooth, so you can write without bumps and lumps. Any kind of pen will work (except Sharpie bleeds through). I prefer old-fashioned ball points, my pen of choice for decades. The paper isn’t too plain, though, it has visual texture, with little flecks of light brown against the cream-colored paper.

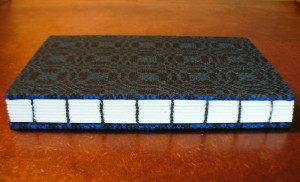
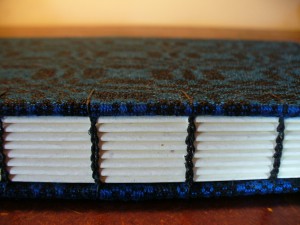
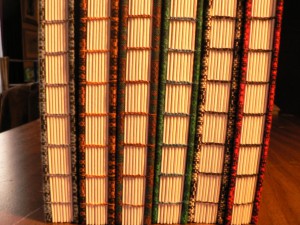
The spines are exposed so you see the folds of the signatures, and the coptic stitch is decorative. I like how the stitching extends the feeling of the threads in the cloth on the covers. It makes the books feel connected, like the covers and pages grew together.blue tencel spinespine close up


Matching the color of the waxed linen thread with the yarns in the cover is fun, though not straightforward. I bought certain colors of waxed linen thread specifically because they matched the yarns I have. But when the cloth is all woven together, interactions between the pattern yarn and the tabby yarn create new color effects. This is always true with weaving, but it happens in a particular way with overshot because of the interactions of the tabby weft with the pattern weft, as well as the warp. Because of these interactions, two colors that were similar when compared one-on-one no longer look alike. I prefer the color of the waxed linen thread to blend into the cloth on the covers. To me it adds to the feeling that the cloth and the stitching are one process or one structure.

My journals are no longer available at Food for Thought Books, since they are in the midst of textbook rush and the space is filled with books for classes for the new semester. For the moment, I have them here at home. Here is the description I posted with the books at the store:

“These books were handmade by Michelle Parrish of Local Color Dyes and Wood Thrush Weaving – Amherst, MA. I hand wove the cloth for the covers using cotton, tencel, and cotton-linen blend yarns. The pattern is a variation on a traditional overshot motif called “Young Lovers’ Knot.” I sewed the books with a Coptic binding using waxed linen thread. In addition to being decorative, the Coptic binding allows your book to lay flat as you write. The writing paper is 50% post consumer recycled, acid free, and FSC certified. Though all the books in this series share the same pattern, each book is one of a kind.

I made these books so that people could write in them. Writing helps me make sense and meaning of my life, to re-tell and remember, to think, plan and decide, and to create continuity and a sense of personal history over time. It connects me to myself. I have kept a journal since I was 7 years old.

The overshot pattern on the cover holds a story of its own, and is connected to a longer history. In times past, these patterns were woven with linen or cotton and wool, and made warm, durable bed covers. Many old coverlets were made entirely by hand and represented months of work: the linen was grown, processed, and spun, and the wool sheared, washed, spun, and dyed, by the weaver and her family. There are hundreds of traditional overshot patterns, many with evocative names. Each of us lives a unique story of our own, but we are all connected to one another, past and present, through the fabric of life. I hope one of these books will connect you to others who labored, created, lived and loved, and passed their stories to us in the form of these traditional patterns.

And I hope these journals offer a space to write some of your own story.”

Chuang Tzu and Huck Lace Hearts

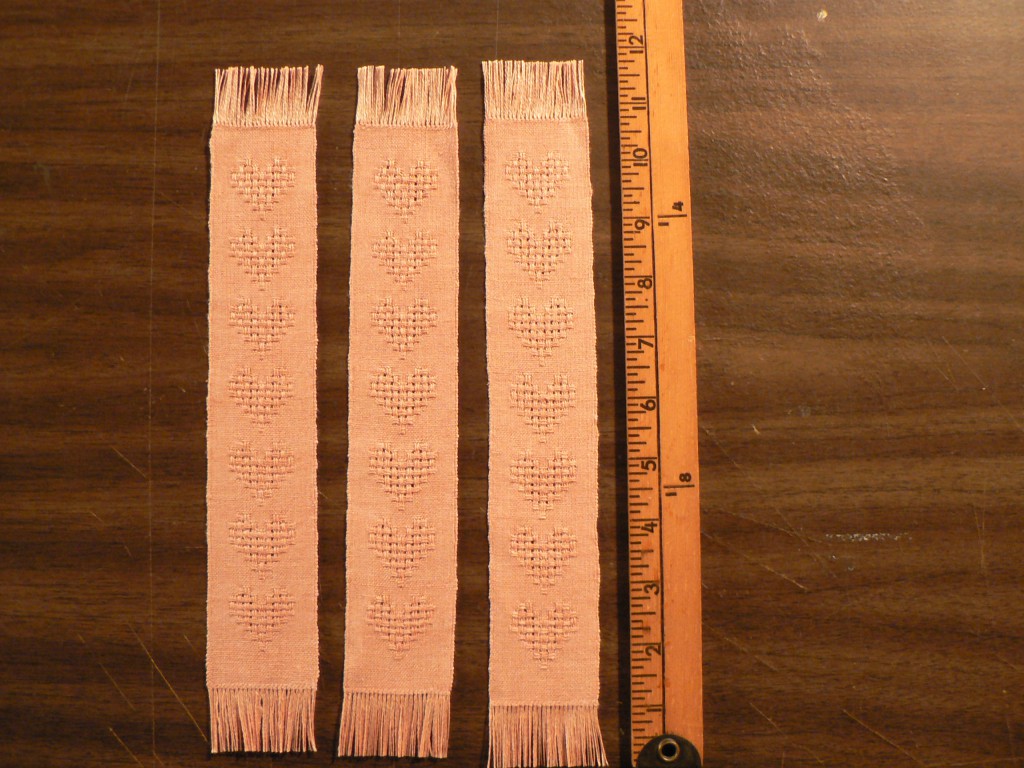
In anticipation of Valentine’s Day, I’ve been weaving bookmarks with heart motifs in huck lace. I really like them. They have a sweet, old-fashioned feeling.

three huck heart bookmarks

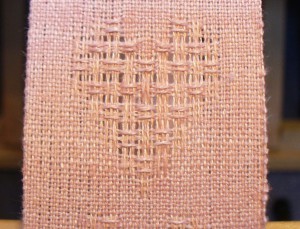
Here are three next to a yardstick to show length. Click on the photo to see more detail. The weave structure of huck lace creates floats that pass over five threads, and these reflect light more than the plain weave background. The reflectivity or sheen helps differentiate the pattern.

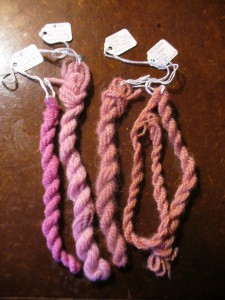
I’m using 40/2 linen that I dyed with madder root last summer. The warp and weft are slightly different colors, and came from two successive dyebaths. The madder roots were leftover from an excellent, inspiring workshop last summer with Joan Morris at Long Ridge Farm (unfortunately a “what I did this summer” post that never got written). By the time I dyed these linen skeins, the roots had been extracted twice already, hence the light colors.

The warp is slightly more salmon colored, toward the orange side of red. The weft is lighter pink, more toward the blue side of red. To my eye the colors and values blend smoothly;  except along the hemstitching, I don’t see the difference. I was surprised to see in this photo, though, that the camera picked up the differences in color.

pink and salmon madder tones

The threads going across are the weft, and the ones going up and down are the warp. The sett is 36 epi (ends per inch), sleyed 3 per dent in a 12 dent reed. The bookmarks are two inches wide in the reed, an inch and three quarters after washing and ironing, and range from 10 and a half to 11 inches long including the fringe. I have woven 20 at this point.

Mostly these bookmarks have been fun and satisfying to weave. The only difficulty I’ve encountered is the hemstitching. The yarn untwists as I work and starts to disintegrate. Re-twisting and wetting it helps a little, but it’s still a tricky business, even though the bookmarks are only 2 inches wide. By the time I get to needle-weaving in the ends, there’s not much left to work with. That’s problem number one.

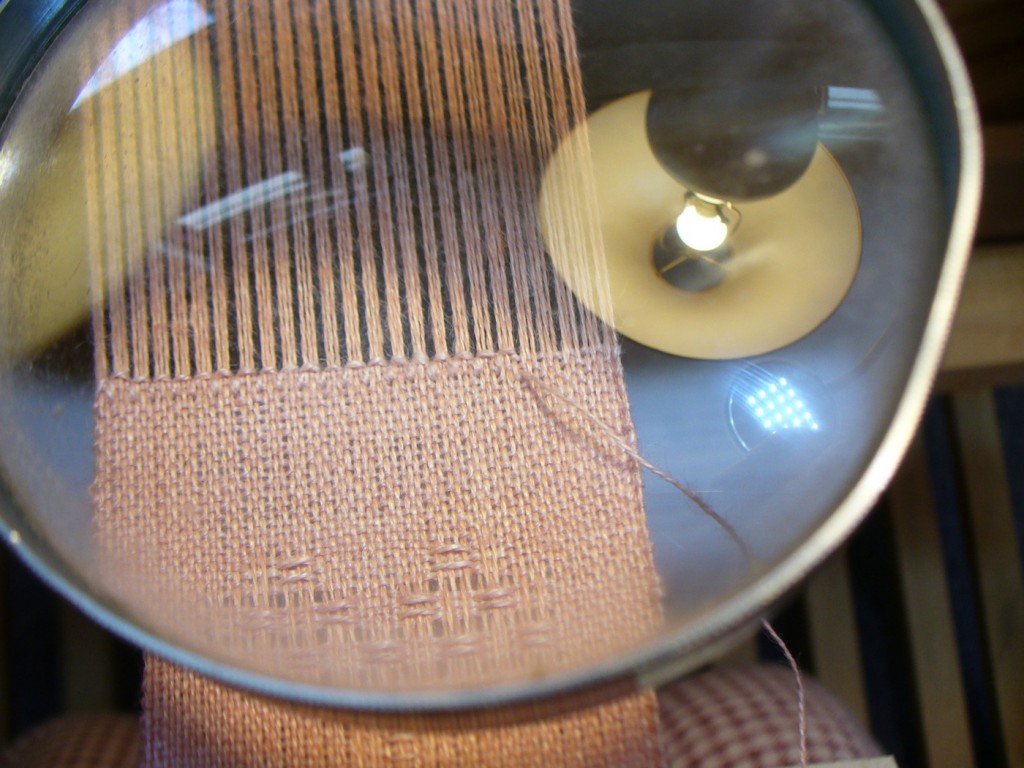
Problem number two is that, at 36 epi, it is hard to see what I’m doing. So, I’ve been using a magnifying glass to help. It would be more efficient to have one on a stand so I could keep both hands free, but I do OK with a handheld one. Sometimes the hemstitching goes smoothly. I feel skillful. Other times there’s fraying and lumps and wispyness. I feel inept.

magnified hemstitching


Here’s where Chuang Tzu comes in. If you’ve heard of Taoism, you’ve heard the sayings of Chuang Tzu: he’s the guy who inspired it all 2000+ years ago.

While I was enjoying a happy hemstitching experience and contemplating its pleasures, a story from Chuang Tzu came to mind. It’s about a butcher, or cook, who never needs to sharpen his knife. I’ve been a vegetarian for about 30 years, but I still like this story. Here’s a little excerpt from the Burton Watson translation. Cook Ting is cutting up an ox for Lord Wen-hui, who marvels at his skillfulness, and Cook Ting says …

“I’ve had this knife for nineteen years and I’ve cut up thousands of oxen with it, and yet the blade is as good as though it had just come from the grindstone. There are spaces between the joints, and the blade of the knife has really no thickness. If you insert what has no thickness into such spaces, then there’s plenty of room–more than enough for the blade to play about in.”

This is how it is with hemstitching. If you slip the needle through the spaces between the threads, it all goes smoothly. There is less abrasion on the thread, less interference with the structure of the cloth, and nothing wears out. I decided I needed a needle with less thickness. Voilá, easier hemstitching!  And the magnifying glass helps.

Cook Ting describes how he feels when he has successfully worked through a “complicated situation” …

“I stand there holding the knife and looking all around me, completely satisfied and reluctant to move on, and then I wipe off the knife and put it away.”

One more bookmark completed. I feel satisfied, then I advance the warp. The Tao of hemstitching.


Weld on Cellulose Yarns

I have not been hibernating, but I am woefully behind on sharing my dye news. So, my first post of 2012 is actually a belated one that I began writing weeks ago.

Back in December, I decided to dye several skeins of cellulose yarns (linen, cotton, and cottolin) for future projects featuring naturally dyed yarns. So many colors to choose from…. I have tons of dried weld in the closet, which made yellow an obvious choice. To prepare for dyeing with weld, I went back through my old dye notebooks, and found a note that one summer some of the weld plants bolted and flowered in their first year, but only got to be about 2 feet tall. So, weld can flower the first year, but technically it’s a biennial.  In my experience, the plants get giant (5-6 feet) in their second year, hence all the dried weld in the closet. Hence yellow yarn.

There are a range of opinions about how to achieve the best results with natural dyes on cellulose (i.e., plant) fibers. Everyone agrees that a thorough scouring is necessary to begin. I washed the skeins in hot water with regular laundry detergent first, then used soda ash at 2% weight of goods and an anionic (edited: cationic, it turns out. My mistake.) scour from Earthues (ordered from the lovely and inspiring Nancy Zeller at Long Ridge Farm) at 6% WOG.

Some folks recommend an alum-tannin-alum sequence using aluminum sulfate and a tannin source. Others recommend just aluminum acetate with no tannin. I decided to follow instructions from Earthues (maybe not their most current recommendations) and treated the yarns with tannin first (Earthues’ gallotannin, from oak galls) at 5% WOG, then the next day mordanted with alum acetate at 5% WOG. My yarns were 22/2 unbleached cottlin and 20/2 linen half-bleach.

I used 9.36 oz. of dried weld (stems, leaves, and flowers) to make the dyebath, planning to dye about 12 oz. yarn.

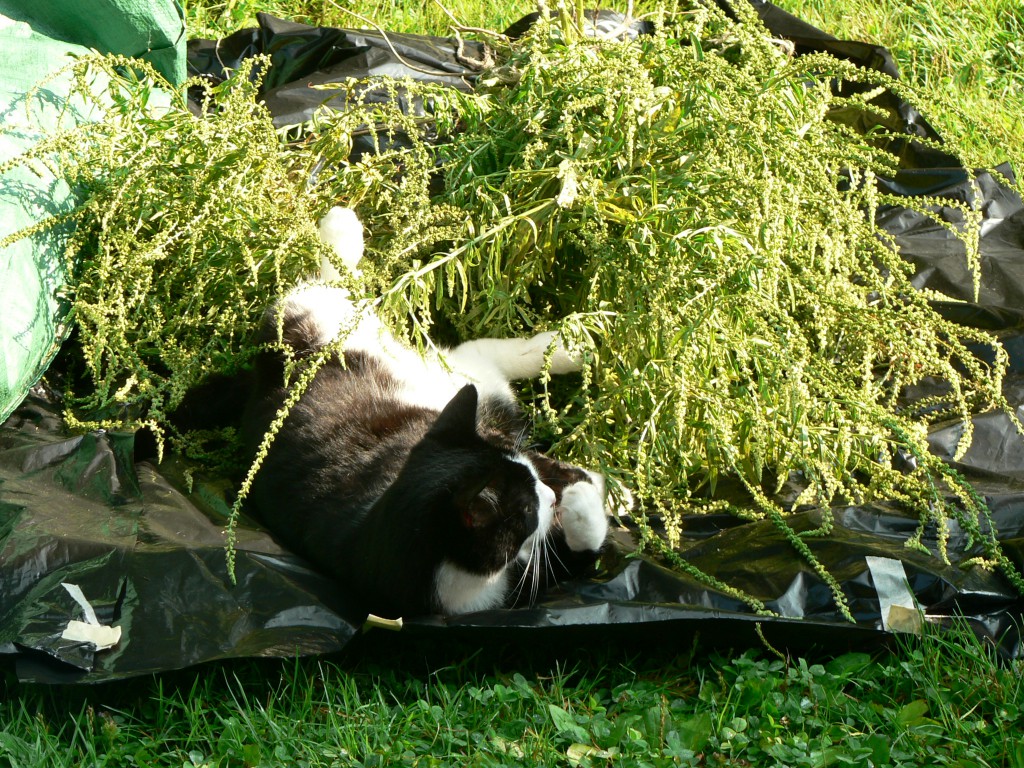
Here I must digress for a moment. Back in December I checked out Anne Bliss’ sweet little book North American Dye Plants from the library. In her preface she acknowledges the support of her family in tolerating the “odoriferous stews” her research required. In our house we call the same phenomenon “stinky pots,” though “odoriferous stews” sounds much more grand. Weld is a stinky plant. The flowers are stinky in a good way. The rest of the plant is stinky in a stinky way. I don’t mind it so much because I have a high tolerance for the smells associated with natural dyes. But I try to spare my love the worst of the stenches by dyeing outside when the weather permits. Our neighbor’s cat loves all my smelly treasures, and we have many funny photos of him enjoying my fiber and dye experiments. Here’s one of Hansel luxuriating in the weld harvest of 2009.

OK, so stinky pots happen outside when weather permits. But since it was a rainy, albeit mild, December, the weld dyepot had to be indoors while it was heating (I brought up the temp to 180, held for an hour, then cooled overnight before straining). Fortunately it was not very smelly when I first heated it. Afterwards, it got outrageous! I did not extract the plant material multiple times, though some people recommend this. Once was enough.

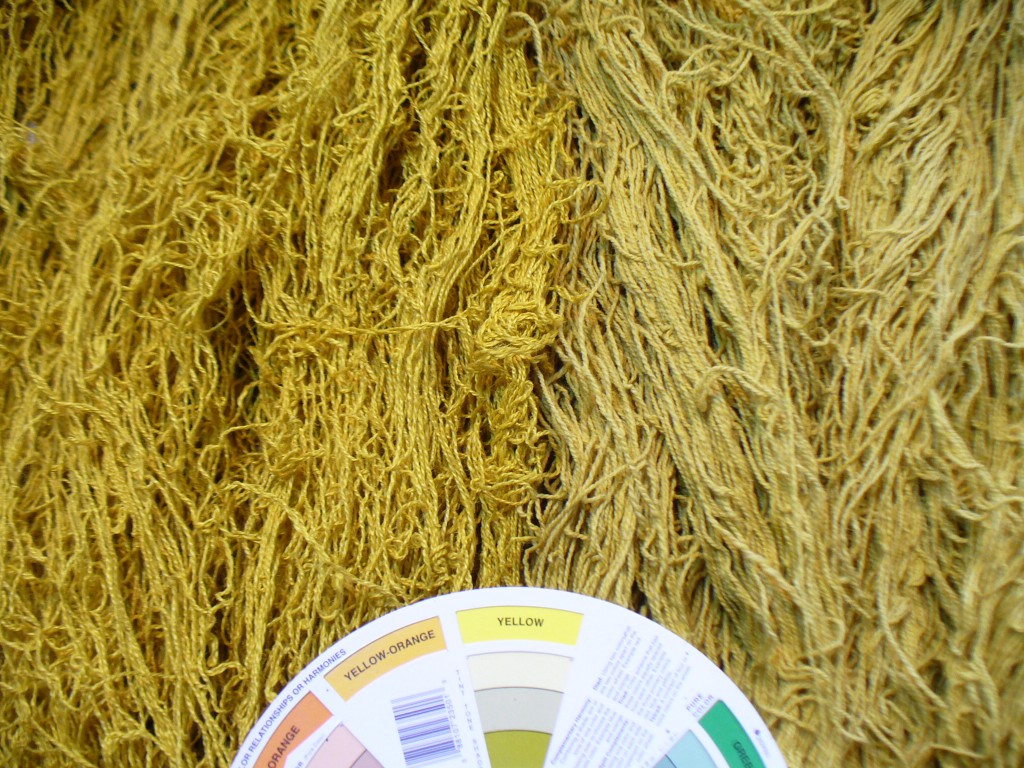
With weld, many people recommend chalk to heighten the color, and/or dipping the fiber in an alkaline afterbath. I decided to add both calcium carbonate (at 3%WOG) and soda ash (at 2%WOG) to the strained dyebath before adding the skeins. The pH was between 9-10. I always do a delayed rinse, meaning I let the dyed yarns dry completely before rinsing them. I got intense, though kind of weird, color.weld-dyed skeins I would describe the linen skeins (on the left of the photo) as mustard. The cottolin (on the right) are a lighter greenish-yellow. I put a color wheel in the photo for comparison.
Weld has a reputation for yielding the most pure or “clear” yellow but you wouldn’t know it from this batch of yarn. I concluded that the tannin affected the color, and the fact that the fibers weren’t bleached also made a difference.

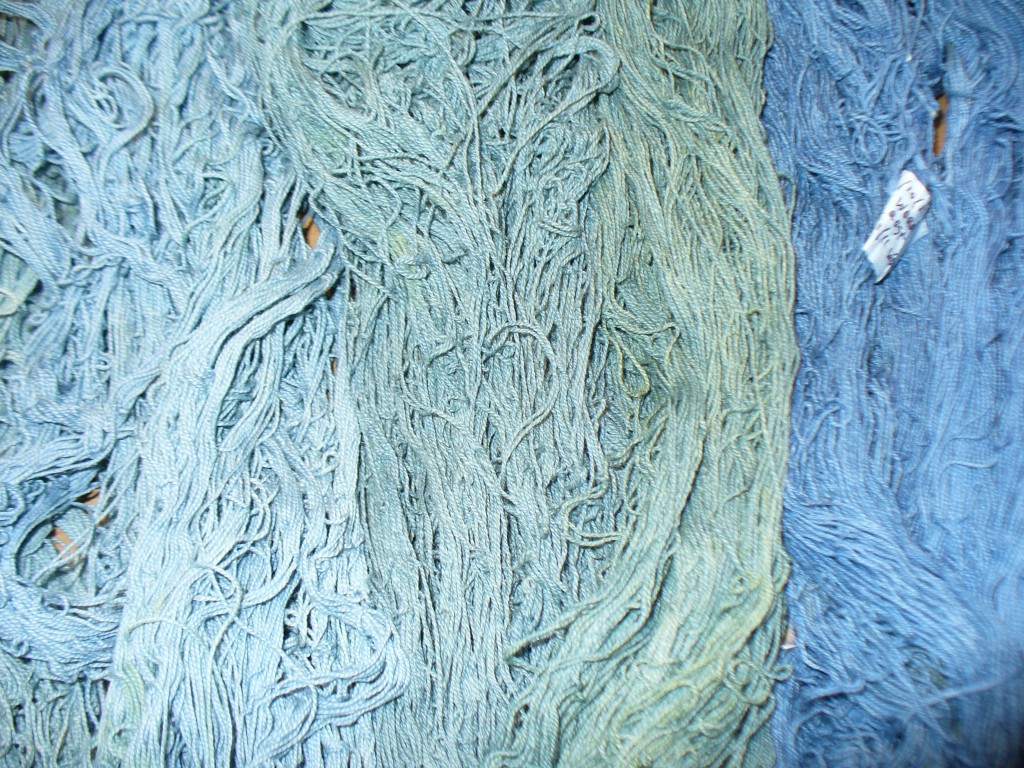
Seeing how intense the color was, I got overly ambitious and decided to use the exhaust bath to make green by overdyeing some cotton and cottolin skeins previously dyed blue with woad. This was my first attempt to make green with cellulose yarns (though I have made many successful greens on wool and alpaca by dyeing the fiber yellow first, then overdyeing with woad). Well, my results were really pathetic and disappointing. Here’s a photo comparing them to a woad dyed skein that I wisely did not mess with.woad overdyed with weld Sorry for the blur, but the colors are pretty accurate. The woad dyed skein is on the far right. They all started out that color. I treated them with the same tannin-alum sequence as the yellow skeins, thinking the tannin might create a nice teal. Sadly, no.

I attribute my lack of success to two factors. First, the weld bath must have been exhausted, and the very little color that was left attached unevenly to the fiber. Second, I must have had a chemistry problem, even though I was pretty sure I wouldn’t. The pH of the exhaust bath when I put the woad-dyed skeins was 8, which I didn’t think it was high enough to strip the blue off the yarn. But clearly it did.

Black Walnut Dye Project

OK, I haven’t sewn a new book in a couple weeks because I have been taking advantage of the extended fall weather and have been dyeing (outdoors) with some particularly stinky and stainy dyes: weld, black walnut, and an ancient umbilicate lichen vat from 2006. Each one deserves a post of its own, so I’ll start with the black walnut.

The black walnut has been an unintended exhausting marathon. That’s a pun. “Exhausting” is what you call it when you re-use the same dyebath (or dye liquor, or ooze, depending who’s talking about it) multiple times until there is no color left. One of my on-going projects is to weave a series of rya rugs using a limited palette of yarns that I have dyed with a given quantity of plant material.

To dye the yarn for the first rug, earlier this summer I dug 5.5 lbs. of Lady’s Bedstraw roots. This quantity ended up dyeing 2lbs. 12 oz. of wool in various shades of pink, peach, apricot, salmon, and, yes, warm beige. Beige in any of its various shades is not my (or, I think, any dyer’s) favorite color. Certainly it comes in handy when you need some neutral to balance out a design. But considering all the work involved in dyeing with plants, especially when you start with the raw materials themselves, it’s not really worth it just to make beige, even warm beige. There are plenty of beige sheep. Creating beige does not inspire awe, or joy, in the dyer. It also does not impress non-dyers with the power and magic of natural dyes. Since part of my concept with this project is to demonstrate the incredible range of color that a single plant–even a single dyebath–can generate, too much beige defeats the purpose.

This year, as you may recall, was a bumper year for black walnuts around here.  I decided to commemorate the bumper black walnut year with a rya rug, even though I often joke that dyeing white wool brown is a questionable pursuit (there is probably a fairytale about the foolish girl who spent her time and energy on this…). There are plenty of brown sheep. Nevertheless, I really love noticing and celebrating the natural world around me, whether events are daily and mundane or unusual and remarkable. Being aware of and participating in the cycles of plants, especially, is one of my great joys in life, and one of the reasons I am passionate about natural dyeing. Plus, you can get an incredible range of colors from black walnut. Thus began the mega-black walnut project.

After the bedstraw experience, I decided I didn’t want as many beige skeins relative to the total quantity of yarn. So, I started with an admittedly huge amount of walnut hulls hoping for a lot of nice dark browns and not so many beiges.  OK, you can already tell at this point in the story that I was dreaming, but my vision was blocking my vision, so to speak, and I can only see that in hindsight. I started with nine and a half pounds of walnut hulls that had been soaking in buckets outside for several weeks. I usually think that boiling walnut hulls smell delicious, but these had an unpleasant “swamp” smell due to the fact that they had been decomposing in the relatively warm weather. So, this had to be an outdoors project, using the portable electric burner.

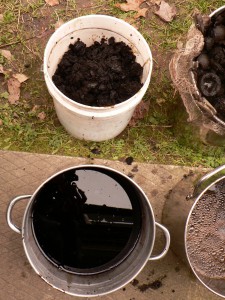
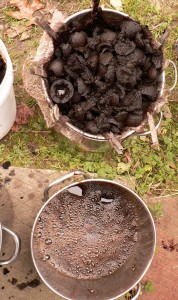
I don’t have large pots, so this whole operation is being run with small pots and small quantities. In fact, I’m thinking “Small Potatoes” may become the name of the series (assuming I ever actually weave these things). I divided the hulls between two pots and extracted the same hulls twice, creating 4 different dyebaths.

black walnut hulls and second dyebath

black walnut hulls and first dye bath

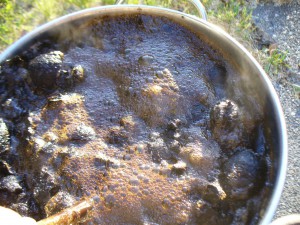
extracting black walnut

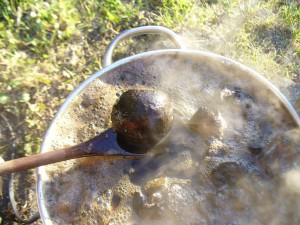
walnut hull in dyepot

When extracting the hulls you can let them boil and it won’t hurt the color, but it will make a huge mess if it boils over, so I kept a close watch. Above see the transition from, “a watched pot never boils,” to “boiling!” On the spoon is a portion of a hull in the dyepot.

Below on the left you can see the white skins being mordanted with aluminum sulfate, and on the right, the rich color of the dye bath once the hulls were strained out.

black walnut dyebathmordanting yarn


Ah, turning white wool brown!

Those four original dyebaths have thus far dyed 4 pounds of wool, in successive batches of 4 ounces each, and I have yet to reach beige (I’ve gotten to tan). I have been mulling for many days now whether or not to continue. I already have plenty of wool for a rug, at least a rug of the size I initially envisioned. But I have not truly exhausted the baths. I think I could dye another pound of wool before I actually exhaust the color.

I took a hiatus from the walnut project when we had a cold snap, and my pots and buckets froze (too stinky to keep indoors). Here are hulls with frost on them (which I could even extract again, if I was crazy) and a frozen dyebath:

black walnut hulls with frost

frozen black walnut dyebath


But I think I have to continue to the point of true exhaustion. A bumper walnut year calls for an epic quantity of brown yarn, and perhaps an astonishingly big rug.

More About My Books

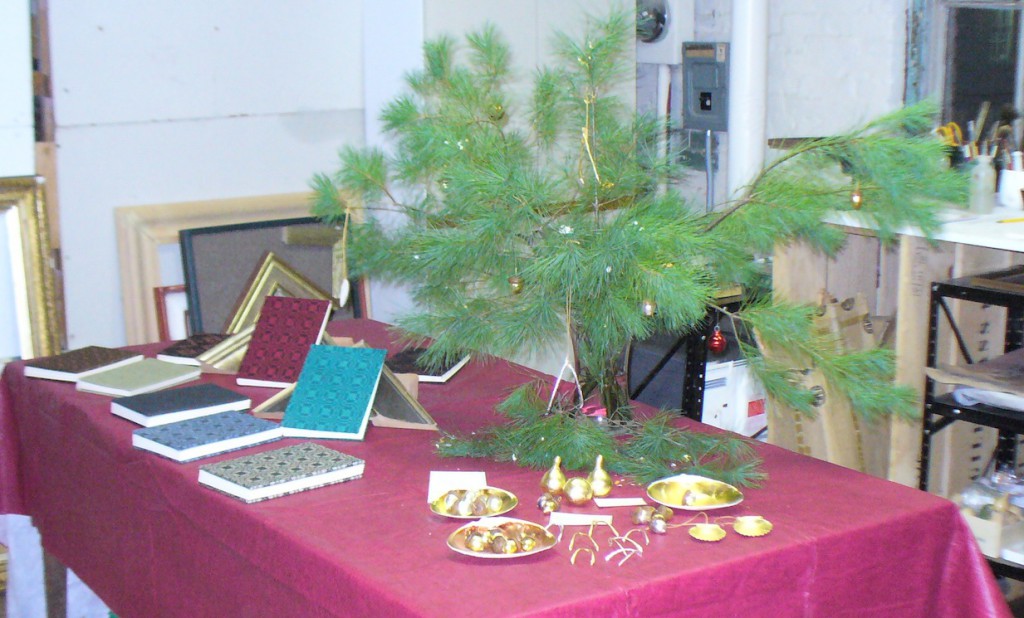
Well, the Cottage Street Studios open house was very interesting. Here’s a photo of my books and some of Amanda’s gilded acorns, wishbones, and gourds around a festive winter-time tree. handbound books with handwoven covers and gilden acornsShe also makes stunning gilded panels, frames, and other treasures. I met lots of great people and had inspiring conversations. My books have now moved to Food For Thought Books in Amherst where they are available for sale. Here they are on display at the bookstore:handmade books by Michelle Parrish at Food for ThoughtMaking these books is a multi-step process. I haven’t photographed every step, but I thought I should give an overview. Understanding the process helps people to understand the labor and expense involved in creating a handmade object.
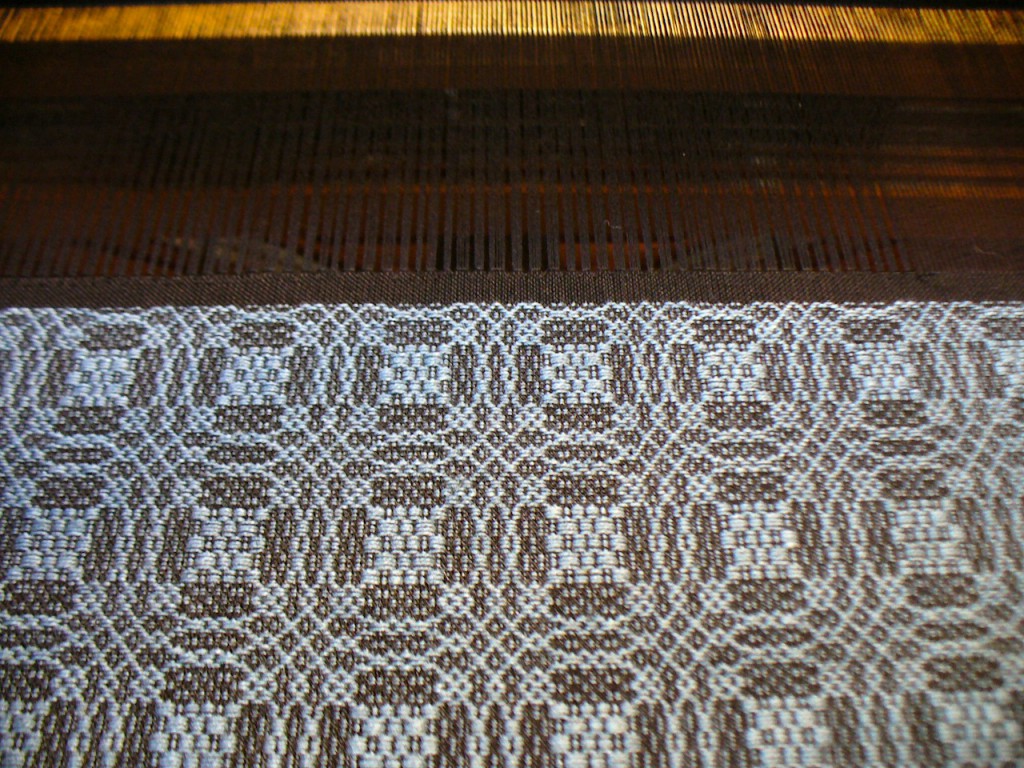
First I wove the cloth, using a variation of the traditional overshot pattern called Young Lovers’ Knot. This involved calculations about the sizes of the books and shrinkage of the cloth, as well as all the steps involved in dressing a loom. I put on a warp long enough to make 12 books. Even though I really loved the pattern and enjoyed playing around with different color combinations, I was happy to get to the end of the warp when I finally finished it; it took a long time to weave. The pattern requires two shuttles, one with a thin thread (20/2, same size as the warp) and one with a thicker thread that makes the pattern. So, it went slowly. Here’s the end of the warp.

woad-dyed blue cottolin Young Lovers Knot warp

Then I washed, dried, and ironed the cloth, and cut it into sections.

handwoven cloth for book covers

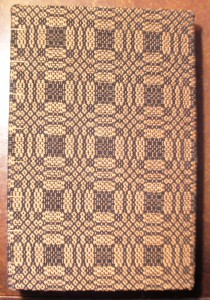
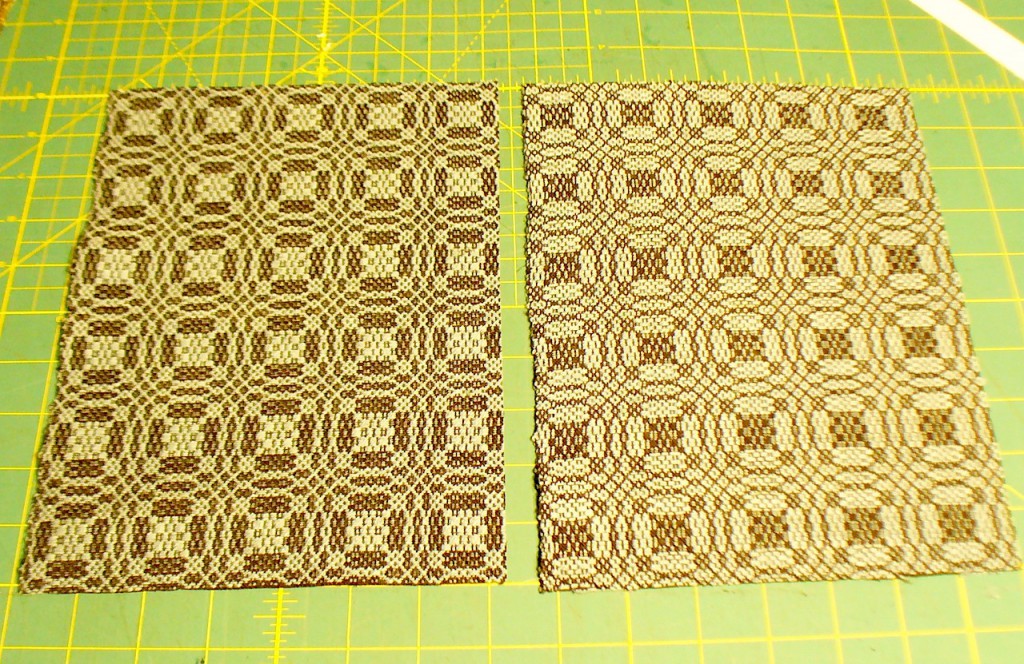
Then, for each book I decided whether to show the front or back of the cloth, because the two sides look very different. For example, in the photo of the black and white cloth, the piece on the left, with the white squares (tables) in the center of the round motif, shows the “right” side of the cloth. With this color combination, I preferred the back side.

front and back sides of overshot cloth

I used a paper template to center the pattern on the cover. I am a symmetry fan, so I was going for symmetry even if I didn’t always attain it. Cloth has a mind of its own. Once I framed the portion of the pattern that I liked, I cut the cloth to size, and glued the cloth onto book board (8.5 inches by 5.5 inches) with PVA glue.

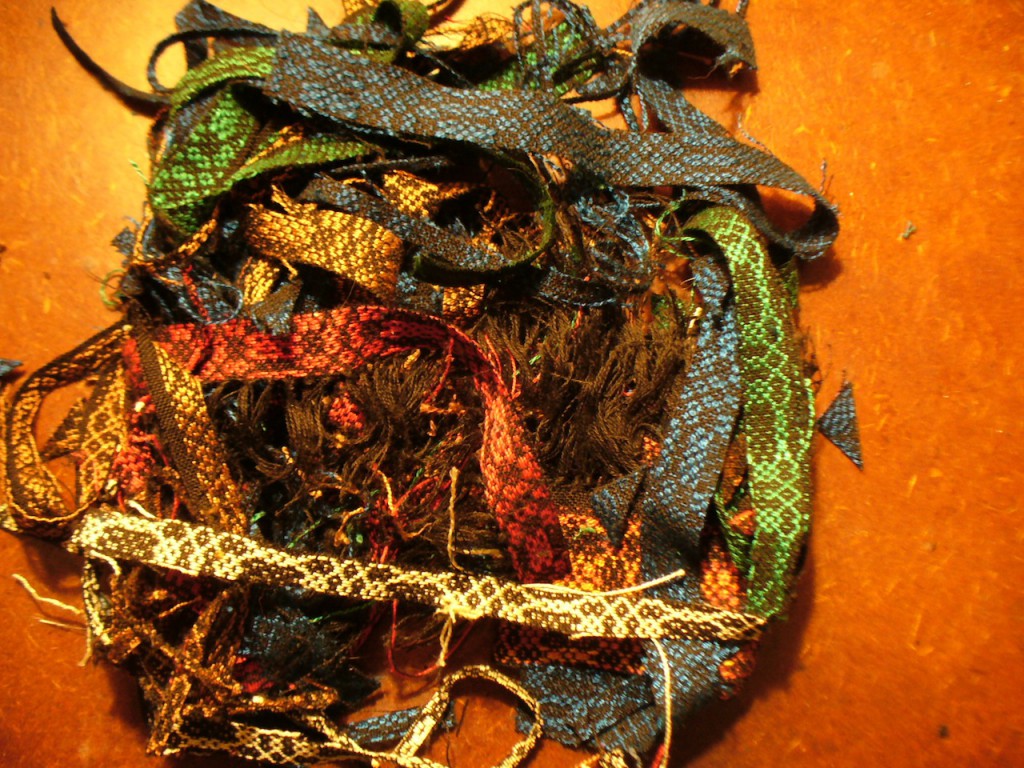
I managed to waste very little cloth in this process, which on the one hand I was pleased about because the cloth took so long to weave that I didn’t want to waste it. On the other hand, I might give myself more of an allowance next time (i.e., weave a couple more pattern repeats in width and length) to give me more design flexibility. Here are my scraps:

more scraps

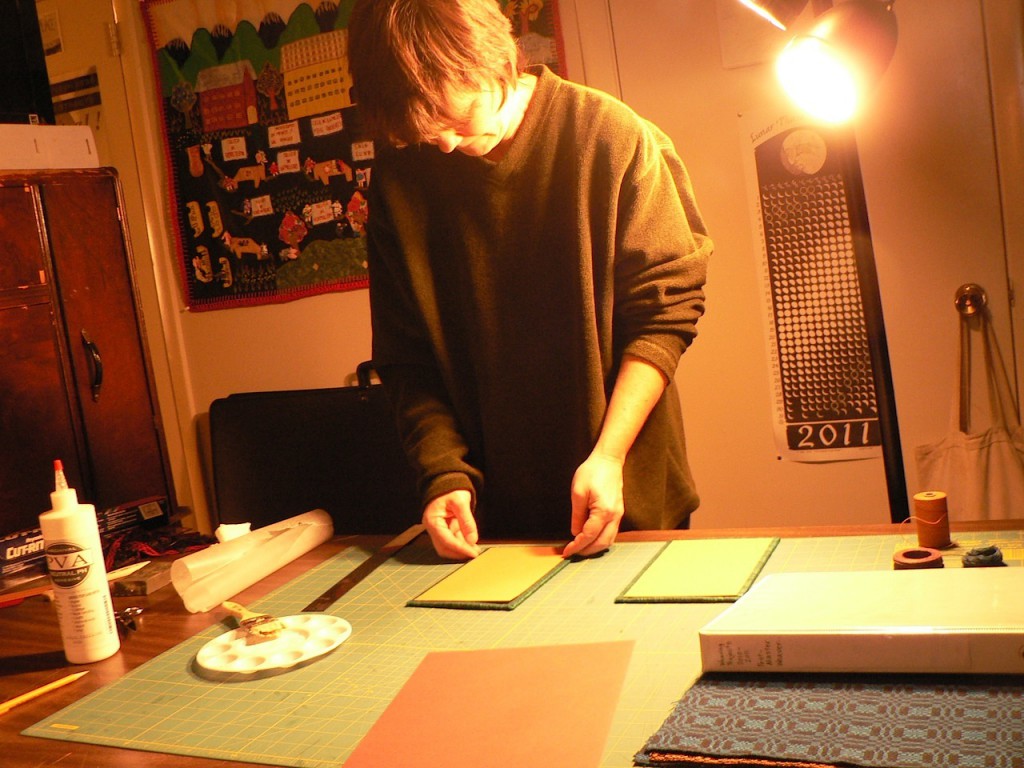
Then I trimmed the corners, and glued down the edges of the cloth on the inside of the cover. Then I pressed the covers. When they were dry, I cut and glued down nice papers on the inside of the covers. Matching paper colors and cloth colors is also a whole decision-making process. Here’s me gluing down the papers.The author making book coversThen I pressed the covers again until the glue was dry. Meanwhile, I folded the signatures, and put them under weights for a while. When the covers were dry, I punched holes in the signatures and holes in the covers with an awl, and sewed the whole thing together with 4 ply waxed linen thread. Ta-da, a book. Six are done, and six more are in the works.


New Handbound Books with Handwoven Covers

Today I am bringing my new crop of handbound books to the Cottage Street Open Studios, where my friend Amanda kindly invited me to offer them for sale alongside her gorgeous gilded pieces.

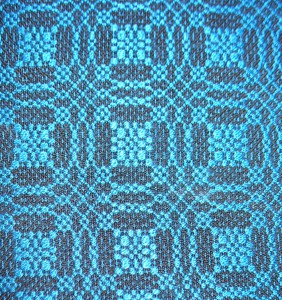
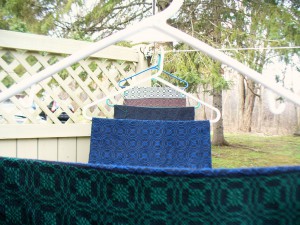
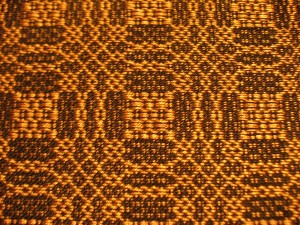
The cloth for the covers of my new books is woven in a traditional overshot pattern called Young Lovers’ Knot. I wanted the scale of the pattern to be small and intricate, so the warp and tabby weft are 20/2 cotton. The pattern wefts are 10/2 cotton, 10/2 tencel, and 22/2 cottolin. The cottolin is a blend, 60% cotton/40% linen, and I hand dyed it blue with woad from my garden. The rest are commercially dyed. The cloth took a ridiculously long time to weave. Then there was the problem of where to dry it since it was very long. It dried inside and outside.

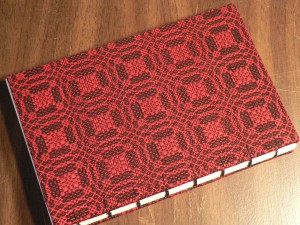
book cloth drying outsideI wove two pieces without the emboldening tabby, a red one and a green one. So, the cloth for this red book is a small piece of history, now made famous right here in this post!Red Book with Young Lovers Knot coverAfter the first two pieces, I resolved my emboldening tabby problem. To make sure your emboldening tabby stays consistent, you need an even number of picks at each turning point in the pattern, i.e., in the center and at the end. I had added a pick at the end of the pattern, but later decided to take out two picks in the center of the pattern. This created a shorter, less busy-looking square or “table” in the pattern.

Young Lovers Knot-shorter squareEach book is unique. Here are a few photos of the books:

Coptic Bound Book Spines
Coptic bound spines
Green tencel and teal tabby
Green tencel pattern yarn and teal tabby
Woad-dyed cottolin
Woad-dyed cottolin
Black and white book