
This is the next installment about the USDA germplasm project I have been working on this year. In this post I will discuss the definition of “days to maturity”, which was one of the pieces of information I was supposed to be tracking for the USDA. I will also share some of my thinking around how I decided to harvest seeds this summer.
Since there has been a significant lapse of time since my last flax-related post, I will quickly recap. In this first season of the project, I was hoping to increase our supply of seed. I tried to prevent cross pollination by using isolation cages made out of lightweight Agribon and wooden stakes. Half of my project suffered utter crop failure in mid-July due to predation by rodents (or possibly other unidentified flax-stalk chewers and flax-seed eaters). Luckily, the other half of the project escaped largely unscathed, thanks to better weeding, daily monitoring, and cat-pee soaked scraps of cloth pinned to the isolation cages. You can read my earlier posts from April to August of 2015 for more details.
Between late July and early September I devoted a lot of time and energy to maximizing the seed yield from the remaining plants. I wanted as much mature, viable seed as possible. During this time, two closely-related questions emerged.
First, how exactly does one measure days to maturity for flax plants? Second, how does one determine when flax seed is mature? Neither of these questions was as simple to answer as you might think (assuming you think about these questions at all, which I’m assuming you do if you are reading my blog).
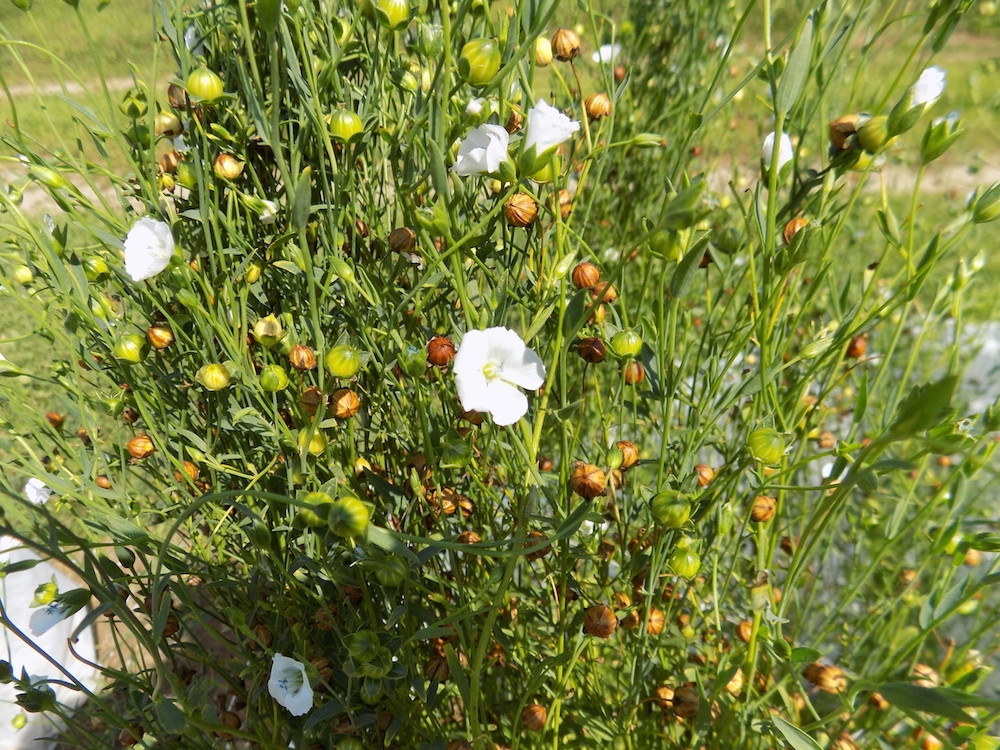
The main reason that these questions aren’t straightforward is that flax is an indeterminate plant. When you hear indeterminate, you might think of tomatoes, but other plants share the same characteristic. Basically, it means that the plants just keep on happily blooming away until some external force makes them stop. And it’s true about flax. Here’s what it looks like in action:

This is the variety nick-named 1602 on August 13th, 2015. It’s still blooming, and new growth is burgeoning from the tips of the stems and stalks. Some seed bolls are green. Some are yellow, and some are brown. Some seeds are mature and some aren’t. The height is really tall, but the plant isn’t done growing. If I didn’t pull it up, it would just keep getting taller and keep flowering and setting more seed.
Here’s another, closer view of the same plot:
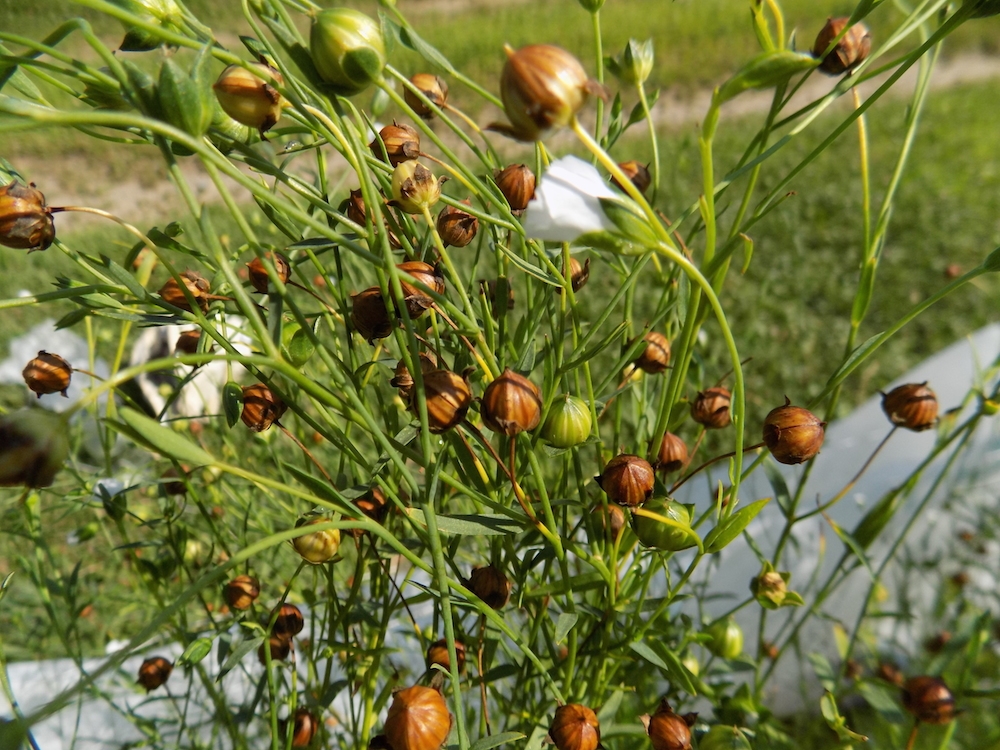
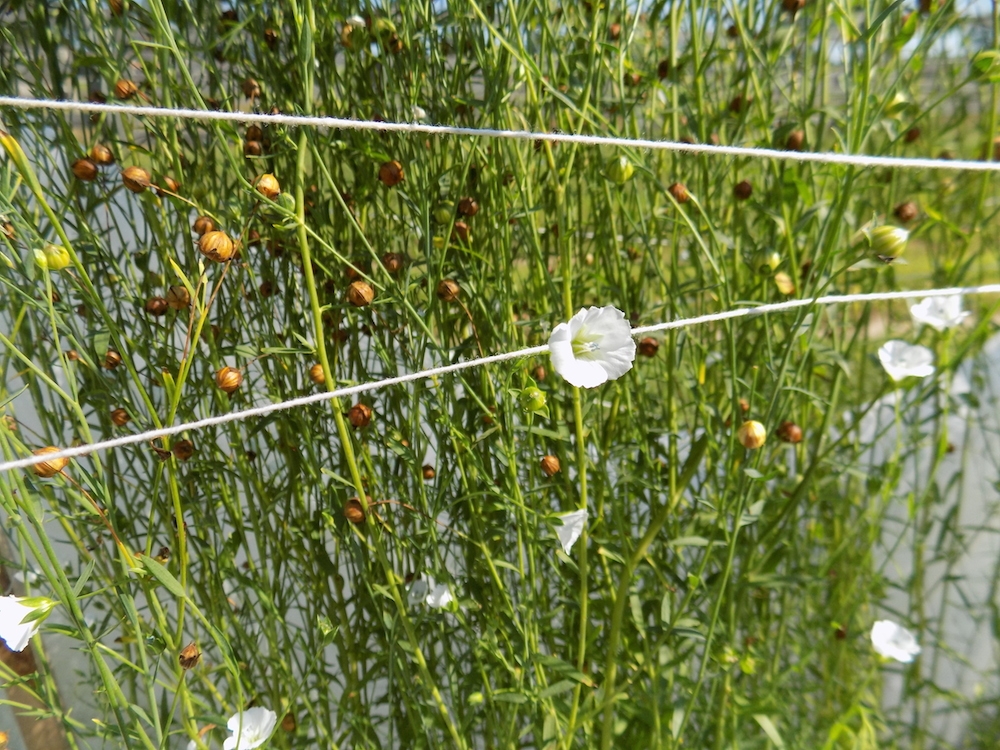
You can see that there are quite a lot of brown seed pods, but the plant is still blooming away merrily. It’s a white-flowered variety by the way. In the photos below you can see that there are still new flower buds forming:
From a seed-saving point of view, the more the plant branches, flowers, and sets seed, the better. Since I wanted as much seed as possible from each little plot, it was clearly in my best interests to just let the plants keep growing for as long as possible. Even if a plant were “mature” in terms of pulling it up for fiber, I wanted to let the plants grow past that point.
Up until this summer, I have always harvested my flax with the intention of retting it and processing it for fiber. Once the lower third or so of the stalks turned yellow, I harvested the whole crop at once by pulling up the plants by the roots. This usually happens roughly 90-100 days after planting, but you have to watch the plants and see what they look like. You can’t just count the number of days from planting because there are a lot of other factors that influence the timing. For example, if it’s been exceptionally hot or dry, you may have to pull it earlier. If you’re going for very fine fiber, you might want to harvest the stems when they are still green. Anyway, the point is that I have pulled the whole crop when it looked ready. Since I wasn’t trying to save seed in the past, it didn’t matter to me whether the seed was mature or not.
When the USDA sent us the seeds, each packet came with a stated number of days to maturity. It seemed nice and clear-cut at first, but when I was faced with the decision of actually pulling up the plants, I realized that the definition wasn’t clear to me. I wasn’t sure whether the USDA had prioritized seed maturity or fiber readiness when determining days to maturity for each type. Their definition of “maturity” was relevant because it was something I was supposed to be keeping records about.
Carolyn our resident botanist helped me clarify what I needed to know. Laura Fredrick Marek, the oil seed crop curator at the USDA in Ames, who we’ve been corresponding with during this project, sent some helpful information about their harvesting procedure.
She said that they harvest when a good portion of the bolls appear mature and before too much has been lost to dehiscence. Dehiscence can mean different things, but with flax it means either that the seeds pods fall off because they are mature, or the seed pods pop open and the seeds fall out when they are mature. She said that they harvest the entire plot by cutting the tops off. Depending on the season and time of first harvest, they may be able to harvest twice in this manner. The uniformity of the plot is noted. She also said that the data regarding days to maturity were received with the collection of fiber flax seeds when it was transferred to Ames from the station where the flax research had previously been conducted.
OK, seed maturity was the main criterion. Check. Uniformity of the plot was also of interest, so take notes. Check.
However, I didn’t want to cut the tops off the plants because we’re interested in their maximum height and growth habits, including branching. Admittedly, from a fiber point of view, the additional height that is gained by allowing the plants to continue branching and blooming isn’t of any benefit. When you ret and process the plants, anything above the point where the plant branched and made smaller flower-bearing (and seed-bearing) stems just breaks off. I wasn’t growing for fiber this year, but I figured we might want to ret these little samples anyway and see if we could determine anything about fiber quality. I’ve read that cut ends of the stalk can make retting uneven, so I wanted to avoid that. I had to figure out another approach.
It seemed obvious that the more brown and dark the seed pods were, the more mature they were. However, I couldn’t just leave the ripe pods on the plants indefinitely because of the problem of dehiscence. If the over-ripe seeds just fell off that didn’t help me.
Carolyn suggested a couple ideas. One was to tie a bag around the seed pods as they matured in case the seed pods fell off or the pods popped open. This proved not so easy in practice.
Her other suggestion was to snip off the seed heads as they matured, and to leave a little piece of stalk attached so that the seeds could continue to draw whatever they needed from the plant as they finished maturing and dried. This is what I ended up doing.
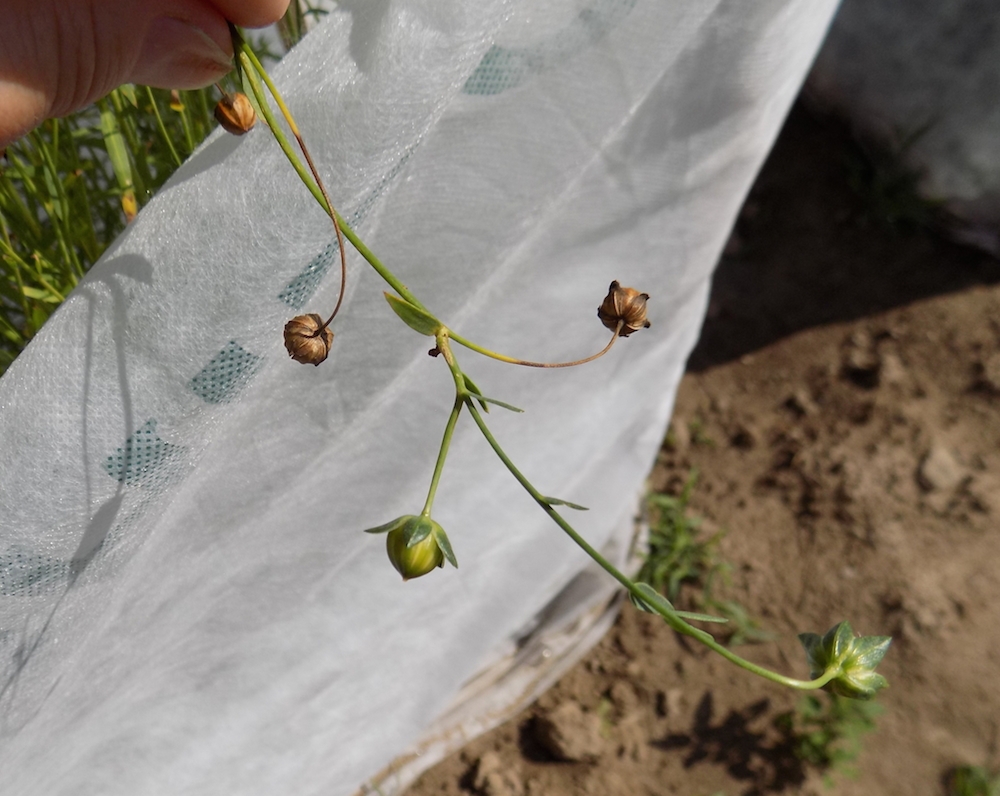
In the photo above you can see that the stem of the seed pod that’s still green is also green. The stems of the seed pods that are brown are starting to turn brown. Below is a closer image of the same thing:
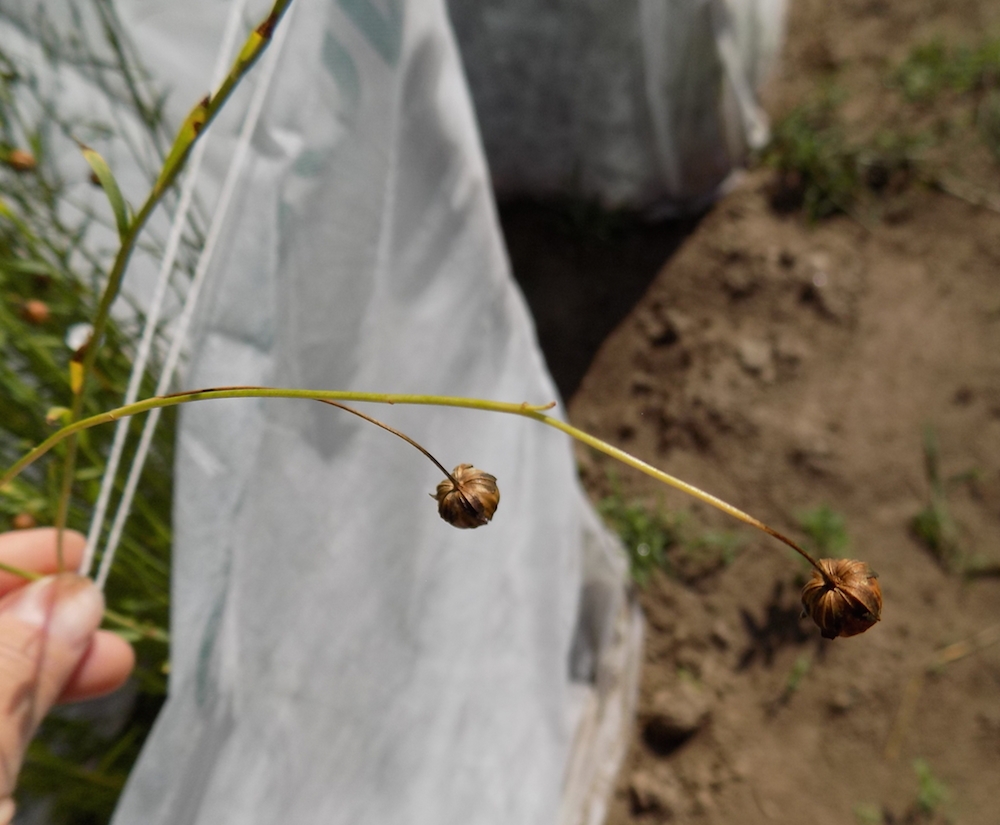
Each day I uncovered one little plot at a time and searched the plants for the most mature-looking pods. I was looking for stems that had started to look withered closest to the seed pod, and were either brown all the way down or getting yellow at the base. I snipped the stem down to the point where it joined the larger stalk.
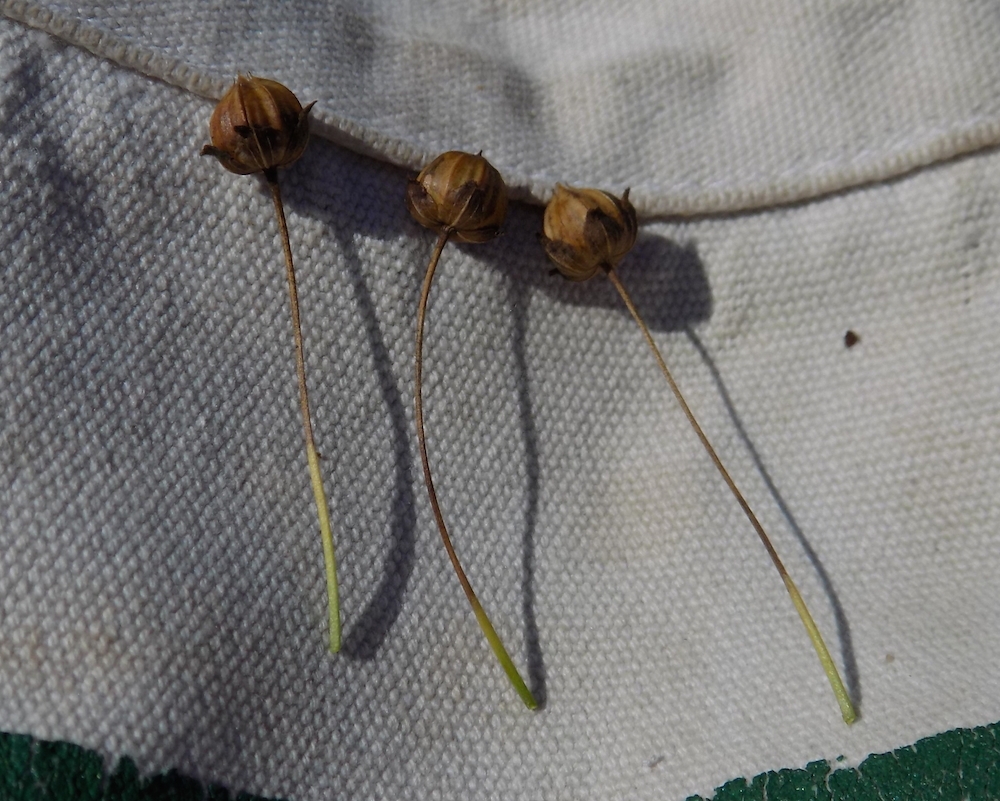
Then I spread these out to dry in a tray, and then bagged them up labeled with the variety and date. It was insanely time consuming. However, I think it was effective.